---
description: Understanding URL parameters and custom settings
---
# Advanced Options (URL Parameters)
## Overview
VDO.Ninja is a tool that can be seen as a mediator, negotiating a direct connection between a publishing device and a viewing device (such as [OBS \[Open Broadcaster Software\]](https://obsproject.com/)). There are generally two links involved; one to push (publish) and one to pull (view), although links can be made to do both at the same time.
The viewer (receiver) and the publisher (sender) each play their own role in determining the qualities of a stream, so likewise each side has its own set of parameters available to them. A publisher can have multiple viewers access their video stream, with each viewer having the ability to customize the quality of the stream they receive.
The following guide details the options, syntax, values, and general use of these available settings/parameters.
## Passing parameters via the URL to achieve your desired stream settings
You can customize the playback of videos by adding query string parameters to the VDO.Ninja URL links, along with many other aspects. VDO.Ninja is highly flexible in this regard, letting you achieve your desired outcome without needing to code and without additional software.---
description: Understanding URL parameters and custom settings
---
# Advanced Options (URL Parameters)
## Overview
VDO.Ninja is a tool that can be seen as a mediator, negotiating a direct connection between a publishing device and a viewing device (such as [OBS \[Open Broadcaster Software\]](https://obsproject.com/)). There are generally two links involved; one to push (publish) and one to pull (view), although links can be made to do both at the same time.
The viewer (receiver) and the publisher (sender) each play their own role in determining the qualities of a stream, so likewise each side has its own set of parameters available to them. A publisher can have multiple viewers access their video stream, with each viewer having the ability to customize the quality of the stream they receive.
The following guide details the options, syntax, values, and general use of these available settings/parameters.
## Passing parameters via the URL to achieve your desired stream settings
You can customize the playback of videos by adding query string parameters to the VDO.Ninja URL links, along with many other aspects. VDO.Ninja is highly flexible in this regard, letting you achieve your desired outcome without needing to code and without additional software.
For example, a simple viewer URL link such as `https://vdo.ninja/?view=streamid` could be amended to `https://vdo.ninja/?view=streamid&videobitrate=500`, which will cause the viewer to receive the publisher's video stream at a video bitrate of 500-kbps.
Multiple parameters can be appended together by using the ampersand (`&`) as a separating character. For example, to view the video stream published at stream ID `streamid` at a video bitrate of 500-kbps and set the [`&stereo`](general-settings/stereo.md) parameter to `1`:
```markup
http://vdo.ninja/?view=streamid&videobitrate=500&stereo=1
```
Some parameters, like [`&view`](advanced-settings/view-parameters/view.md) will accept a comma-separated list of valid values, so you can do some rather powerful combos, such as publish a video (using [`&push`](source-settings/push.md)) while also viewing multiple others videos. VDO.Ninja will auto-mix the videos together into a single layout for you:
```markup
http://vdo.ninja/?push=aaa&view=bbb,ccc,ddd
```
You might notice the stream ID values I'm using (ie: `aaa`, `bbb`, etc); these can be manually created and reused. Use `&push=STREAMID` to publish a video and `&view=STREAMID` to remotely view it. If you don't manually specify a stream ID, VDO.Ninja will sometimes generate one for you.
To make up a valid stream ID of your own though, choose something with less than 31-characters of length and ensure it's AlpHaNuMerIc-only.
A stream ID must also not already be in active use, else you will be provided with an error.
## General/Sender/Viewer Option
All of the available parameters can be seperated in five categories. You find the category on the top of the page of a parameter.
* **General Option** ([`&push`](source-settings/push.md), [`&room`](general-settings/room.md), [`&view`](advanced-settings/view-parameters/view.md), [`&scene`](advanced-settings/view-parameters/scene.md), [`&solo`](advanced-settings/mixer-scene-parameters/and-solo.md), [`&director`](viewers-settings/director.md))
You can use these parameters as a sender or as a viewer as well as in scenes, solo-links and rooms or even as a director.
* **Sender-Side Option** ([`&push`](source-settings/push.md))
You can use these parameters as a sender when you are publishing a video with `&push`. You can use these parameters in rooms ([`&room`](general-settings/room.md)) when publishing or as a basic push link outside a room. These parameters will affect the outgoing stream.
* **Viewer-Side Option** ([`&view`](advanced-settings/view-parameters/view.md), [`&scene`](advanced-settings/view-parameters/scene.md), [`&room`](general-settings/room.md), [`&solo`](advanced-settings/mixer-scene-parameters/and-solo.md))
You can use these parameters as a viewer of one or more video sources (scenes and solo-links in a room, as a guest in a room, or a basic `&view` stream). These parameters will affect the incoming stream(s).
* **Director Option** ([`&director`](viewers-settings/director.md))
These parameters are specifically for the director of a room.
* **Meshcast Option** ([`&meshcast`](newly-added-parameters/and-meshcast.md))
These parameters can only be used in combination with `&meshcast`. You can find them in [Meshcast Parameters](advanced-settings/meshcast-parameters/). These parameters are always Sender-Side Option, so you will find `&push` in the URL, too.
* **WHIP Option** ([WHIP and WHEP tooling](steves-helper-apps/whip-and-whep-tooling.md))
WHIP Parameters are specific to WHIP and WHEP. You can find them in [WHIP Parameters](advanced-settings/whip-parameters/).
[https://docs.vdo.ninja/sponsor](https://docs.vdo.ninja/sponsor)
# FAQ
## Project Information and Support Links
**Web service URL**: [https://vdo.ninja/](https://vdo.ninja/)
**Project development URL**: [https://github.com/steveseguin/vdo.ninja](https://github.com/steveseguin/vdo.ninja)
**Developer/maintainer**: [steve@seguin.email](mailto:steve@seguin.email)
**Donations**: [via GitHub Sponsors](https://github.com/steveseguin/obsninja/wiki/Sponsor-%E2%9D%A4)
### Community Support
**Discord**: [https://discord.vdo.ninja](https://discord.vdo.ninja)
**Reddit**: [https://www.reddit.com/r/VDONinja/](https://www.reddit.com/r/VDONinja/)
## Where can I get support?
The preferred support mechanism is via [Reddit](https://www.reddit.com/r/VDONinja/) or [Discord](https://discord.gg/feenJm8HTa), which offer community-assisted support. Development issues, feature requests, and bugs are tracked on [GitHub](https://github.com/steveseguin/obsninja). For mission critical support issues, or business-related inquiries, you can contact Steve directly.
## Where can I report a bug?
It is most helpful to report bugs via the official [GitHub](https://github.com/steveseguin/obsninja). We also monitor the [Reddit](https://www.reddit.com/r/VDONinja/) and [Discord](https://discord.gg/qWDshMsTar) channels, though it is easier to miss reports that occur there.
# How does it work
[VDO.Ninja](https://vdo.ninja) relies heavily on [WebRTC](https://webrtc.org/), a secure peer-to-peer streaming technology that exists in most modern web browsers. Most of the VDO.Ninja code runs completely within your browser, although some server-side components are hosted to help facilitate an initial ‘handshake’ between connecting peers.
As video data is streamed directly from one peer to the other, extremely low-latency and very high video quality is possible. If both peers are on the same Local Area Network (LAN), data transfer will stay local to your network, saving your bandwidth.
Since applications like OBS have a built-in browser, you can use VDO.Ninja to stream low-latency video directly into the application without any downloads or user accounts. It's possible to start streaming within seconds to OBS and many modern applications -- you can even watch VDO.Ninja streams on a Tesla EV or within the Unity game engine.
Essentially, the basic usage of VDO.Ninja makes use of two URLs; one for **input** (i.e. PUSH) and one as an **output** (i.e. VIEW).
The **PUSH** URL is loaded up in the browser on the **remote device**, which obtains access to the device's camera and microphone.
To view the stream, you load up the corresponding **VIEW** URL in another browser, from anywhere. That's it. The video will begin playing in a full-window, without pesky watermarks or visual distractions, ready for professional-level video capture.
Since collaboration is a big part of live streaming video, VDO.Ninja also offers [group chat rooms](help/how-does-group-chat-work.md), allowing for more complex options and controls over multiple streams at a time. What's possible with VDO.Ninja can be rather overwhelming, as the feature set does not end there, but the basic defaults are designed to satisfy the needs of most users.
One thing that may not be intuitive at first is the use of [URL-parameters](advanced-settings.md) to control settings, video quality, and many of the other options. URL parameters are used by VDO.Ninja in the same conceptual way that command-line parameters are used, such as by FFmpeg. Some URL parameters are set on the VIEW side, while others can be set on the PUSH side to allow for configuration of a standard offering with the opportunity for viewers to further refine their experience. The documentation is a great resource for finding out more on all the advanced options and how to use them.
---
description: All useful links you might take a look at
---
# Useful Links
### VDO.Ninja Versions
---
description: Known issues or problems, bugs, and limitations
---
# Known Issues
Known issues that are most critical are normally listed on the main page of VDO.Ninja.
You can also refer to the #report-bugs channel on discord, at https://discord.vdo.ninja, to see recently reported issues. I push bug fixes daily to beta, at https://vdo.ninja/beta, so give that a shot if you find a bug on the main release.
Since bugs and issues are ever evolving, it's hard to keep all issues up to date and verified.
Below are some links to third parties, for a list of known issues that commonly will apply to VDO.Ninja as well:
[https://docs.agora.io/en/All/web\_sdk\_compatibility?platform=Web](https://docs.agora.io/en/All/web\_sdk\_compatibility?platform=Web)
[https://github.com/twilio/twilio-video.js/blob/master/COMMON\_ISSUES.md](https://github.com/twilio/twilio-video.js/blob/master/COMMON\_ISSUES.md)
[https://support.twilio.com/hc/en-us/articles/223180908-Troubleshooting-Common-Problems-with-the-Twilio-Voice-JavaScript-SDK](https://support.twilio.com/hc/en-us/articles/223180908-Troubleshooting-Common-Problems-with-the-Twilio-Voice-JavaScript-SDK)
[https://github.com/webrtc/samples/issues](https://github.com/webrtc/samples/issues)
[https://bugs.chromium.org/p/chromium/issues/list?q=webrtc%20type%3DBug\&can=2\&sort=-pri](https://bugs.chromium.org/p/chromium/issues/list?q=webrtc%20type%3DBug\&can=2\&sort=-pri)
Time fixes all wounds, even with Apple products.
---
description: Not ready for production, not intended to be used or not well-documented
---
# Other Parameters
There are some more parameters on [VDO.Ninja](https://vdo.ninja/) which are currently not ready for production, not intended to be used, or not well-documented.
You could find out more about these parameters when searching for them on this link:
[https://github.com/steveseguin/vdo.ninja/blob/develop/main.js](https://github.com/steveseguin/vdo.ninja/blob/develop/main.js)
Parameter
Explanation
&crop
Changes the aspect ratio on the publisher side, but lets you pass an integer value to represent a percentile cropping value.
So, &crop=10 will reduce the width by 90% and &crop=-10 will increase the aspect ratio. The assumed base aspect ratio is 16:9.
&debug
Sends live debug log data to a remote server. That debug server is normally off, but this flag can be used by Steve to debug issues remotely. The debug data is not stored at any point.
&directorview
Not currently an active feature.
&nomouseevents
Disables 'some' of the mouse/touch/drag triggers and events; for debugging and niche situations.
&nonacks
'Tries' to force the browser to not send key frames or lower quality/resolution; doesn't really work.
Tells the browser to not send NACK feedback.
&nopli
Tries to find ways to combat frame stutter caused by packet loss or key frame requests. Doesn't really work.
Tells the browser to not send picture loss indicators.
&noremb
Deletes the flag for Chrome's bandwidth estimation logic.
&pusheffectsdata
Makes the data for the active digital effect available to the IFRAME API or a remote guest.
&retry
Used in rare cases, sometimes with the Raspberry Ninja project, where the peer connection may "crash" and the remote viewer won't bother to try reconnecting.
&retrytimeout
Should not be changed (value in milliseconds).
&salt
Mainly to allow Versus.cam to work with VDO.Ninja.
&slot
Not currently an active feature.
&speedtest
Forces essentially UDP mode, unless TCP is specified, and some other stuff.
&viewereffect
Not currently an active feature.
&wss
Specify the handshake server address to use.
&graphs
?
&lowmobilebitrate
?
&maxmobilebitrate
?
&minroombitrate
?
&sendframes
?
&overlaycontrols
?
&pushloudness
This sets the loudness IFRAME API output, if available
&hangupbutton
?
&socialstream
?
&fakeuser
?
&androidfix
?
&scenelinkcodec
This is mainly for a niche IFRAME API use
&scenelinkbitrate
This is mainly for a niche IFRAME API use
&showheader
Forces the header bar to show even if using &cleanoutput for example
°rade
Firefox, and maybe Safari, supported I think. The possible values are maintain-framerate, maintain-resolution, or balanced. The default value is balanced.
&iframetarget
Specifies the IFRAME Hostname target
&bypass
?
&mixminus
In development
&nopassword
?
&micsamplerate
Lets you specify the capture audio sample rate. Also added purely for experimental reasons; I don't recommend touching.
&insertablestreams
Enables a special mode that allows for custom codecs
&leaveorientationflag
?
&motionrecord
Switch OBS to this scene when there is motion, and "solo view" this video in the VDO.Ninja auto-mixer, if used
&alpha
Fixed &webp + &codec=webp + &alpha so it properly supports alpha channels. If your needs are modest it can offer transparent streaming video when using &fileshare /w a transparent WebM video source (or a virtual background /w a transparent png)
---
description: '"Vee-Dee-Oh" .. oh, video!'
---
# What is VDO.Ninja?
## What is VDO.Ninja?
In its simplest form, [VDO.Ninja](https://vdo.ninja) brings live video from a smartphone, tablet, or remote computer, directly into OBS Studio or other browser-enabled software. VDO.Ninja is offered as a free web service, but it's also available as customizable and deployable code. Some have called it the modern Swiss Army knife of audio and video transmission. 🛠
https://www.youtube.com/watch?index=1&list=PLWodc2tCfAH1l_LDvEyxEqFf42hOBKqQM&v=QaA_6aOP9z8
Video intro to VDO.Ninja and getting-started playlist
## Getting Started
There is a playlist of videos above that will demonstrate some of the basics. YouTube actually has MANY community-created guides, in various languages, that you can check out also.
The documentation that you are reading here contains details of advanced settings (URL parameters), support information, starting guides, and more. Using the search-box is a great way to navigate it for specific topics.
There are some cheat sheet and quick-start guides here:
[cheat-sheets.md](guides/cheat-sheets.md)
There are a few basic guides for beginners here as well:
[getting-started](getting-started/)
## Need help or support?
The preferred support mechanism is via [Reddit](https://www.reddit.com/r/vdoninja) or [Discord](https://discord.gg/feenJm8HTa), which offer community-assisted support. Discord is very active, so check it out. As well, development issues, feature requests, and bugs are tracked on [GitHub](https://github.com/steveseguin/obsninja).
For mission critical support issues, or business-related inquiries, you can contact Steve directly. Please don't make it a habit.
## Bug reports
It is most helpful to report bugs via the official [GitHub](https://github.com/steveseguin/obsninja). While we monitor the [Reddit](https://www.reddit.com/r/vdoninja) and [Discord](https://discord.gg/qWDshMsTar) channels, it is easy to miss issues/details that occur in comments and older threads.
---
description: List of apps and helper tools Steve has created to be used with VDO.Ninja
---
# Steve's helper apps & tools
* [#electron-capture](steves-helper-apps.md#electron-capture "mention")
* [#youtube-twitch-chat-and-social-comment-overlays-plugin](steves-helper-apps.md#youtube-twitch-chat-and-social-comment-overlays-plugin "mention")
* [#meshcast.io](steves-helper-apps.md#meshcast.io "mention")
* [#caption.ninja](steves-helper-apps.md#caption.ninja "mention")
* [#raspberry-ninja](steves-helper-apps.md#raspberry-ninja "mention")
* [#native-mobile-app-versions-for-vdo.ninja](steves-helper-apps.md#native-mobile-app-versions-for-vdo.ninja "mention")
* [#social-stream](steves-helper-apps.md#social-stream "mention")
* [#versus.cam](steves-helper-apps.md#versus.cam "mention")
## Electron Capture
[https://github.com/steveseguin/electroncapture](https://github.com/steveseguin/electroncapture)
Created for [VDO.Ninja](https://vdo.ninja) users, it can provide users a clean way of window capturing websites. In the case of [VDO.Ninja](https://vdo.ninja), it may offer a more flexible and reliable method of capturing live video than the browser source plugin built into OBS.
### Why ?
On some systems the OBS Browser Source plugin isn't available or doesn't work all that well, so this tool is a viable alternative. It lets you cleanly screen-grab just a video stream without the need of the Browser Source plugin. It also makes it easy to select the output audio playback device, such as a Virtual Audio device: ie) [https://vb-audio.com/Cable/](https://vb-audio.com/Cable/) (Windows & macOS; donationware).
The app can also be set to remain on top of other windows, attempts to hide the mouse cursor when possible, provides accurate window sizes for 1:1 pixel mapping, and supports global system hotkeys (`CTRL+M` on Windows, for example).
Windows users may find it beneficial too, as it offers support for VDO.Ninja's [`&buffer`](https://docs.vdo.ninja/viewers-settings/buffer) audio sync command and it has robust support for video packet loss. In other words, it can playback live video better than OBS can, with fewer video playback errors and with better audio/video sync. If you have a spare monitor, it may at times be worth the hassle to use instead of OBS alone.
The Electron Capture app uses recent versions of Chromium, which is more resistant to desync, video smearing, and other issues that might exist in the native OBS browser source capture method. [More benefits listed here](https://github.com/steveseguin/electroncapture/blob/master/BENEFITS.md)
Lastly, since playback is agnostic, you can window-capture the same video multiple times, using one copy in a mixed-down live stream, while using a window-capture to record a clean full-resolution isolated video stream.
## Chat Overlay
[https://chat.overlay.ninja](https://chat.overlay.ninja)
This Chrome browser extension turns your social chat and comments section into selectable social overlays for OBS Studio or other studio production software.
This chat overlay extension will forward the selected chat message over a web-socket connection to a secondary webpage, which can be used in OBS-Studio as a simple browser source. This makes capturing the chat messages from a live video stream very easy and fast -- no Chroma keying or window-capturing needed. It also makes customizing the style pretty easy, with no Chrome extension development needed.
**Supported sites as of August 2022 (requests welcomed)**
* glimesh.tv (pop-out chat)
* youtube.com (pop-out chat)
* twitch.tv (pop-out chat)
* restream.io (go here: [https://chat.restream.io/chat](https://chat.restream.io/chat))
* trovo.live (pop-out chat)
* Instagram (posts) (trigger it with a button)
* Instagram Live (click on chat messages)
* Twitter (works with tweets and replies)
* Facebook Live chat (no pop up option; does not support Mobile/4G/LTE - wifi or ethernet only)
* Crowdcast.io
* Zoom.us (text chat and polls)
* polleverywhere.com ([https://www.polleverywhere.com/discourses/xxxxx](https://www.polleverywhere.com/discourses/xxxxx) question page)
* Trovo (open the chat pop-up page: [https://trovo.live/chat/xxxxxx](https://trovo.live/chat/xxxxxx))
📺 Video demoing how to install and use here: [https://youtu.be/UOg3RvHO-xk](https://youtu.be/UOg3RvHO-xk)
## Meshcast.io
[https://meshcast.io](https://meshcast.io)
This is a free to use service that can work in conjunction with VDO.Ninja. It's a low latency video CDN (content delivery network), which can be used to host larger group rooms in VDO.Ninja. It's not designed for mass broadcast, not at present anyways, but it can handle upwards of 100-viewers without taxing your CPU or network.
[https://youtu.be/-7QsLChfdsE](https://youtu.be/-7QsLChfdsE)
## Caption.Ninja
### Caption
[https://caption.ninja/](https://caption.ninja/)
Although VDO.Ninja supports captions, sometimes you need something simple yet flexible. Caption.Ninja lets you use the browser's built in speech-to-text service to provide overlay captions for your live stream.
Captions are streamed via a web-socket service to your OBS or other studio software, where they can be shown over your video.
Transcriptions can be saved by means of copy and paste when done, multiple languages are supported, and even **manual** user-entered captions support is provided at [https://caption.ninja/manual](https://caption.ninja/manual)
### Translation
[https://caption.ninja/translate](https://caption.ninja/translate)
Added a "translation" component to caption.ninja, so you can convert speakers to a single language for overlay on stream. I tried this before, but only now do I think I have it working okay. There's two ways to use it:
1\. You can go here to explore and tinker.[ https://caption.ninja/translate](https://caption.ninja/translate) which offers a bit of a menu to play with, but is sender's side-based translation (works in a single page, but you can't translate to more than one language)
2\. And then there's the normal way of using caption.ninja, which offers viewer-side translation and scrolling support, so you can use this mode to have different languages as outputs instead of just one (assuming the viewer supports the translation code).
[https://caption.ninja/?room=ufv3QaH\&lang=en-US](https://caption.ninja/?room=ufv3QaH\&lang=en-US) (to capture as english) and [https://caption.ninja/overlay?room=ufv3QaH\&translate=fr](https://caption.ninja/overlay?room=ufv3QaH\&translate=fr) (viewer-side, which converts to french).
I welcome feedback.
## Raspberry Ninja
[https://raspberry.ninja](https://raspberry.ninja)
Turn your Raspberry Pi or Nvidia Jetson into a Ninja-cam with hardware-acceleration enabled! Publish live streaming video to VDO.Ninja on the cheap at very high resolutions! The script for the Nvidia Jetson ($69 and up) is setup to plug in a $10 1080p30 HDMI to USB adapter and go, while the Raspberry Pi is setup as a quick-deploy image that can work with the official Raspicam.
.png>)
## Native mobile app versions for VDO.Ninja
Mobile native app versions of VDO.Ninja can be found behind the link below. These are mainly backup options for when the browser-based versions fail to work or lack a certain feature due to system restrictions.
[native-mobile-app-versions.md](getting-started/native-mobile-app-versions.md)
## Social Stream
[https://socialstream.ninja](https://socialstream.ninja)
Consolidate your live social messaging streams, including Youtube, Twitch, and more, into a single chat stream that can be docked into OBS and be used to to select featured chat messages as an overlay.
Very much like Chat Overlay Ninja, except is purely for live chat and has a focus on consolidation of chat messages, instead of just featured chat. Has many features and supported sites at this point.
[https://github.com/steveseguin/social\_stream#readme](https://github.com/steveseguin/social\_stream#readme)
## Versus.cam
[https://versus.cam/](https://versus.cam/)
Versus.cam is the upcoming and standalone replacement for the [vdo.ninja/monitor](https://vdo.ninja/monitor) page. Versus.cam has some interesting features that are specific to the upcoming version of VDO.Ninja, so at the moment it only works in conjunction with [vdo.ninja/alpha](https://vdo.ninja/alpha/).
### Details
* It contains a larger and dedicated graph per scene/view link than what the [vdo.ninja/beta/'s ](https://vdo.ninja/beta/)director room has under scene-stats. Both color code to indicate packet loss, where red is bad, and green is good.
* It is setup to use a group room by default, with a very simple interface to login and get started without visiting vdo.ninja itself.
* Despite having a group room by default, it works with standalone push/view links as well, via the "Add a stream manually" button, which lets you include normal view links that exist outside rooms.
* All the scene links and invite links are preconfigured for E-Sports , where video is set to pull around 20-mbps for smooth 1080p60 game play. The idea is, if you choose to use this page for creating links, it's all already setup to be used for ingestion.
* The room is configured so that guests cannot see or talk to each other. All guests can do is text-chat with the versus host.
* Versus.cam is compatible with a director and the director room, so you can use a director room AND the Versus.cam room at the same time, without conflict.
* A new feature that Versus.cam has, that will also soon be coming to the normal VDO.Ninja directors' room, is the ability to **dynamically change the resolution and bitrate of remote scenes**. This works by means of the [`&remote`](general-settings/remote.md) control feature, which is preconfigured in the links already, so no director is needed when using versus. This will then also work with non-room links, so long as [`&remote`](general-settings/remote.md) is included in their URL.
* I don't intend to add many advanced features to this site.
* It's designed to be very simple, elegant, and hyper focused on a single use case and user type.
* E-Sports and one-way ingestion of very high quality video. I'll likely be making more scenario-specific interfaces in the future like this, to make VDO.Ninja easier and less cluttered for common use cases.
* Versus.cam is built using the VDO.Ninja IFRAME API, which I hope demonstrates the flexibility of it.
* Versus.cam is only supported by Chrome/Chromium-based browsers; it isn't yet compatible with Firefox/Safari (they lack the features needed for it to operate).
Please report bugs. It's a first release, using the alpha version of VDO.Ninja, so bugs are kind of expected.
[https://youtu.be/I12ASNWHPPI](https://youtu.be/I12ASNWHPPI)
# Table of contents
* [What is VDO.Ninja?](README.md)
* [How does it work](how-does-it-work.md)
* [Use cases](use-cases.md)
* [Why use VDO.Ninja over other solutions?](why-use-obs.ninja-over-other-solutions.md)
* [Sponsor ❤](https://docs.vdo.ninja/getting-started/sponsor)
* [Getting started](getting-started/README.md)
* [VDO.Ninja basics](getting-started/vdo.ninja-basics.md)
* [What are stream IDs?](getting-started/stream-ids.md)
* [The power of the URL parameter](getting-started/the-power-of-the-url-parameter.md)
* [Multi-Person Chat](getting-started/multi-person-chat.md)
* [Rooms](getting-started/rooms/README.md)
* [Even higher quality video](getting-started/high-quality-camera.md)
* [Mobile phone camera into webcam](getting-started/mobile-phone-camera-into-webcam.md)
* [Cheat sheet of basic parameters](https://docs.vdo.ninja/getting-started/cheat-sheet-of-basic-parameters)
* [Steve's helper apps & tools](steves-helper-apps/README.md)
* [Electron Capture](steves-helper-apps/electron-capture.md)
* [Documentation](steves-helper-apps/electron-capture/documentation.md)
* [Social Stream Ninja](steves-helper-apps/social-stream-ninja/README.md)
* [Documentation reference](steves-helper-apps/social-stream-ninja/documentation-reference.md)
* [Meshcast.io](steves-helper-apps/meshcast.io.md)
* [Caption.Ninja](steves-helper-apps/caption.ninja.md)
* [Raspberry.Ninja](steves-helper-apps/raspberry.ninja/README.md)
* [Documentation](steves-helper-apps/raspberry.ninja/documentation.md)
* [Mixer App](steves-helper-apps/mixer-app.md)
* [WHIP and WHEP tooling](steves-helper-apps/whip-and-whep-tooling.md)
* [Versus.cam](steves-helper-apps/versus.cam.md)
* [Speed Test](steves-helper-apps/speed-test.md)
* [Comms](steves-helper-apps/comms.md)
* [Teleprompter Tool](steves-helper-apps/teleprompter-tool.md)
* [LUT maker for color grading](steves-helper-apps/lut-maker-for-color-grading.md)
* [Native mobile app versions](steves-helper-apps/native-mobile-app-versions.md)
* [VDO Applications](steves-helper-apps/vdo-applications.md)
* [Tech Demonstrations](steves-helper-apps/tech-demonstrations.md)
* [Invite Link Generators](steves-helper-apps/invite-link-generators.md)
* [Community contributed tools](steves-helper-apps/community-contributed-tools.md)
* [Mic test](https://vdo.ninja/mictest)
* [Guides](guides/README.md)
* [Cheat Sheets](guides/cheat-sheets.md)
* [How Group Chat works](help/how-does-group-chat-work.md)
* [Video bitrate for push/view links](guides/video-bitrate-for-push-view-links.md)
* [Video bitrate in rooms](guides/video-bitrate-in-rooms.md)
* [Basic hotkeys](guides/hotkey-support/README.md)
* [MIDI, API and WebHID support](guides/midi-api-and-webhid-support.md)
* [Hardware-accelerated video encoding](guides/hardware-accelerated-video-encoding.md)
* [Audio Filters & Bitrate](guides/audio-filters.md)
* [Options to record streams](guides/options-to-record-streams.md)
* [External guides and how-tos](guides/guides-and-how-tos.md)
* [How to lock the resolution](guides/how-do-i-lock-the-resolution.md)
* [How to use VDO.Ninja as a webcam for Google Hangouts, Zoom, and more](guides/use-vdo.ninja-as-a-webcam-for-google-hangouts-zoom-and-more.md)
* [How to capture without browser sources](guides/capturing-without-browser-sources.md)
* [How to control bitrate/quality](guides/how-do-i-control-bitrate-quality.md)
* [How to selectively allow access](guides/how-to-selectively-allow-access.md)
* [How to send the audio/video output of one OBS to another OBS using VDO.Ninja](guides/how-to-send-the-audio-video-output-of-one-obs-to-another-obs-using-vdo.ninja.md)
* [How to mirror a video while Full-Screen - For iPads and Teleprompters](guides/how-to-mirror-a-video-while-full-screen-for-ipads-and-teleprompters.md)
* [How to get permanent links](guides/how-to-get-permanent-links.md)
* [How to capture an application's audio](guides/audio.md)
* [How to control VDO.Ninja with Touch Portal](guides/hotkey-support/how-to-control-vdo.ninja-with-touch-portal.md)
* [How to publish from OBS into VDO.Ninja](guides/publish-from-obs-into-vdo.ninja.md)
* [How to screen share your iPhone/iPad](guides/screen-share-your-iphone-ipad.md)
* [How to get iPhones to output 1080p Videos](guides/how-to-get-iphones-to-output-1080p-videos.md)
* [How to stream into Zoom without OBS](guides/how-to-stream-into-zoom-without-obs.md)
* [How to connect a smartphone to computer via USB](guides/connecting-smartphone-to-computer-via-usb.md)
* [How to edit an invite after sending it](guides/edit-an-invite-after-sending-it.md)
* [How to get highest video quality (for an interview)](guides/highest-quality-video-for-an-interview.md)
* [How to stream 4K video using VDO.Ninja](guides/how-to-stream-4k-video-using-vdo.ninja.md)
* [How to get lowest audio latency possible](guides/lowest-audio-latency-possible.md)
* [How to share webcam from inside OBS](guides/share-webcam-from-inside-obs.md)
* [How to publish to Facebook Live](guides/publish-to-facebook-live.md)
* [How to embed VDO.Ninja into a site with iFrames](guides/iframe-api-documentation.md)
* [How to use the green screen just locally](guides/use-the-green-screen-just-locally.md)
* [How to connect a GoPro to VDO.Ninja](guides/connect-a-gopro-to-vdo.ninja.md)
* [How to install RaspNinja on Jetson](guides/installing-raspninja-on-jetson.md)
* [How to transfer guests to other rooms](getting-started/rooms/transfer-rooms.md)
* [How to set up a simple chat room](guides/how-to-set-up-a-simple-chat-room.md)
* [How to screen share in 1080p](guides/how-to-screen-share-in-1080p.md)
* [How to control PowerPoint remotely with VDO.Ninja](guides/how-to-control-powerpoint-remotely-with-vdo.ninja.md)
* [How to improve quality of the native app](guides/improving-quality-of-the-native-app.md)
* [How to stream transparent video](guides/how-to-stream-transparent-video.md)
* [How to set up OBS WHIP output settings](guides/obs-whip-output-settings.md)
* [How to use VDO.Ninja on a website](guides/how-to-use-vdo.ninja-on-a-website.md)
* [Advanced Options (URL Parameters)](advanced-settings.md)
* [Most common Parameters](advanced-settings/cheat-sheet-of-basic-parameters/README.md)
* [\&push](https://docs.vdo.ninja/advanced-settings/source-parameters/push)
* [\&quality](https://docs.vdo.ninja/advanced-settings/video-parameters/quality)
* [\&videodevice](https://docs.vdo.ninja/advanced-settings/setup-parameters/videodevice)
* [\&audiodevice](https://docs.vdo.ninja/advanced-settings/setup-parameters/audiodevice)
* [\&effects](https://docs.vdo.ninja/advanced-settings/video-parameters/effects)
* [\&label](https://docs.vdo.ninja/advanced-settings/setup-parameters/label)
* [\&meshcast](https://docs.vdo.ninja/advanced-settings/meshcast-parameters/and-meshcast)
* [\&view](https://docs.vdo.ninja/advanced-settings/mixer-scene-parameters/view)
* [\&videobitrate](https://docs.vdo.ninja/advanced-settings/video-parameters/bitrate)
* [\&audiobitrate](https://docs.vdo.ninja/advanced-settings/audio-parameters/audiobitrate)
* [\&codec](https://docs.vdo.ninja/advanced-settings/video-parameters/codec)
* [\&novideo](https://docs.vdo.ninja/advanced-settings/video-parameters/novideo)
* [\&noaudio](https://docs.vdo.ninja/advanced-settings/audio-parameters/noaudio)
* [\&showlabels](https://docs.vdo.ninja/advanced-settings/design-parameters/showlabels)
* [\&room](https://docs.vdo.ninja/advanced-settings/general-parameters/room)
* [\&director](https://docs.vdo.ninja/advanced-settings/director-parameters/director)
* [\&proaudio](https://docs.vdo.ninja/advanced-settings/audio-parameters/and-proaudio)
* [\&scene](https://docs.vdo.ninja/advanced-settings/mixer-scene-parameters/scene)
* [\&roombitrate](https://docs.vdo.ninja/advanced-settings/video-parameters/roombitrate)
* [\&password](https://docs.vdo.ninja/advanced-settings/setup-parameters/password)
* [\&broadcast](https://docs.vdo.ninja/advanced-settings/view-parameters/broadcast)
* [Setup Parameters](advanced-settings/setup-parameters/README.md)
* [\&push](source-settings/push.md)
* [\&room](general-settings/room.md)
* [\&password](advanced-settings/setup-parameters/and-password.md)
* [\&hash](newly-added-parameters/and-hash.md)
* [\&e2ee](advanced-settings/setup-parameters/and-e2ee.md)
* [\&label](general-settings/label.md)
* [\&labelsuggestion](advanced-settings/setup-parameters/and-labelsuggestion.md)
* [\&permaid](advanced-settings/setup-parameters/and-permaid.md)
* [\&group](general-settings/and-group.md)
* [\&groupview](advanced-settings/setup-parameters/and-groupview.md)
* [\&groupaudio](general-settings/and-groupaudio.md)
* [\&datamode](newly-added-parameters/and-datamode.md)
* [\&audiooutput](advanced-settings/setup-parameters/and-audiooutput.md)
* [\&sink](advanced-settings/view-parameters/and-sink.md)
* [\&audiodevice](source-settings/audiodevice.md)
* [\&videodevice](source-settings/videodevice.md)
* [\&vdo](newly-added-parameters/and-vdo.md)
* [\&device](source-settings/and-device.md)
* [\&miconly](source-settings/miconly.md)
* [\&miconlyoption](advanced-settings/setup-parameters/and-miconlyoption-alpha.md)
* [\&safemode](newly-added-parameters/and-safemode.md)
* [\&autostart](source-settings/and-autostart.md)
* [\&easyexit](source-settings/easyexit.md)
* [\&webcam](source-settings/and-webcam.md)
* [\&webcam2](newly-added-parameters/and-webcam2.md)
* [\&screenshare](source-settings/screenshare.md)
* [\&screenshare2](newly-added-parameters/and-screenshare2.md)
* [\&website](source-settings/and-website.md)
* [\&fileshare](source-settings/and-fileshare.md)
* [\&intro](source-settings/intro.md)
* [\&host](newly-added-parameters/and-host.md)
* [\&tips](general-settings/tips.md)
* [\&welcome](newly-added-parameters/and-welcome.md)
* [\&welcomeb64](advanced-settings/setup-parameters/and-welcomeb64-alpha.md)
* [\&welcomeimage](advanced-settings/setup-parameters/and-welcomeimage.md)
* [\&hangupmessage](advanced-settings/setup-parameters/and-hangupmessage-alpha.md)
* [\&humb64](advanced-settings/setup-parameters/and-humb64-alpha.md)
* [\&groupmode](advanced-settings/setup-parameters/and-groupmode.md)
* [Camera Parameters](advanced-settings/camera-parameters/README.md)
* [\&whitebalance](advanced-settings/camera-parameters/and-whitebalance.md)
* [\&exposure](advanced-settings/camera-parameters/and-exposure.md)
* [\&saturation](advanced-settings/camera-parameters/and-saturation.md)
* [\&sharpness](advanced-settings/camera-parameters/and-sharpness.md)
* [\&contrast](advanced-settings/camera-parameters/and-contrast.md)
* [\&brightness](advanced-settings/camera-parameters/and-brightness.md)
* [Video Parameters](advanced-settings/video-parameters/README.md)
* [\&blind](advanced-settings/video-parameters/and-blind.md)
* [\&quality](advanced-settings/video-parameters/and-quality.md)
* [\&width](source-settings/and-width.md)
* [\&height](source-settings/and-height.md)
* [\&aspectratio](advanced-settings/video-parameters/and-aspectratio.md)
* [\&contenthint](advanced-settings/video-parameters/and-contenthint.md)
* [\&mediasettings](newly-added-parameters/and-mediasettings.md)
* [\&noscale](newly-added-parameters/and-noscale.md)
* [\&fps](advanced-settings/video-parameters/and-fps.md)
* [\&maxframerate](source-settings/and-maxframerate.md)
* [\&effects](source-settings/effects.md)
* [\&effectvalue](newly-added-parameters/and-effectvalue.md)
* [\&imagelist](advanced-settings/video-parameters/and-imagelist.md)
* [\&avatar](advanced-settings/video-parameters/and-avatar.md)
* [\&fullscreen](source-settings/fullscreen.md)
* [\&showpreview](source-settings/and-preview.md)
* [\&minipreview](source-settings/and-minipreview.md)
* [\&minipreviewoffset](advanced-settings/video-parameters/and-minipreview-1.md)
* [\&largepreview](advanced-settings/video-parameters/and-largepreview.md)
* [\&nopreview](source-settings/and-nopreview.md)
* [\&hideguest](newly-added-parameters/and-hideguest.md)
* [\&videomute](source-settings/and-videomute.md)
* [\&ptz](source-settings/ptz.md)
* [\&webp](advanced-settings/view-parameters/webp.md)
* [\&webpquality](advanced-settings/view-parameters/webpquality.md)
* [\&scale](advanced-settings/view-parameters/scale.md)
* [\&viewwidth](advanced-settings/video-parameters/and-viewwidth.md)
* [\&viewheight](advanced-settings/video-parameters/and-viewheight.md)
* [\&dpi](advanced-settings/view-parameters/dpi.md)
* [\&sharper](advanced-settings/video-parameters/and-sharper.md)
* [\&codec](advanced-settings/view-parameters/codec.md)
* [\&h264profile](newly-added-parameters/and-h264profile.md)
* [\&buffer](advanced-settings/view-parameters/buffer.md)
* [\&buffer2](advanced-settings/video-parameters/and-buffer2.md)
* [\&fadein](advanced-settings/view-parameters/fadein.md)
* [\&broadcast](advanced-settings/view-parameters/broadcast.md)
* [\&directoronly](advanced-settings/video-parameters/and-directoronly.md)
* [\&showonly](advanced-settings/video-parameters/novideo.md)
* [\&novideo](advanced-settings/video-parameters/and-novideo.md)
* [\&nodirectorvideo](advanced-settings/video-parameters/and-nodirectorvideo.md)
* [\&slideshow](advanced-settings/video-parameters/and-slideshow.md)
* [Video Bitrate Parameters](advanced-settings/video-bitrate-parameters/README.md)
* [\&outboundvideobitrate](advanced-settings/video-bitrate-parameters/and-outboundvideobitrate.md)
* [\&maxvideobitrate](advanced-settings/video-bitrate-parameters/and-maxvideobitrate.md)
* [\&limittotalbitrate](advanced-settings/video-bitrate-parameters/limittotalbitrate.md)
* [\&controlroombitrate](advanced-settings/video-bitrate-parameters/and-controlroombitrate.md)
* [\&roombitrate](advanced-settings/video-bitrate-parameters/roombitrate.md)
* [\&maxbandwidth](advanced-settings/video-bitrate-parameters/and-maxbandwidth.md)
* [\&videobitrate](advanced-settings/video-bitrate-parameters/bitrate.md)
* [\&totalscenebitrate](advanced-settings/video-bitrate-parameters/and-totalscenebitrate.md)
* [\&totalroombitrate](advanced-settings/video-bitrate-parameters/totalroombitrate.md)
* [\&totalbitrate](advanced-settings/video-bitrate-parameters/and-totalbitrate.md)
* [\&zoomedbitrate](advanced-settings/video-bitrate-parameters/and-zoomedbitrate.md)
* [\&optimize](advanced-settings/video-bitrate-parameters/optimize.md)
* [Audio Parameters](advanced-settings/audio-parameters/README.md)
* [\&proaudio](advanced-settings/audio-parameters/and-proaudio.md)
* [\&stereo](general-settings/stereo.md)
* [\&mutespeaker](source-settings/and-mutespeaker.md)
* [\&deafen](general-settings/deafen.md)
* [\&noaudioprocessing](general-settings/noaudioprocessing.md)
* [\&audiodevice](https://docs.vdo.ninja/advanced-settings/source-parameters/audiodevice)
* [\&echocancellation](source-settings/aec.md)
* [\&audiogain](advanced-settings/audio-parameters/and-audiogain.md)
* [\&autogain](source-settings/autogain.md)
* [\&compressor](source-settings/and-compressor.md)
* [\&denoise](source-settings/and-denoise.md)
* [\&distort](advanced-settings/audio-parameters/and-distort.md)
* [\&equalizer](source-settings/and-equalizer.md)
* [\&limiter](source-settings/and-limiter.md)
* [\&lowcut](source-settings/lowcut.md)
* [\&noisegate](source-settings/noisegate.md)
* [\&noisegatesettings](advanced-settings/audio-parameters/and-noisegatesettings.md)
* [\&audiocontenthint](advanced-settings/audio-parameters/and-audiocontenthint.md)
* [\&audiolatency](newly-added-parameters/and-audiolatency.md)
* [\&micdelay](source-settings/and-micdelay.md)
* [\&mute](source-settings/and-mute.md)
* [\&automute](advanced-settings/audio-parameters/and-automute.md)
* [\&outboundaudiobitrate](source-settings/and-outboundaudiobitrate.md)
* [\&inputchannels](advanced-settings/audio-parameters/and-inputchannels.md)
* [\&monomic](advanced-settings/audio-parameters/and-monomic.md)
* [\&audiooutput](https://docs.vdo.ninja/advanced-settings/view-parameters/and-outputdevice)
* [\&sink](https://docs.vdo.ninja/advanced-settings/view-parameters/and-sink)
* [\&volume](advanced-settings/audio-parameters/and-volume.md)
* [\&volumecontrol](advanced-settings/audio-parameters/and-volumecontrol.md)
* [\&audiobitrate](advanced-settings/view-parameters/audiobitrate.md)
* [\&vbr](advanced-settings/view-parameters/vbr.md)
* [\&mono](advanced-settings/view-parameters/mono.md)
* [\&noaudio](advanced-settings/view-parameters/noaudio.md)
* [\&nodirectoraudio](advanced-settings/audio-parameters/and-nodirectoraudio.md)
* [\&panning](advanced-settings/view-parameters/and-panning.md)
* [\&sync](advanced-settings/view-parameters/sync.md)
* [\&samplerate](advanced-settings/view-parameters/and-samplerate.md)
* [\&channels](advanced-settings/view-parameters/and-channels.md)
* [\&channeloffset](advanced-settings/view-parameters/and-channeloffset.md)
* [\&playchannel](advanced-settings/audio-parameters/and-channeloffset-1.md)
* [\&ptime](advanced-settings/view-parameters/and-ptime.md)
* [\&maxptime](advanced-settings/view-parameters/and-maxptime.md)
* [\&minptime](advanced-settings/view-parameters/minptime.md)
* [\&audiocodec](advanced-settings/audio-parameters/minptime-1.md)
* [\&dtx](advanced-settings/audio-parameters/minptime-2.md)
* [\&nofec](advanced-settings/audio-parameters/minptime-3.md)
* [Mixer/Scene Parameters](advanced-settings/mixer-scene-parameters/README.md)
* [\&solo](advanced-settings/mixer-scene-parameters/and-solo.md)
* [\&view](advanced-settings/view-parameters/view.md)
* [\&include](advanced-settings/mixer-scene-parameters/and-include.md)
* [\&exclude](advanced-settings/view-parameters/and-exclude.md)
* [\&layout](advanced-settings/mixer-scene-parameters/and-layout.md)
* [\&activespeaker](advanced-settings/view-parameters/activespeaker.md)
* [\&order](source-settings/order.md)
* [\&slots](newly-added-parameters/and-slots.md)
* [\&fakeguests](advanced-settings/mixer-scene-parameters/and-fakeguests.md)
* [\&randomize](advanced-settings/view-parameters/randomize.md)
* [\&cover](advanced-settings/view-parameters/cover.md)
* [&43](newly-added-parameters/and-43.md)
* [\&portrait](advanced-settings/view-parameters/and-portrait.md)
* [\&square](newly-added-parameters/and-square.md)
* [\&forceviewerlandscape](advanced-settings/mixer-scene-parameters/and-forceviewerlandscape.md)
* [\&animated](advanced-settings/view-parameters/animated.md)
* [\&manual](advanced-settings/view-parameters/manual.md)
* [\&locked](advanced-settings/mixer-scene-parameters/and-locked.md)
* [\&poster](advanced-settings/mixer-scene-parameters/and-poster.md)
* [\&hideplaybutton](advanced-settings/mixer-scene-parameters/and-hideplaybutton.md)
* [\&motiondetection](advanced-settings/mixer-scene-parameters/and-motiondetection-alpha.md)
* [\&scene](advanced-settings/view-parameters/scene.md)
* [\&scenetype](advanced-settings/mixer-scene-parameters/scenetype.md)
* [\&autoadd](newly-added-parameters/and-autoadd.md)
* [\&hiddenscenebitrate](newly-added-parameters/and-hiddenscenebitrate.md)
* [\&preloadbitrate](newly-added-parameters/and-preloadbitrate.md)
* [\&waitimage](advanced-settings/newly-added-parameters/and-waitimage.md)
* [\&waitmessage](advanced-settings/newly-added-parameters/and-waitmessage.md)
* [\&waittimeout](advanced-settings/newly-added-parameters/and-waittimeout.md)
* [Settings Parameters](advanced-settings/settings-parameters/README.md)
* [\&language](advanced-settings/settings-parameters/and-language.md)
* [\&remote](general-settings/remote.md)
* [\&controlobs](advanced-settings/settings-parameters/and-controlobs.md)
* [\&allowedscenes](advanced-settings/settings-parameters/and-allowedscenes.md)
* [\&stats](general-settings/and-stats.md)
* [\&sticky](general-settings/sticky.md)
* [\&clearstorage](advanced-settings/settings-parameters/and-clearstorage.md)
* [\&disablehotkeys](advanced-settings/settings-parameters/and-disablehotkeys.md)
* [\&showlist](source-settings/showlist.md)
* [\&nopush](advanced-settings/settings-parameters/and-nopush.md)
* [\&hidehome](advanced-settings/settings-parameters/and-hidehome.md)
* [\&hidetranslate](advanced-settings/settings-parameters/and-hidetranslate.md)
* [\&clock](advanced-settings/settings-parameters/and-clock.md)
* [\&clock24](advanced-settings/settings-parameters/and-clock24-alpha.md)
* [\&timer](advanced-settings/settings-parameters/and-timer.md)
* [\&powerpoint](advanced-settings/settings-parameters/and-powerpoint.md)
* [\&widget](advanced-settings/settings-parameters/and-widget.md)
* [\&token](advanced-settings/settings-parameters/and-token.md)
* [\&transcribe](source-settings/transcribe.md)
* [\&signalmeter](newly-added-parameters/and-signalmeter.md)
* [\&batterymeter](advanced-settings/settings-parameters/and-batterymeter.md)
* [\&consent](source-settings/consent.md)
* [\&prompt](advanced-settings/settings-parameters/and-prompt.md)
* [\&hands](https://docs.vdo.ninja/advanced-settings/buttons-and-control-bar-parameters/and-hands)
* [\¬ify](source-settings/and-notify.md)
* [\&r2d2](source-settings/r2d2.md)
* [\&directorchat](source-settings/directorchat.md)
* [\&maxconnections](source-settings/and-maxconnections.md)
* [\&maxviewers](source-settings/and-maxviewers.md)
* [\&chunked](newly-added-parameters/and-chunked.md)
* [\&retransmit](advanced-settings/settings-parameters/and-retransmit.md)
* [\&rampuptime](newly-added-parameters/and-rampuptime.md)
* [\&sensor](source-settings/sensor.md)
* [\&sensorfilter](advanced-settings/settings-parameters/and-sensorfilter.md)
* [\&postimage](advanced-settings/settings-parameters/and-postimage.md)
* [\&postinterval](advanced-settings/settings-parameters/and-postinterval.md)
* [\&slot](advanced-settings/settings-parameters/and-slot.md)
* [\&closedcaptions](advanced-settings/settings-parameters/and-closedcaptions.md)
* [\&nocaptionlabels](advanced-settings/settings-parameters/and-nocaptionlabels.md)
* [\&enhance](advanced-settings/view-parameters/enhance.md)
* [\&bitratecutoff](advanced-settings/parameters-only-on-beta/and-bitratecutoff.md)
* [\&cutscene](advanced-settings/settings-parameters/and-cutscene.md)
* [\&statsinterval](advanced-settings/parameters-only-on-beta/and-statsinterval.md)
* [\&keyframerate](advanced-settings/view-parameters/keyframerate.md)
* [\&maxpublishers](advanced-settings/view-parameters/and-maxpublishers.md)
* [\&showconnections](advanced-settings/settings-parameters/and-showconnections.md)
* [\&obsfix](advanced-settings/view-parameters/and-obsfix.md)
* [\&streamlabs](advanced-settings/view-parameters/streamlabs.md)
* [\&getfaces](advanced-settings/settings-parameters/and-getfaces.md)
* [\&nochunked](advanced-settings/settings-parameters/and-nochunked.md)
* [Buttons and Control Bar Parameters](advanced-settings/buttons-and-control-bar-parameters/README.md)
* [\&autohide](parameters-only-on-beta/and-autohide.md)
* [\&controlbarspace](advanced-settings/settings-parameters/and-controlbarspace.md)
* [\&nosettings](source-settings/and-nosettings.md)
* [\&nomicbutton](viewers-settings/nomicbutton.md)
* [\&nospeakerbutton](source-settings/and-nospeakerbutton.md)
* [\&novideobutton](viewers-settings/and-novideobutton.md)
* [\&nofileshare](source-settings/nofileshare.md)
* [\&screensharebutton](advanced-settings/settings-parameters/and-screensharebutton.md)
* [\&nohangupbutton](advanced-settings/settings-parameters/and-nohangupbutton.md)
* [\&chatbutton](general-settings/chatbutton.md)
* [\&bigbutton](newly-added-parameters/and-bigbutton.md)
* [\&fullscreenbutton](advanced-settings/settings-parameters/and-fullscreenbutton.md)
* [\&nowebsite](source-settings/nowebsite.md)
* [\&hands](source-settings/and-hands.md)
* [\&videocontrols](advanced-settings/newly-added-parameters/and-videocontrols.md)
* [\&nocontrols](advanced-settings/settings-parameters/and-nocontrols.md)
* [\&forcecontrols](advanced-settings/buttons-and-control-bar-parameters/and-hands-1.md)
* [Design Parameters](advanced-settings/design-parameters/README.md)
* [\&label](https://docs.vdo.ninja/advanced-settings/general-parameters/label)
* [\&showlabels](advanced-settings/design-parameters/showlabels.md)
* [\&fontsize](advanced-settings/view-parameters/fontsize.md)
* [\&style](advanced-settings/design-parameters/style.md)
* [\&bgimage](advanced-settings/design-parameters/and-bgimage.md)
* [\&showall](advanced-settings/design-parameters/and-showall.md)
* [\&meterstyle](advanced-settings/design-parameters/meterstyle.md)
* [\&cleanoutput](advanced-settings/design-parameters/cleanoutput.md)
* [\&cleanish](advanced-settings/design-parameters/cleanish.md)
* [\&css](advanced-settings/design-parameters/css.md)
* [\&base64css](advanced-settings/design-parameters/and-base64css.md)
* [\&js](advanced-settings/design-parameters/and-js.md)
* [\&base64js](advanced-settings/design-parameters/and-base64js.md)
* [\&mirror](advanced-settings/design-parameters/and-mirror.md)
* [\&nomirror](advanced-settings/design-parameters/and-nomirror-alpha.md)
* [\&flip](advanced-settings/design-parameters/and-flip.md)
* [\&rotatewindow](advanced-settings/design-parameters/and-rotatewindow.md)
* [\&structure](advanced-settings/design-parameters/and-structure.md)
* [\&color](advanced-settings/design-parameters/and-color.md)
* [\&blur](advanced-settings/design-parameters/and-blur.md)
* [\&border](advanced-settings/design-parameters/and-border.md)
* [\&bordercolor](advanced-settings/design-parameters/and-bordercolor.md)
* [\&rounded](advanced-settings/design-parameters/rounded.md)
* [\&margin](advanced-settings/design-parameters/margin.md)
* [\&darkmode](advanced-settings/design-parameters/darkmode.md)
* [\&lightmode](advanced-settings/design-parameters/and-lightmode.md)
* [\&background](advanced-settings/design-parameters/and-background.md)
* [\&chroma](advanced-settings/design-parameters/chroma.md)
* [\&transparent](advanced-settings/design-parameters/and-transparent.md)
* [\&nocursor](general-settings/and-nocursor.md)
* [\&favicon](advanced-settings/design-parameters/and-favicon-alpha.md)
* [\&headertitle](advanced-settings/design-parameters/and-headertitle.md)
* [\&rotate](advanced-settings/design-parameters/and-rotate.md)
* [\&grid](advanced-settings/design-parameters/grid.md)
* [\&hideheader](advanced-settings/design-parameters/and-hideheader.md)
* [\&hidemenu](advanced-settings/design-parameters/and-hidemenu.md)
* [\&tally](advanced-settings/design-parameters/tallyoff.md)
* [\&tallyoff](advanced-settings/design-parameters/tallyoff-1.md)
* [\&cleanviewer](advanced-settings/design-parameters/and-cleanviewer.md)
* [\&obsoff](advanced-settings/design-parameters/and-obsoff.md)
* [\&pip](advanced-settings/design-parameters/and-pip.md)
* [\&pipall](advanced-settings/design-parameters/and-pipall-alpha.md)
* [\&pipme](advanced-settings/design-parameters/and-pipme-alpha.md)
* [Director Parameters](advanced-settings/director-parameters/README.md)
* [\&director](viewers-settings/director.md)
* [\&codirector](director-settings/codirector.md)
* [\&blindall](newly-added-parameters/and-blindall.md)
* [\&cleandirector](director-settings/cleandirector.md)
* [\&hidesolo](newly-added-parameters/and-hidesolo.md)
* [\&hidecodirectors](advanced-settings/director-parameters/and-hidecodirectors.md)
* [\&minidirector](newly-added-parameters/and-minidirector.md)
* [\&orderby](newly-added-parameters/and-orderby.md)
* [\&queue](https://docs.vdo.ninja/advanced-settings/guest-queuing-parameters/and-queue)
* [\&rooms](director-settings/rooms.md)
* [\&broadcasttransfer](advanced-settings/director-parameters/and-broadcasttransfer.md)
* [\&showdirector](viewers-settings/and-showdirector.md)
* [\&slotmode](advanced-settings/director-parameters/and-slotmode.md)
* [\&previewmode](advanced-settings/director-parameters/and-previewmode.md)
* [\&novice](advanced-settings/director-parameters/and-novice.md)
* [\&layouts](advanced-settings/director-parameters/and-layouts.md)
* [\&maindirectorpassword](advanced-settings/director-parameters/and-maindirectorpassword.md)
* [\&totalroombitrate](https://docs.vdo.ninja/advanced-settings/video-parameters/totalroombitrate)
* [\&limittotalbitrate](https://docs.vdo.ninja/advanced-settings/video-bitrate-parameters/limittotalbitrate)
* [\¬ify](https://docs.vdo.ninja/advanced-settings/source-parameters/and-notify)
* [\&mutespeaker=0](https://docs.vdo.ninja/advanced-settings/audio-parameters/and-mutespeaker)
* [\&showconnections](https://docs.vdo.ninja/advanced-settings/settings-parameters/and-showconnections)
* [\&widget](https://docs.vdo.ninja/advanced-settings/settings-parameters/and-widget-alpha)
* [Screen-share Parameters](advanced-settings/screen-share-parameters/README.md)
* [\&screensharestereo](newly-added-parameters/and-screensharestereo.md)
* [\&screenshare](https://docs.vdo.ninja/advanced-settings/source-parameters/screenshare)
* [\&screenshare2](https://docs.vdo.ninja/advanced-settings/newly-added-parameters/and-screenshare2)
* [\&screenshareaec](newly-added-parameters/and-screenshareaec.md)
* [\&screenshareautogain](newly-added-parameters/and-screenshareautogain.md)
* [\&screensharecursor](source-settings/cursor.md)
* [\&screensharedenoise](newly-added-parameters/and-screensharedenoise.md)
* [\&screensharefps](source-settings/screensharefps.md)
* [\&screensharehide](newly-added-parameters/and-screensharehide.md)
* [\&screenshareid](source-settings/screenshareid.md)
* [\&screensharelabel](newly-added-parameters/and-screensharelabel.md)
* [\&screensharequality](source-settings/screensharequality.md)
* [\&screensharecontenthint](advanced-settings/screen-share-parameters/and-screensharecontenthint.md)
* [\&screenshareaspectratio](advanced-settings/screen-share-parameters/and-screenshareaspectratio.md)
* [\&screensharetype](newly-added-parameters/and-screensharetype.md)
* [\&smallshare](advanced-settings/screen-share-parameters/and-smallshare.md)
* [\&screensharevideoonly](newly-added-parameters/and-screensharevideoonly.md)
* [\&suppresslocalaudio](advanced-settings/screen-share-parameters/and-suppresslocalaudio.md)
* [\&prefercurrenttab](advanced-settings/screen-share-parameters/and-prefercurrenttab.md)
* [\&selfbrowsersurface](advanced-settings/screen-share-parameters/and-selfbrowsersurface.md)
* [\&systemaudio](advanced-settings/screen-share-parameters/and-systemaudio.md)
* [\&displaysurface](advanced-settings/screen-share-parameters/and-displaysurface.md)
* [\&screensharebutton](https://docs.vdo.ninja/advanced-settings/settings-parameters/and-screensharebutton)
* [\&screensharebitrate](newly-added-parameters/and-screensharebitrate.md)
* [\&sharperscreen](advanced-settings/screen-share-parameters/and-sharperscreen.md)
* [\&sspaused](parameters-only-on-beta/and-sspaused.md)
* [Recording Parameters](advanced-settings/recording-parameters/README.md)
* [\&record](advanced-settings/recording-parameters/and-record.md)
* [\&autorecord](advanced-settings/recording-parameters/and-autorecord.md)
* [\&autorecordlocal](advanced-settings/recording-parameters/and-autorecordlocal.md)
* [\&autorecordremote](advanced-settings/recording-parameters/and-autorecordremote.md)
* [\&recordcodec](advanced-settings/recording-parameters/and-recordcodec.md)
* [\&pcm](advanced-settings/recording-parameters/and-pcm.md)
* [\&recordmotion](advanced-settings/recording-parameters/and-recordmotion.md)
* [\&chunked](https://docs.vdo.ninja/advanced-settings/settings-parameters/and-chunked)
* [Guest queuing Parameters](advanced-settings/guest-queuing-parameters/README.md)
* [\&queue](general-settings/queue.md)
* [\&screen](advanced-settings/guest-queuing-parameters/and-screen-alpha.md)
* [\&hold](advanced-settings/guest-queuing-parameters/and-hold-alpha.md)
* [\&holdwithvideo](advanced-settings/guest-queuing-parameters/and-holdwithvideo-alpha.md)
* [\&queuetransfer](advanced-settings/settings-parameters/and-queuetransfer.md)
* [Meshcast Parameters](advanced-settings/meshcast-parameters/README.md)
* [\&meshcast](newly-added-parameters/and-meshcast.md)
* [\&meshcastaudiobitrate](advanced-settings/meshcast-parameters/and-meshcastaudiobitrate.md)
* [\&meshcastbitrate](meshcast-settings/and-meshcastbitrate.md)
* [\&meshcastcodec](meshcast-settings/and-meshcastcodec.md)
* [\&mcscreensharebitrate](meshcast-settings/and-mcscreensharebitrate.md)
* [\&mcscreensharecodec](meshcast-settings/and-mcscreensharecodec.md)
* [\&meshcastscale](advanced-settings/upcoming-parameters/and-meshcastscale.md)
* [\&meshcastcode](advanced-settings/meshcast-parameters/and-meshcastcode.md)
* [\&nomeshcast](advanced-settings/meshcast-parameters/and-nomeshcast.md)
* [WHIP Parameters](advanced-settings/whip-parameters/README.md)
* [\&whipout](advanced-settings/whip-parameters/and-whipout.md)
* [\&whipview](advanced-settings/whip-parameters/and-whip.md)
* [\&whipoutcodec](advanced-settings/whip-parameters/and-whipoutcodec.md)
* [\&whipoutaudiobitrate](advanced-settings/whip-parameters/and-whipoutaudiobitrate.md)
* [\&whipoutvideobitrate](advanced-settings/whip-parameters/and-whipoutvideobitrate.md)
* [\&whipoutscale](advanced-settings/whip-parameters/and-whipoutscale-alpha.md)
* [\&whipoutscreensharecodec](advanced-settings/whip-parameters/and-whipoutscreensharecodec-alpha.md)
* [\&whipoutscreensharebitrate](advanced-settings/whip-parameters/and-whipoutscreensharebitrate-alpha.md)
* [\&cftoken](advanced-settings/whip-parameters/and-cftoken-alpha.md)
* [\&svc](advanced-settings/whip-parameters/and-svc.md)
* [Mobile Parameters](advanced-settings/mobile-parameters/README.md)
* [\&facing](advanced-settings/mobile-parameters/and-facing.md)
* [\&forcelandscape](advanced-settings/mobile-parameters/and-forcelandscape.md)
* [\&forceportrait](advanced-settings/mobile-parameters/and-forceportrait.md)
* [\&forceios](advanced-settings/mobile-parameters/and-forceios.md)
* [\¬ios](advanced-settings/mobile-parameters/and-notios.md)
* [\&flagship](advanced-settings/upcoming-parameters/and-flagship.md)
* [\&mobile](advanced-settings/upcoming-parameters/and-mobile.md)
* [\¬mobile](advanced-settings/upcoming-parameters/and-notmobile.md)
* [\&app](advanced-settings/mobile-parameters/and-app.md)
* [API & MIDI Parameters](advanced-settings/api-and-midi-parameters/README.md)
* [\&api](general-settings/api.md)
* [API reference](advanced-settings/api-and-midi-parameters/api/api-reference.md)
* [\&pie](general-settings/pie.md)
* [\&midi](midi-settings/midi.md)
* [\&midiin](midi-settings/midiin.md)
* [\&midiout](midi-settings/midiout.md)
* [\&midiremote](director-settings/midiremote.md)
* [\&midichannel](midi-settings/and-midichannel.md)
* [\&mididevice](midi-settings/and-mididevice.md)
* [\&midioffset](midi-settings/and-midioffset.md)
* [\&mididelay](advanced-settings/api-and-midi-parameters/and-mididelay.md)
* [\&datamode](https://docs.vdo.ninja/advanced-settings/setup-parameters/and-datamode)
* [\&postapi](advanced-settings/api-and-midi-parameters/and-postapi.md)
* [TURN & STUN Parameters](advanced-settings/turn-and-stun-parameters/README.md)
* [\&turn](general-settings/turn.md)
* [\&stun](general-settings/stun.md)
* [\&addstun](newly-added-parameters/and-addstun.md)
* [\&icefilter](general-settings/and-icefilter.md)
* [\&proxy](newly-added-parameters/and-proxy.md)
* [\&relay](general-settings/and-relay.md)
* [\&secure](source-settings/secure.md)
* [\&tcp](general-settings/and-tcp.md)
* [\&tz](newly-added-parameters/and-tz.md)
* [New Parameters in Version 24](advanced-settings/new-parameters.md)
* [Upcoming Parameters](advanced-settings/upcoming-parameters.md)
* [Other Parameters](other-parameters.md)
* [Releases](release-notes/older-releases.md)
* [v24](releases/v24.md)
* [v23 🌱](releases/v23.md)
* [v22 👑](releases/v22.md)
* [v21 ❤️](older-releases/v21.md)
* [v20 🎁](release-notes/v20.md)
* [v19 🚀🤯](release-notes/v19.md)
* [v19.1 - 19.4](release-notes/v19/v19.1-19.4.md)
* [v18](release-notes/v18.md)
* [v18.3](release-notes/v18/v18.3.md)
* [v17](release-notes/v17-release-notes.md)
* [v16](release-notes/v16-release-notes/README.md)
* [v16.3](release-notes/v16-release-notes/v16.3-update-notes.md)
* [v16.4](release-notes/v16-release-notes/v16.4-update-notes.md)
* [v15](release-notes/v15-release-notes.md)
* [v14](release-notes/v14-release-notes.md)
* [v13](releases/v13/README.md)
* [v13.4](releases/v13/v13.4.md)
* [v12](releases/v12.md)
* [v10](releases/v10.md)
* [v8](releases/v8.md)
* [Updates](updates/README.md)
* [Updates - VDO.Ninja](updates/updates-vdo.ninja.md)
* [Updates - Social Stream & Chat Overlay](updates/updates-social-stream-and-chat-overlay/README.md)
* [Updates - Social Stream Standalone App](updates/updates-social-stream-and-chat-overlay/updates-social-stream-standalone-app.md)
* [Updates - Electron Capture App](updates/updates-electron-capture-app.md)
* [Updates - Raspberry.Ninja](updates/updates-raspberry.ninja.md)
* [Updates - Versus.cam](updates/updates-versus.cam.md)
* [Updates - Mixer App](updates/updates-mixer-app.md)
* [Updates - WHIP/WHEP](updates/updates-whip-whep.md)
* [Updates - Native mobile apps](updates/updates-native-mobile-apps.md)
* [Updates - Caption.Ninja](updates/updates-caption.ninja.md)
* [Updates - Meshcast.io](updates/updates-meshcast.io.md)
* [Updates - Speed Test](updates/updates-speed-test.md)
* [Updates - Comms](updates/updates-comms.md)
* [Updates - Miscellaneous](updates/updates-miscellaneous.md)
* [Development Progress](https://updates.vdo.ninja/)
* [Help!](help/README.md)
* [Fail safes and Backups](help/fail-safes-and-backups.md)
* [Privacy and security details](help/privacy-and-security-details.md)
* [VDO.Ninja Terms of Service](help/privacy-and-security-details/vdo.ninja-terms-of-service.md)
* [VDO.Ninja Privacy Policy](help/privacy-and-security-details/vdo.ninja-privacy-policy.md)
* [Project Contact Info](help/project-contact-info.md)
* [Where can I report a bug?](help/report-a-bug.md)
* [Where can I get support?](help/where-can-i-get-support.md)
* [Feature Requests](help/feature-requests.md)
* [Logos and media assets](help/logos-and-media-assets.md)
* [What does VDO stand for?](help/what-does-vdo-stand-for.md)
* [Common errors and known issues](common-errors-and-known-issues/README.md)
* [Can't screen capture certain games](common-errors-and-known-issues/cant-screen-capture-certain-games.md)
* [ATEM not working with Firestick](common-errors-and-known-issues/atem-not-working-with-firestick.md)
* [Very old iPhone support](common-errors-and-known-issues/very-old-iphone-support.md)
* [Can't select audio output on iOS](common-errors-and-known-issues/cant-select-audio-output-on-ios.md)
* [Screen-share is just a black video](common-errors-and-known-issues/screen-share-is-just-a-black-video.md)
* [Mic audio dropping out](common-errors-and-known-issues/mic-audio-dropping-out.md)
* [Loss of audio when OBS minimized](common-errors-and-known-issues/loss-of-audio-when-obs-minimized.md)
* [Known issues](common-errors-and-known-issues/known-issues.md)
* [Echo or feedback issues](common-errors-and-known-issues/echo-or-feedback-issues.md)
* [Works on WiFi but not on 4G](common-errors-and-known-issues/works-on-wifi-but-not-on-4g.md)
* [Can't capture an application's audio when screen-sharing](common-errors-and-known-issues/cant-capture-an-applications-audio-when-screen-sharing.md)
* [Can't load camera both in OBS and VDON](common-errors-and-known-issues/cant-load-camera-both-in-obs-and-vdon.md)
* [Can't select a camera lens on mobile](common-errors-and-known-issues/cant-select-a-camera-lens-on-mobile.md)
* [No video in OBS, just an "Add camera" button](common-errors-and-known-issues/no-video-in-obs-just-an-add-camera-button.md)
* [Audio over VDO.Ninja isn't working](common-errors-and-known-issues/audio-over-vdo.ninja-isnt-working.md)
* [Loading circle shows in OBS or browser](common-errors-and-known-issues/loading-circle-shows-in-obs-or-browser.md)
* [Appearing then disappearing guest](common-errors-and-known-issues/appearing-then-disappearing-guest.md)
* [Can't auto-start screen sharing](common-errors-and-known-issues/cant-auto-start-screen-sharing.md)
* [Audio Clicking / Popping](common-errors-and-known-issues/audio-clicking-popping.md)
* [Can't share my screen](common-errors-and-known-issues/cant-share-my-screen.md)
* [Nothing shows up in OBS or it is choppy](common-errors-and-known-issues/nothing-shows-up-in-obs-or-it-is-choppy.md)
* [Already in use or claimed errors](common-errors-and-known-issues/already-in-use-or-claimed-errors.md)
* [Blue spinning window](common-errors-and-known-issues/blue-spinning-window.md)
* [Cursor shows trailing or artifacting](common-errors-and-known-issues/cursor-shows-trailing-or-artifacting.md)
* [Packet Loss](common-errors-and-known-issues/packet-loss.md)
* [Overheating](common-errors-and-known-issues/overheating.md)
* [Audio is delayed in OBS](common-errors-and-known-issues/audio-is-delayed-in-obs.md)
* [vMix High CPU](common-errors-and-known-issues/vmix-high-cpu.md)
* [OBS Virtual Camera has low FPS](common-errors-and-known-issues/obs-virtual-camera-low-has-fps.md)
* [Virtual camera not working on Mac](common-errors-and-known-issues/virtual-camera-not-working-on-mac.md)
* [Mic stops on MacOS when OBS opens](common-errors-and-known-issues/mic-stops-on-macos-when-obs-opens.md)
* [Video stream looks corrupted](common-errors-and-known-issues/video-is-pixelated.md)
* [Video freezes mid-stream](common-errors-and-known-issues/video-freezes-mid-stream.md)
* [Webcam freezes after a time](common-errors-and-known-issues/webcam-freezes-after-a-time.md)
* [Is the VDO.Ninja server down?](common-errors-and-known-issues/is-the-obs.ninja-server-down.md)
* [Hosted your own TURN server?](common-errors-and-known-issues/hosted-your-own-turn-server.md)
* [Can't screen-share from certain devices](common-errors-and-known-issues/why-cant-i-screen-share-from-certain-devices.md)
* [Cursor shows when screen-sharing](common-errors-and-known-issues/cursor-shows-when-screen-sharing.md)
* [Getting “Overconstrained" Camera Error](common-errors-and-known-issues/getting-overconstrained-camera-error.md)
* [Autoplay doesn't work in Chrome or vMix v77](common-errors-and-known-issues/autoplay-doesnt-work-in-chrome-or-vmix-v77.md)
* [Low frame rates](common-errors-and-known-issues/low-frame-rates.md)
* [Black borders around the video in OBS](common-errors-and-known-issues/there-are-black-borders-around-the-video-in-obs..md)
* [Mic's volume keeps changing](common-errors-and-known-issues/mics-volume-keeps-changing.md)
* [Enable Camera / Microphone permissions](common-errors-and-known-issues/enable-camera-microphone-permissions.md)
* [FPS drop if app not in focus](common-errors-and-known-issues/fps-drop-if-app-not-in-focus.md)
* [Surround sound error when screen sharing with USB headset](common-errors-and-known-issues/surround-sound-error-when-screen-sharing-with-usb-headset.md)
* [Relay candidate being selected](common-errors-and-known-issues/relay-candidate-being-selected.md)
* [Camera works in Safari; not Chrome](common-errors-and-known-issues/camera-works-in-safari-not-chrome.md)
* [Robotic audio](common-errors-and-known-issues/robotic-audio.md)
* [Can't load camera from non-SSL host](common-errors-and-known-issues/cant-load-camera-from-non-ssl-host.md)
* [Camera on macOS doesn't show?](common-errors-and-known-issues/camera-on-macos-doesnt-show.md)
* [Can't screen share Adobe Lightroom](common-errors-and-known-issues/cant-screen-share-adobe-lightroom.md)
* [Decklink support?](common-errors-and-known-issues/decklink-support.md)
* [Platform specific issues](platform-specific-issues/README.md)
* [Android](platform-specific-issues/android.md)
* [macOS](platform-specific-issues/macos.md)
* [iOS (iPhone/iPad)](platform-specific-issues/ios.md)
* [Firefox](platform-specific-issues/untitled-2.md)
* [Opera GX](platform-specific-issues/opera-gx.md)
* [Useful Links](important-links.md)
* [FAQ](faq.md)
* [Sponsor ❤](getting-started/sponsor.md)
* [Edit this documentation](https://app.gitbook.com/invite/-MZHZncFvSR7JqXHwUKe/-MZHZo3beLi-WKccV59-)
* [Redirect](advanced.md)
* [Redirect 2](donate.md)
---
description: >-
The use cases of VDO.Ninja are many; they go far beyond the original scope of
the project
---
# Use cases
* To allow your mobile device to be used as a wireless remote camera.
* To pull in other people's video and audio for podcasting/broadcast (guest appearances).
* For sharing high-quality and low-latency audio and video across the Internet and within LANs.
* Bring a friend's remote game stream into your OBS and do side-by-side gaming together.
* For VR chat applications.
* For high-quality audio streaming, including remote DJing.
* Wirelessly stream video from any pro camera using just a $10 Raspberry Pi and HDMI adapter.
* For sending any streaming-data peer-to-peer over the Internet in a few lines of code, including JSON.
* To allow you to publish to YouTube with your smartphone even though you don't yet have enough followers to broadcast to YouTube with the YT mobile yet.
* To watch movies with friends, via screen sharing, privately, and with low-enough latency to talk on the phone together while watching it.
* Use as a remote low-latency teleprompter feed.
* Recording remote or local video at high quality without needing any downloads.
* Remotely streaming MIDI device output, such as MIDI keyboards or production control boards.
* Controlling OBS remotely from any computer on the Internet using [VDO.Ninja](https://vdo.ninja/) as a p2p bridge.
* Recording remote participates during interviews directly to their own computer; perfect recordings.
* Applying green screens, digital face effects, and other advanced video filters to video streams.
* Real-time closed-captions and transcriptions.
* For whatever other reason you might come up with.
# Why use VDO.Ninja over other solutions?
In some cases, the functionality of [VDO.Ninja](https://vdo.ninja) may overlap with existing solutions. However, in its primary function as an ultra-low latency peer-to-peer video bridge to OBS, it has many benefits and advantages over other methods:
* **100% free.** There's **no downloads** required, **no personal data collected**, and **no sign-in** needed.
* Compatible with most modern browsers and mobile devices.
* **Free support** offered via email, Discord, Reddit and numerous written guides.
* **Video data is peer-to-peer**, so unlike Skype, your video data does not go thru the NSA's spying servers.
* **Video can be transferred over a LAN directly**, so if using your phone as a webcam, you can crank the bitrates up to 40-mbps if you want, and your bandwidth won't be affected.
* **Low latency**. I'm talking as low as 30-ms, and normally it never goes higher than 200-ms.
* **Adjustable resolutions and video bitrates** (1920x1080p60 @ 30-mbps -- or even custom resolutions). 4K @ 30fps is possible, but CPU intensive.
* **Control over audio denoise**, **echo-cancellation**, and **auto-gain** is available, along with custom audio bitrates, and **stereo-sound**. It is an exceptional tool for podcasters and live streaming DJs.
* You can **parameterize many aspects of VDO.Ninja** such as total bitrate usage, bitrate per viewer usage, auto-select a device, autostart a session, removing the preview window.
* The interface is **open-source**, so you can white-label, stylize, tweak, and deploy the website code however you want.
* **Reusable invite links**, meaning OBS Browser Sources don't need to be recreated or changed once created and shared.
* Playback of video has been tested to work on using Amazon's Firestick's with Silk browser, along with a Tesla's Model 3's infotainment display.
* **No plugins needed for OBS** -- just drag the selected link into OBS (v25 or newer on PC\*) and it auto generates the OBS Browser source with the correct resolution. (\*[MacOS](https://github.com/steveseguin/obsninja/wiki/FAQ#MacOS) users need to update to OBS v26.1.2 to access support for VDO.Ninja natively.)
* **QR Code support for invite links**, which allows for easy ingestion of mobile devices without needing to use the keyboard.
* **Browser-based control of OBS scenes**.
* **No overlays or windows to crop** -- VDO.Ninja auto-fills the window and if there is a black border, it becomes a transparent layer.
* **Group rooms available** with a Director able to control participants, the options presented to them, and even an autojoin experience.
* **Group chat rooms** have an "auto-mix" mode, making for easy management of dynamic group chat sessions.
* Those in a **group-chat can also be split up into individual streams**, so the Director has control to treat them like different sources in OBS, switching and mixing as they want.
* **Free TURN servers** are hosted for VDO.Ninja users, which normally are quite costly, but are kindly subsidized by community sponsors and by Steve, the developer of the application. [Sponsor ❤](getting-started/sponsor.md)
* **Tally-light** support is offered when VDO.Ninja is used in conjunction with OBS.
* Group rooms and streams can be **password protected** and given extra security.
* The group-room director has a **"push to talk"** capability, along with text-chat being available.
* Support for **ISO feed recording** via the Director's Control Room.
* With little dependence on video servers, at peak usage hours video quality does not suffer.
* VDO.Ninja is a **project of passion**, **built by creators for creators**, and we like to think it shows.
---
description: The link has been moved.
---
# Redirect 2
Please find the new link here:
[https://docs.vdo.ninja/getting-started/donate](https://docs.vdo.ninja/getting-started/donate)
---
description: Advanced
---
# Redirect
This link has been moved to here:[ https://docs.vdo.ninja/advanced-settings](https://docs.vdo.ninja/advanced-settings)
---
description: Recently added to VDO.Ninja
---
# New Parameters in Version 24
These parameters are all on production in [v24](../releases/v24.md) of VDO.Ninja
Will try to keep the video controls visible, even if your mouse isn't hovering over the video
---
description: >-
Upcoming parameters which are currently on vdo.ninja/alpha and/or
vdo.ninja/beta
---
# Upcoming Parameters
Version 24 was released on December 19th. All new parameters are [here](new-parameters.md).
You can use/test these new parameters for Version 25 on [vdo.ninja/alpha](https://vdo.ninja/alpha/) and/or [vdo.ninja/beta](https://vdo.ninja/beta/):
\***ALPHA-ONLY** - Only available at [https://vdo.ninja/alpha/](https://vdo.ninja/alpha/)
\*\*on [vdo.ninja/beta](https://vdo.ninja/beta/) and [vdo.ninja/alpha](https://vdo.ninja/alpha/)
---
description: Lets you precisely delay the MIDI play-out
---
# &mididelay
General Option! ([`&push`](../../source-settings/push.md), [`&room`](../../general-settings/room.md), [`&view`](../view-parameters/view.md), [`&scene`](../view-parameters/scene.md))
## Options
Example: `&mididelay=1000`
| Value | Description |
| --------------- | ----------- |
| (numeric value) | delay in ms |
## Details
`&mididelay=1000` lets you precisely delay the MIDI play-out from VDO.Ninja to your MIDI device when using [`&midiin`](../../midi-settings/midiin.md), irrespective of network latency.
Use case: If you have a remote drum machine, you can have it play out the beat exactly 4-bars ahead, allowing for music jamming types with even high ping delays between locations.
## Related
[midi.md](../../midi-settings/midi.md)
[midiin.md](../../midi-settings/midiin.md)
---
description: Lets you specify a custom POST URL to send events within VDO.Ninja to
---
# &postapi
General Option! ([`&push`](../../source-settings/push.md), [`&room`](../../general-settings/room.md), [`&view`](../view-parameters/view.md), [`&scene`](../view-parameters/scene.md))
## Aliases
* `&posturl`
## Options
Example: `&postapi=https%3A%2F%2Fwebhook.site%2Fb190f5bf-e4f8-454a-bd51-78b5807df9c1`
Value
Description
(custom POST URL)
Data JSON encoded, post URL requires HTTPS+CORS, and the passed URL parameter value needs to be encodedURLComponent
## Details
`&postapi` lets you specify a custom POST URL to send events within VDO.Ninja to.
Data JSON encoded, post URL requires HTTPS+CORS, and the passed URL parameter value needs to be encodedURLComponent.
ie: `&postapi=https%3A%2F%2Fwebhook.site%2Fb190f5bf-e4f8-454a-bd51-78b5807df9c1`
If you don't want to listen for events with the websocket server API I host, you can use this with your own API https server instead and get key events pushed to you that way.
---
description: hotkey features via API and MIDI
---
# API & MIDI Parameters
Lets you specify a custom POST URL to send events within VDO.Ninja to
---
description: This is a snapshot of the VDO.Ninja API documentation as of Aug 16th, 2023
---
# API reference
For the most up to date copy of this API endpoint documentation, please go to [https://github.com/steveseguin/Companion-Ninja/#readme](https://github.com/steveseguin/Companion-Ninja/#readme)
For a test sandbox, to easily try out a few of the basic API options via a web dashboard, please go to: [https://companion.vdo.ninja/](https://companion.vdo.ninja/)
You can use this API on its own directly, or can use it indirectly via the Bitfocus Companion app /w the VDO.Ninja module. The Companion app can be found here: [https://bitfocus.io/companion](https://bitfocus.io/companion)
While not maintained or controlled by VDO.Ninja, you can find the third-party Bitfocus Companion module for VDO.Ninja here: [https://github.com/bitfocus/companion-module-vdo-ninja](https://github.com/bitfocus/companion-module-vdo-ninja)
## Companion Ninja _(aka, the VDO.Ninja remote HTTP/WSS API)_
Remote control VDO.Ninja using an HTTP or Websocket interface; now Companion compatible.
#### Direct integration into VDO.Ninja
Support for Companion.Ninja is now built into VDO.Ninja (v19), with a set of hard-coded commands. The available API commands and their related options are listed further down. The index.html file contains sample code with an interactive layer, where you can press buttons to send commands to VDO.Ninja. HTTP and Websocket methods of sending commands are provided as examples. Details of those two methods are also below.
To use the integrated command set and API, just add \&api=XXXXXX to the VDO.Ninja link you wish to remotely control, like you would any other parameter. ie: https://vdo.ninja?api=XXXXXX The API value needs to match the value used by Companion Ninja and should be kept private. Then just send commands however you may wish.
Note: This API should also work with the vdo.ninja/beta/mixer?api=XXXXX page.
#### Companion Plugin
A fantastic user in the community also has made a BitFocus-Companion module for this VDO.Ninja API. If you wish to avoid doing custom API calls, definitely give the module a go.
[https://github.com/bitfocus/companion-module-vdo-ninja](https://github.com/bitfocus/companion-module-vdo-ninja)
#### Customized IFRAME API Integration
You can also use the Companion Ninja service with your own custom set of commands if desired. You would wrap VDO.Ninja into an IFRAME, and use the parent-window to relay commands to VDO.Ninja and Companion Ninja. You can speak to VDO.Ninja via the IFRAME API in that case, to have access to the more exhaustive set of remote control options.
An example of this approach can be found here:
[https://github.com/steveseguin/Companion-Ninja/blob/main/iframe\_api\_customizable\_example.html](https://github.com/steveseguin/Companion-Ninja/blob/main/iframe\_api\_customizable\_example.html)
Also note, the IFRAME API used by VDO.Ninja (v19.1) is also largely backwards compatible with the Companion Ninja API. You can find the IFRAME developer sandbox here: [https://vdo.ninja/beta/iframe](https://vdo.ninja/beta/iframe) to get a sense of what is available.
#### Technical Details of the API
The API is likely to change over time, as this is still early days and user feedback with direct how things evolve. More commands added on request.
**HTTP/GET API (/w SSL)**
The HTTP API uses GET-requests (not POST/PUT), and is structured in a way to be compatible with existing hotkey control software.
`https://api.vdo.ninja/{apiID}/{action}/{target}/{value}`
or
`https://api.vdo.ninja/{apiID}/{action}/{value}`
or
`https://api.vdo.ninja/{apiID}/{action}`
Any field can be replaced with "null", if no value is being passed to it. Double slashes will cause issues though, so avoid those.
**Websocket API**
If using the Websocket API, this accepts JSON-based commands
connect to: `wss://api.vdo.ninja:443`
On connection, send: `{"join": $apiID }`, where `$apiID` is your api ID.
* be sure to stringify objects as JSON before sending over the websocket connection. ie: `JSON.stringify(object)`
Once joined, you can then issue commands at will, such as this object
```
{
"action":"reload",
"value": "true",
"target" "null"
}
```
Be sure to implement reconnection logic with the websocket connection, as it will timeout every minute or so by default otherwise. You will need to rejoin after a timeout.
**API Commands**
The API and its commands are currently in a DRAFT form, and as such, may/will undergo change.
| Action | Target | Value | Details |
| ----------------- | ------ | --------------------------------- | ------------------------------------------------------------------------------------------------------------------------------------------------------------- |
| speaker | null | true | Unmute the Local Speaker |
| speaker | null | false | Mute the Local Speaker |
| speaker | null | toggle | Toggle the state of the local Speaker |
| mic | null | true | Unmute the local Microphone |
| mic | null | false | Mute the local Microphone |
| mic | null | toggle | Toggle the state of the local Microphone |
| camera | null | true | Unmute local Camera |
| camera | null | false | Mute local Camera |
| camera | null | toggle | Toggle the state of the local Camera |
| volume | null | true | Mutes all local audio tracks by setting the volume to 0% |
| volume | null | false | Sets the playback volume of all audio tracks to 100% |
| volume | null | {integer value between 0 and 100} | Sets the playback volume of all local playback audio |
| sendChat | null | {some chat message} | Sends a chat message to everyone connected. Better suited for the websocket API over the HTTP one. |
| record | null | true | Start recording the local video stream to disk; will probably create a popup currently |
| record | null | false | Stops recording the local video stream |
| reload | null | null | Reload the current page |
| hangup | null | null | Hang up the current connection. For the director, this just stops the mic and camera mainly. |
| bitrate | null | true | Unlock/reset bitrate of all currently incoming video |
| bitrate | null | false | Pause all currently incoming video streams (bitrate to 0) |
| bitrate | null | {some integer} | Set video bitrate of all incoming video streams to target bitrate in kilobits per second. |
| panning | null | true | Centers the pan |
| panning | null | false | Centers the pan |
| panning | null | {an integer between 0 and 180} | Sets the stereo panning of all incoming audio streams; left to right, with 90 being center. |
| togglehand | null | null | Toggles whether your hand is raised or not |
| togglescreenshare | null | null | Toggles screen sharing on or off; will still ask you to select the screen though. |
| forceKeyframe | null | null | Forces the publisher of a stream to issue keyframes to all viewers; "rainbow puke fix" |
| group | null | {an integer between 1 and 8} | Toggle the director of a room in/out of a specified group room (vdo.ninja +v22). Useful for Comms app, etc |
| joinGroup | null | {an integer between 1 and 8} | Have the director of a room join a specified group room (vdo.ninja +v22.12) |
| leaveGroup | null | {an integer between 1 and 8} | Have the director of a room leave a specified group room (vdo.ninja +v22.12) |
| viewGroup | null | {an integer between 1 and 8} | Toggle the director of a room's preview of a specific group (vdo.ninja +v22). Useful for Comms app, etc |
| joinViewGroup | null | {an integer between 1 and 8} | Have the director of a room preview a specific group (vdo.ninja +v22.12) |
| leaveViewGroup | null | {an integer between 1 and 8} | Have the director of a room un-preview a specific group (vdo.ninja +v22.12) |
| getDetails | null | null | Will return a JSON object containing detailed state of everything. If a director, this will contain guest-state as seen by the director. |
| nextSlide | null | null | Next PowerPoint slide. See https://github.com/steveseguin/powerpoint\_remote for setup (vdo.ninja +v22.12) |
| prevSlide | null | null | Previous PowerPoint slide. See https://github.com/steveseguin/powerpoint\_remote for setup (vdo.ninja +v22.12) |
| soloVideo | null | toggle | Toggle the Highlight of video for all guests (if a director) (vdo.ninja +v23) |
| soloVideo | null | true | Highlight your video for all guests (if a director) (vdo.ninja +v23) |
| soloVideo | null | false | Un-highlight your video for all guests (if a director) (vdo.ninja +v23) |
| stopRoomTimer | null | null | Stop the timer for everyone in the room (if a director) (vdo.ninja +v23.9) |
| startRoomTimer | null | Integer to count down from | Value to count down from is in seconds in the room; applies to everyone in a room (if a director) (vdo.ninja +v23.9) |
| PauseRoomTimer | null | null | Pause the timer for all everyone in the room (if a director) (vdo.ninja +v23.9) |
| getGuestList | null | null | Returns an object containing the guest slots positional values, so "1", "2", etc. Each is a key that contains the stream ID and label for that guest as well. |
layout | null | {\*\* see below}
**Custom layout switching \*\***
You can create an array of layouts, set them via the URL parameters in VDO.Ninja, and then switch between them remotely using the API.
The value passed to the API can either be a number, representing the position in the array of the layout you want to activate, or it can be a single layout object.
`{action: "layout", value:3}` or `{action: "layout", value:[{"x":0,"y":0,"w":100,"h":100,"slot":0}]}`
```
layout 0 is the auto mixer
layout 1 is the first custom layout
layout 2 is the second custom layout
etc
```
If using the [Mixer App](../../../steves-helper-apps/mixer-app.md), the layout objects are controlled via the mixer app itself, so you don't need to pass an object in that case to the URL.
`?layouts=[[{"x":0,"y":0,"w":100,"h":100,"slot":0}],[{"x":0,"y":0,"w":100,"h":100,"slot":1}],[{"x":0,"y":0,"w":100,"h":100,"slot":2}],[{"x":0,"y":0,"w":100,"h":100,"slot":3}],[{"x":0,"y":0,"w":50,"h":100,"c":false,"slot":0},{"x":50,"y":0,"w":50,"h":100,"c":false,"slot":1}],[{"x":0,"y":0,"w":100,"h":100,"z":0,"c":false,"slot":1},{"x":70,"y":70,"w":30,"h":30,"z":1,"c":true,"slot":0}],[{"x":0,"y":0,"w":50,"h":50,"c":true,"slot":0},{"x":50,"y":0,"w":50,"h":50,"c":true,"slot":1},{"x":0,"y":50,"w":50,"h":50,"c":true,"slot":2},{"x":50,"y":50,"w":50,"h":50,"c":true,"slot":3}],[{"x":0,"y":16.667,"w":66.667,"h":66.667,"c":true,"slot":0},{"x":66.667,"y":0,"w":33.333,"h":33.333,"c":true,"slot":1},{"x":66.667,"y":33.333,"w":33.333,"h":33.333,"c":true,"slot":2},{"x":66.667,"y":66.667,"w":33.333,"h":33.333,"c":true,"slot":3}]]`
Some of these layout features are only available with [Version 22](../../../releases/v22.md) of VDO.Ninja; specifically the [`&layouts=`](../../director-parameters/and-layouts.md) parameter is available on v22.5 or newer only.
See for details and better documentation on this layout function:
[and-layouts.md](../../director-parameters/and-layouts.md "mention")
**Commands that target remote guests as a director (available on VDO.Ninja v19)**
The guest slot (1 to 99) or the guests's stream ID can be used as a target.
Currently toggling is primarily available for options; on/off absolute value options will be coming soon.
| Action | Target | Value | Details |
| --------------------- | ------------------------- | -------------------------------------------------- | -------------------------------------------------------------------------------- |
| forward | {guest slot or stream ID} | {destination room} | Transfer guest to specified room |
| addScene | {guest slot or stream ID} | {scene ID; 0 to 8, or an active custom scene name} | Toggle guest in/out of specified scene |
| muteScene | {guest slot or stream ID} | {scene ID; 0 to 8, or an active custom scene name} | Toggle guest's mic audio in scenes |
| group | {guest slot or stream ID} | {group ID; 1 to 8} | Toggle guest in/out of specified group; default group 1 |
| mic | {guest slot or stream ID} | null | Toggle the mic of a specific guest |
| hangup | {guest slot or stream ID} | null | Hangup a specific guest |
| soloChat | {guest slot or stream ID} | null | Toggle solo chat with a specific guest |
| soloChatBidirectional | {guest slot or stream ID} | null | Toggle two-way solo chat with a specific guest |
| speaker | {guest slot or stream ID} | null | Toggle speaker with a specific guest |
| display | {guest slot or stream ID} | null | Toggle whether a specific guest can see any video or not |
| sendDirectorChat | {guest slot or stream ID} | {some chat message} | Sents a chat message to a guest and overlays it on their screen |
| forceKeyframe | {guest slot or stream ID} | null | Trigger a keyframe for active scenes, wrt to a guest; helps resolve rainbow puke |
| soloVideo | {guest slot or stream ID} | null | Toggle whether a video is highlighted everywhere |
| volume | {guest slot or stream ID} | {0 to 100} | Set the microphone volume of a specific remote guest |
| stopRoomTimer | {guest slot or stream ID} | null | Stop the timer for the specific guest (+v23.9) |
| startRoomTimer | {guest slot or stream ID} | Integer to count down from | Value to count down from is in seconds (+v23.9) |
| PauseRoomTimer | {guest slot or stream ID} | null | Pause the timer for the specific guest (+v23.9) |
#### Callbacks / State Responses
Start with Version 22 of VDO.Ninja, the API requests will have a response reflecting the state of the request.
For example, if toggling a mic of a guest, the response of the HTTP API request will be `true` or `false`, based on whether the mic is now muted or not. If the request is an object, such as when using `getDetails`, you'll get a JSON response instead of basic text. There's also `getGuestList`, which can be useful for getting a set of possible guest slot positional values, along with its corresponding stream ID and label.
Basic text/word responses are such things as `true`, `false`, `null`, `fail`, {`somevalue`}, or `timeout`. Timeout occurs if there's no listener or no response to a request; the system will stop the callback and fail to a timeout after 1-second.

If the request was made via WebSockets, instead of the HTTP request, you'll get a JSON object back that contains the same data, along with the original request, including custom data fields. These custom data fields, such as `data.cid = 3124`, can be used to link requests with the callback, if precision with the requests is needed.
There is no time-out when using WebSockets; the callback can happen seconds or minutes later even, although normally a response should be expected in under a second as well.
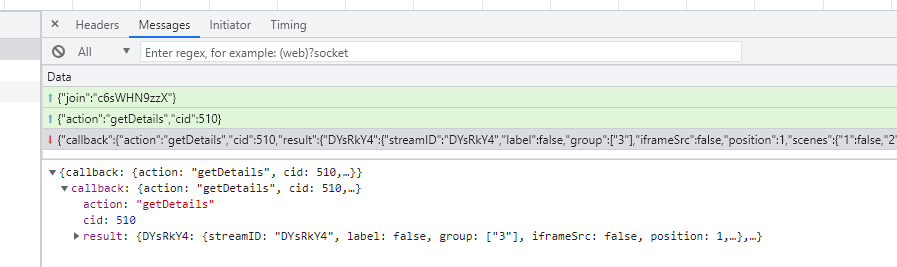
---
description: '=music fixed bitrate; =speech bitrate is variable'
---
# &audiocontenthint
Sender-Side Option! ([`&push`](../../source-settings/push.md))
## Aliases
* `&audiohint`
* `&audiocontenttype`
* `&audiocontent`
## Options
Example: `&audiocontenthint=music`
| Value | Description |
| -------- | ----------------------------------------------------------- |
| `music` | seems to be a fixed bitrate of 32-kbps sent out by default |
| `speech` | bitrate is variable, using less bandwidth when not speaking |
## Details
There are two options for `&audiocontenthint`: `speech` and `music`. No idea what it does exactly, but when using `music` there seems to be a fixed bitrate of 32-kbps sent out by default, where as with `speech` it is variable, using less bandwidth when not speaking.
This parameter has been tested on Chrome, but other browsers may vary in behavior. Safari seems to just ignore things, for example.
## Related
[vbr.md](../view-parameters/vbr.md)
[and-contenthint.md](../video-parameters/and-contenthint.md)
---
description: Applies a gain multiplier (as a percentage) to the local microphone
---
# &audiogain
Sender-Side Option! ([`&push`](../../source-settings/push.md))
## Aliases
* `&g`
* `&gain`
## Options
Example: `&audiogain=80`
Value
Description
0
mutes the microphone so that only the Director can unmute it; the guest cannot unmute.
100
full volume - default
(integer value)
value will be applied as a percentage.
## Details
Adding `&audiogain=50` to a source link sets the audio gain of the source to 50%.
* Can be used to have a guest muted by default when joining a room (`&audiogain=0`).
* Can be remotely controlled by the Director if in a room; the guest cannot unmute themselves.
* Only applies to the first audio-source selected by a guest, if there is more than one selected.
* If audio processing is on, then this should be available by default for the director to remotely control.
* The gain function will NOT work if web-audio node processing cannot be enabled.
In Version 22 you can control the audio gain in the Audio Settings. If you want the guests to be able to change it by themselves, you can add [`&mediasettings`](../../newly-added-parameters/and-mediasettings.md) to the guests' link.
Enables the audio processing pipeline.
## Related
[and-volume.md](and-volume.md)
[autogain.md](../../source-settings/autogain.md)
[and-limiter.md](../../source-settings/and-limiter.md)
---
description: Will mute the microphone of a guest when not loaded in an active OBS scene
---
# &automute
Sender-Side Option! ([`&push`](../../source-settings/push.md))
## Aliases
* `&am`
## Options
Example: `&automute=2`
Value
Description
(no value given)
will auto mute the microphone of a guest when not loaded in an active OBS scene
2
will mute it everywhere, while the default will still allow the director to speak to the guest, even if not in a scene
## Details
[`&automute`](and-automute.md) will auto mute the microphone of a guest when not loaded in an active OBS scene. Useful for perhaps limiting the discussion in a group chat to those on air.
`&automute=2` will mute it everywhere, while the default will still allow the director to speak to the guest, even if not in a scene.
This is a guest-side URL parameter; you may want to apply it to all guests.
Required quite a bit of code reworking; error reporting is on in the console, so please report issues. Feedback also welcomed.
## Related
[and-mute.md](../../source-settings/and-mute.md)
[and-audiogain.md](and-audiogain.md)
---
description: >-
Will play either the left or right audio stream-only for an incoming stereo
stream
---
# &playchannel
Viewer-Side Option! ([`&view`](../view-parameters/view.md), [`&scene`](../view-parameters/scene.md), [`&room`](../../general-settings/room.md))
## Options
Example: `&playchannel=1`
Value
Description
1
Will play the left audio channel only
2
Will play the right audio channel only
3-6
Will play the selected channel
## Details
`&playchannel` will play either the left or right audio stream-only for an incoming stereo stream.
It will play back the selected channel as mono audio, dropping other channels from the playback. `&playchannel=1` is left channel; `2` is right; and if multi channel works for you, then you can target 6 different channels.
This is useful if you wanted to capture the left and right audio channels of a remote guest in OBS in different browser sources, without having to do any fancy audio routing on the studio side.
Both left and right audio channels are still sent; it's just during local playback that the non-selected channels are dropped, so it's not as efficient as local routing, nor will both channel be in exact sync anymore either.
This will not currently work in conjunction with [`&panning`](../view-parameters/and-panning.md) of [`&channeloffset`](../view-parameters/and-channeloffset.md); and will override those options.
Example usage: [https://vdo.ninja/?view=XXXXXXXX\&stereo\&playchannel=1](https://vdo.ninja/?view=XXXXXXXX\&stereo\&playchannel=1)
## Related
[and-channels.md](../view-parameters/and-channels.md)
[and-inputchannels.md](and-inputchannels.md)
[and-channels.md](../view-parameters/and-channels.md)
---
description: >-
Will try to "distort" your microphone's output audio, making your voice a bit
anonymous
---
# &distort
Sender-Side Option! ([`&push`](../../source-settings/push.md))
## Details
`&distort` as a URL parameter for the sender's side will try to "distort" your microphone's output audio, making your voice a bit anonymous.
[https://vdo.ninja/?push\&webcam\&distort](https://vdo.ninja/?push\&webcam\&distort)
---
description: >-
Audio capture device to select N-number of audio channels; force mono or
stereo capture
---
# &inputchannels
Sender-Side Option! ([`&push`](../../source-settings/push.md))
## Aliases
* `&channelcount`
* `&ac`
## Options
Example: `&inputchannels=6`
| Value | Description |
| ----------------- | ------------------------------------------- |
| `1` | Audio capture device set to mono; 1 channel |
| `2` | Audio capture device set to 2 channels |
| `6` | Audio capture device set to 6 channels |
| (integer value X) | Audio capture device set to X channels |
## Details
`&inputchannels=N` tells the audio capture device explicitly to select N-number of audio channels.
Setting [`&stereo=0`](../../general-settings/stereo.md) will set `&inputchannels=1` by default.
If using [`&proaudio`](and-proaudio.md) you want want to disable stereo-audio capture, particularly if you are using an XLR to USB microphone preamp that has two channels, but only one microphone connected.
For example, if a guest joins and you can only hear them in the left or right channel, either add [`&mono`](../view-parameters/mono.md) to the view-link or add `&inputchannels=1` to the respective guest invite-link.
### Mono-specific alias
If looking for a memorable parameter to set a guest's audio input to mono (1-channel), [`&monomic`](and-monomic.md) is the same as `&inputchannels=1`. This was added in VDO.Ninja v22.
## Related
[and-monomic.md](and-monomic.md)
[mono.md](../view-parameters/mono.md)
[stereo.md](../../general-settings/stereo.md)
---
description: Sets a guest's audio input to mono (1-channel)
---
# &monomic
Sender-Side Option! ([`&push`](../../source-settings/push.md))
## Aliases
* `&channelcount=1`
* `&ac=1`
* `&inputchannels=1`
## Details
`&monomic` sets a guest's audio input to mono (1-channel). `&monomic` is the same as [`&inputchannels=1`](and-inputchannels.md).
There is [`&mono`](../view-parameters/mono.md) to set the audio output to mono on the viewer's side.
## Related
[and-inputchannels.md](and-inputchannels.md)
[mono.md](../view-parameters/mono.md)
---
description: Disables all audio playback from room directors
---
# &nodirectoraudio
Viewer-Side Option! ([`&view`](../view-parameters/view.md), [`&scene`](../view-parameters/scene.md), [`&room`](../../general-settings/room.md))
## Details
`&nodirectoraudio` is just like [`&noaudio`](../view-parameters/noaudio.md) (disables all audio playback on the local computer), except it only applies to incoming connections from room directors. So, if your are using the [Mixer App](../../steves-helper-apps/mixer-app.md) with OBS, but you want to exclude the audio of yourself from the OBS, this potentially could be an easy way to do that.
## Related
[noaudio.md](../view-parameters/noaudio.md)
[and-nodirectorvideo.md](../video-parameters/and-nodirectorvideo.md)
[director.md](../../viewers-settings/director.md)
[mixer-app.md](../../steves-helper-apps/mixer-app.md)
---
description: >-
Lets you tweak the &noisegate variables, making it more or less aggressive as
needed
---
# &noisegatesettings
Sender-Side Option! ([`&push`](../../source-settings/push.md))
## Options
Example: `&noisegatesettings=10,25,3000`
| Value | Description |
| --------------------------------------- | -------------------------------------------------------------------- |
| (TargetGain,Threshold,GateOpenPosition) | see [Details](and-noisegatesettings.md#details) for more information |
| `10,25,3000` | example |
## Details
`&noisegatesettings` is used in conjunction with [`&noisegate`](../../source-settings/noisegate.md). This feature lets you tweak the noise-gate's variables, making it more or less aggressive as needed.
It takes a comma separated list:
* First value is target volume (0 to 100), although 0 to 40 is probably the recommended range here.
* Since how we perceive loudness isn't linear, to have the audio become inaudible, you'll want to set this to 0 to 3. Setting it to 10 for example will leave it still quite audible, but just dampened.
* Second value is the threshold value where the gate is triggered if below it. \~ 100 is loudly speaking, \~ 20 is light background noise levels, and under 5 is quiet background levels.
* Third value is how 'sticky' the gate-open position is, in milliseconds. Having this set to a few seconds should prevent someone from being cut off while speaking or if taking a short pause.
* You may want to try a value of 10 to 300 for this third value, if just testing or want a sharper cut off.
Example:
[`https://vdo.ninja/?noisegate&noisegatesettings=10,25,3000`](https://vdo.ninja/?noisegate\&noisegatesettings=10,25,3000)
## Related
[noisegate.md](../../source-settings/noisegate.md)
---
description: >-
Improves the audio quality, changes default audio settings and sets the audio
mode to stereo
---
# &proaudio
General Option! ([`&push`](../../source-settings/push.md), [`&room`](../../general-settings/room.md), [`&view`](../view-parameters/view.md), [`&scene`](../view-parameters/scene.md))
## Aliases
* [`&stereo`](../../general-settings/stereo.md)
* `&s`
## Options
Example: `&proaudio=1`
Value
Description
(no value given)
it behaves like 3 or 1, depending on if you are a guest or not
0
will try to down-mix your mic to mono. Does not enable any pro-audio settings
1
enables it for both push and view (if used on both links) and switches off aec/denoise/autogain settings
2
enables it just for viewing requests and not publishing requests
3
enables it for just publishing requests and not viewing requests
4
enables 5.1-multichannel audio support (Experimental and may require a Chrome flag to be set)
5
this is the default if nothing is set. It behaves like 3 or 1, depending on if you are a guest or not
6
solely just enables stereo for both in/out
## Details
Adding `&proaudio` to the URL will apply audio-specific setting presets. For inbound audio streams, it can be used to increase the audio bitrate from 32-kbps to 256-kbps. For outbound streams, it will disable echo-cancellation and noise-reduction. When applied to both the outbound and inbound sides of an audio stream, it will also enable stereo audio if available.
There are a variety of different modes that apply different combination of presets. You can also override any preset with other URL parameters, such as [`&audiobitrate`](../view-parameters/audiobitrate.md), [`&outboundaudiobitrate`](../../source-settings/and-outboundaudiobitrate.md), and [`&aec=1`](../../source-settings/aec.md).
If using a microphone, wearing headphones is strongly recommended if using this parameter, along with knowledge of correctly setting your microphone gain settings. Echo and feedback issues can occur if this option is used incorrectly.
When using this option in a group room, you can't simply just apply this URL option to the director and have it apply to all guests. You will need to add the flag to each guest and to each scene-link to enable the pro-audio stereo mode. Depending on the value you pass to the URL parameter, you will get slightly different outcomes.
There is a director's room toggle for guest's invite link and for scene links:
### More Details
`&stereo` and `&proaudio` currently do the same thing, so they are just aliases of each other. When used, they can be used to setup the audio transfer pipeline to allow for unprocessed, high-bitrate, stereo audio.
Use of this option is generally for advanced users who understand the consequences of enabling this. High-quality audio can cause audio clicking, reduced video quality, feedback issues, low volume levels, and higher background noise levels.
For stereo-channel support to work, you will want both the viewer AND the publisher of the stream to have the respective `&proaudio` flag add to their URL.
You can customize things further using [`&aec`](../../source-settings/aec.md), [`&ag`](../../source-settings/autogain.md), [`&dn`](../../source-settings/and-denoise.md), [`&ab`](../view-parameters/audiobitrate.md) and [`&mono`](../view-parameters/mono.md). These flags will override the presets applied by the `&proaudio` flag. Please note, depending on your browser, enabling `&aec`, `&ag`, or `&dn` can force disable stereo audio.
The most powerful mode is `proaudio=1` , which if enabled:
* Turns off audio normalization or auto-gain when publishing ([`&push`](../../source-settings/push.md))
* Turns off noise-cancellation when publishing
* Turns off echo-cancellation when publishing
* Enables higher audio bitrate playback, up to 256-kbps, when listening ([`&view`](../view-parameters/view.md))
If the parameter is used, but left without a value, it is treated as a special case (either 1 or 3). Please see follow link for more info:
[https://docs.google.com/spreadsheets/d/e/2PACX-1vS7Up5jgXPcmg\_tN52JLgXBZG3wfHB3pZDQWimzxixiuRIDbeMdmU11fgrMpdYFT6yy4Igrkc9hnReY/pubhtml](https://docs.google.com/spreadsheets/d/e/2PACX-1vS7Up5jgXPcmg\_tN52JLgXBZG3wfHB3pZDQWimzxixiuRIDbeMdmU11fgrMpdYFT6yy4Igrkc9hnReY/pubhtml)
Option
alias
aec
autogain
denoise
stereo playback
stereo output
default ab in
max ab out
limited ab in
cbr
&proaudio=0
off
on
on
on
off
no
32
510
510
no
&proaudio=1
both
off
off
off
on
yes
256
510
510
yes
&proaudio=2
in
on
on
on
on
no
256
510
510
yes
&proaudio=3
out
off
off
off
off
yes
32
510
510
no
&proaudio=4
multi
off
off
off
on (5.1)
yes
256
510
510
yes
### Newbie mode
The default mode when `&proaudio` is used alone is `&proaudio=5`, which acts like either `&proaudio=3` or `&proaudio=1`, depending on whether the link its applied to is a room guest or not. This option will make the most sense for most users.
| Option | Context | alias | aec | autogain | denoise | stereo playback | stereo output | default ab in | max ab out | limited ab in | cbr |
| ------------- | ----------- | ----- | ----- | -------- | ------- | --------------- | ------------- | ------------- | ---------- | ------------- | ---- |
| `&proaudio=5` | Regular/OBS | 5 | _off_ | _off_ | _off_ | on | yes | 256 | 510 | 510 | yes |
| `&proaudio=5` | Director | 5 | _off_ | _off_ | _off_ | on | yes | 32 | 510 | 510 | _no_ |
| `&proaudio=5` | Room Guest | 5 | _off_ | _off_ | _off_ | _off_ | yes | 32 | 510 | 510 | _no_ |
### iOS Devices
| Option | alias | aec | autogain | denoise | stereo playback | stereo output | default ab in | max ab out | limited ab in | cbr |
| ----------- | ----- | --- | -------- | ------- | --------------- | ------------- | ------------- | ---------- | ------------- | ---- |
| iOS devices | | on | on | on | _off_ | _off_ | 32 | 32 | 32 | _no_ |
Just for reference, the audio codec used by VDO.Ninja is OPUS (48khz), which can provide high-fidelity music transfer when the audio bitrate is set to 80-kbps per channel or higher. The default audio bitrate used is 32-kbps VBR, which is sufficient for most voice applications. Increasing the audio bitrate to a near-lossless 500-kbps or something may end up causing more problems than anything, but that is supported if needed.
### Disabling stereo when using \&proaudio
If you want to use the `&proaudio` parameter but wish the output to still be mono (1-channel), there's some options.
* [`&inputchannels=1`](and-inputchannels.md) or [`&monomic`](and-monomic.md) can be used on the sender's side, which will force their audio-capture device (microphone) to only capture in mono.
* [`&mono`](../view-parameters/mono.md) can be added to the viewer's side, which will try to playback incoming audio as mono.
* If using OBS, in the audio settings, you can set the browser-source's audio to be mono.
## Related
[audiobitrate.md](../view-parameters/audiobitrate.md)
[and-outboundaudiobitrate.md](../../source-settings/and-outboundaudiobitrate.md)
[and-screensharestereo.md](../../newly-added-parameters/and-screensharestereo.md)
---
description: Sets the 'default' playback volume for all video elements
---
# &volume
Viewer-Side Option! ([`&scene`](../view-parameters/scene.md), [`&room`](../../general-settings/room.md), [`&view`](../view-parameters/view.md), [`&solo`](../mixer-scene-parameters/and-solo.md))
## Aliases
* `&vol`
## Options
Example: `&volume=50`
| Value | Description |
| ------- | -------------------------------- |
| (0-100) | audio playback volume in percent |
## Details
`&volume` can set the 'default' playback volume for all video elements in VDO.Ninja. Currently the range is 0 to 100 and other volume commands or mute states may override this value. The default is 100.
`&volume=50`
## Related
[and-audiogain.md](and-audiogain.md)
[autogain.md](../../source-settings/autogain.md)
[and-volumecontrol.md](and-volumecontrol.md)
---
description: Shows a dedicated local audio-volume control bar for canvas or image elements
---
# &volumecontrol
Viewer-Side Option! ([`&scene`](../view-parameters/scene.md), [`&room`](../../general-settings/room.md), [`&view`](../view-parameters/view.md), [`&solo`](../mixer-scene-parameters/and-solo.md))
## Aliases
* `&volumecontrols`
* `&vc`
## Details
`&volumecontrol` shows a dedicated local audio-volume control bar for canvas or image elements. Video elements already have a control-bar with volume, so I don't show it there currently.
The [Comms app](../../steves-helper-apps/comms.md) is a good demonstrator of the feature @[vdo.ninja/alpha/comms](https://vdo.ninja/alpha/comms).
## Related
[and-volume.md](and-volume.md)
[and-audiogain.md](and-audiogain.md)
---
description: Lets you specify the audio codec
---
# &audiocodec
Viewer-Side Option! ([`&view`](../view-parameters/view.md), [`&scene`](../view-parameters/scene.md), [`&room`](../../general-settings/room.md), [`&solo`](../mixer-scene-parameters/and-solo.md))
## Options
Example: `&audiocodec=opus`
| Value | Description |
| ------ | -------------------------------------------- |
| `opus` | default; selects audio codec opus |
| `red` | selects audio codec [red](minptime-1.md#red) |
| `pcmu` | selects audio codec pcmu |
| `pcma` | selects audio codec pcma |
| `isac` | selects audio codec isac |
| `g722` | selects audio codec g722 |
| `pcm` | selects audio codec [pcm](minptime-1.md#pcm) |
## Details
`&audiocodec` on the viewer side can let you specify the audio codec; `opus` (default), `pcmu`, `pcma`, `isac`, `g722`, `red` and `pcm`.
#### red
`&audiocodec=red` is pretty much like sending two opus streams, with one as a backup in case of packet loss; support in Chromium 97 and up, but the only way I can so far tell that it is working is to check if the audio bitrate has doubled.
When using [`&proaudio`](and-proaudio.md), [`&stereo`](../../general-settings/stereo.md), or higher than [`&audiobitrate=216`](../view-parameters/audiobitrate.md) with this, the resulting bitrate may not actually double. I don't quite understand what's going on here, if its still working or not, so to be safe when using [`&proaudio`](and-proaudio.md) or [`&stereo`](../../general-settings/stereo.md), along with `&audiocodec=red`, I set the bitrate to 216 by default, which will then result in a sending bitrate of around 440-kbps.
I've tried to enable RED-mode to work with PCM audio, but so far it will only work with OPUS audio.
#### pcm
`&audiocodec=pcm` now will support 48khz and 44.1khz mono playback (48khz default), and if [`&stereo`](../../general-settings/stereo.md) is used, it changes to two-channel stereo 32khz.
The existing [`&samplerate=44100`](../view-parameters/and-samplerate.md) option can lower the sample rate of this pcm mode (down to 8khz even), and hence the resulting audio bitrate. Since PCM is raw, [`&audiobitrate`](../view-parameters/audiobitrate.md) won't work, so expect 550 to 1200-kbps in just audio bitrates per viewer.
There may be clicking when using PCM mode (L16) if you are on a bad connection, as PCM doesn't have much in the way of error correction. You'll need to address this yourself probably with post-processing if any issue.
#### Future options
In the near future you'll be able to send PCM audio via [`&chunked`](../../newly-added-parameters/and-chunked.md) mode, which will guarantees delivery of all packets sent, however there may be buffering issues if your connection can't keep up with bandwidth requirements.
Currently [`&chunked`](../../newly-added-parameters/and-chunked.md) mode does work with OPUS-audio though; please provide feedback and requests if you use it. Chunked mode does not support [WHIP/WHEP](../../steves-helper-apps/whip-and-whep-tooling.md) or [Meshcast](../../newly-added-parameters/and-meshcast.md).
## Related
[codec.md](../view-parameters/codec.md)
[minptime-3.md](minptime-3.md)
---
description: >-
Turns off the audio encoder automatically when no little to no sound is
detected
---
# &dtx
Viewer-Side Option! ([`&view`](../view-parameters/view.md), [`&scene`](../view-parameters/scene.md), [`&room`](../../general-settings/room.md), [`&solo`](../mixer-scene-parameters/and-solo.md))
## Aliases
* `&usedtx`
## Details
Using `&dtx` will turn off the audio encoder automatically when no little to no sound is detected. The VDO.Ninja default uses a dynamic audio bitrate mode ([`&vbr`](../view-parameters/vbr.md)), but using `&dtx` takes things to the next level. It might be useful as a very mild [noise-gate](../../source-settings/noisegate.md) I suppose?
## Related
[vbr.md](../view-parameters/vbr.md)
[minptime-3.md](minptime-3.md)
[minptime-1.md](minptime-1.md)
---
description: Disables FEC (audio forward error correction)
---
# &nofec
Viewer-Side Option! ([`&view`](../view-parameters/view.md), [`&scene`](../view-parameters/scene.md), [`&room`](../../general-settings/room.md), [`&solo`](../mixer-scene-parameters/and-solo.md))
## Details
`&nofec` on the viewer side can disable audio forward error correction (FEC). I show the audio codec now used in the stats, along with whether FEC is on or not (on by default).
---
description: Filters, adding delay, bitrate, channels, mono/stereo, muting guests etc.
---
# Audio Parameters
They are separated in three groups: [general options](./#general-options) (push and view), [source side](./#source-side-options) (push) options and [viewer side](./#viewer-side-options) (view) options.
## General options
You can add them to both, source ([`&push`](../../source-settings/push.md)) and viewer ([`&view`](../view-parameters/view.md), [`&scene`](../view-parameters/scene.md) or [`&solo`](../mixer-scene-parameters/and-solo.md)) sides.
## **Viewer side options**
You have to add them to the viewer side ([`&view`](../view-parameters/view.md), [`&scene`](../view-parameters/scene.md) or [`&solo`](../mixer-scene-parameters/and-solo.md)).
\*NEW IN [VERSION 24](../../releases/v24.md)
---
description: >-
Will try to keep the video controls visible, even if your mouse isn't hovering
over the video
---
# &forcecontrols
General Option! ([`&push`](../../source-settings/push.md), [`&room`](../../general-settings/room.md), [`&view`](../view-parameters/view.md), [`&scene`](../view-parameters/scene.md))
## Details
`&forcecontrols` is experimental, but it will try to keep the video controls visible, even if your mouse isn't hovering over the video.
The VDO.Ninja tab/window still needs to be 'active' however, for this to work; changing focus to another tab will stop it.
Only works really for Chrome/Chromium on desktop; not Firefox, etc.
## Related
[and-videocontrols.md](../newly-added-parameters/and-videocontrols.md)
[and-nocontrols.md](../settings-parameters/and-nocontrols.md)
---
description: Show/hide buttons, adjust the user control bar and video control bar
---
# Buttons and Control Bar Parameters
## User Control Bar Options
#### Positioning the control bar
While you can position the control bar by dragging it around, you can also set it's initial position with the use of a custom CSS parameter. For example:
`&cssb64=I3N1YkNvbnRyb2xCdXR0b25ze3RyYW5zZm9ybTp0cmFuc2xhdGUoMHB4LCBjYWxjKC0xMDB2aCArIDkwcHgpKSFpbXBvcnRhbnR9Ow`
The above is a base64 encoded version of the following CSS, which positions the control bar at the top by default. Base64 encoding allows us to use stylings safely as a URL parameter.
`#subControlButtons{transform:translate(0px, calc(-100vh + 90px))!important};`
## Video Control Bar Options
Will try to keep the video controls visible, even if your mouse isn't hovering over the video
\*NEW IN [VERSION 24](../../releases/v24.md)
---
description: Lets you manually pre-set the brightness of the camera/webcam
---
# &brightness
Sender-Side Option! ([`&push`](../../source-settings/push.md))
## Options
Example: `&brightness=128`
Value
Description
(integer value; 1 to 255)
brightness of the camera
## Details
Lets you manually pre-set the brightness of the camera/webcam:
It will normally take an integer value in the range of `1` to `255`, at least for a Logitech webcam, but will vary based on the camera / device you are using.
VDO.Ninja already tries to auto-save camera settings for android devices that support video settings, but for desktop browsers, it does not. Using these new values though you can manually set things to auto-configure as you want.
These settings will apply to ALL video devices though, not just a specific one. If a setting isn't supported by your camera or browser, it will just fail quietly, and not apply. You'll see an error in the console log though.
* Firefox and Safari may not support this feature.
* Not all cameras/smartphones will support this option
You can check the video settings menu as to whether a device supports a certain feature or what value ranges are support; you can also check it out here [https://vdo.ninja/supports](https://vdo.ninja/supports).
## Related
[.](./)
---
description: Lets you manually pre-set the contrast of the camera/webcam
---
# &contrast
Sender-Side Option! ([`&push`](../../source-settings/push.md))
## Options
Example: `&contrast=128`
Value
Description
(integer value; 1 to 255)
contrast of the camera
## Details
Lets you manually pre-set the contrast of the camera/webcam:
It will normally take an integer value in the range of `1` to `255`, at least for a Logitech webcam, but will vary based on the camera / device you are using.
VDO.Ninja already tries to auto-save camera settings for android devices that support video settings, but for desktop browsers, it does not. Using these new values though you can manually set things to auto-configure as you want.
These settings will apply to ALL video devices though, not just a specific one. If a setting isn't supported by your camera or browser, it will just fail quietly, and not apply. You'll see an error in the console log though.
* Firefox and Safari may not support this feature.
* Not all cameras/smartphones will support this option
You can check the video settings menu as to whether a device supports a certain feature or what value ranges are support; you can also check it out here [https://vdo.ninja/supports](https://vdo.ninja/supports).
## Related
[.](./)
---
description: Lets you manually pre-set the exposure of the camera/webcam
---
# &exposure
Sender-Side Option! ([`&push`](../../source-settings/push.md))
## Options
Example: `&exposure=128`
Value
Description
(integer value; 1 to 255)
exposure of the camera for a Logitech webcam
(integer value; 1 to 8000)
exposure of the camera for a Pixel 4a Android smartphone
## Details
Lets you manually pre-set the exposure of the camera/webcam:
It will normally take an integer value in the range of `1` to `255`, at least for a Logitech webcam, but will vary based on the camera / device you are using.
VDO.Ninja already tries to auto-save camera settings for android devices that support video settings, but for desktop browsers, it does not. Using these new values though you can manually set things to auto-configure as you want.
These settings will apply to ALL video devices though, not just a specific one. If a setting isn't supported by your camera or browser, it will just fail quietly, and not apply. You'll see an error in the console log though.
* Firefox and Safari may not support this feature.
* Not all cameras/smartphones will support this option
You can check the video settings menu as to whether a device supports a certain feature or what value ranges are support; you can also check it out here [https://vdo.ninja/supports](https://vdo.ninja/supports).
## Related
[.](./)
---
description: Lets you manually pre-set the saturation of the camera/webcam
---
# &saturation
Sender-Side Option! ([`&push`](../../source-settings/push.md))
## Options
Example: `&saturation=128`
Value
Description
(integer value; 1 to 255)
saturation of the camera for a Logitech camera
## Details
Lets you manually pre-set the saturation of the camera/webcam:
It will normally take an integer value in the range of `1` to `255`, at least for a Logitech webcam, but will vary based on the camera / device you are using.
VDO.Ninja already tries to auto-save camera settings for android devices that support video settings, but for desktop browsers, it does not. Using these new values though you can manually set things to auto-configure as you want.
These settings will apply to ALL video devices though, not just a specific one. If a setting isn't supported by your camera or browser, it will just fail quietly, and not apply. You'll see an error in the console log though.
* Firefox and Safari may not support this feature.
* Not all cameras/smartphones will support this option
You can check the video settings menu as to whether a device supports a certain feature or what value ranges are support; you can also check it out here [https://vdo.ninja/supports](https://vdo.ninja/supports).
## Related
[.](./)
---
description: Lets you manually pre-set the sharpness of the camera/webcam
---
# &sharpness
Sender-Side Option! ([`&push`](../../source-settings/push.md))
## Options
Example: `&sharpness=128`
Value
Description
(integer value; 1 to 255)
sharpness of the camera
## Details
Lets you manually pre-set the sharpness of the camera/webcam:
It will normally take an integer value in the range of `1` to `255`, at least for a Logitech webcam, but will vary based on the camera / device you are using.
VDO.Ninja already tries to auto-save camera settings for android devices that support video settings, but for desktop browsers, it does not. Using these new values though you can manually set things to auto-configure as you want.
These settings will apply to ALL video devices though, not just a specific one. If a setting isn't supported by your camera or browser, it will just fail quietly, and not apply. You'll see an error in the console log though.
* Firefox and Safari may not support this feature.
* Not all cameras/smartphones will support this option
You can check the video settings menu as to whether a device supports a certain feature or what value ranges are support; you can also check it out here [https://vdo.ninja/supports](https://vdo.ninja/supports).
## Related
[.](./)
---
description: Lets you manually pre-set the white balance of the camera/webcam
---
# &whitebalance
Sender-Side Option! ([`&push`](../../source-settings/push.md))
## Aliases
* `&wb`
## Options
Example: `&whitebalance=5000`
Value
Description
(integer value)
white balance in Kelvin (5000 to 6500 are typical values)
## Details
Lets you manually pre-set the white balance of the camera/webcam:
It is normally in Kelvin, so `5000` or `6500` are typical values it will take.
VDO.Ninja already tries to auto-save camera settings for android devices that support video settings, but for desktop browsers, it does not. Using these new values though you can manually set things to auto-configure as you want.
These settings will apply to ALL video devices though, not just a specific one. If a setting isn't supported by your camera or browser, it will just fail quietly, and not apply. You'll see an error in the console log though.
* Firefox and Safari may not support this feature.
* Not all cameras/smartphones will support this option
You can check the video settings menu as to whether a device supports a certain feature or what value ranges are support; you can also check it out here [https://vdo.ninja/supports](https://vdo.ninja/supports).
## Related
[.](./)
---
description: Options to pre-set the camera settings
---
# Camera Parameters
## General options
You have to add the parameters to the source link ([`&push`](../../source-settings/push.md)).
Lets you manually pre-set the brightness of the camera/webcam
\*NEW IN [VERSION 24](../../releases/v24.md)
---
description: Cheat sheet of the basic URL-based settings
---
# Most common Parameters
VDO.Ninja makes heavy use of URL-based parameters to configure settings. Some of the most commonly used ones are listed below, with a brief explanation of what they are for and links to more detail.
| Sender-side parameter | Explanation |
| -------------------------------------------------------------------- | ----------------------------------------------------------------------------------------------------------------------------------------------------------------------------------------------------------------------------------------------------------------------------------------------------------------------------------------------------------------------------------- |
| [`&push`](https://docs.vdo.ninja/source-settings/push) | The stream ID you wish to publish your video under; it must be unique. The value can be defined manually and reused. If left blank, a value will be generated automatically. |
| [`&quality`](https://docs.vdo.ninja/source-settings/quality) | Sets the default target resolution and frame rate. If not used, the system default is 720p60. Setting `&quality=0`will result in 1080p60 being the new target default, but this may significantly increase the CPU load on the sender's computer. |
| [`&videodevice`](../../source-settings/videodevice.md) | Specify an video device to auto-select on load. If left blank, the system's default audio device will be selected. |
| [`&audiodevice`](https://docs.vdo.ninja/source-settings/audiodevice) | Specify an audio device to auto-select on load. If left blank, the system's default audio device will be selected. |
| [`&effects`](../../source-settings/effects.md) | This parameter will allow for digital effects to be applied to the video, including background-blurring and a digital greenscreen. You can preset which effect is loaded by setting this value to a corresponding number, such as `&effects=4`. |
| [`&label`](https://docs.vdo.ninja/general-settings/label) | Allows the guest connection to be assigned a display name, which will be used in chat and if overlays are turned on. If left blank, the guest will be prompted to enter a display name. |
| [`&meshcast`](../../newly-added-parameters/and-meshcast.md) | Adding `&meshcast` to a guest or director link will trigger the service, causing the outbound audio/video stream to be transferred to a hosted server, which then distributes the stream to all the viewers. This adds a bit of latency to the stream, but it implies the guest/director does not need to encode and upload multiple videos, lowering CPU load and bandwidth usage. |
| Viewer-side parameter | Explanation |
| ----------------------------------------------------------------------- | ------------------------------------------------------------------------------------------------------------------------------------------------------------------------------------------------------------------------------------------------------------------------------------------------------------------------------------------------------------------------------------------------------------------------------------------------------------------------------------------------------------------------------------------------------------------------------- |
| [`&view`](https://docs.vdo.ninja/viewers-settings/view) |
The stream ID you wish to view/hear; a comma-separated list can be passed as well to view multiple at a time. This isn't required if using a group room, but it can be used in conjunction with the &push parameter to create faux-rooms.
Using &view without passing any values to it will prevent any incoming peer connections. It technically is responsible for allowing inbound connections, and not explicitly in control of whether video or audio is requested.
The video bitrate you wish to view a video at, in kbps. The default is 2500-kbps and is well-suited for interviews and talking-heads, but you may need to increase it if video contains significant motion and scene changes.
This parameter will not work for guests in a group room, but should work elsewhere.
|
| [`&audiobitrate`](https://docs.vdo.ninja/viewers-settings/audiobitrate) | Sets the audio bitrate, in kbps. The system default is 32-kbps, with the max limit being between 300 to 510-kbps, based on other factors. Too high and you may actually introduce clicking noise issues. |
| [`&codec`](https://docs.vdo.ninja/viewers-settings/codec) | h264, vp9, vp8, and sometimes av1 are options. Setting `&codec=h264` can sometimes trigger the sender's hardware encoder to be used, but this can often have unexpected consequences. The default is left up to the browsers to decide. |
| [`&novideo`](https://docs.vdo.ninja/viewers-settings/novideo) | This flag will disable incoming video streams. Connections will still be established, allowing for data and audio still. You can pass a list of stream IDs to exempt streams from this filter. |
| [`&noaudio`](https://docs.vdo.ninja/viewers-settings/noaudio) | This flag will disable incoming audio streams. Connections will still be established, allowing for data and video still. You can pass a list of stream IDs to exempt streams from this filter. |
| [`&showlabels`](https://docs.vdo.ninja/general-settings/showlabels) | If the sender has set a display name, you can overlay that name by using this parameter. Different styles of labels are available, which can be set by passing their corresponding style ID to this parameter. |
| Director, room, and general parameters | Explanation |
| ----------------------------------------------------------------- | ----------------------------------------------------------------------------------------------------------------------------------------------------------------------------------------------------------------------------------------------------------------------------------------------------------------------------------------------------------------------------------------------------------------------------------------------------------------------------------------------------------------------------------------------------------------------------------------------------------------------------- |
| [`&room`](https://docs.vdo.ninja/general-settings/room) |
Defines a room for guests to chat in. If used, everyone in a room will auto-connect to each other on joining, unless &view is used. Rooms benefit from allowing for echo-free conversation and rooms can be managed by a director.
Guests in a room have limited control and will see videos at reduced quality; this is intentional.
|
| [`&director`](https://docs.vdo.ninja/viewers-settings/director) | The director flag should be set to whatever the room name is. The first director to join a room then becomes the controller of the room. They have the ability to remotely control guest's settings, such as microphone volume of a guest, and they can add and remove guests to scenes. |
| [`&proaudio`](../audio-parameters/and-proaudio.md) |
Several other parameters into one, designed to quick-start applications needing high-quality audio. This parameter can be considered pretty heavy duty, so it's primarily designed for professional users needing near-raw audio quality, such as music DJs.
If used on the sender's side, it disable echo-cancellation, noise-reduction, and auto-volume leveling. It also requests stereo audio from the microphone source.
When applied to the viewer's side as well, it will increase the connection's audio bitrate to 256-kbps and request stereo-audio from the sender, if it is available.
If using a room, then to view a specific stream or collection of streams, the &scene and &room parameter must be added to any view link. The scene parameter lets the system know the connection is not a guest, but rather designed for capture.
Different scenes and scene types are available, and since a director can add and remove streams from scenes from their control room, multiple scenes can be used together to act as media slots in complex show layouts.
This parameter can be added to a guest's invite link to reduce the maximum video bandwidth they will make available to each other guest.
On mobile devices, outbound bandwidth to other guest is already set very low, but if a guest is still struggling to participate in a group room, adding &roombitrate=0 to their invite link will disable their outbound video to other guests and free up even more CPU. See &totalroombitrate for another option.
Specifies the custom password to be used. If left blank, the user will be prompted for the password on page load. Passwords are not stored and used purely client-side. They are used to encrypt the initial connection handshake between peers and to obfuscate room names.
The &hash parameter is system-generated and is a bit like the &password parameter, except it has the ability to validate a user-entered password.
|
| [`&broadcast`](https://docs.vdo.ninja/viewers-settings/broadcast) | Adding this flag will have guests only accept video connections from the director, but still share audio and accept audio-connections from other guests. This reduces the CPU and network load on guests, allowing for larger rooms, so long as the director can also support those larger rooms. |
[advanced-settings.md](../../advanced-settings.md)
---
description: Accepts a URL-encoded image URL to make as the app's default background
---
# &background
General Option! ([`&push`](../../source-settings/push.md), [`&room`](../../general-settings/room.md), [`&view`](../view-parameters/view.md), [`&scene`](../view-parameters/scene.md), [`&solo`](../mixer-scene-parameters/and-solo.md))
## Aliases
* `&appbg`
## Options
Example: `&background=./media/logo_cropped.png`
| Value | Description |
| ------------- | ----------------------------------- |
| (encoded URL) | Changes the background of VDO.Ninja |
## Details
Accepts a URL-encoded image URL to make as the app's default background.
To test:
[`https://vdo.ninja/?background=./media/logo_cropped.png`](https://vdo.ninja/?background=./media/logo\_cropped.png)
The image will scale in size to cover the VDO.Ninja app's background. [`&chroma`](chroma.md) can still be used to set the background color, if using transparencies. There already exists [`&bgimage`](and-bgimage.md), which will set the default background image for videos; this however will set a background image for the entire page.
You can encode and decode a URL here:
[https://www.urlencoder.org/](https://www.urlencoder.org/)
## Related
[and-bgimage.md](and-bgimage.md)
[chroma.md](chroma.md)
[and-waitimage.md](../newly-added-parameters/and-waitimage.md)
---
description: >-
Lets you add css to the URL, but as a single string, so no external reference
to a file is needed
---
# &base64css
General Option! ([`&push`](../../source-settings/push.md), [`&room`](../../general-settings/room.md), [`&view`](../view-parameters/view.md), [`&scene`](../view-parameters/scene.md))
## Aliases
* `&b64css`
* `&cssbase64`
* `&cssb64`
## Options
Example: `&base64css=JTIzbWFpbm1lbnUlN0JiYWNrZ3JvdW5kLWNvbG9yJTNBJTIwcGluayUzQiUyMCVFMiU5RCVBNA`
| Value | Description |
| -------- | -------------------- |
| (string) | Custom base64 string |
## Details
This command lets you add CSS to VDO.Ninja via the URL, but as a single string, so no external reference to a file is needed.
Example usage:
[`https://vdo.ninja/?base64css=JTIzbWFpbm1lbnUlN0JiYWNrZ3JvdW5kLWNvbG9yJTNBJTIwcGluayUzQiUyMCVFMiU5RCVBNA`](https://vdo.ninja/?base64css=JTIzbWFpbm1lbnUlN0JiYWNrZ3JvdW5kLWNvbG9yJTNBJTIwcGluayUzQiUyMCVFMiU5RCVBNA)
You can create the base64 encoding using `btoa(encodeURIComponent(csshere))`, for example `window.btoa(encodeURIComponent("#mainmenu{background-color: pink; ❤" ));`
Will return the base64 encoded string required. Special non-latin characters are supported with this approach; not just latin characters.
The [https://invite.vdo.ninja/](https://invite.vdo.ninja/) tool has an option to do these base64 encoding steps under "General Options".
## Related
[css.md](css.md)
---
description: Lets a user add raw javascript to the URL to run on page load
---
# &base64js
General Option! ([`&push`](../../source-settings/push.md), [`&room`](../../general-settings/room.md), [`&view`](../view-parameters/view.md), [`&scene`](../view-parameters/scene.md),[`&solo`](../mixer-scene-parameters/and-solo.md))
## Aliases
* `&jsb64`
* `&b64js`
* `&jsb64`
## Options
Example: `&base64js=YWxlcnQoJ2hpJyk=`
| Value | Description |
| -------- | -------------- |
| (string) | Javascript URL |
## Details
`&base64js` lets a user add raw java script to the URL to run on page load.
To test:
[`https://vdo.ninja/?base64js=YWxlcnQoJ2hpJyk=`](https://vdo.ninja/?base64js=YWxlcnQoJ2hpJyk=)
## Related
[and-base64css.md](and-base64css.md)
[and-js.md](and-js.md)
---
description: Can be used to set the default image avatar, when using &style=0 or &style=6
---
# &bgimage
General Option! ([`&push`](../../source-settings/push.md), [`&room`](../../general-settings/room.md), [`&view`](../view-parameters/view.md), [`&scene`](../view-parameters/scene.md), [`&solo`](../mixer-scene-parameters/and-solo.md))
## Aliases
* `&bgimg`
* `&avatarimg`
## Options
Example: `&bgimage=https%3A%2F%2Fvdo.ninja%2Fmedia%2Fold_icon.png`
Value
Description
(Encoded URL)
URL or base64 data image/svg
## Details
`&bgimage` can be used to set the default image avatar, when using [`&style=0`](style.md) or [`&style=6`](style.md). This only impacts what the person with the parameter added sees and must be either a URL or a base64 data image/svg. URL-encoded values.
[`https://vdo.ninja/?push=aSmexM6&style=0&vd=0&webcam&bgimage=https%3A%2F%2Fvdo.ninja%2Fmedia%2Fold_icon.png`](https://vdo.ninja/?push=aSmexM6\&style=0\&vd=0\&webcam\&bgimage=https%3A%2F%2Fvdo.ninja%2Fmedia%2Fold\_icon.png)
You can encode your URL here:
[https://www.urlencoder.org/](https://www.urlencoder.org/)
If you want to change the background image / avatar on the sender's side for all viewers, use [`&avatar`](../video-parameters/and-avatar.md).
## `&bgimage2` and `&bgimage3`
`&bgimage2` and `&bgimage3` work in conjunction with the existing `&bgimage` parameter. You pass an URL-encoded image URL to each, and when a guest speaks, it will switch their background image between the 3 possible images, based on their loudness.
eg:
```
vdo.ninja/alpha/?view=stream2,stream2&avatarimg=./media/avatar1.png&avatarimg2=./media/avatar2.png&avatarimg3=./media/avatar3.png
```
I've included some hand-drawn avatar sample images to test with; they are the default values for `&bgimage`, `&bgimage2`, and `&bgimage3`.
The images will only show when there is no active video and is essentially the same as using [`&meterstyle=4`](meterstyle.md) with some custom CSS to specify the behaviour, but it is not stream ID specific however.
## Related
[style.md](style.md)
[and-avatar.md](../video-parameters/and-avatar.md)
[and-waitimage.md](../newly-added-parameters/and-waitimage.md)
[and-background.md](and-background.md)
---
description: >-
Will try to add a blurred background to the video so it fits the structured
video container
---
# &blur
General Option! ([`&push`](../../source-settings/push.md), [`&room`](../../general-settings/room.md), [`&view`](../view-parameters/view.md), [`&scene`](../view-parameters/scene.md))
## Options
Example: `&blur=25`
| Value | Description |
| ---------------- | ----------------------- |
| (no value given) | blurring intensity = 10 |
| (integer) | blurring intensity |
| `25` | blurring intensity = 25 |
## Details
`&blur` which will try to add a blurred background to the video so it fits the structured video container. Using `&blur` auto enables [`&structure`](and-structure.md).
Code in the auto mixer, so you won't see the effect in a simple preview or some self-preview types.
`&blur` doesn't work with [`&color`](and-color.md), etc.
You can change the blurring intensity with `&blur=25` or whatever; `10` is default
`&blur=0` works as well.
May be buggy if using it with [`&forcedlandscape`](../mobile-parameters/and-forcelandscape.md) or [`&rotate`](and-rotate.md)
## Related
[and-structure.md](and-structure.md)
[and-border.md](and-border.md)
[and-color.md](and-color.md)
---
description: Adds a border around the videos
---
# &border
General Option! ([`&push`](../../source-settings/push.md), [`&room`](../../general-settings/room.md), [`&view`](../view-parameters/view.md), [`&scene`](../view-parameters/scene.md), [`&solo`](../mixer-scene-parameters/and-solo.md))
## Options
Example: `&border=20`
Value
Description
(no value given)
adds a border with 10 px
(integer value)
adds a border in px
## Details
Adds a border around the videos.
## Related
[and-bordercolor.md](and-bordercolor.md)
[margin.md](margin.md)
[rounded.md](rounded.md)
---
description: Defines the color of &border
---
# &bordercolor
General Option! ([`&push`](../../source-settings/push.md), [`&room`](../../general-settings/room.md), [`&view`](../view-parameters/view.md), [`&scene`](../view-parameters/scene.md), [`&solo`](../mixer-scene-parameters/and-solo.md))
## Options
Example: `&bordercolor=ffffff` or `&bordercolor=white`
| Value | Description |
| --------------------- | --------------------------------- |
| (no value given) | black border |
| (HEX) \| (color name) | specifies the color of the border |
| `ffffff` | white border |
Do not include the # character with the hex value.
## Details
Defines the color of `&border`.
## Related
[and-border.md](and-border.md)
[margin.md](margin.md)
[rounded.md](rounded.md)
---
description: >-
Hides many of the UI elements and pop-ups that may cause unwanted visual
elements
---
# &cleanviewer
Viewer-Side Option! ([`&view`](../view-parameters/view.md), [`&scene`](../view-parameters/scene.md), [`&room`](../../general-settings/room.md))
## Aliases
* `&cv`
## Details
This is the exact same thing as [`&cleanoutput`](cleanoutput.md), except it only triggers if added to a view-only link.
Hides many of the UI elements and pop-ups that may cause unwanted visual elements not desired in a high-stakes live stream.
## Related
[cleanoutput.md](cleanoutput.md)
---
description: You can specify the background color independent of the border color
---
# &color
General Option! ([`&push`](../../source-settings/push.md), [`&room`](../../general-settings/room.md), [`&view`](../view-parameters/view.md), [`&scene`](../view-parameters/scene.md))
## Options
Example: `&color=ffffff` or `&color=white`
| Value | Description |
| --------------------- | ------------------------------------- |
| (no value given) | black background |
| (HEX) \| (color name) | specifies the color of the background |
| `ffffff` | white background |
Do not include the # character with the hex value.
## Details
You can specify the background color independent of the border color with `&color`. If using [`&border`](and-border.md), it will not set the background color, so you may need to use both `&border` and `&color`.
May not yet work with [`&forcedlandscape`](../mobile-parameters/and-forcelandscape.md) or [`&rotate`](and-rotate.md).
## Related
[and-structure.md](and-structure.md)
[and-border.md](and-border.md)
[and-blur.md](and-blur.md)
[and-bordercolor.md](and-bordercolor.md)
---
description: Will change the browser's page favicon image
---
# &favicon
General Option! ([`&push`](../../source-settings/push.md), [`&room`](../../general-settings/room.md), [`&view`](../view-parameters/view.md), [`&scene`](../view-parameters/scene.md), [`&solo`](../mixer-scene-parameters/and-solo.md))
## Options
Example: `&favicon=https%3A%2F%2Fmeshcast.io%2Ffavicon.ico`
Value
Description
(URL encoded URL)
Changes the favicon
[https://www.urlencoder.org/](https://www.urlencoder.org/)
## Details
`&favicon` will change the browser's page favicon image. Passed values should be URL encoded. (Google URL encoding if needed). Since this is Javascript based, the values only update once the page loads. Meta-page-previews will likely not reflect the values.
Sample link: [`https://vdo.ninja/?headertitle=LINDENKRON4TW&favicon=https%3A%2F%2Fmeshcast.io%2Ffavicon.ico`](https://vdo.ninja/?headertitle=LINDENKRON4TW\&favicon=https%3A%2F%2Fmeshcast.io%2Ffavicon.ico)
## Related
[and-headertitle.md](and-headertitle.md)
---
description: Inverts the video so it is upside down
---
# &flip
General Option! ([`&push`](../../source-settings/push.md), [`&room`](../../general-settings/room.md), [`&view`](../view-parameters/view.md), [`&scene`](../view-parameters/scene.md))
## Details
Inverts the video so it is upside down. That's it. It doesn't change the viewer's link. If you want to have the viewer's link. If you want to flip the viewer's link as well, you have to add `&flip` to the viewer's side as well.
#### Alternative method for mirroring and flipping
If you are looking for a form of rotation and flipping that rotates the actual video, rather than relying on CSS to achieve it, you can check out the sender-side [`&effects`](../../source-settings/effects.md) options.
`https://vdo.ninja/?effects=-1`, which will flip the video
`https://vdo.ninja/?effects=-2`, which will flip and mirror the video
`https://vdo.ninja/?effects=2`, which will mirror the video
Effects however may increase CPU/GPU usage, and could cause frame rate instability, especially if the browser tab is not in active focus.
### Dedicated teleprompter tool that works for most sites
There's a dedicated tool for mirror, flipping, and rotating websites as part of VDO.Ninja as well:
[teleprompter-tool.md](../../steves-helper-apps/teleprompter-tool.md "mention")
In case the built-in options to mirror or flip don't work, the teleprompter app might be a good alternative.
## Related
[teleprompter-tool.md](../../steves-helper-apps/teleprompter-tool.md)
[and-mirror.md](and-mirror.md)
[effects.md](../../source-settings/effects.md)
---
description: Will change the browser's page title
---
# &headertitle
General Option! ([`&push`](../../source-settings/push.md), [`&room`](../../general-settings/room.md), [`&view`](../view-parameters/view.md), [`&scene`](../view-parameters/scene.md), [`&solo`](../mixer-scene-parameters/and-solo.md))
## Options
Example: `&headertitle=LINDENKRON4TW`
Value
Description
(string)
Changes the browser's page title
## Details
`&headertitle` will change the browser's page title.
Sample link: [`https://vdo.ninja/?headertitle=LINDENKRON4TW&favicon=https%3A%2F%2Fmeshcast.io%2Ffavicon.ico`](https://vdo.ninja/?headertitle=LINDENKRON4TW\&favicon=https%3A%2F%2Fmeshcast.io%2Ffavicon.ico)
## Related
[and-favicon-alpha.md](and-favicon-alpha.md)
---
description: Hides just the top header-bar
---
# &hideheader
Sender-Side Option! ([`&push`](../../source-settings/push.md))
## Aliases
* `&noheader`
* `&hh`
## Details
`&hideheader` could be useful for hiding VDO.Ninja branding, making videos a bit larger at times, or for IFRAME use-case applications.
It hides this:
## Related
[and-hidemenu.md](and-hidemenu.md)
---
description: Hides the VDO.Ninja-branded menu and header bar
---
# &hidemenu
Sender-Side Option! ([`&push`](../../source-settings/push.md))
## Aliases
* `&hm`
## Details
Hides the VDO.Ninja-branded menu and header bar.
Useful for making videos larger for guests by freeing up space.
## Related
[and-hideheader.md](and-hideheader.md)
---
description: Lets you pass a third party hosted javascript file URL
---
# &js
General Option! ([`&push`](../../source-settings/push.md), [`&room`](../../general-settings/room.md), [`&view`](../view-parameters/view.md), [`&scene`](../view-parameters/scene.md))
## Options
Example: `&js=https%3A%2F%2Fvdo.ninja%2Fexamples%2Ftestjs.js`
| Value | Description |
| ------------- | --------------------------------------- |
| (encoded URL) | Third party hosted java script file URL |
## Details
`&js` lets you pass a third party hosted java script file URL (URL-encoded), allowing for a custom code injection without self-hosting, IFrames or chrome extensions.
Example:
[https://vdo.ninja/?js=https%3A%2F%2Fvdo.ninja%2Fexamples%2Ftestjs.js](https://vdo.ninja/?js=https%3A%2F%2Fvdo.ninja%2Fexamples%2Ftestjs.js)
You can use this tool to encode the URL you want to link to
[https://www.urlencoder.org/](https://www.urlencoder.org/)
## Related
[and-base64js.md](and-base64js.md)
---
description: Forces to enable the lightmode / disable the darkmode
---
# &lightmode
General Option! ([`&push`](../../source-settings/push.md), [`&room`](../../general-settings/room.md), [`&view`](../view-parameters/view.md), [`&scene`](../view-parameters/scene.md))
## Details
Forces to enable the lightmode. It's the same like [`&darkmode=0`](darkmode.md) or [`&darkmode=false`](darkmode.md).
## Related
[darkmode.md](darkmode.md)
---
description: Inverts the video so it is the mirror reflection
---
# &mirror
General Option! ([`&push`](../../source-settings/push.md), [`&room`](../../general-settings/room.md), [`&view`](../view-parameters/view.md), [`&scene`](../view-parameters/scene.md))
## Options
Example: `&mirror=2`
Value
Description
(no value given)
Mirroring is forced for all videos
0
Preview video is mirrored only (excluding rear cameras and OBS Virtualcam/NDI)
1
Mirroring is forced for all videos
2
Inverts the default; local previews are not mirrored, but guests are mirrored
3
Same as default, except everything is mirrored, including text - useful for teleprompters
## Details
Mirroring does not work if using the browser's native video full-screen button. Use [`&effects=2`](../../source-settings/effects.md) instead for this use case.
Try `F11` or the Electron Capture app (right-click → Resize window -> Fullscreen) to hide the browser menu instead.
#### Alternative method for mirroring and flipping
If you are looking for a form of rotation and flipping that rotates the actual video, rather than relying on CSS to achieve it, you can check out the sender-side [`&effects`](../../source-settings/effects.md) options.
`https://vdo.ninja/beta/?effects=-1`, which will flip the video `https://vdo.ninja/beta/?effects=-2`, which will flip and mirror the video
`https://vdo.ninja/beta/?effects=2`, which will mirror the video
Effects however may increase CPU/GPU usage, and could cause frame rate instability, especially if the browser tab is not in active focus.
### Dedicated teleprompter tool that works for most sites
There's a dedicated tool for mirror, flipping, and rotating websites as part of VDO.Ninja as well:
[teleprompter-tool.md](../../steves-helper-apps/teleprompter-tool.md "mention")
In case the built-in options to mirror or flip don't work, the teleprompter app might be a good alternative.
## Related
[teleprompter-tool.md](../../steves-helper-apps/teleprompter-tool.md)
[effects.md](../../source-settings/effects.md)
[and-flip.md](and-flip.md)
---
description: Disables the default mirror state of the video preview for a guest
---
# &nomirror
General Option! ([`&push`](../../source-settings/push.md), [`&room`](../../general-settings/room.md), [`&view`](../view-parameters/view.md), [`&scene`](../view-parameters/scene.md))
## Details
`&nomirror` disables the default mirror state of the video preview for a guest, unlike [`&mirror=0`](and-mirror.md). Previews are often mirrored by default. [`&mirror`](and-mirror.md) can be applied on top of that state, to mirror things back for everyone if needed.
## Related
[and-mirror.md](and-mirror.md)
[how-to-mirror-a-video-while-full-screen-for-ipads-and-teleprompters.md](../../guides/how-to-mirror-a-video-while-full-screen-for-ipads-and-teleprompters.md)
---
description: Disables the tally light effects
---
# &obsoff
Viewer-Side Option! ([`&view`](../view-parameters/view.md), [`&scene`](../view-parameters/scene.md), [`&room`](../../general-settings/room.md))
## Aliases
* `&oo`
* `&disableobs`
## Details
Disables the tally light effects; can be applied to both viewer or publisher. Tally lights are represented as a glowing red border around videos. When the light is on, the video is considered "VISIBLE" within OBS Studio. This is based on whether OBS Studio tells VDO.Ninja if a video is active or not.
Videos on **first-load** in OBS, even if visible in OBS, **don't glow red**; it requires an **initial visibility change to trigger it**.
`&obsoff` can be used to set permissions to fully off (also disables tally light and scene optimizations tho) when added to the OBS browser source link.
## Related
[and-controlobs.md](../settings-parameters/and-controlobs.md)
[tallyoff-1.md](tallyoff-1.md)
---
description: Auto PIP the first loaded video
---
# &pip
Viewer-Side Option! ([`&view`](../view-parameters/view.md), [`&scene`](../view-parameters/scene.md), [`&room`](../../general-settings/room.md))
## Details
Adding this to a guest's link in a room, it forces the system-based PIP to trigger on the first video that loads.
## Related
[and-pipall-alpha.md](and-pipall-alpha.md)
[and-pipme-alpha.md](and-pipme-alpha.md)
---
description: >-
New floating picture in picture mode, so you can pop out the entire video mix
as a pinned window overlay
---
# &pipall
General Option! ([`&push`](../../source-settings/push.md), [`&room`](../../general-settings/room.md), [`&view`](../view-parameters/view.md), [`&scene`](../view-parameters/scene.md))
## Aliases
* `&pip2`
## Details
Added a new floating picture in picture mode, so you can pop out the entire video mix as a pinned window overlay.
`&pipall` will add a dedicated button for this mode.
Or just right-click any video and select "Picture in picture all" from the context menu. This is available without any URL option.
This requires Chrome v115 right now; it might vanish in v116 due to it being in a `chrome field trial`, and so you might need to enable it via `chrome:flags` if it stops working.
Update: Doesn't break the site if browser does not supported.
## Related
[and-pip.md](and-pip.md)
[and-pipme-alpha.md](and-pipme-alpha.md)
---
description: >-
Will cause your self-video preview window to pop out into its own picture in
picture
---
# &pipme
General Option! ([`&push`](../../source-settings/push.md), [`&room`](../../general-settings/room.md), [`&view`](../view-parameters/view.md), [`&scene`](../view-parameters/scene.md))
## Aliases
* `&mypip`
* `&pip3`
## Details
`&pipme` will cause your self-video preview window to pop out into its own picture in picture (floating/draggable) on load.
This is not compatible with [`&autostart`](../../source-settings/and-autostart.md). Works with director or guest; not tested on mobile.
`CTRL + ALT + P` will also toggle the picture in picture, without needing any URL parameters. (`cmd + ALT + P` on Mac)
## Related
[and-pip.md](and-pip.md)
[and-pipall-alpha.md](and-pipall-alpha.md)
---
description: Rotates the camera
---
# &rotate
Sender-Side Option! ([`&push`](../../source-settings/push.md))
## Options
Example: `&rotate=180`
Value
Description
(no value given) | 90
90 degree
(degree)
Rotates the camera in the specified value in degree
## Details
Applies to the publisher's side. Rotates the camera 90-deg by default, or specify `&rotate=180` or `&rotate=270` to rotate more.
Rotates your video for the guests/OBS as well. The rotation uses CSS.
CSS-based video effects will not work in full-screen mode. As well, the control-bar gets rotated with the video, when using CSS.
#### If looking to flip or mirror a video instead:
If you are looking for a form of mirroring and flipping that changes the actual video, rather than relying on CSS to achieve the effect, you can check out the sender-side [`&effects`](../../source-settings/effects.md) options.
`https://vdo.ninja/beta/?effects=-1`, which will flip the video `https://vdo.ninja/beta/?effects=-2`, which will flip and mirror the video
`https://vdo.ninja/beta/?effects=2`, which will mirror the video
Effects however may increase CPU/GPU usage, and could cause frame rate instability, especially if the browser tab is not in active focus.
There's also the [`&flip`](and-flip.md) and [`&mirror`](and-mirror.md) options, which use CSS, but are generally viewer-side only.
### Dedicated teleprompter tool that works for most sites
There's a dedicated tool for mirror, flipping, and rotating websites as part of VDO.Ninja as well:
[https://vdo.ninja/teleprompter](https://vdo.ninja/teleprompter)
In case the built-in options to mirror or flip don't work, the teleprompter app might be a good alternative.
## Related
[effects.md](../../source-settings/effects.md)
[and-flip.md](and-flip.md)
[and-mirror.md](and-mirror.md)
[and-rotatewindow.md](and-rotatewindow.md)
---
description: Will rotate the contents of the VDO.Ninja window
---
# &rotatewindow
General Option! ([`&push`](../../source-settings/push.md), [`&room`](../../general-settings/room.md), [`&view`](../view-parameters/view.md), [`&scene`](../view-parameters/scene.md))
## Aliases
* `&rotatepage`
## Options
Example: `&rotatewindow=270`
Value
Description
(no value given) | 90
90 degree
(degree)
Rotates the page in the specified value in degree
## Details
`&rotatewindow` will rotate the contents of the VDO.Ninja window. It doesn't target any specific video, and can be used on the viewer-side, not just the sender.
This will be overridden by [`&forcelandscape`](../mobile-parameters/and-forcelandscape.md) mode, if that is used also.
You can pass `90`, `180`, or `270` as a value to the parameter, to rotate accordingly. The default is `90` though, if used without any value.
You might still want to use OBS to rotate instead, but if not using OBS and find the teleprompter app too cumbersome, this is a good option.
## Related
[and-rotate.md](and-rotate.md)
[and-flip.md](and-flip.md)
[and-mirror.md](and-mirror.md)
---
description: Includes non-media-based push connections as video elements in a group room
---
# &showall
General Option! ([`&push`](../../source-settings/push.md), [`&room`](../../general-settings/room.md), [`&view`](../view-parameters/view.md), [`&scene`](../view-parameters/scene.md), [`&solo`](../mixer-scene-parameters/and-solo.md))
## Aliases
* `&style=7`
## Details
Added `&showall` (or [`&style=7`](style.md)), which will include non-media-based push connections as video elements in a group room. This can include guests that joined without audio/video, directors, or a data-only connection, like maybe MIDI-output source.
To help avoid some types of connections showing up when using `&showall`, I've also added a [`&nopush`](../settings-parameters/and-nopush.md) mode, which blocks outbound publishing connections. This acts a bit like a [`&scene=1`](../view-parameters/scene.md) link, so unless `&showall` is added, you'll need to use the IFRAME API to show/hide videos in it.
## Related
[style.md](style.md)
[and-nopush.md](../settings-parameters/and-nopush.md)
---
description: Will have the video holding div element be structured to the aspect ratio
---
# &structure
General Option! ([`&push`](../../source-settings/push.md), [`&room`](../../general-settings/room.md), [`&view`](../view-parameters/view.md), [`&scene`](../view-parameters/scene.md))
## Details
`&structure` will have the video holding div element be structured to 16:9 (or whatever [`&aspectratio`](../video-parameters/and-aspectratio.md) is set to), making it easier to apply custom CSS backgrounds to videos.
It will have the label/border/margins align relative to the 16:9 holder element, rather than video itself.
Also related, you can also specify the background color independent of the border color with [`&color`](and-color.md). If using [`&border`](and-border.md), it will not set the background color, so you may need to use both `&border` and `&color`.
May not yet work with [`&forcedlandscape`](../mobile-parameters/and-forcelandscape.md) or [`&rotate`](and-rotate.md).
Updated `&structure` to work with [`&cover`](../view-parameters/cover.md), allowing for some more flexibility with controlling fixed aspect-ratios from the viewer/scene side.
ie: `https://vdo.ninja/?room=XXXXX&scene&cover&structure&square&fakeguests=10`
## Related
[and-locked.md](../mixer-scene-parameters/and-locked.md)
[and-color.md](and-color.md)
[and-blur.md](and-blur.md)
[and-border.md](and-border.md)
---
description: Makes the background transparent
---
# &transparent
General Option! ([`&push`](../../source-settings/push.md), [`&room`](../../general-settings/room.md), [`&view`](../view-parameters/view.md), [`&scene`](../view-parameters/scene.md))
## Aliases
* `&transparency`
## Details
Makes the background for the website transparent using CSS.
The browser source in OBS already has a transparent background by default.
This is useful for embedding VDO.Ninja as an [IFRAME](https://developer.mozilla.org/en-US/docs/Web/HTML/Element/iframe).
Not helpful with the Electron Capture app.
Not needed for OBS if using default OBS CSS stylesheet:
```css
body {
background-color: rgba(0, 0, 0, 0);
margin: 0px auto;
overflow: hidden;
}
```
## Related
A video demo of the [`&chunked`](../../newly-added-parameters/and-chunked.md) transfer and how to enable support for alpha-channel transparency is available here: [https://youtu.be/SWDlm1Jf-Oo](https://youtu.be/SWDlm1Jf-Oo)
[chroma.md](chroma.md)
[and-chunked.md](../../newly-added-parameters/and-chunked.md)
---
description: Sets the background for the website to a particular hex color
---
# &chroma
General Option! ([`&push`](../../source-settings/push.md), [`&room`](../../general-settings/room.md), [`&view`](../view-parameters/view.md), [`&scene`](../view-parameters/scene.md))
## Options
Example: `&chroma=F0F`
| Value | Description |
| ---------------- | ----------------------- |
| (no value given) | green background |
| `F0F` | any RGB format color |
| `DEDEDE` | any RRGGBB format color |
Use it to chroma-key out the background on the Electron Capture app.
Do not include the # character with the hex value.
Can be 3 or 6 characters in length, 0 to F, in RGB or RRGGBB format.
[https://vdo.ninja/?scene\&room=roomname\&chroma](https://vdo.ninja/?scene\&room=roomname\&chroma)
See [`&color`](and-color.md) if you want to set the background color of one single video feed.
## Related
[and-color.md](and-color.md)
[and-transparent.md](and-transparent.md)
[and-background.md](and-background.md)
---
description: Cleaner output; not as clean as &cleanoutput
---
# &cleanish
General Option! ([`&push`](../../source-settings/push.md), [`&room`](../../general-settings/room.md), [`&view`](../view-parameters/view.md), [`&scene`](../view-parameters/scene.md))
## Details
Same as [`&cleanoutput`](cleanoutput.md), except it still shows the play button that allows handling gesture requirements in chrome.
Director direct overlay messages are still visible.
When using `&cleanish` and [`&record`](../recording-parameters/and-record.md), you'll get the record button showing, but nothing else.
## Related
[cleanoutput.md](cleanoutput.md)
[cleandirector.md](../../director-settings/cleandirector.md)
---
description: Keeps the output as clean as possible from UI elements
---
# &cleanoutput
General Option! ([`&push`](../../source-settings/push.md), [`&room`](../../general-settings/room.md), [`&view`](../view-parameters/view.md), [`&scene`](../view-parameters/scene.md))
## Aliases
* `&clean`
## Details
Hides many of the UI elements and pop-ups that may cause unwanted visual elements not desired in a high-stakes live stream.
## Related
[cleanish.md](cleanish.md)
[cleandirector.md](../../director-settings/cleandirector.md)
[and-cleanviewer.md](and-cleanviewer.md)
---
description: Loads a custom CSS file
---
# &css
General Option! ([`&push`](../../source-settings/push.md), [`&room`](../../general-settings/room.md), [`&view`](../view-parameters/view.md), [`&scene`](../view-parameters/scene.md))
## Options
Example: `&css=https%3A%2F%2Fbackup.vdo.ninja%2Fdev4321%2Fexamples%2Fmain.css`
Value
Description
(encoded URL)
will show the VU-style meter that the director has by default already
Any URL-encoded URL that links to a CSS file.
Example:
[https://vdo.ninja/?css=https%3A%2F%2Fbackup.vdo.ninja%2Fdev4321%2Fexamples%2Fmain.css](https://vdo.ninja/?css=https%3A%2F%2Fbackup.vdo.ninja%2Fdev4321%2Fexamples%2Fmain.css)
You can use this tool to encode the URL you want to link to
[https://www.urlencoder.org/](https://www.urlencoder.org/)
## Details
Link to a remotely hosted CSS style sheet via the URL. You can stylize VDO.Ninja without needing to host anything more than a CSS file. The page elements are not visible until the remote style sheet has been loaded.
I've made the `&css` parameter within VDO.Ninja more tolerant to invalid forms of input, so if you don't know what URL or Base64 encoding is, you might be able to get away without using any now.
[`https://vdo.ninja/?css=body{background-color:blue!important}`](https://vdo.ninja/?css=body{background-color:blue!important})
### base64css
You can pass CSS as a base64-encoded string using the [`&base64css`](and-base64css.md) parameter. This needs to be URLComponent encoded first, and then converted to base 64.
The [https://invite.vdo.ninja/](https://invite.vdo.ninja/) tool has an option to do these base64 encoding steps under "General Options".
### Customizable director's dock for OBS
Customizable director's dock for OBS example made:
`&css=minidirector.css`
Example:
[https://vdo.ninja/?css=minidirector.css\&cleanoutput\&hidesolo\&director](https://vdo.ninja/?css=minidirector.css\&cleanoutput\&hidesolo\&director)
## Related
[and-base64css.md](and-base64css.md)
---
description: Darkens the website and interface
---
# &darkmode
General Option! ([`&push`](../../source-settings/push.md), [`&room`](../../general-settings/room.md), [`&view`](../view-parameters/view.md), [`&scene`](../view-parameters/scene.md))
## Aliases
* `&nightmode`
## Options
Example: `&darkmode=0`
| Value | Description |
| ---------------- | ---------------------- |
| (no value given) | enables the dark-mode |
| `0` \| `false` | disables the dark-mode |
## Details
Enables the dark-mode stylings of the website.
Conversely, setting [`&lightmode`](and-lightmode.md), `&darkmode=0` or `&darkmode=false` will disable the dark-mode, forcing the light-mode.
The dark-mode will be selected automatically by default if your system is set to dark color mode, so this flag can be used to override that.
## Related
[and-lightmode.md](and-lightmode.md)
---
description: Applies an rule-of-thirds grid overlay to the self-preview
---
# &grid
Sender-Side Option! ([`&push`](../../source-settings/push.md))
## Aliases
* `&ruler`
* `&thirds`
## Options
Example: `&grid=./media/thirdshead.svg`
Value
Description
(no value given)
adds a white rule-of-thirds grid overlay
(encoded URL)
adds an image as a overlay
## Details
Applies an rule-of-thirds grid overlay to the self-preview video window. This is useful for passively nudging guests to better center themselves while on camera.
As of [v19.0](../../release-notes/v19.md), this only works for guests of a room or of a faux-room. It doesn't yet support basic push/view links, as those don't use the auto-mixer code, which is where this code is currently applied.
 (1).png>)
### Changes in Version 22
Added the option to customize the `&grid` effect by passing an image link (can help center guests).
A transparent PNG or an SVG file are the recommended options.
It will stretch to cover the camera preview-area, so probably best to keep things 16:9 aspect if needed.
URL can be URL-encoded, for more complex URLs. Simple URLs might work without.
Technically this can be used as an overlay for other things, but it only works with the self-preview.
Example: [`https://vdo.ninja/?push&grid=./media/thirdshead.svg`](https://vdo.ninja/?push\&grid=./media/thirdshead.svg)
Leave the passed value empty if you wish to have the white basic rule-of-thirds show as default.
* As of v22, it now works in non-room mode (basic push links):
[https://vdo.ninja/?push\&grid](https://vdo.ninja/?push\&grid)
* You can now also toggle it in the director's room to add it to the guest's link:
 (1).png>)
You can encode your URL here:
[https://www.urlencoder.org/](https://www.urlencoder.org/)
---
description: Adds a margin around the videos in pixel
---
# &margin
General Option! ([`&push`](../../source-settings/push.md), [`&room`](../../general-settings/room.md), [`&view`](../view-parameters/view.md), [`&scene`](../view-parameters/scene.md))
## Options
Example: `&margin=100`
| Value | Description |
| ---------------- | ------------------- |
| (no value given) | margin value = 10px |
| (integer value) | margin value in px |
## Details
Adds 10px around the videos for some spacing, by default. It can be customized.
`https://vdo.ninja/?scene&room=roomname&margin=100`
It's also available as a toggle to the director's room.
---
description: Optional audio meter style type
---
# &meterstyle
General Option! ([`&push`](../../source-settings/push.md), [`&room`](../../general-settings/room.md), [`&view`](../view-parameters/view.md), [`&scene`](../view-parameters/scene.md), [`&director`](../../viewers-settings/director.md))
## Aliases
* `&meter`
## Options
Example: `&meterstyle=3`
Value
Description
1 | (no value given)
will show the VU-style meter that the director has by default already
2
will show a green-border around the guest's video when they are talking
3
will show a little green dot in the top-right corner when the guest's talking; this is default for the guest's view already
4
no meter is shown, but a data-attribute named data-loudness is applied to the video element. This can be targeted with CSS to do custom styles via OBS browser source or with &css
5
has the audio-only background image pulse larger in size when that specific guest is speaking
## Details
If you add this to a director's/guest's URL, it will show an optional audio style type, when a guest is talking.
When using any `&meterstyle` effect, I now include a data attribute called `data-speaking` to the video element. It will be either 0, 1, or 2. 0 is quiet, 1 is whispering, and 2 is loud. `&meterstyle=4` includes a fine-grain option already for loudness as an attribute, but for basic CSS needs, this option might be more approachable.
You can use this attribute to use CSS to customize your own effects when someone speaks. You can further target what is CSS used based on a specific guest by using each video's stream ID data attribute as well.
### &meterstyle=4
When using `&meterstyle=4` or greater, the background of an audio-only element is transparent now; not black. I also specifically hide the video-control bar when using `&meterstyle=4`, but you can use [`&videocontrols`](../newly-added-parameters/and-videocontrols.md) to add them back in if needed.
### &meterstyle=5
It can be used in conjunction with [`&bgimage`](and-bgimage.md) to specific a custom background image for the video, which will pulse in size. ie: `&meterstyle=5&bgimage=./media/avatar1.png`
## Related
[style.md](style.md)
---
description: >-
Labels, styles, clean output, CSS, mirroring, margin, dark mode, background
color, disable tallies etc.
---
# Design Parameters
They are separated in three groups: [general options](./#general-options) (push and view), [source side](./#source-side-options) (push) options and [viewer side](./#viewer-side-options) (view) options.
## General options
You can add them to both, source ([`&push`](../../source-settings/push.md)) and viewer ([`&view`](../view-parameters/view.md) or [`&scene`](../view-parameters/scene.md)) sides.
---
description: Rounds the edges of videos
---
# &rounded
General Option! ([`&push`](../../source-settings/push.md), [`&room`](../../general-settings/room.md), [`&view`](../view-parameters/view.md), [`&scene`](../view-parameters/scene.md))
## Aliases
* `&round`
## Options
Example: `&rounded=100`
Value
Description
(no value given)
50 px
(positive integer value)
the higher the number, the more aggressive the curve
## Details
This is a stylistic effect; it attempts to apply rounded edges to videos (crop-based).
The default value is 50-pixels. You can pass other integer values to customize the amount of curving; the higher the number, the more aggressive the curve.
This works great for solo-video streams where the video fits the window fully, but may not round the edges of videos that do not fit their container area. To compensate for this, using the [`&cover`](../view-parameters/cover.md) command as well can force the video to fit the window, and hence, have the rounded edges applied correctly.
An example of an aggressive rounded effect is with the following parameters:
`https://vdo.ninja/?view=streamID123&cover&rounded=1000`
## Related
[cover.md](../view-parameters/cover.md)
---
description: Display labels as a video overlay
---
# &showlabels
General Option! ([`&push`](../../source-settings/push.md), [`&room`](../../general-settings/room.md), [`&view`](../view-parameters/view.md), [`&scene`](../view-parameters/scene.md))
## Aliases
* `&showlabel`
* `&sl`
## Options
There are some preset style options, which can be passed to the parameter as a value. You can also choose to just edit the label's style with CSS, as discussed lower on this page.
Example: `&showlabels=ninjablue`
Value
Description
(no value given)
Generic styled display names
fire
Fire looking display names
ninjablue
VDO.Ninja styled display names
skype
Skype styled display names
teams
Microsoft Teams styled display names
toprounded
Top-center rounded display names
zoom
Zoom styled display names
rounded
Rounded lower-right names; bold
## Details
This parameter will display the user's display name or label on screen, as a text overlay. The label can be set either via the URL using the [`&label`](../../general-settings/label.md) parameter, or the room's director can set it dynamically via the "Add a label" option.
This parameter can be used on guest links, view links, or scene links. It will be sticky to each individual video and not the browser window as a whole.
Underscores "\_" used in label values will be replaced by spaces, allowing for word separation.
HTML5 Emojis 🎈 and some non-Latin characters are supported.
For example: `https://vdo.ninja/?showlabels=fire`
If no preset option is passed, a default generic style is used:
### Font size customization
You can change the font-size without using CSS, using the [`&fontsize`](../view-parameters/fontsize.md) parameter. CSS is also supported though.
Font-size of labels will adjust slightly based on the window size.
### Advanced Customization
CSS of the styles can be set via the OBS browser source stylesheet window.
The CSS class name you can customize is called `video-label`.
 (1) (1).png>)
You can copy the below code, modifying it as you desire, as a starting point. You'll still need to use `&showlabels` to trigger the labels to display though.
```
.video-label {
color: red;
bottom: 2vh;
left: 50%;
transform: translateX(-50%);
background: rgba(0, 0, 0, .8);
pointer-events:none;
border-radius: 5px;
font-size: 0.8em;
}
```
Below is another example, this time we target the video tile class, creating a margin above the video elements. We can then move the display label into that space, creating a label that is not overlaying the video itself, but still attached.
 (1).png>)
```
.tile {
margin-top: 10vh !important;
max-height: 90vh!important;
}
.video-label {
bottom:unset;
top:0;
text-align:middle;
left:unset;
background:unset;
text-shadow : 0 0 10px #035;
font-size: 7vh!important;
}
```
## Related
[label.md](../../general-settings/label.md)
[and-screensharelabel.md](../../newly-added-parameters/and-screensharelabel.md)
[fontsize.md](../view-parameters/fontsize.md)
[css.md](css.md)
[and-labelsuggestion.md](../setup-parameters/and-labelsuggestion.md)
---
description: Lets you select how audio-only elements are displayed in OBS and for guests
---
# &style
General Option! ([`&push`](../../source-settings/push.md), [`&room`](../../general-settings/room.md), [`&view`](../view-parameters/view.md), [`&scene`](../view-parameters/scene.md))
## Aliases
* `&st`
## Options
Example: `&style=2`
Value
Description
0
shows the audio-control bar with a little person as a background silhouette, if the stream is an audio-only. This lets you control the volume and mute and get some feedback that the stream is present
1 | (no value given)
hides audio-only windows from appearing. The default is for guests to see audio-only boxes for guests that do not have a video feed; the director is excluded
2
just shows an animated audio waveform of the speaker's voice, although I made the quality HD now
3
shows the audio meter, which you can customize using &meterstyle. You can conversely just use &meterstyle on its own, and mix it with a different style, and it will still work
4
will just show a black background for any audio-only source
5
will show a random color for a background, instead of just black
6
will show the first letter of the guest's display name, in a colored circle, with a black background. If no display name is provided, it will just be a colored circle on a black background
7
will include non-media-based push connections as video elements in a group room. This can include guests that joined without audio/video, directors, or a data-only connection, like maybe MIDI-output source
## Details
`&style` lets you select how media elements are displayed in OBS and for guests; audio-only elements in particular.
Styles are experimental and will undergo change, tweaks, and likely there are more to come.
The default style depends on numerous factors; the intent is to predict the most desirable for a given situation. Manually setting the style will override the default. Defaults may be changed from time to time, based on user feedback.
There is a toggle in the director's room which adds `&st` to the guest's invite link..png>)
## Related
[meterstyle.md](meterstyle.md)
[and-bgimage.md](and-bgimage.md)
[and-showall.md](and-showall.md)
---
description: Disables the Tally Light's visibility for that particular guest
---
# &tallyoff
Sender-Side Option! ([`&push`](../../source-settings/push.md))
## Aliases
* `¬ally`
* `&disabletally`
* `&to`
## Details
Disables the Tally Light's visibility for that particular guest.
## Related
[and-obsoff.md](and-obsoff.md)
---
description: Will make the tally sign larger and colorize the background of the page
---
# &tally
Sender-Side Option! ([`&push`](../../source-settings/push.md))
## Details
`&tally` will make the tally sign larger and colorize the background of the page, for added emphasis when the feed is added to OBS.
## Related
[tallyoff-1.md](tallyoff-1.md)
[and-obsoff.md](and-obsoff.md)
---
description: >-
Will let you specify the default for whether to transfer a guest from room to
room in broadcast mode or not
---
# &broadcasttransfer
Director Option! ([`&director`](../../viewers-settings/director.md))
## Aliases
* `&bct`
## Details
`&broadcasttransfer` will let you specify the default for whether to transfer a guest from room to room in [broadcast mode](../view-parameters/broadcast.md) or not. Mainly useful for when using [`&rooms`](../../director-settings/rooms.md), since there isn't a transfer menu option when using it, since its more of a hotkey option.
If a director clicks "transfer", there is a checkmark to enable "covert user into broadcast mode when transferred". This URL option enables it by default. It also then is enabled by default when using the quick-transfer feature used by [`&rooms`](../../director-settings/rooms.md).
## Related
[broadcast.md](../view-parameters/broadcast.md)
[rooms.md](../../director-settings/rooms.md)
[transfer-rooms.md](../../getting-started/rooms/transfer-rooms.md)
---
description: Hides the co-directors from appearing in the director's room
---
# &hidecodirectors
Director Option! ([`&director`](../../viewers-settings/director.md))
## Aliases
* `&hidedirector`
* `&hd`
## Details
`&hidecodirectors` will hide the co-directors from appearing in the director's room. You might have a few co-directors join you, but they might be taking up space, so this is a way to prevent that. It simply hides the boxes; they are still there at a code level.
Changed the logic so it stops the video/audio/IFrame/widget data from any director loading.
This is a bit like the opposite of [`&showdirector`](../../viewers-settings/and-showdirector.md), but only viewer side.
Another change is that it works with more than just one codirector hiding another codirector, but can be used with scenes, view links, or guests.
Lastly, this is not like [`&exclude`](../view-parameters/and-exclude.md), as it still allows the data-connection to happen between the two peers, allowing chat and two codirectors to sync their dashboards/commands. Keeping data connections active is important for directors, who rely on them to issue commands, so exclude is a bit to harsh in some cases.
## Related
[codirector.md](../../director-settings/codirector.md)
[director.md](../../viewers-settings/director.md)
---
description: >-
An ordered array of layouts, which can be used to switch between using the API
layouts action
---
# &layouts
Director Option! ([`&director`](../../viewers-settings/director.md))
## Options
Example: `&layouts=[[{"x":0,"y":0,"w":100,"h":100,"slot":0}],[{"x":0,"y":0,"w":100,"h":100,"slot":1}],[{"x":0,"y":0,"w":100,"h":100,"slot":2}],[{"x":0,"y":0,"w":100,"h":100,"slot":3}],[{"x":0,"y":0,"w":50,"h":100,"c":false,"slot":0},{"x":50,"y":0,"w":50,"h":100,"c":false,"slot":1}],[{"x":0,"y":0,"w":100,"h":100,"z":0,"c":false,"slot":1},{"x":70,"y":70,"w":30,"h":30,"z":1,"c":true,"slot":0}],[{"x":0,"y":0,"w":50,"h":50,"c":true,"slot":0},{"x":50,"y":0,"w":50,"h":50,"c":true,"slot":1},{"x":0,"y":50,"w":50,"h":50,"c":true,"slot":2},{"x":50,"y":50,"w":50,"h":50,"c":true,"slot":3}],[{"x":0,"y":16.667,"w":66.667,"h":66.667,"c":true,"slot":0},{"x":66.667,"y":0,"w":33.333,"h":33.333,"c":true,"slot":1},{"x":66.667,"y":33.333,"w":33.333,"h":33.333,"c":true,"slot":2},{"x":66.667,"y":66.667,"w":33.333,"h":33.333,"c":true,"slot":3}]]`
Value
Description
[layout1,layout2,...]
(URL-encoded ordered array)
## Details
`&layouts=[[{xxxxxx}]]` is a URL parameter option, where you can pass a set of different layouts (as a URL-encoded ordered array) to VDO.Ninja.
This is akin to using the [vdo.ninja/mixer](https://vdo.ninja/mixer), to visually set layouts, but instead you are just manually setting all the available layouts directly, bypassing the mixer app.
Once you have set the layouts, the "layout" [API](../../general-settings/api.md) feature becomes a bit more useful, as you can remotely activate any of those layouts with a simple API command.
I documented the 'layout' API option a bit here, but the tl;dr; is that you can either use this API call to set a layout from within the array of layouts that are set, or you can pass a full-fledge layout-object, for on-the-fly custom layouts.
ie: `{action:'layout',value':5}` or `{action:'layout',value':[{xxxx.layout-stuff-here.xxxx]]}`
fyi, the layout and the API in general work with the [vdo.ninja/mixer](https://vdo.ninja/mixer) page, so you can use it to create the layouts, and then manually switch between them via the API. The API is streamdeck-friendly.
You can assign guests to custom slots when using [`&slotmode`](and-slotmode.md) on the director's URL.
### URL example
`&layouts=[`
Layout1:
`[{"x":0,"y":0,"w":100,"h":100,"slot":0}],`
Layout2:
`[{"x":0,"y":0,"w":100,"h":100,"slot":1}],`
Layout3:
`[{"x":0,"y":0,"w":100,"h":100,"slot":2}],`
Layout4:
`[{"x":0,"y":0,"w":100,"h":100,"slot":3}],`
Layout5:
`[{"x":0,"y":0,"w":50,"h":100,"c":false,"slot":0},{"x":50,"y":0,"w":50,"h":100,"c":false,"slot":1}],`
Layout6:
`[{"x":0,"y":0,"w":100,"h":100,"z":0,"c":false,"slot":1},{"x":70,"y":70,"w":30,"h":30,"z":1,"c":true,"slot":0}],`
Layout7:
`[{"x":0,"y":0,"w":50,"h":50,"c":true,"slot":0},{"x":50,"y":0,"w":50,"h":50,"c":true,"slot":1},{"x":0,"y":50,"w":50,"h":50,"c":true,"slot":2},{"x":50,"y":50,"w":50,"h":50,"c":true,"slot":3}],`
Layout8:
`[{"x":0,"y":16.667,"w":66.667,"h":66.667,"c":true,"slot":0},{"x":66.667,"y":0,"w":33.333,"h":33.333,"c":true,"slot":1},{"x":66.667,"y":33.333,"w":33.333,"h":33.333,"c":true,"slot":2},{"x":66.667,"y":66.667,"w":33.333,"h":33.333,"c":true,"slot":3}]`
`]`
### Streamdeck usage
You need to add [`&api=xxx`](../../general-settings/api.md) to the director's URL to control the layouts via Streamdeck.
\*If you use the HTTP Get like this, you don't need to add `&layouts` to the director's URL.
Using these URLs change the layout of your scene in OBS. The URL you should use in OBS is the default one:
[https://vdo.ninja/?scene\&room=roomname](https://vdo.ninja/?scene\&room=roomname)
### Excel-based Layout Generator
[https://docs.google.com/spreadsheets/d/1cHBTfni-Os3SAITsXrrNJ3qVCMVjunuW3xugvw1dykw/edit#gid=151839312](https://docs.google.com/spreadsheets/d/1cHBTfni-Os3SAITsXrrNJ3qVCMVjunuW3xugvw1dykw/edit#gid=151839312)
Download it and save it as .xlsx - then you can edit it and create custom layouts for the `&layouts` parameter.
## Related
[and-slotmode.md](and-slotmode.md)
[api.md](../../general-settings/api.md)
[and-layout.md](../mixer-scene-parameters/and-layout.md)
---
description: Lets you set a pseudo 'master room password' as a director
---
# &maindirectorpassword
Director Option! ([`&director`](../../viewers-settings/director.md))
## Aliases
* `&maindirpass`
## Options
Example: `&maindirectorpassword=SomePassword123`
Value
Description
(alphanumeric-characters only)
the password you want to set for the main director
## Details
`&maindirectorpassword` lets you set a pseudo 'master room password' as a director. It helps avoid getting locked out as the director, if someone else tries to claim the director-role first. ie:
[`https://vdo.ninja/?director=ROOMNAME&maindirectorpassword=MASTERPASS`](https://vdo.ninja/?director=ROOMNAME\&maindirectorpassword=MASTERPASS)
This will add a [`&token`](../settings-parameters/and-token.md) value to the invite/scene links.
This token is used by the guests to check a remote database server to see who currently 'owns' the token; it persists though, even if the director is not connected.
When using `&maindirectorpassword` as a director, it tells this database that you are the owner, and it will persist even if you aren't connected to VDO.Ninja. The [`&token`](../settings-parameters/and-token.md) tells the guest to ignore other logic about who the director is, instead using the info provided by the token-lookup to determine whose the director.
I may change or revoke this feature, depending on how testing goes this week, as it's rather experimental.
## Related
[and-password.md](../setup-parameters/and-password.md)
[codirector.md](../../director-settings/codirector.md)
[and-token.md](../settings-parameters/and-token.md)
---
description: Hides some advanced guest options in the director's control center
---
# &novice
Director Option! ([`&director`](../../viewers-settings/director.md))
## Details
`&novice` hides some advanced guest items in the director's control center.
## Related
[director.md](../../viewers-settings/director.md)
---
description: Activates the Preview layout for the director's room by default
---
# &previewmode
Director Option! ([`&director`](../../viewers-settings/director.md))
## Details
There is a new button in the director's room. It lets you toggle between a Preview layout and the normal Director layout; the Preview layout will mirror what a basic [`&scene=0`](../view-parameters/scene.md) link would look like.
Useful if you want to switch to a guest-like mode as a director, and then switch back as needed to the director's room to make adjustments. To enter this mode by default,`&previewmode` can be used by the director.
## Related
[scene.md](../view-parameters/scene.md)
[director.md](../../viewers-settings/director.md)
---
description: Gives you the possibility to assign slots to the connected guests
---
# &slotmode
Director Option! ([`&director`](../../viewers-settings/director.md))
## Details
Adding `&slotmode` to a director's URL gives you the possibility to assign slots to the connected guests. While the layout switching options of the [Video Mixer](../../steves-helper-apps/mixer-app.md) will be missing when doing this as a normal director, you can still specify [`&layout`](../mixer-scene-parameters/and-layout.md) via the URL for multiple scenes that will obey the slot assignments (might interest advanced users or inspire user suggestions).
## Related
[mixer-app.md](../../steves-helper-apps/mixer-app.md)
[and-slot.md](../settings-parameters/and-slot.md)
[and-layout.md](../mixer-scene-parameters/and-layout.md)
[director.md](../../viewers-settings/director.md)
---
description: Options for &director URLs
---
# Director Parameters
Parameters specified for the director's control panel; have to be used together with the [`&director`](../../viewers-settings/director.md) parameter.
## Director Only Parameters
Will load a side-bar for guests with an IFrame embed, with support for YouTube / Twitch / Social Stream
---
description: >-
Like &queue, except the guest gets a message telling them they need to wait
until approved by the director
---
# &hold
Sender-Side Option! ([`&push`](../../source-settings/push.md), [`&room`](../../general-settings/room.md))
## Aliases
* `&queue3`
## Details
`&hold` added, with the alias `&queue3`, which is like [`&queue`](../../general-settings/queue.md), except the guest gets a message telling them they need to wait until approved by the director. They don't see the director until activated, and the director doesn't see the guest's video/audio either - just their control box with any label. Once activated, the director will see the guest's video/audio, and vice versa.
This mode do not apply when you have [`&queue`](../../general-settings/queue.md) also on the director's link, however, rather just when added to the guest-invite link only.
Transferring the guest to another room will also automatically activate the guest. You don't need to press the pink 'activate' button if you just intend to transfer them and don't want to talk to the guest you are screening.
## Related
[queue.md](../../general-settings/queue.md)
[and-holdwithvideo-alpha.md](and-holdwithvideo-alpha.md)
[and-screen-alpha.md](and-screen-alpha.md)
---
description: >-
Just like &hold, except the director does see the guest's video and audio
before the guest is activated
---
# &holdwithvideo
Sender-Side Option! ([`&push`](../../source-settings/push.md), [`&room`](../../general-settings/room.md))
## Aliases
* `&queue4`
## Details
`&holdwithvideo` added, with the alias `&queue4`, which is just like [`&hold`](and-hold-alpha.md), except the director does see the guest's video and audio before the guest is activated. The guest can't see the director until activated, but does get a message telling them they are waiting to be activated.
This mode do not apply when you have [`&queue`](../../general-settings/queue.md) also on the director's link, however, rather just when added to the guest-invite link only.
Transferring the guest to another room will also automatically activate the guest. You don't need to press the pink 'activate' button if you just intend to transfer them and don't want to talk to the guest you are screening.
## Related
[queue.md](../../general-settings/queue.md)
[and-hold-alpha.md](and-hold-alpha.md)
[and-screen-alpha.md](and-screen-alpha.md)
---
description: >-
Replaces the way &queue worked before, where the guest can see/hear the
director, but not other guests, until activated
---
# &screen
Sender-Side Option! ([`&push`](../../source-settings/push.md), [`&room`](../../general-settings/room.md))
## Aliases
* `&queue2`
## Details
`&screen` now replaces the way [`&queue`](../../general-settings/queue.md) worked before, where the guest can see/hear the director, but not other guests, until activated.
[`&queue`](../../general-settings/queue.md) was changed to not allow the guest to see the director's video, until the director activates the guest with their pink activate-guest button. Otherwise, it's the same as before.
`&queue2` is given the alias `&screen`, intending to imply you can use this mode to screen incoming guests by talking to them, before approving them.
This mode do not apply when you have [`&queue`](../../general-settings/queue.md) also on the director's link, however, rather just when added to the guest-invite link only.
Transferring the guest to another room will also automatically activate the guest. You don't need to press the pink 'activate' button if you just intend to transfer them and don't want to talk to the guest you are screening.
## Related
[queue.md](../../general-settings/queue.md)
[and-hold-alpha.md](and-hold-alpha.md)
[and-holdwithvideo-alpha.md](and-holdwithvideo-alpha.md)
---
description: Options for guest queuing and approving system
---
# Guest queuing Parameters
## For Director and Guests
Will transfer a guest from one room into another, but once transferred, the guest will be in Queue mode
\*NEW IN VERSION 24
---
description: Option to change outbound audio bitrate of the &meshcast parameter
---
# &meshcastaudiobitrate
Meshcast Option / Sender-Side Option! ([`&meshcast`](../../newly-added-parameters/and-meshcast.md), [`&push`](../../source-settings/push.md))
## Aliases
* `&mcaudiobitrate`
* `&mcab`
* `&meshcastab`
## Options
Example: `&meshcastaudiobitrate=128`
Value
Description
(integer value)
publishing Meshcast audio bitrate in kbps
## Details
`&meshcastab` controls the outbound audio bitrate of the [`&meshcast`](../../newly-added-parameters/and-meshcast.md) parameter. Without it, it will be a variable bitrate, up to 32-kbps per channel. With it added, it will be CBR, at the specified bitrate.
## Related
[and-meshcast.md](../../newly-added-parameters/and-meshcast.md)
[and-meshcastbitrate.md](../../meshcast-settings/and-meshcastbitrate.md)
---
description: Lets you specify the Meshcast server to use
---
# &meshcastcode
Sender-Side Option! ([`&push`](../../source-settings/push.md))
## Aliases
* `&mccode`
## Options
Example: `&meshcastcode=usw2`
Value
Description
(no value given)
Chooses the best server automatically
(servercode)
Chooses the selected Meshcast server
Full server list: [https://meshcast.io/servers.json](https://meshcast.io/servers.json)
## Details
`&meshcastcode`lets you specify the Meshcast server to use. This was already possible with just [`&meshcast`](../../newly-added-parameters/and-meshcast.md), but if you wanted to specify audio/video-only modes as well as the server, this new option will let you specify the server another way, allowing both options to work.
ie: [`https://vdo.ninja/?meshcastcode=cae1&meshcast=video`](https://vdo.ninja/?meshcastcode=cae1\&meshcast=video)
You can select the Meshcast server via URL Parameter, if you want low-level control there.
If you don't set it, the best one will be chosen automatically. If the specified one isn't found, the next best is used.
Example: `&meshcastcode=usw2`
Value
Description
(servercode)
Meshcast server
cae1
Canada-East 1
cae2
Canada-East 2
use1
USA-East 1
use2
USA-East 2
usw1
USA-West 1
usw2
USA-West 2
fr1
France
de1
Germany
usc1
Dev-server
Full server list: [https://meshcast.io/servers.json](https://meshcast.io/servers.json)
## Related
[and-meshcast.md](../../newly-added-parameters/and-meshcast.md)
https://meshcast.io/
---
description: Tells a sender to provide a p2p stream, rather than a Meshcast stream
---
# &nomeshcast
Viewer-Side Option! ([`&view`](../view-parameters/view.md), [`&scene`](../view-parameters/scene.md), [`&room`](../../general-settings/room.md), [`&solo`](../mixer-scene-parameters/and-solo.md))
## Details
`&nomeshcast` is a viewer-side option that tells a sender to provide a p2p stream, rather than a Meshcast stream, if they have [`&meshcast`](../../newly-added-parameters/and-meshcast.md) active. A bit of a niche option, but might be useful if bandwidth or latency is a consideration for a specific viewer, like the director.
## Related
[and-meshcast.md](../../newly-added-parameters/and-meshcast.md)
---
description: >-
Options for the &meshcast parameter like audio filters, bitrate, screen-share,
codecs etc.
---
# Meshcast Parameters
**Meshcast Parameters** are specific to the [`&meshcast`](../../newly-added-parameters/and-meshcast.md) parameter. They are all parameters for the publisher's side ([`&push`](../../source-settings/push.md)) and have to be used together with [`&meshcast`](../../newly-added-parameters/and-meshcast.md).
## Source side options
creates simulated guest videos, based on the value passed to the parameter
(no value given)
4 fake guests added
## Details
`&fakeguests=N` creates simulated guest videos, based on the value passed to the parameter, using real-guests where possible. The default value is 4.
You can use this feature to help position and visualize what [`&cover`](../view-parameters/cover.md), [`&portrait`](../view-parameters/and-portrait.md), etc. looks like.
This doesn't yet support labels or layouts really, but I welcome feedback. Currently I just threw up a video of me, 16:9, of 500-kbps.
You don't actually need to create a room / scene to play with it.
Try it at: [https://vdo.ninja/?room=xxxxtestxxxx\&scene\&cover\&square\&fakeguests=7](https://vdo.ninja/?room=xxxxtestxxxx\&scene\&cover\&square\&fakeguests=7)
## Related
[cover.md](../view-parameters/cover.md)
[scene.md](../view-parameters/scene.md)
---
description: >-
Keeps all incoming videos oriented (rotated) so that the aspect ratio is
always above 1
---
# &forceviewerlandscape (alpha)
Viewer-Side Option! ([`&scene`](../view-parameters/scene.md), [`&room`](../../general-settings/room.md))
## Options
Example: `&forceviewerlandscape=90`
Value
Description
(value in degrees)
value, how much the video is rotated in degree
(no value given)
270
180
locked upside down
## Details
`&forceviewerlandscape` keeps all **incoming** videos oriented (rotated) so that the [aspect ratio](../video-parameters/and-aspectratio.md) is always above 1, so effectively, forces landscape mode.
ie: [https://vdo.ninja/?forceviewerlandscape\&view=xxx](https://vdo.ninja/?forceviewerlandscape\&view=xxx)
This normally shouldn't be needed, as the sender side should control the orientation, but the native app seems to auto rotate back to portrait when the phone is locked. Until that is fixed, this can work around the issue I think, by rotating the video when it detects its been rotated.
The parameter can take a value, the default is `270`, which is how much the video is rotated. You might want to also use `90`, or in the case you want it to be locked upside down, you can technically pass `180` I guess?
## Related
[and-aspectratio.md](../video-parameters/and-aspectratio.md)
[and-forcelandscape.md](../mobile-parameters/and-forcelandscape.md)
---
description: >-
Will hide the default big play button that overlays a video when auto play is
not allowed
---
# &hideplaybutton
Viewer-Side Option! ([`&view`](../view-parameters/view.md), [`&scene`](../view-parameters/scene.md), [`&room`](../../general-settings/room.md))
## Aliases
* `&hpb`
## Details
`&hideplaybutton` will hide the default big play button that overlays a video when auto play is not allowed. This option is useful when you want to perhaps include your own playbutton as part of the poster image.
Example of the command:
```
https://vdo.ninja/?view=YbFmisR&poster=./media/bg_sample.webp&hideplaybutton
```
## Related
[and-poster.md](and-poster.md)
---
description: Includes streams that do not exist in the room
---
# &include
Viewer-Side Option! ([`&scene`](../view-parameters/scene.md), [`&room`](../../general-settings/room.md))
## Options
Example: `&include=StreamID`
| Value | Description |
| ----------- | ------------------------------------------------------------------- |
| (stream ID) | stream ID of a publisher outside of a room with a matching password |
## Details
`&include`, which is like [`&view`](../view-parameters/view.md), except it's for including streams that do not exist in the room you are in, assuming those streams are not in another room and have matching passwords. So, useful for adding basic push-streams that you might want to be in multiple rooms at the same time, but not actually be locked to any room. ([`&view`](../view-parameters/view.md), conversely, is pretty exclusive; that or nothing.)
## Related
[view.md](../view-parameters/view.md)
[and-exclude.md](../view-parameters/and-exclude.md)
---
description: >-
Shows the guest a return feed of the current mixer layout when using the Mixer
App
---
# &layout
Viewer-Side Option! ([`&room`](../../general-settings/room.md), [`&view`](../view-parameters/view.md))
## Details
Adding `&layout` to a guest link shows the guest a return feed of the current mixer layout when using the [Mixer App](../../steves-helper-apps/mixer-app.md).
## Related
[mixer-app.md](../../steves-helper-apps/mixer-app.md)
[and-layouts.md](../director-parameters/and-layouts.md)
---
description: >-
Will force a the VDO.Ninja's mixer output keep the mixed render contained to a
specific aspect-ratio, regardless of the browser's window size
---
# &locked
Viewer-Side Option! ([`&scene`](../view-parameters/scene.md))
## Options
Example: `&locked=portrait`
Value
Description
landscape | (no value given)
16:9 aspect ratio
portrait
9:16 aspect ratio
square
1:1 aspect ratio
1.77777
aspect ratio
## Details
`&locked` will force a the VDO.Ninja's mixer output keep the mixed render contained to a specific aspect-ratio, regardless of the browser's window size. (as seen in photo)
You'll get black bars (or whatever the background color is) as padding on the sides to force the inner video elements into the desired aspect ratio
When using `&locked`, the default aspect ratio is 16:9, but you can pass a floating point value for different aspect ratios, or use `landscape` (instead of `1.77777`) / `portrait` / `square` as presets if needed.
Padding is centered, so the rendered video will be in the center of the screen. (tho using [`&widget`](../settings-parameters/and-widget.md) mode might break things though).
This `&locked` option is added to the [Mixer App](../../steves-helper-apps/mixer-app.md)'s WHIP/**Twitch publishing output option**, so regardless of window size, you'll get a 16:9 video render.
## Related
[and-structure.md](../design-parameters/and-structure.md)
[and-aspectratio.md](../video-parameters/and-aspectratio.md)
---
description: Does a few things when it detects motion in a video
---
# &motiondetection
Viewer-Side Option! ([`&scene`](../view-parameters/scene.md), [`&room`](../../general-settings/room.md))
## Aliases
* `&motionswitch`
## Options
Example: `&motiondetection=40`
Value
Description
1 to 64
sensitivity of the motion detection trigger as a value
(no value given)
sensitivity 15 of the motion detection trigger
## Details
`&motiondetection` does a few things when it detects motion in a video (viewer-side).
It will feature highlight the specific video where movement is detected, if more than one video is included in the mix. Using a custom [`&layout`](and-layout.md) will disable this feature though, and use the layout instead.
It will also trigger an IFrame API event, which might be useful if you want to use VDO.Ninja as a security camera; you could script things to auto-record the video or log data events.
It will also switch to itself in OBS as a scene, which might be how this will be mainly used. (you need to have the OBS browser source's page permission set to high to allow this to actually work)
You can adjust the sensitivity of the motion detection trigger as a value; the default I think is 15, but it can be between 1 and 64 I think.
## Related
[activespeaker.md](../view-parameters/activespeaker.md)
---
description: Lets you specify a poster image for videos that have not yet started playing
---
# &poster
Viewer-Side Option! ([`&view`](../view-parameters/view.md), [`&scene`](../view-parameters/scene.md), [`&room`](../../general-settings/room.md))
## Options
Example: `&poster=./media/bg_sample.webp`
| Value | Description |
| ------------- | -------------------------------------------------------------- |
| (encoded URL) | takes an encoded URL, pointing to a CORS-accessible image file |
## Details
`&poster` lets you specify a poster image for videos that have not yet started playing (using the built-in HTML poster attribute). This flag takes an encoded URL, pointing to a CORS-accessible image file.
Example of the command:
```
https://vdo.ninja/?view=YbFmisR&poster=./media/bg_sample.webp&hideplaybutton
```
## Related
[and-hideplaybutton.md](and-hideplaybutton.md)
---
description: Similar to &scene, but tells the system to be a solo-link
---
# &solo
Viewer-Side Option! ([`&room`](../../general-settings/room.md))
## Details
`&solo` is used to bring a solo-link of a guest in a room into OBS Studio.
[https://vdo.ninja/?view=streamid1\&room=roomname\&solo](https://vdo.ninja/?view=streamid1\&room=roomname\&solo)
This tells the system to only view `streamid1` in the specified room. `&solo` and [`&scene`](../view-parameters/scene.md) also tells the system not to be a publisher, but a viewer.
This parameter behaves just as [`&scene`](../view-parameters/scene.md). The only difference is, that the system does not apply custom 'layouts' to `&solo` links.
Links updates in the director's room from Version 22 onwards.
## Related
[scene.md](../view-parameters/scene.md)
---
description: Layout and design for the mixer in rooms/scenes, preload/hidden scene bitrate
---
# Mixer/Scene Parameters
Mixer/Scene Parameters are viewer side options. You can add them to guest's URLs in rooms and scene URLs.
## **Room and Scene options**
You have to add them to [`&scene`](../view-parameters/scene.md) or [`&room`](../../general-settings/room.md) or [`&view`](../view-parameters/view.md) URLs to change the behaviour of the Video Mixer.
Does a few things when it detects motion in a video
\*NEW IN VERSION 24
## **Only Scene options**
You have to add them to [`&scene`](../view-parameters/scene.md) or [`&view`](../view-parameters/view.md) URLs.
---
description: Shows only the last added video to a scene
---
# &scenetype
Viewer-Side Option! ([`&scene`](../view-parameters/scene.md))
## Aliases
* `&type`
## Options
Example: `&scenetype=2`
Value
Description
1
just shows the last guest that was added in the scene, but doesn't mute the previous guests
2
just shows the last guest that was added in the scene
3
the general idea is it will only show the video that is in a particular ordered position (default, position = 1), rather than all the videos in the scene
## Details
You can change the behaviour of scenes a bit with this parameter.
`&scenetype` can be set to `1` or `2`, which overrides the default scene state.
Scene state of 1 and 2 will only show the last video added to a group scene. `&scenetype=2` will mute the other videos, while `&scenetype=1` will not mute previously added videos.
`&scenetype=3` - Usage is like this: `&scene&room=roomname&scenetype=3&order=1` , where [`&order=N`](../../source-settings/order.md) is optional. This feature isn't set in stone yet, but the general idea is it will only show the video that is in a particular ordered position (default, position = 1), rather than all the videos in the scene. When someone leaves, the spots are recalculated. The order that the positions are based on is calculated via alphanumeric sorting of connection IDs, though I wish to improve this to be probably sync with the director's order. Anyways, this feature was a result of a user request.
This URL parameter option is a bit of a hack currently and may be replaced in the future.
This parameter is added to scene view links.
## Related
[scene.md](../view-parameters/scene.md)
[order.md](../../source-settings/order.md)
---
description: >-
Loads the site into an "app mode" and allows you to load a new URL via the
website itself
---
# &app
Sender-Side Option! ([`&push`](../../source-settings/push.md))
## Details
`&app` loads the site into an "**app mode**" and allows you to load a new URL via the website itself.
This parameter is enabled in the mobile native app's new website-mode option by default (the screen share option is also hidden).
---
description: Lets you specify either the front or rear facing camera as the default camera
---
# &facing
Sender-Side Option! ([`&push`](../../source-settings/push.md))
## Options
Example: `&facing=rear`
Value
Description
rear | environment | back
rear-facing camera
front | user
front-facing camera
## Details
The `&facing` setting lets you specify either the front or rear facing camera as the default camera. Passing one of `rear`, `environment`, `back`, `front`, and `user` are required to specify whether to select back or front.
Example usage:[`https://vdo.ninja/?webcam&facing=rear`](https://vdo.ninja/?webcam\&facing=rear)
`&facing` takes priority over [`&videodevice`](../../source-settings/videodevice.md), but it will fail to [`&videodevice`](../../source-settings/videodevice.md) or the default behaviour if the rear/front camera can't be selected automatically. If there are multiple rear or front cameras, it will use the first one. [`&videodevice=0`](../../source-settings/videodevice.md) will disable the video outright.
## Related
[and-forcelandscape.md](and-forcelandscape.md)
[and-forceportrait.md](and-forceportrait.md)
---
description: Forces iOS devices to publish video to this room
---
# &forceios
Sender-Side Option! ([`&push`](../../source-settings/push.md))
## Details
By default, iOS devices do not publish video to other guests in a group room.
iOS devices can publish **THREE (3)** video streams at any one time, before things explode.
## Related
[and-notios.md](and-notios.md)
---
description: >-
Forces the video output to landscape mode, regardless of how the phone is
rotated
---
# &forcelandscape
Sender-Side Option! ([`&push`](../../source-settings/push.md))
## Aliases
* `&forcedlandscape`
* `&fl`
## Details
Forces the video output to landscape mode (16:9), regardless of how the phone is rotated.
You add this flag to the sender's side, and it applies to the sender and the viewers of that video stream. There is a short sub-second delay that it takes to counter-act any system-flipping. It can be used in conjunction with [`&rotate`](../design-parameters/and-rotate.md), if you need to do a 180 or something also.
## Related
[and-forceportrait.md](and-forceportrait.md)
[and-forceviewerlandscape.md](../mixer-scene-parameters/and-forceviewerlandscape.md)
---
description: >-
Forces the video output to portrait mode, regardless of how the phone is
rotated
---
# &forceportrait
Sender-Side Option! ([`&push`](../../source-settings/push.md))
## Aliases
* `&forcedportrait`
* `&fp`
## Details
Forces the video output to portrait mode (9:16), regardless of how the phone is rotated.
You add this flag to the sender's side, and it applies to the sender and the viewers of that video stream. There is a short sub-second delay that it takes to counter-act any system-flipping. It can be used in conjunction with [`&rotate`](../design-parameters/and-rotate.md), if you need to do a 180 or something also.
## Related
[and-forcelandscape.md](and-forcelandscape.md)
---
description: Just tells the system that its not an iOS device, or iPad, even if it is
---
# ¬ios
Sender-Side Option! ([`&push`](../../source-settings/push.md))
## Details
`¬ios`, as in "not iOS", just tells the system that it's not an iOS device, or iPad, even if it is. This might change the behavior of the phone in certain ways, mainly for the purposes of debugging.
## Related
[and-forceios.md](and-forceios.md)
---
description: Options to specify push links and guest invite links for mobile phones
---
# Mobile Parameters
## Source side options
All these options are for push links and guest invite links in a room ([`&push`](../../source-settings/push.md) / [`&room`](../../general-settings/room.md))
Loads the site into an "app mode" and allows you to load a new URL via the website itself
---
description: Shows the video control bar
---
# &videocontrols
General Option! ([`&push`](../../source-settings/push.md), [`&room`](../../general-settings/room.md), [`&view`](../view-parameters/view.md), [`&scene`](../view-parameters/scene.md))
## Aliases
* `&controls`
## Options
Example: `&videocontrols=false`
| Value | Description |
| ----------------------- | --------------------------- |
| (no value given) | Shows the video control bar |
| `0` \| `false` \| `off` | Hides the video control bar |
## Details
`&videocontrols` will show the video control bar (provides access to full screen on mobile). You can also show the control bar with `Right-Click` -> `Show control bar`.
This is not the same control bar as the user control bar. Also, be sure to not accidentally unmute yourself -- echo feedback galore.
## Related
[and-hands-1.md](../buttons-and-control-bar-parameters/and-hands-1.md)
[and-nocontrols.md](../settings-parameters/and-nocontrols.md)
[and-autohide.md](../../parameters-only-on-beta/and-autohide.md)
---
description: >-
You can add a custom image which shows up while waiting for the &scene or
&view link
---
# &waitimage
Viewer-Side Option! ([`&scene`](../view-parameters/scene.md), [`&view`](../view-parameters/view.md))
## Options
Example: `&waitimage=https%3A%2F%2Fvdo.ninja%2Fmedia%2Flogo_cropped.png`
| Value | Description |
| ------------- | ------------------------ |
| (encoded URL) | Specifies a custom image |
## Details
This is for when waiting for the [`&scene`](../view-parameters/scene.md) or [`&view`](../view-parameters/view.md) link to load. You can add a custom image which shows up while waiting for the [`&scene`](../view-parameters/scene.md) or [`&view`](../view-parameters/view.md) link.
Example:
[`https://vdo.ninja/?view=streamid&waitmessage=hello&waittimeout=0&waitimage=https%3A%2F%2Fvdo.ninja%2Fmedia%2Flogo_cropped.png`](https://vdo.ninja/?view=streamid\&waitmessage=hello\&waittimeout=0\&waitimage=https%3A%2F%2Fvdo.ninja%2Fmedia%2Flogo\_cropped.png)
It fits to the screen, and [`&cover`](../view-parameters/cover.md) will have it 'cover' the screen.
When using `&waitimage`, the specified 'waiting to connect' image will appear after all connections end.
It overrides [`&cleanoutput`](../design-parameters/cleanoutput.md).
You can encode the URL here:
[https://www.urlencoder.org/](https://www.urlencoder.org/)
## Related
[and-waitmessage.md](and-waitmessage.md)
[and-waittimeout.md](and-waittimeout.md)
[and-bgimage.md](../design-parameters/and-bgimage.md)
[and-background.md](../design-parameters/and-background.md)
---
description: >-
You can add a custom message which shows up while waiting for the &scene or
&view link
---
# &waitmessage
Viewer-Side Option! ([`&scene`](../view-parameters/scene.md), [`&view`](../view-parameters/view.md))
## Options
Example: `&waitmessage=hello`
| Value | Description |
| -------- | ------------------- |
| (string) | Specifies a message |
## Details
This is for when waiting for the [`&scene`](../view-parameters/scene.md) or [`&view`](../view-parameters/view.md) link to load. You can add a custom message which shows up while waiting for the [`&scene`](../view-parameters/scene.md) or [`&view`](../view-parameters/view.md) link.
Example:
[`https://vdo.ninja/?view=streamid&waitmessage=hello&waittimeout=0&waitimage=https%3A%2F%2Fvdo.ninja%2Fmedia%2Flogo_cropped.png`](https://vdo.ninja/?view=streamid\&waitmessage=hello\&waittimeout=0\&waitimage=https%3A%2F%2Fvdo.ninja%2Fmedia%2Flogo\_cropped.png)
It overrides [`&cleanoutput`](../design-parameters/cleanoutput.md).
## Related
[and-waitimage.md](and-waitimage.md)
[and-waittimeout.md](and-waittimeout.md)
---
description: >-
Specifies a delay for &waitimage and &waitmessage while waiting for the &scene
or &view link
---
# &waittimeout
Viewer-Side Option! ([`&scene`](../view-parameters/scene.md), [`&view`](../view-parameters/view.md))
## Options
Example: `&waittimeout=3000`
| Value | Description |
| --------------- | ----------- |
| (integer value) | Delay in ms |
## Details
This is for when waiting for the [`&scene`](../view-parameters/scene.md) or [`&view`](../view-parameters/view.md) link to load. It specifies a delay for [`&waitimage`](and-waitimage.md) and [`&waitmessage`](and-waitmessage.md) while waiting for the [`&scene`](../view-parameters/scene.md) or [`&view`](../view-parameters/view.md) link.
Example:
[`https://vdo.ninja/?view=streamid&waitmessage=hello&waittimeout=0&waitimage=https%3A%2F%2Fvdo.ninja%2Fmedia%2Flogo_cropped.png`](https://vdo.ninja/?view=streamid\&waitmessage=hello\&waittimeout=0\&waitimage=https%3A%2F%2Fvdo.ninja%2Fmedia%2Flogo\_cropped.png)
It overrides [`&cleanoutput`](../design-parameters/cleanoutput.md).
## Related
[and-waitimage.md](and-waitimage.md)
[and-waitmessage.md](and-waitmessage.md)
---
description: >-
If the total bitrate drops below the specified bitrate, the viewer will
auto-hide the audio and video for that stream
---
# &bitratecutoff
Viewer-Side Option! ([`&view`](../view-parameters/view.md), [`&scene`](../view-parameters/scene.md), [`&room`](../../general-settings/room.md))
## Aliases
* `&bitcut`
## Options
Example: `&bitratecutoff=500`
| Value | Description |
| ---------------- | ----------------------------- |
| (no value given) | video cuts off under 300-kbps |
| (integer value) | cut off bitrate in kbps |
## Details
`&bitratecutoff` is a viewer-side parameter. If the total bitrate drops below the specified bitrate (default value of 300), the viewer will auto-hide the audio and video for that stream. It will un-hide once the average bitrate returns above 300-kbps.
There is a 3-second delay in calculating the average bitrate. Won't work with viewers that are Firefox/Safari; just Chrome/Chromium, so OBS, vMix, Electron Capture, Chrome. This is because Firefox/Safari lack the stats in VDO.Ninja needed to trigger this.
When using `&bitratecutoff` on a room scene, it won't trigger due to a director being in the room with no video, unless they are using [`&showdirector`](../../viewers-settings/and-showdirector.md).
## Related
[and-cutscene.md](../settings-parameters/and-cutscene.md)
[and-statsinterval.md](and-statsinterval.md)
---
description: >-
Lets you change the default stats update interval from 3-seconds to something
else
---
# &statsinterval
Viewer-Side Option! ([`&view`](../view-parameters/view.md), [`&scene`](../view-parameters/scene.md), [`&room`](../../general-settings/room.md))
## Options
Example: `&statsinterval=1500`
| Value | Description |
| ---------------- | ------------------------------- |
| (no value given) | stats update interval = 3000-ms |
| (integer value) | stats update interval in ms |
## Details
`&statsinterval` lets you change the default stats update interval from 3-seconds to something else. Changing it to 1-second or 10-seconds might suit your needs better when using [`&bitratecutoff`](and-bitratecutoff.md), or if you just want frequent updates. Changing the stats interval will impact the auto-keyframe fix feature, potentially breaking it, but this won't be an issue with OBS 27.2 and onwards.
## Related
[and-bitratecutoff.md](and-bitratecutoff.md)
[and-stats.md](../../general-settings/and-stats.md)
---
description: >-
Records the local video and the remote video(s) automatically on their initial
load
---
# &autorecord
General Option! ([`&push`](../../source-settings/push.md), [`&room`](../../general-settings/room.md), [`&view`](../view-parameters/view.md), [`&scene`](../view-parameters/scene.md), [`&solo`](../mixer-scene-parameters/and-solo.md))
## Options
Example: `&autorecord=1500`
Value
Description
0
No video recorded; audio tentatively recorded as 32bit PCM lossless.
(negative integer)
No video recorded; audio recorded as {integer} kbps OPUS file. eg: -120 - Audio only at 120 kbps.
(positive integer)
Recorded video bitrate in kbps.
## Details
`&autorecord` will record the local and remote videos automatically on their initial load. This applies to the director, guest, scenes, and whatever really.
You can stop/restart recordings as needed via the right-click menu per each video for now, until I can design a nicer UI for managing multi-recording state at least.
You can pass the default recording bitrate as a value to the parameter, like you might if using [`&record`](and-record.md).
### Update in [v23](../../releases/v23.md)
There are buttons in the room settings of the director to start/stop _all_ recordings; both remote/local.
## Related
[and-record.md](and-record.md)
[and-autorecordlocal.md](and-autorecordlocal.md)
[and-autorecordremote.md](and-autorecordremote.md)
---
description: Records just the local video automatically on their initial load
---
# &autorecordlocal
General Option! ([`&push`](../../source-settings/push.md), [`&room`](../../general-settings/room.md), [`&view`](../view-parameters/view.md), [`&scene`](../view-parameters/scene.md), [`&solo`](../mixer-scene-parameters/and-solo.md))
## Options
Example: `&autorecordlocal=2000`
Value
Description
0
No video recorded; audio tentatively recorded as 32bit PCM lossless.
(negative integer)
No video recorded; audio recorded as {integer} kbps OPUS file. eg: -120 - Audio only at 120 kbps.
(positive integer)
Recorded video bitrate in kbps.
## Details
`&autorecordlocal` will record the local video automatically on their initial load. This applies to the director, guest, scenes, and whatever really.
You can stop/restart recordings as needed via the right-click menu per each video for now, until I can design a nicer UI for managing multi-recording state at least.
You can pass the default recording bitrate as a value to the parameter, like you might if using [`&record`](and-record.md).
### Update in [v23](../../releases/v23.md)
There are buttons in the room settings of the director to start/stop _all_ recordings; both remote/local.
## Related
[and-record.md](and-record.md)
[and-autorecord.md](and-autorecord.md)
[and-autorecordremote.md](and-autorecordremote.md)
---
description: Records just the remote video(s) automatically on their initial load
---
# &autorecordremote
General Option! ([`&push`](../../source-settings/push.md), [`&room`](../../general-settings/room.md), [`&view`](../view-parameters/view.md), [`&scene`](../view-parameters/scene.md), [`&solo`](../mixer-scene-parameters/and-solo.md))
## Options
Example: `&autorecordremote=1500`
Value
Description
0
No video recorded; audio tentatively recorded as 32bit PCM lossless.
(negative integer)
No video recorded; audio recorded as {integer} kbps OPUS file. Eg: -120 - Audio only at 120 kbps.
(positive integer)
Recorded video bitrate in kbps.
## Details
`&autorecordremote` will record the remote video(s) automatically on their initial load. This applies to the director, guest, scenes, and whatever really.
You can stop/restart recordings as needed via the right-click menu per each video for now, until I can design a nicer UI for managing multi-recording state at least.
You can pass the default recording bitrate as a value to the parameter, like you might if using [`&record`](and-record.md).
### Update in [v23](../../releases/v23.md)
There are buttons in the room settings of the director to start/stop _all_ recordings; both remote/local.
## Related
[and-record.md](and-record.md)
[and-autorecord.md](and-autorecord.md)
[and-autorecordlocal.md](and-autorecordlocal.md)
---
description: PCM audio recordings
---
# &pcm
Sender-Side Option! ([`&push`](../../source-settings/push.md))
## Details
Video recordings will be saved as Video + PCM audio format.
### Converting and playing back WebM-PCM
WebM is a universal container of sorts when used within a Chromium browser, but it doesn't always work well for VLC or popular video editors. FFmpeg can be used to convert to other formats though, including MP4 and WAV, typically without transcoding.
To make converting from WebM to other formats easier, a version of FFmpeg is hosted within VDO.Ninja for this. It can be located here at [https://vdo.ninja/convert](https://vdo.ninja/convert), with several of the most common conversion options ready to go, such as WebM-PCM to WAV-PCM.
Due to memory limits and other browser limitations, this FFmpeg tool can only process files under about 2-gigabytes in size. For larger files, you may need to download and use a desktop version of [FFmpeg](https://ffmpeg.org/download.html) instead.
FFmpeg command lines are provided if you choose to run FFmpeg yourself locally, but if that is still to complicated, you can grab [Handbrake ](https://handbrake.fr/)for free; it's a GUI-based option that is fairly accessible.
## Related
[and-record.md](and-record.md)
---
description: Record functionality for guests
---
# &record
Sender-Side Option! ([`&push`](../../source-settings/push.md))
## Options
Example: `&record=1000`
Value
Description
0
No video recorded; audio tentatively recorded as 32bit PCM lossless
(negative integer)
No video recorded; audio recorded as {integer} kbps OPUS file. Eg: -120 - Audio only at 120 kbps
(positive integer)
Recorded video bitrate in kbps
false | off
Will disable the user from being able to record a video. Buttons for recording are hidden/deleted and the recording function is disabled when used; so the director won't even be able to trigger it remotely
## Details
### Recorded file properties
**`File format`**` ``- WebM.`
**`File Codec:`**` ``H264 or VP8 for video; OPUS or PCM for audio.`
Usually up to the browser.
Default bitrate will record at around 4000 kbps, but it will still prompt still for value if not set.
The Director of a room will be notified if a user is recording and they can start/stop the recording.
The Director of a room can trigger the record function remotely, even if the \&record parameter has not been added.
The video/audio will be saved in real-time to the guest's local download folder.
Do not force-close the browser or turn off the computer while it is recording; you may lose the file or have a partial capture.
The recording should stop automatically when the guest hangs-ups manually. I try my best to do the same when the browser is closed, but it's best to still purposefully stop recording first.
It will automatically capture with stereo audio and echo cancellation off, if available.
You can use [https://isolated.vdo.ninja/convert](https://isolated.vdo.ninja/convert) to convert from WebM file formats to OPUS or WAV file formats, **without transcoding and without downloads**. [More about converting from WebM to MP4 or WAV here](and-record.md#converting-and-playing-back-webm).
### Recording as the director
When recording as the director, the button and option to record each guest is available by default. It's hidden behind Advanced controls. You have the option to record locally, to your own disk, or record remotely, directly to the remote guest's local storage.
When recording to the guest's local storage, quality should be near pristine, given as its not being sent via the Internet first. Recording locally, the video may have dynamic resolutions and varying quality, due to the low latency transmission. ([`&chunked`](../../newly-added-parameters/and-chunked.md)-mode excepted)
Anyone can also access the recording options via right-clicking a video. This option is available as of VDO.Ninja [v22](../../releases/v22.md).
### Bitrate Thresholds
| Threshold | Inbound Audio | Recorded audio |
| -------------- | ------------- | -------------- |
| 4000 | 128 kpbs | 128 kpbs |
| 2500 | 80 kbps | 128 kpbs |
| Less than 2500 | 32 kbps | 32 kbps |
### When using [`&chunked`](../../newly-added-parameters/and-chunked.md) mode
When the sender of a stream is using the `&chunked` mode, recording their video will save the inbound video directly to disk without transcoding. Not needing to transcode the saved video in the browser is only possible with the `&chunked` mode. Of course, you also don't have the option to increase the bitrate or change codecs when using this mode; at least not as the viewer.
The chunked mode (as of June 2022) is still a maturing feature. Please report any issues and provide feedback.
### Converting and playing back WebM
WebM is a universal container of sorts when used within a Chromium browser, but it doesn't always work well for VLC or popular video editors. FFmpeg can be used to convert to other formats though, including MP4 and WAV, typically without transcoding.
To make converting from WebM to other formats easier, a version of FFmpeg is hosted within VDO.Ninja for this. It can be located here at [https://vdo.ninja/convert](https://vdo.ninja/convert), with several of the most common conversion options ready to go, such as WebM-PCM to WAV-PCM.
Due to memory limits and other browser limitations, this FFmpeg tool can only process files under about 2-gigabytes in size. For larger files, you may need to download and use a desktop version of [FFmpeg](https://ffmpeg.org/download.html) instead.
FFmpeg command lines are provided if you choose to run FFmpeg yourself locally, but if that is still to complicated, you can grab [Handbrake ](https://handbrake.fr/)for free; it's a GUI-based option that is fairly accessible.
Lastly, sometimes a video recorded by VDO.Ninja will have a variable resolution or/and frame rate, which can cause problems with some video editors. For example, the quality might be stuck low, or it might freeze after a few seconds. In these cases, you may need to transcode the video to a fixed resolution and frame rate using FFmpeg (or Handbrake) first, before using.. Transcoding is very slow in the browser, so I'd recommend you download Handbrake or FFmpeg for this task.
FFmpeg in the browser; up to 4-gb file sizes
### Please note:
When recording with PCM, ([`&pcm`](and-pcm.md)) the inbound audio bitrate will be at 256-kbps. (regardless of video bitrate)
* If recording with an Nvidia/AMD graphics card installed on your computer, ensure your drivers are up to date or try recording with VP8-codec instead. Hardware-encoding might reduce CPU load, but it can also result in discolored video if the driver is buggy.
* Safari browsers and iOS devices may struggle with media recording.
* Enabling Safari's _MediaRecorder_ under E_xperimental webKit Features_ may be needed. As well, users may be asked to download a file once the recording ends, for the webM media file to be saved correctly to disk.
## Related
[and-recordcodec.md](and-recordcodec.md)
[and-autorecord.md](and-autorecord.md)
[and-pcm.md](and-pcm.md)
---
description: Lets you set the video recording codec
---
# &recordcodec
Sender-Side Option / Director Option! ([`&push`](../../source-settings/push.md), [`&director`](../../viewers-settings/director.md))
## Aliases
* `&rc`
## Options
Example: `&recordcodec=h264`
Value
Description
h264
request the h264 codec
vp8
request the VP8 codec
vp9
request the VP9 codec
av1
request the AV1 codec
## Details
Adding `&recordcodec` to a source or director link lets you set the video recording codec (saving to disk mode; aka [`&record`](and-record.md)). The container format is still WebM, and not all codecs are going to be supported, but things will fail back to vp8 if not supported. Main reason for this is because vp8 on chrome for android kinda stinks, so at least you have an option to tinker with things now.
As a guest or source side don't forget to add [`&record`](and-record.md) to the URL to get the record button.
## Related
[and-record.md](and-record.md)
[codec.md](../view-parameters/codec.md)
[and-pcm.md](and-pcm.md)
---
description: >-
Takes a video snapshot and saves it to disk whenever there is motion detected
in a video
---
# &recordmotion
General Option! ([`&push`](../../source-settings/push.md), [`&room`](../../general-settings/room.md), [`&view`](../view-parameters/view.md), [`&scene`](../view-parameters/scene.md), [`&solo`](../mixer-scene-parameters/and-solo.md))
## Aliases
* `&motionrecord`
## Options
Example: `&recordmotion=15`
Value
Description
(integer value)
will control the sensitivity of the motion capture
## Details
`&recordmotion` takes a video snapshot and saves it to disk as a PNG file whenever there is motion detected in a video.
* Auto saves (to download folder) one photo per second, max.
* It can take values, such as `&recordmotion=15`, which will control the sensitivity of the motion capture
* It's primarily designed for the sender-side, but I think it should work if a viewer also
* I don't think this will work within OBS, so Chrome/Chromium is recommended instead
* I guess the point of this is to allow for basic security camera operation, but also as a source of inspiration for other ideas
* File name of the saved file contains the timestamp
---
description: Options to specify recordings with VDO.Ninja
---
# Recording Parameters
Does not use webRTC's video streaming protocols; rather it uses a custom-made protocol
\*NEW IN [VERSION 24](../../releases/v24.md)
---
description: Will pre-select display-share, rather than tab-share, when screen-sharing
---
# &displaysurface
Sender-Side Option! ([`&push`](../../source-settings/push.md))
## Options
Example: `&displaysurface=monitor`
Value
Description
monitor
Will pre-select "display-share"
browser
Will pre-select "tab-share"
window
Will pre-select "window-share"
## Details
`&displaysurface` will pre-select "display-share", rather than tab-share, when screen-sharing. You can pass `monitor`, `browser`, or `window` as options to customize this though.
For more details on these new features see here:
[https://developer.chrome.com/docs/web-platform/screen-sharing-controls/](https://developer.chrome.com/docs/web-platform/screen-sharing-controls/)
(Chrome/chromium-browsers only)
## Related
[screenshare.md](../../source-settings/screenshare.md)
---
description: Will have the current tab as the default screen-share source
---
# &prefercurrenttab
Sender-Side Option! ([`&push`](../../source-settings/push.md))
## Details
`&prefercurrenttab` will have the current tab as the default screen-share source.
For more details on these new features see here:
[https://developer.chrome.com/docs/web-platform/screen-sharing-controls/](https://developer.chrome.com/docs/web-platform/screen-sharing-controls/)
(Chrome/chromium-browsers only)
## Related
[screenshare.md](../../source-settings/screenshare.md)
---
description: Changes the screen-share aspect ratio on the publisher side
---
# &screenshareaspectratio
Sender-Side Option! ([`&push`](../../source-settings/push.md))
## Aliases
* `&ssar`
## Options
Example: `&screenshareaspectratio=landscape`
Value
Description
(no value given)
overrides &aspectratio and sets the screen-share to the default aspect ratio
(decimal number)
sets the screen-share aspect ratio
landscape
screen-share aspect ratio of 16:9 (1.777777)
portrait
screen-share aspect ratio of 9:16 (0.5625)
square
screen-share aspect ratio of 1:1 (1)
1.33333
screen-share aspect ratio of 4:3
## Details
`&screenshareaspectratio` sets the aspect ratio for screen-shares on the publisher side.
[`&aspectratio`](../video-parameters/and-aspectratio.md) works with screen-shares, so you can force crop an incoming screen-share to be a certain aspect ratio. If `&screenshareaspectratio` is used it will apply to just screen-shares. If `&screenshareaspectratio` does not have a value passed, it's assumed to be set as "default", which overrides [`&aspectratio`](../video-parameters/and-aspectratio.md) option, if used also.
## Related
[and-aspectratio.md](../video-parameters/and-aspectratio.md)
---
description: >-
=motion prioritizes screen-share frame rate; =detail prioritizes screen-share
resolution
---
# &screensharecontenthint
Sender-Side Option! ([`&push`](../../source-settings/push.md))
## Aliases
* `&sscontenthint`
* `&screensharecontenttype`
* `&sscontent`
* `&sshint`
## Options
Example: `&screensharecontenthint=detail`
Value
Description
detail
will prioritize screen-share resolution over frame rate
motion
will prioritize screen-share frame rate over resolution
#### Additional value options
Depending on browser and version, there may be additional values you can pass, such as `text`. Please see the following link for possible options that your browser may offer:
[https://developer.mozilla.org/en-US/docs/Web/API/MediaStreamTrack/contentHint](https://developer.mozilla.org/en-US/docs/Web/API/MediaStreamTrack/contentHint)
## Details
`&screensharecontenthint` can customize how you want VDO.Ninja to balance screen-share resolution vs screen-share frame rate, specifically when bitrate or CPU is insufficient to offer both at the same time.
The two options are `detail` or `motion`. Screen-shares generally tend towards `detail` by default, and camera sources are tend towards `motion` by default. `detail` will try to prioritize resolution over frame rate, so the frame rate may drop a lot used. `motion` will try to maximize frame rate, but may drop the resolution a lot. There's no way to force both on as there's no magic bullet if your CPU or network cannot keep up.
For more information on how to lock or maximize the resolution of a video feed, please see the following guide:
[how-do-i-lock-the-resolution.md](../../guides/how-do-i-lock-the-resolution.md)
There is [`&contenthint`](../video-parameters/and-contenthint.md) if you want the parameter to affect all kinds of video sources. You can also use both, `&screensharecontenthint` will override [`&contenthint`](../video-parameters/and-contenthint.md) for just screen-shares if set also.
If using [`&codec=vp9`](../view-parameters/codec.md) on the viewer side, the frame rate may drop as low as even 5-fps.
This parameter has been tested on Chrome, but other browsers may vary in behavior. Safari seems to just ignore things, for example.
## Related
[and-contenthint.md](../video-parameters/and-contenthint.md)
---
description: Excludes the current tab as a screen-share source option
---
# &selfbrowsersurface
Sender-Side Option! ([`&push`](../../source-settings/push.md))
## Options
Example: `&selfbrowsersurface=include` or `&selfbrowsersurface=exclude`
Value
Description
(no value given)
Excludes the current tab as a screen-share source option
include
Includes the current tab as a screen-share source option
exclude
Excludes the current tab as a screen-share source option
## Details
`&selfbrowsersurface` excludes the current tab as a screen-share source option. You can pass `include` or `exclude` as a value to control this though.
For more details on these new features see here:
[https://developer.chrome.com/docs/web-platform/screen-sharing-controls/](https://developer.chrome.com/docs/web-platform/screen-sharing-controls/)
(Chrome/chromium-browsers only)
## Related
[screenshare.md](../../source-settings/screenshare.md)
---
description: Sets &scale=100, but only for screen-shares
---
# &sharperscreen
Viewer-Side Option! ([`&scene`](../view-parameters/scene.md), [`&room`](../../general-settings/room.md), [`&view`](../view-parameters/view.md), [`&solo`](../mixer-scene-parameters/and-solo.md))
## Details
As an alternative to [`&sharper`](../video-parameters/and-sharper.md), I've also added `&sharperscreen`, which sets [`&scale=100`](../view-parameters/scale.md), but _only_ for screen-shares (virtual cameras not included). This is probably even more efficient than [`&scale=100`](../view-parameters/scale.md) or [`&sharper`](../video-parameters/and-sharper.md), and it's designed for when screen-sharing a lot of text. Text looks a bit soft when streaming video at 1:1 pixel resolution.
It's recommended to only use these parameters within the context of a scene link, and not on guest links, due to the higher CPU / bandwidth it may use.
## Related
[and-sharper.md](../video-parameters/and-sharper.md)
[dpi.md](../view-parameters/dpi.md)
[scale.md](../view-parameters/scale.md)
---
description: Makes the screen share behave like a webcam share
---
# &smallshare
Sender-Side Option! ([`&push`](../../source-settings/push.md))
Viewer-Side Option! ([`&scene`](../view-parameters/scene.md), [`&room`](../../general-settings/room.md), [`&solo`](../mixer-scene-parameters/and-solo.md)) \*on alpha
## Details
`&smallshare` makes the screen share behave like a webcam share. ie: not larger in size vs other windows, for the publisher or the viewers. This is a push-side parameter. This is useful if a VR guests screen sharing an app of themselves, versus using a virtual camera. It can also be useful for gaming, where a larger screen share might bog down the system of the sender more than needed.
Layout if using `&smallshare`:
Layout if NOT using `&smallshare`:
### Update on [v23](../../releases/v23.md)
`&smallshare` will work on the scene-side now also, which disables the automixer's larger screen-share layout, and instead just uses an equal-sized video layout for all videos.
## Related
[screenshare.md](../../source-settings/screenshare.md)
[and-screensharetype.md](../../newly-added-parameters/and-screensharetype.md)
---
description: Will disable local audio playback of a Chrome tab while screen-sharing it
---
# &suppresslocalaudio
Sender-Side Option! ([`&push`](../../source-settings/push.md))
## Details
`&suppresslocalaudio` will disable local audio playback of a Chrome tab while screen-sharing it. This can be used with the new [WHIP](../whip-parameters/and-whip.md) output of VDO.Ninja to publish a VDO.Ninja scene directly to Twitch, without having to deal with any audio feedback issues while having that scene tab open.
For more details on these new features see here:
[https://developer.chrome.com/docs/web-platform/screen-sharing-controls/](https://developer.chrome.com/docs/web-platform/screen-sharing-controls/)
(Chrome/chromium-browsers only)
## Related
[and-whip.md](../whip-parameters/and-whip.md)
---
description: Excludes the system-audio as an audio source when display sharing
---
# &systemaudio
Sender-Side Option! ([`&push`](../../source-settings/push.md))
## Details
`&systemaudio` excludes the system-audio as an audio source when display sharing. Tab audio is still available though. (can help prevent accidental audio feedback loops)
For more details on these new features see here:
[https://developer.chrome.com/docs/web-platform/screen-sharing-controls/](https://developer.chrome.com/docs/web-platform/screen-sharing-controls/)
(Chrome/chromium-browsers only)
## Related
[screenshare.md](../../source-settings/screenshare.md)
---
description: Labels, audio filters, type, bitrate, quality etc.
---
# Screen-share Parameters
Screen-share Parameters are separated in [general options](./#general-options), [source side](./#source-side-options) (push) options and [viewer side](./#viewer-side-options) (view) options.
## General options
You can add them to both, source ([`&push`](../../source-settings/push.md)) and viewer ([`&view`](../view-parameters/view.md) or [`&scene`](../view-parameters/scene.md)) sides.
Sets the audio mode for screen-shares to stereo and changes default audio settings to improve audio quality
## Source side options
You can add them to both, source ([`&push`](../../source-settings/push.md)) and viewer ([`&view`](../view-parameters/view.md) or [`&scene`](../view-parameters/scene.md)) sides.
---
description: >-
Option to filter which OBS scenes a remote guest has access to controlling
when using &controlobs
---
# &allowedscenes
General Option! ([`&push`](../../source-settings/push.md), [`&room`](../../general-settings/room.md), [`&view`](../view-parameters/view.md), [`&scene`](../view-parameters/scene.md), [`&solo`](../mixer-scene-parameters/and-solo.md))
## Options
Example: `&allowedscenes=Scene1,Scene2`
Value
Description
(comma separated OBS scene names)
filter which OBS scenes a remote guest has access to controlling when using &controlobs
## Details
`&allowedscenes` filters which OBS scenes a remote guest has access to controlling when using [`&controlobs`](and-controlobs.md). Uses CSV to split up the scenes (avoid special characters in your scene names if there are issues)
Example: `vdo.ninja/?view=StreamID&remote&allowedscenes=Scene1,Scene2`
If you don't want a user to have the ability to start/stop a stream, set the OBS page permissions to level 4, instead of 5. It'll disable the start/stop buttons for the user if they don't have those permissions.
## Related
[and-controlobs.md](and-controlobs.md)
[remote.md](../../general-settings/remote.md)
---
description: >-
Shows the battery meter for guests that are on devices with a battery that's
draining/charging
---
# &batterymeter
Sender-Side Option! ([`&push`](../../source-settings/push.md))
## Options
Example: `&batterymeter=0`
| Value | Description |
| -------------------- | ------------------------------ |
| (no value given) | Adds a battery-meter per guest |
| `0` \| `no` \| `off` | Disables the battery-meter |
## Details
Curtesy of @Yong.
Notes:
[https://github.com/steveseguin/vdo.ninja/pull/1078#issuecomment-1627799535](https://github.com/steveseguin/vdo.ninja/pull/1078#issuecomment-1627799535)
It's the same concept of [`&signalmeter`](../../newly-added-parameters/and-signalmeter.md), except shows the battery meter for guests that are on devices with a battery that's draining/charging.
Shows blinking warning if under 25% battery life.
The battery meter was already available by default as the director, but now it can be enabled as a guest, etc.
Also supports disabling the meter with `&batterymeter=0`.
## Related
[and-signalmeter.md](../../newly-added-parameters/and-signalmeter.md)
---
description: Will clear all the saved user preferences for all sessions
---
# &clearstorage
General Option! ([`&push`](../../source-settings/push.md), [`&room`](../../general-settings/room.md), [`&view`](../view-parameters/view.md), [`&scene`](../view-parameters/scene.md))
## Aliases
* `&clear`
## Details
`&clearstorage` will clear all the saved user preferences for all sessions, including [`&sticky`](../../general-settings/sticky.md)'d data, director settings, any camera and microphone settings, and probably a couple other small things. This also includes the "default" saved stated of camera settings before adjusted.
I also added a button to manually do this via the User menu settings.
## Related
[sticky.md](../../general-settings/sticky.md)
---
description: Shows the current time
---
# &clock
General Option! ([`&push`](../../source-settings/push.md), [`&room`](../../general-settings/room.md), [`&view`](../view-parameters/view.md), [`&scene`](../view-parameters/scene.md), [`&solo`](../mixer-scene-parameters/and-solo.md), [`&director`](../../viewers-settings/director.md))
## Options
Example: `&clock=5` or `&clock=false`
Value
Description
1 - 9
Shows the current time as in the graphic below. Each option specifies where the clock will appear on the screen
9 | (no value given)
Shows the current time in the lower right
false
Will force-disable the clock from being remotely triggerable
## Details
`&clock` shows the current time in the lower right; this can be applied to pretty much all link types.
The director has a button that lets them enable the clock for everyone in the room (via the director's room settings button).
`&clock=false` or [`&cleanoutput`](../design-parameters/cleanoutput.md) will force-disable the clock from being remotely triggerable.
The director will see the clock also; it will just be a bit smaller on screen.
## Related
[and-clock24-alpha.md](and-clock24-alpha.md)
[and-timer.md](and-timer.md)
---
description: The same as &clock option, except it uses 24-hour time for the display
---
# &clock24
General Option! ([`&push`](../../source-settings/push.md), [`&room`](../../general-settings/room.md), [`&view`](../view-parameters/view.md), [`&scene`](../view-parameters/scene.md), [`&solo`](../mixer-scene-parameters/and-solo.md), [`&director`](../../viewers-settings/director.md))
## Options
Example: `&clock24=5`
Value
Description
1 - 9
Shows the current time as in the graphic below. Each option specifies where the clock will appear on the screen
9 | (no value given)
Shows the current time in the lower right
false
Will force-disable the clock from being remotely triggerable
## Details
`&clock24` is the same as the existing [`&clock`](and-clock.md) option, (which shows a clock) except it uses 24-hour time for the display (vs. am/pm).
If the director uses `&clock24` on their URL, and then enables the room clock, it will be 24-hour time for all guests, matching the director's settings.
Shows the current time in the lower right; this can be applied to pretty much all link types.
The director has a button that lets them enable the clock for everyone in the room (via the director's room settings button).
The director will see the clock also; it will just be a bit smaller on screen.
## Related
[and-clock.md](and-clock.md)
[and-timer.md](and-timer.md)
---
description: Enables displaying of closed captioning text
---
# &closedcaptions
Viewer-Side Option! ([`&view`](../view-parameters/view.md), [`&scene`](../view-parameters/scene.md), [`&room`](../../general-settings/room.md))
## Aliases
* `&captions`
* `&cc`
## Details
This command will display the incoming transcribed text-data as an overlay. You will need to use this on the VIEW link, while also using the [`&transcribe`](../../source-settings/transcribe.md) command on the PUSH link.
See video for a walk-thru:
Overlay text data is pulled from the source with [`&transcribe`](../../source-settings/transcribe.md) added.
[`&fontsize={percent}`](../view-parameters/fontsize.md) can be used to adjust the overlay font-size. 100% is default;
Use can use [`&css=somecssfile.css`](../design-parameters/css.md) to further customize the CSS style, or do so in the OBS Browser source style sheet area. You can also set the CSS via a base64 encoded string in the URL, via the [`&base64css`](../design-parameters/css.md) parameter.
An example of a custom stylesheet for OBS that changes the font-family of the overlay text is the is the following:
```
body {
background-color: rgba(0, 0, 0, 0); margin: 0px auto; overflow: hidden;
}
@font-face {
font-family: 'opendyslexic';
src: url('https://vdo.ninja/examples/OpenDyslexic-Regular.otf');
font-style: normal;
font-weight: normal;
}
#overlayMsgs {
font-family: "opendyslexic", opendyslexic, serif;
}
```
Another example of limiting the captioning-text to only use a fixed height of space when used as an overlay to OBS browser source. Just replace the OBS browser style with this code snippet instead:
```
body { background-color: rgba(0, 0, 0, 0); margin: 0px auto; overflow: hidden; }
#overlayMsgs{
overflow: auto!important;
display: flex!important;
flex-direction: column-reverse!important;
height: 240px!important;
}
#overlayMsgs span {
text-align: left!important;
}
```
If not using OBS, you can still add the above CSS via the URL using the [`&base64css`](../design-parameters/and-base64css.md) parameter. For example, instead of the above CSS, you can append the following to the URL:
`&base64css=I292ZXJsYXlNc2dzew0KICAgIG92ZXJmbG93OiBhdXRvIWltcG9ydGFudDsNCiAgICBkaXNwbGF5OiBmbGV4IWltcG9ydGFudDsNCiAgICBmbGV4LWRpcmVjdGlvbjogY29sdW1uLXJldmVyc2UhaW1wb3J0YW50Ow0KICAgIGhlaWdodDogMjQwcHghaW1wb3J0YW50Ow0KfQ0KDQojb3ZlcmxheU1zZ3Mgc3BhbiB7DQogICAgdGV4dC1hbGlnbjogbGVmdCFpbXBvcnRhbnQ7DQp9`
Feedback and user requests are welcomed.
### Example links and Resources
[https://vdo.ninja/?transcribe](https://vdo.ninja/?transcribe)
[https://vdo.ninja/?view=abc123\&closedcaptions](https://vdo.ninja/?view=abc123\&closedcaptions)
[https://meyerweb.com/eric/tools/dencoder/](https://meyerweb.com/eric/tools/dencoder/)
[https://vdo.ninja/examples/rainbow.css](https://vdo.ninja/examples/rainbow.css)
[https://vdo.ninja/?css=https%3A%2F%2Fvdo.ninja%2Fexamples%2Frainbow.css](https://vdo.ninja/?css=https%3A%2F%2Fvdo.ninja%2Fexamples%2Frainbow.css)
## Related
[css.md](../design-parameters/css.md)
[transcribe.md](../../source-settings/transcribe.md)
---
description: Forces the user control bar to be in its own dedicated space
---
# &controlbarspace
Sender-Side Option! ([`&push`](../../source-settings/push.md), [`&room`](../../general-settings/room.md))
## Details
`&controlbarspace` forces the bottom control bar to be in its own dedicated space, regardless of screen size.
The control bar is not overlapping the video feed
## Related
[and-autohide.md](../../parameters-only-on-beta/and-autohide.md)
---
description: >-
The ability for VDO.Ninja to Remotely Control OBS Studio while
streaming/directing
---
# &controlobs
General Option! ([`&push`](../../source-settings/push.md), [`&room`](../../general-settings/room.md), [`&view`](../view-parameters/view.md), [`&scene`](../view-parameters/scene.md), [`&solo`](../mixer-scene-parameters/and-solo.md))
## Aliases
* `&obscontrols`
* `&remoteobs`
* `&obsremote`
* `&obs`
## Options
Example: `&controlobs=0`
## Remotely Control OBS Studio
Added the ability for VDO.Ninja to **Remotely Control OBS Studio** while streaming/directing. It may be useful for [IRL streaming](https://restream.io/blog/irl-streaming-ultimate-guide/)?
The menu button to control OBS auto-shows in the director's view or push-mode, if OBS Studio is set to give VDO.Ninja "full" permissions.
The menu button can also be added manually, for even guests, using `&controlobs`. [`&obsoff`](../design-parameters/and-obsoff.md) can be used to set permissions to fully off (also disables tally light and scene optimizations tho) when added to the OBS browser source link.
The OBS instance still needs [`&remote=optional-passcode-here`](../../general-settings/remote.md) added to the URL for remote commands to work. If [`&remote`](../../general-settings/remote.md) is left blank, it gives anyone permissions to control it. If a value is passed to [`&remote`](../../general-settings/remote.md), the sender needs to have a matching [`&remote` ](../../general-settings/remote.md)value or they need to manually enter the passcode in the pop up control menu.
If the OBS browser source has its permissions set to something other than full (lower than level 5), the control menu will still show what info it has -- current scene, recording/streaming state, etc; depending on level. The lower the level, the less info is available to show. It can't remotely change anything though.
It supports multiple OBS instances and will label them according to the [`&label=xxx`](../../general-settings/label.md) value set on the scene/view link, or whatever the unique connection ID is.
## How to set it up (example)
1\. Add a browser source to OBS Studio with this URL:
`https://vdo.ninja/?view=streamid12345&remote&controlobs`
2\. Give page permissions to the browser source (Full access to OBS) like on the image below
3\. Open this Push Link: [https://vdo.ninja/?push=streamid12345\&wc\&as\&controlobs\&remote](https://vdo.ninja/?push=streamid12345\&wc\&as\&controlobs\&remote)
4\. Click on this button
5\. Control OBS Studio remotely via VDO.Ninja
### Disabling or hiding the controls
Setting `&controlobs=0` or to `false`/`off`, will hide the control option on the sender side, regardless of the OBS browser source page permissions.
As well, setting the OBS browser source to low or no page permissions will also not show the controls, which is how it is by default. You can force show the controls of course, but they won't work if the browser source doesn't have the right permissions.
## Related
[remote.md](../../general-settings/remote.md)
[and-cutscene.md](and-cutscene.md)
[and-obsoff.md](../design-parameters/and-obsoff.md)
[and-allowedscenes.md](and-allowedscenes.md)
---
description: >-
Specifies an OBS cut scene to switch to when the bitrate drops below a
threshold
---
# &cutscene
Viewer-Side Option! ([`&view`](../view-parameters/view.md), [`&scene`](../view-parameters/scene.md), [`&room`](../../general-settings/room.md))
## Aliases
* `&lowbitratescene`
## Options
Example: `&cutscene=ObsSceneName`
| Value | Description |
| ---------------- | ------------------------- |
| (OBS scene name) | The name of the OBS scene |
## Details
You can use the IRL-related command called `&cutscene` to specify an OBS cut scene to switch to when the bitrate drops below a threshold and return to the original scene when the bitrate recovers. (assuming the cut scene is active; it won't switch back from a scene that isn't the cut away scene)
The default bitrate threshold is 300-kbps, but you can use the existing [`&bitratecutoff=N`](../parameters-only-on-beta/and-bitratecutoff.md) option to specify a custom one. Using `&cutscene` with [`&bitratecutoff`](../parameters-only-on-beta/and-bitratecutoff.md) will override the behaviour of [`&bitratecutoff`](../parameters-only-on-beta/and-bitratecutoff.md)'s other features. It won't start triggering until the bitrate has hit at least the threshold once. to use:
```
https://vdo.ninja/?push=XXX
https://vdo.ninja/?view=XXX&controlobs&bitratecutoff=300&cutscene=FML&remote
```
You can of course use this with [`&controlobs`](and-controlobs.md)[`&remote`](../../general-settings/remote.md), to have the publisher change the scenes dynamically, and see what the current OBS scene is (if still connected).
Note that the OBS browser source needs the permissions to be set to high, to give VDO.Ninja permissions to change scenes.
Do not set the OBS browser source to "Shutdown" when not visible, as this will prevent things from being able to switch back.
When using `&cutscene` on a room scene, it won't trigger due to a director being in the room with no video, unless they are using [`&showdirector`](../../viewers-settings/and-showdirector.md). `&cutscene` wasn't intended really for a group scene; just a solo link or view link, but this fix makes it at more usable with a group scene.
## Related
[and-bitratecutoff.md](../parameters-only-on-beta/and-bitratecutoff.md)
[and-controlobs.md](and-controlobs.md)
[remote.md](../../general-settings/remote.md)
---
description: Disables hotkeys (like CRTL + M)
---
# &disablehotkeys
General Option! ([`&push`](../../source-settings/push.md), [`&room`](../../general-settings/room.md), [`&view`](../view-parameters/view.md), [`&scene`](../view-parameters/scene.md))
## Details
`&disablehotkeys` disables hotkeys (like `CRTL + M`).
## Related
[hotkey-support](../../guides/hotkey-support/)
---
description: Adds a full-screen button to the control bar
---
# &fullscreenbutton
Sender-Side Option! ([`&push`](../../source-settings/push.md))
## Aliases
* `&fsb`
## Details
`&fullscreenbutton` adds a full-screen button to the control bar. It essentially just mimics F11, with added support for detecting the Escape button to exit full screen.
Also while using `&fullscreenbutton`, the previous little 'full window' button in the top-right of videos (if in a group room) will also auto-F11 and isolate that video, rather than just isolate the video.
You can still right-click and select "full-window" on any video to isolate it without going full screen, if you need that.
You can test by opening two such guest links:
[https://vdo.ninja/?fsb\&room=test123123123\&webcam\&autostart](https://vdo.ninja/?fsb\&room=test123123123\&webcam\&autostart)
Ultimately I'd like to override the native video full screen button with this behaviour, when `&fullscreenbutton` is used, but I'm still working on that aspect.
### Update in [v23](../../releases/v23.md)
`&fullscreenbutton` is improved, so that even when there is a single video on the page, it will show. It also shows more reliably, without needing to move the mouse around a bit to re-show the button after going full screen. Lastly, when used, it now hides the native full-screen button, so users have to use it.
Unlike the native full screen button, this full screen mode alternative keeps the chat and control bar overlays visible (like press F11). Since this is probably the preferred way most users will want to full screen to work, I may make it the default mode at some point, after some more testing/feedback. (not supported on iOS/iPhone tho)
Testing at [https://vdo.ninja/?fullscreenbutton](https://vdo.ninja/?fullscreenbutton) (join a room as a guest to trigger)
## Related
[fullscreen.md](../../source-settings/fullscreen.md)
---
description: Will request a continuous stream of face bounding boxes
---
# &getfaces
Viewer-Side Option! ([`&scene`](../view-parameters/scene.md), [`&room`](../../general-settings/room.md), [`&view`](../view-parameters/view.md), [`&solo`](../mixer-scene-parameters/and-solo.md))
## Aliases
* `&pushfaces`
## Details
`&getfaces` on the viewer link will request a continuous stream of face bounding boxes, for all inbound videos and all faces contained within. The data is transmitted to the parent IFRAME, and this data can be used for moving the IFrame window around, if you wish to make your own custom face-tracker or whatever else.
`&getfaces` requires the use of the Chromium experimental face detection API, as I'm using the built-in browser face-tracking model for this. You can enable the API flag here: `chrome://flags/#enable-experimental-web-platform-features`
My hope is that this feature will eventually be enabled by default within Chromium, as loading a large ML model to do face detection otherwise is a bit heavy; you may need to enable this within the OBS CLI if wishing to use it there?
---
description: Hides the VDO.Ninja homepage and many links that lead to it
---
# &hidehome
General Option! ([`&push`](../../source-settings/push.md), [`&room`](../../general-settings/room.md), [`&view`](../view-parameters/view.md), [`&scene`](../view-parameters/scene.md), [`&solo`](../mixer-scene-parameters/and-solo.md), [`&director`](../../viewers-settings/director.md))
## Details
`&hidehome` hides the VDO.Ninja homepage and many links that lead to it. You can also enable at a code level with `session.hidehome=true;`, which is useful if doing a self-deployment, where you don't want anyone to stumble onto the site and start using it. You'll still be able to join push links and create rooms via URL parameters, but that's about it.
## Related
[and-hidemenu.md](../design-parameters/and-hidemenu.md)
[and-hideheader.md](../design-parameters/and-hideheader.md)
---
description: Hides the option to translate VDO.Ninja
---
# &hidetranslate
General Option! ([`&push`](../../source-settings/push.md), [`&room`](../../general-settings/room.md), [`&view`](../view-parameters/view.md), [`&scene`](../view-parameters/scene.md), [`&solo`](../mixer-scene-parameters/and-solo.md))
## Details
`&hidetranslate` hides the button at the bottom right of VDO.Ninja to select a different language. If you want to change the language via URL you can use [`&language`](and-language.md).
## Related
[and-language.md](and-language.md)
---
description: Sets the interface language
---
# &language
General Option! ([`&push`](../../source-settings/push.md), [`&room`](../../general-settings/room.md), [`&view`](../view-parameters/view.md), [`&scene`](../view-parameters/scene.md))
## Aliases
* `&ln`
## Options
Example: `&language=fr`
Value
Language
cn
Chinese
cs
Czech
de
German
en
English (default if &ln not present)
es
Spanish
eu
Basque
fr
French
it
Italian
ja
Japanese
nl
Dutch
pig
Pig Latin
pt
Portuguese
ru
Russian
tr
Turkish
uk
Ukrainian
(no value given)
Less verbose interface
## Details
You can [contribute new or update existing translations](https://github.com/steveseguin/obsninja/tree/master/translations).
You can also change the language of VDO.Ninja dynamically on the bottom right.
## Related
[and-hidetranslate.md](and-hidetranslate.md)
---
description: Disables showing the names when using the &closedcaptions feature
---
# &nocaptionlabels
Viewer-Side Option! ([`&view`](../view-parameters/view.md), [`&scene`](../view-parameters/scene.md), [`&room`](../../general-settings/room.md))
## Aliases
* `&nocaptionlabel`
* `&nocclabels`
* `&nocclabel`
## Details
`&nocclabels` disables showing the names when using the [`&closedcaptions`](and-closedcaptions.md) feature, as you might want to only show labels on the video themselves, and not in the transcription text.
## Related
[and-closedcaptions.md](and-closedcaptions.md)
[label.md](../../general-settings/label.md)
---
description: Will ignore the chunked version and use the low-latency version
---
# &nochunked
Viewer-Side Option! ([`&view`](../view-parameters/view.md), [`&scene`](../view-parameters/scene.md), [`&solo`](../mixer-scene-parameters/and-solo.md))
## Aliases
* `&nochunk`
## Details
If a VDO.Ninja guest has [`&chunked`](../../newly-added-parameters/and-chunked.md) added, the viewer or another guest can use `&nochunked` to ignore the chunked version, and use the low-latency version. In this way, guests in a room can still use the low latency streams to chat, but publish chunked video to OBS for (delayed) high quality video.
## Related
[and-chunked.md](../../newly-added-parameters/and-chunked.md)
---
description: Will force hide the video control bar
---
# &nocontrols
General Option! ([`&push`](../../source-settings/push.md), [`&room`](../../general-settings/room.md), [`&view`](../view-parameters/view.md), [`&scene`](../view-parameters/scene.md))
## Aliases
* `&controls=0`
## Details
`&nocontrols` will force hide the video control bar. You can also hide the control bar with `Right-Click` -> `Hide control bar`.
This is not the same control bar as the user control bar. Also, be sure to not accidentally unmute yourself -- echo feedback galore.
This is the video control bar:
## Related
[and-videocontrols.md](../newly-added-parameters/and-videocontrols.md)
---
description: Hides the hang-up button
---
# &nohangupbutton
Sender-Side Option! ([`&push`](../../source-settings/push.md))
## Aliases
* `&nohub`
## Details
This option hides the hang-up button, so it can't be accidentally clicked.
## Related
[nomicbutton.md](../../viewers-settings/nomicbutton.md)
[and-novideobutton.md](../../viewers-settings/and-novideobutton.md)
---
description: Blocks outbound publishing connections
---
# &nopush
General Option! ([`&push`](../../source-settings/push.md), [`&room`](../../general-settings/room.md), [`&view`](../view-parameters/view.md), [`&scene`](../view-parameters/scene.md), [`&solo`](../mixer-scene-parameters/and-solo.md))
## Aliases
* `&noseed`
* `&viewonly`
* `&viewmode`
## Details
To help avoid some types of connections showing up when using [`&showall`](../design-parameters/and-showall.md), I've also added a `&nopush` mode, which blocks outbound publishing connections. This acts a bit like a `&scene=1` link, so unless [`&showall`](../design-parameters/and-showall.md) is added, you'll need to use the IFRAME API to show/hide videos in it.
## Related
[and-showall.md](../design-parameters/and-showall.md)
---
description: Post a snapshot of your local camera to a HTTPS/POST URL
---
# &postimage
Sender-Side Option! ([`&push`](../../source-settings/push.md))
## Options
Example: `&postimage=https%3A%2F%2Ftemp.vdo.ninja%2F`
| Value | Description |
| --------------------------------- | --------------- |
| `https%3A%2F%2Ftemp.vdo.ninja%2F` | URL-encoded URL |
## Details
Added an option to post a snapshot of your local camera to a HTTPS/POST URL (blob/jpeg).
`https://vdo.ninja/?postimage=URL_TO_POST_IMAGE_TO_AS_BLOCK&postinterval=INTERVAL_IN_SEC`
So, for example:
[`https://vdo.ninja/?postimage=https%3A%2F%2Ftemp.vdo.ninja%2F&postinterval=30&push&wc`](https://vdo.ninja/?postimage=https%3A%2F%2Ftemp.vdo.ninja%2F\&postinterval=30\&push\&wc)
posts to a sample test server I have up. The URL is URL encoded, but not always necessary. If posting to my test server, the image can be accessed at `https://temp.vdo.ninja/images/STREAMID.jpg`.
There's caching enabled mind you, so you'll want to post-fix the current timestamp to the URL to disable that per request.
For example: [`https://temp.vdo.ninja/images/yiMkpMg.jpg?t=3412341234`](https://temp.vdo.ninja/images/yiMkpMg.jpg?t=3412341234)
This feature could be useful to checking out a stream before actually connecting to it, as that's my intent with it, but it is also something you can use with Octoprint, where you need an IP camera jpeg source as input.
## Related
[and-postinterval.md](and-postinterval.md)
[and-slideshow.md](../video-parameters/and-slideshow.md)
---
description: Time interval in seconds for &postimage
---
# &postinterval
Sender-Side Option! ([`&push`](../../source-settings/push.md))
## Options
Example: `&postinterval=20`
| Value | Description |
| ------- | --------------- |
| (value) | time in seconds |
## Details
Added an option to post a snapshot of your local camera to a HTTPS/POST URL (blob/jpeg).
`https://vdo.ninja/?postimage=URL_TO_POST_IMAGE_TO_AS_BLOCK&postinterval=INTERVAL_IN_SEC`
So, for example:
[`https://vdo.ninja/?postimage=https%3A%2F%2Ftemp.vdo.ninja%2F&postinterval=30&push=testID1&wc`](https://vdo.ninja/?postimage=https%3A%2F%2Ftemp.vdo.ninja%2F\&postinterval=30\&push=testID1\&wc)
posts to a sample test server I have up. The URL is URL encoded, but not always necessary. If posting to my test server, the image can be accessed at `https://temp.vdo.ninja/images/STREAMID.jpg`.
There's caching enabled mind you, so you'll want to post-fix the current timestamp to the URL to disable that per request.
For example: [`https://temp.vdo.ninja/images/yiMkpMg.jpg?t=3412341234`](https://temp.vdo.ninja/images/yiMkpMg.jpg?t=3412341234)
This feature could be useful to checking out a stream before actually connecting to it, as that's my intent with it, but it is also something you can use with Octoprint, where you need an IP camera jpeg source as input.
## Related
[and-postimage.md](and-postimage.md)
---
description: Adds a built-in basic controller to control PowerPoint
---
# &powerpoint
General Option! ([`&push`](../../source-settings/push.md), [`&room`](../../general-settings/room.md), [`&view`](../view-parameters/view.md), [`&scene`](../view-parameters/scene.md))
## Aliases
* `&slides`
* `&pptcontrols`
* `&ppt`
## Details
Adds a built-in basic controller to control PowerPoint.
Detailed information on how to control PowerPoint remotely:
[how-to-control-powerpoint-remotely-with-vdo.ninja.md](../../guides/how-to-control-powerpoint-remotely-with-vdo.ninja.md)
## Related
[how-to-control-powerpoint-remotely-with-vdo.ninja.md](../../guides/how-to-control-powerpoint-remotely-with-vdo.ninja.md)
---
description: >-
Another security option, for those concerned about random spying of their
streams
---
# &prompt
Sender-Side Option! ([`&push`](../../source-settings/push.md))
## Aliases
* `&approve`
* `&validate`
## Details
After a new peer viewer connection is established, but before the video/audio streams start getting sent to that new viewer, a prompt will appear asking the publisher if they wish to send their stream to that viewer. If they say no, the remote viewer is disconnected and no video/audio is sent to them. If they have [`&label=xxx`](../../general-settings/label.md) added to their view link, that label will appear as the display name. Otherwise, if no label is available, a random ID representing that connection is shown.
There's nothing stopping a disconnected viewer from re-joining and re-asking, causing some grief, and spoofing an identify isn't too hard, but it gives you some control and warning to block unexpected viewers.
In the future, I can add this control to the director, rather than just the senders, and add additional ways to check identities. For now though, it's a start.
## Related
[and-password.md](../setup-parameters/and-password.md)
[and-hash.md](../../newly-added-parameters/and-hash.md)
---
description: >-
Will transfer a guest from one room into another, but once transferred, the
guest will be in Queue mode
---
# &queuetransfer
Sender-Side Option! ([`&push`](../../source-settings/push.md), [`&room`](../../general-settings/room.md))
## Aliases
* `&qt`
## Details
`&queuetransfer` will transfer a guest from one room into another, but one transferred, the guest will be in Queue mode. So they won't share their video with anyone by the [director](../../viewers-settings/director.md).
## Related
[queue.md](../../general-settings/queue.md)
---
description: >-
Will relay the incoming 'chunked' media stream to others connected to you,
without transcoding
---
# &retransmit
Sender-Side Option! ([`&push`](../../source-settings/push.md))
## Details
Added a new experimental option called `&retransmit`; it will relay the incoming '[chunked](../../newly-added-parameters/and-chunked.md)' media stream to others connected to you, without transcoding. In a way, this enables a form of peer to peer to peer broadcasting.
\-- It only works with incoming [`&chunked`](../../newly-added-parameters/and-chunked.md) data streams, however trying to forward more than one chunked stream will break things currently.
\-- It will disable your own mic/camera from being streamed; when `&retransmit` is used it configures itself as a viewer in a sense.
\-- Chunked mode has a default play out buffer delay of about 1-second still, but that buffer time does not get passed down to the relayed viewer. There is still some transmission delay that gets introduced though, but it can be very low latency on a series of good computers/network.
### Example p2p2p setup:
```
https://vdo.ninja/?chunked&push=PUBLISHER123
```
This is the source. Notice they are publishing in chunked mode.
```
https://vdo.ninja/?view=PUBLISHER123&retransmit&push=RESTREAMER123
```
This person is both viewing the video, but also relaying.
```
https://vdo.ninja/?view=RESTREAMER123
```
This person is viewing the stream from the relayed chunked stream; p2p2p. They don't know they are getting a relayed stream.
This feature is just for fun at the moment. It's does not do automatic p2p2p broadcasting, as you still need to manually customize who sees what, and chunked mode isn't compatible with all browsers/devices yet.
## Related
[and-chunked.md](../../newly-added-parameters/and-chunked.md)
---
description: Forces the screen-share button to appear for guests
---
# &screensharebutton
Sender-Side Option! ([`&push`](../../source-settings/push.md))
## Aliases
* `&ssb`
## Details
Forces the screen-share button to appear for guests.
The screen share button will show even if they are on an incompatible device, using [`&nosettings`](../../source-settings/and-nosettings.md), or using [`&webcam`](../../source-settings/and-webcam.md).
## Related
[screenshare.md](../../source-settings/screenshare.md)
[and-nosettings.md](../../source-settings/and-nosettings.md)
[and-webcam.md](../../source-settings/and-webcam.md)
---
description: >-
An option to explicitly list what &sensor data you want to capture and
transmit
---
# &sensorfilter
Sender-Side Option! ([`&push`](../../source-settings/push.md))
## Aliases
* `&sensorsfilter`
* `&filtersensor`
* `&filtersensors`
## Options
Example: `&sensorfilter=gyro`
Value
Description
gyro
gyroscopic
lin
-
acc
accelerometer
mag
magnetometer
pos
-
ori
-
## Details
Added a new option to explicitly list what sensor data you want to capture and transmit, when using [`&sensor`](../../source-settings/sensor.md)`&sensorfilter=gyro,lin,acc,mag,pos,ori`. For the above demo, you can use `&sensorfilter=pos,lin` to just send the data you need, reducing the load on the phone/network.
## Related
[sensor.md](../../source-settings/sensor.md)
---
description: Displays the total number of p2p connections of a remote stream
---
# &showconnections
Viewer-Side Option! / Director Option! ([`&scene`](../view-parameters/scene.md), [`&room`](../../general-settings/room.md), [`&view`](../view-parameters/view.md), [`&solo`](../mixer-scene-parameters/and-solo.md), [`&director`](../../viewers-settings/director.md))
## Details
`&showconnections` will display the total number of p2p connections of a remote stream. Works with the director's room and the automixer. Might help give comfort over privacy/security during a stream.
Total number of p2p remote connections (viewers) of a stream source will also appear in the stats menu, even without `&showconnections`. Could be useful for debugging CPU/bandwidth issues.
Connections may represent video/audio streams, or just a data-connection. Meshcast-hosted streams might not be accounted for, depending on how the viewer is connecting.
## Related
[and-maxconnections.md](../../source-settings/and-maxconnections.md)
---
description: Tells the director which slot the guest should prefer to be in
---
# &slot
Sender-Side Option! ([`&push`](../../source-settings/push.md), [`&room`](../../general-settings/room.md))
## Options
Example: `&slot=4`
| Value | Description |
| --------------- | ------------------------------------ |
| (integer value) | the slot guest should be assigned to |
## Details
`&slot=N` is a guest side property (sender side). It just tells the director ([Mixer App](../../steves-helper-apps/mixer-app.md) / [`&slotmode`](../director-parameters/and-slotmode.md)) which slot the guest should prefer to be in, if slots are being auto-assigned. If the desired slot is already taken, then that guest will then not be assign a slot. If the guest was assigned a slot by the [director](../../viewers-settings/director.md), refreshing will keep the assign slot, and the URL-specified slot preference will be ignored.
## Related
[and-slotmode.md](../director-parameters/and-slotmode.md)
[mixer-app.md](../../steves-helper-apps/mixer-app.md)
[and-slots.md](../../newly-added-parameters/and-slots.md)
---
description: Positions the countdown timer
---
# &timer
General Option! ([`&push`](../../source-settings/push.md), [`&room`](../../general-settings/room.md), [`&view`](../view-parameters/view.md), [`&scene`](../view-parameters/scene.md), [`&solo`](../mixer-scene-parameters/and-solo.md), [`&director`](../../viewers-settings/director.md))
## Options
Example: `&timer=5`
Value
Description
1 - 9
Shows the current countdown timer as in the graphic below. Each option specifies where the countdown timer will appear on the screen
2 | (no value given)
Shows the countdown timer in the top center
## Details
`&timer=N` can be used to position where the countdown timer is positioned on a guest's window. Default is still center top but a value of 1 to 9 can be be passed to change positions.
You can enable the countdown as a director via the room settings.
The director has a button that lets them also enable a global count-down timer. Holding `CTRL + click` will let the director pause the timer. If someone joins the room or reloads, the timer will also be reloaded, in sync. Button also in the room settings menu.
This count down timer is the same concept as the per-guest timer the director already has, and will actually conflict with it if both are used, since it uses the same state/variable to keep track of time remaining.
The director will see the global count down timer also; it will just be a bit smaller on screen.
## Related
[and-clock.md](and-clock.md)
---
description: A token for invite/scene links to determine whose the director of a room
---
# &token
General Option! ([`&push`](../../source-settings/push.md), [`&room`](../../general-settings/room.md), [`&view`](../view-parameters/view.md), [`&scene`](../view-parameters/scene.md), [`&solo`](../mixer-scene-parameters/and-solo.md))
## Options
Example: `&token=5eb5e63ee4d9ba06`
Value
Description
(alphanumeric-characters only)
a token for invite/scene links to determine whose the director of a room
## Details
When using [`&maindirectorpassword`](../director-parameters/and-maindirectorpassword.md) as a director, it will add `&token=xxx` to the invite/scene links.
This token is used by the guests to check a remote database server to see who currently 'owns' the token; it persists though, even if the director is not connected.
When using [`&maindirectorpassword`](../director-parameters/and-maindirectorpassword.md) as a director, it tells this database that you are the owner, and it will persist even if you aren't connected to VDO.Ninja. The `&token` tells the guest to ignore other logic about who the director is, instead using the info provided by the token-lookup to determine whose the director.
I may change or revoke this feature, depending on how testing goes this week, as it's rather experimental.
## Related
[and-maindirectorpassword.md](../director-parameters/and-maindirectorpassword.md)
---
description: >-
Will load a side-bar with an IFrame embed, with support for YouTube / Twitch /
Social Stream
---
# &widget
General Option! / Director Option! ([`&director`](../../viewers-settings/director.md), [`&push`](../../source-settings/push.md), [`&room`](../../general-settings/room.md), [`&view`](../view-parameters/view.md), [`&scene`](../view-parameters/scene.md))
## Options
Example: `&widget=https%3A%2F%2Fwww.youtube.com%2Flive_chat%3Fis_popout%3D1%26v%3DORBwkXsUNEs`
Value
Description
(URLComponent-encoded URL value)
load a side-bar with that page as an IFRAME embed
## Details
`&widget` lets you pass a URLComponent-encoded URL value. It will load a side-bar with that page as an IFrame embed, with support for YouTube/Twitch specifically added.
This was designed for Twitch / YouTube / [Social Stream chat](../../steves-helper-apps/social-stream-ninja/), but could in theory work with any CORS-friendly site, such as a third-party web tool.
The director of a room also has the option to enable/disable the widget function for everyone in the room via the room settings menu.
You can encode the URL here:
[https://www.urlencoder.org/](https://www.urlencoder.org/)
If the director uses `&widget`, it will auto sync that with all guests as they connect. I'll try to find ways to make it easier to resize/minimize in the future.
## Related
[chatbutton.md](../../general-settings/chatbutton.md)
[social-stream-ninja](../../steves-helper-apps/social-stream-ninja/)
---
description: >-
Language, save cookies, remote access, chat widget, chunked mode, raise hands,
notify, transcription, closed captions
---
# Settings Parameters
They are separated in three groups: [general options](./#general-options) (push and view), [source side](./#source-side-options) (push) options and [viewer side](./#viewer-side-options) (view) options.
## General Options
You can use them for publisher, viewer and director URLs.
A token for invite/scene links to determine whose the director of a room
\*NEW IN [VERSION 24](../../releases/v24.md)
## Source Side Options
**Source Settings**, which are settings specific to publishing. The parameters can be added to a publishing link, like for example a guest, a director or just a basic push link.
Tells the director which slot the guest should prefer to be in
\*NEW IN [VERSION 24](../../releases/v24.md)
## Viewer Side Options
**Viewer's Settings**, which are aspects that are controllable by the viewer's side. These parameters are mostly added to [`&room`](../../general-settings/room.md) (viewing other guests), [`&view`](../view-parameters/view.md) and [`&scene`](../view-parameters/scene.md) or [`&solo`](../mixer-scene-parameters/and-solo.md) links, but some of them can also be added to the director's URL.
Will ignore the chunked version and use the low-latency version
\*NEW IN [VERSION 24](../../releases/v24.md)
---
description: Like &sink, but selects the default audio output device
---
# &audiooutput
General Option! ([`&push`](../../source-settings/push.md), [`&room`](../../general-settings/room.md), [`&view`](../view-parameters/view.md), [`&scene`](../view-parameters/scene.md))
## Aliases
* `&outputdevice`
* `&od`
## Options
Example: `&audiooutput=Cable_Input`
Value
Description
(string value)
partial string that matches the device's label/name
Cable_Input
will match against "CABLE Input" (VB-Audio Virtual Cable). Use any other string to match against other device names.
(no value given)
hides the option to change the output device, including under the settings cog
## Details
`&audiooutput` lets you set the default audio output device, based on its name.
Matches on "string contains", so a partial string of the device name is enough. Use lower case, with underscores replacing special characters or spaces.
[`&sink`](../view-parameters/and-sink.md) takes priority, if used, and [`&sink`](../view-parameters/and-sink.md) is more strict in matching. While `&audiooutput` matches on the device name, `&sink` matches on the device ID.
`&audiooutput=labelname` is consistent across domains / cookie sessions, while [`&sink=deviceid`](../view-parameters/and-sink.md) isn't.
If the parameter's value is left blank, it hides the option to change the output device, including under the settings cog.
Visit [vdo.ninja/devices](https://vdo.ninja/devices) to find the available device IDs and device names on your system.
Device IDs are specific to VDO.Ninja's domain, while device names are not.
This web-based tool will also auto-create links for you, just by clicking on the respective device.
You can change the audio output device dynamically via the settings menu.
In Version 22 of VDO.Ninja you can change the audio output device of each video feed individually via `Right-Click -> Audio Destination` on the video feed.
### Electron Capture
You can specify an audio output device via the Electron Capture app's command line using this URL parameter (when used in conjunction with VDO.Ninja).
Example:
`electron.exe --url="https://vdo.ninja/?view=guest1&outputdevice=mixer_usb"`
## Related
[and-sink.md](../view-parameters/and-sink.md)
---
description: >-
Support for something called "end to end encryption" using "insertable
streams"
---
# &e2ee
General Option! ([`&push`](../../source-settings/push.md), [`&room`](../../general-settings/room.md), [`&view`](../view-parameters/view.md), [`&director`](../../viewers-settings/director.md))
## Details
There is support for something called "end to end encryption" using "insertable streams" to VDO.Ninja. To use, **add** `&e2ee` **to both the viewer and sender side links**. Can be used in conjunction with [`&password`](and-password.md) to specify a cipher.
More technical details about it:
* VDO.Ninja is already end to end encrypted by default (in peer to peer mode), so this isn't anything of much value to most users.
* In p2p mode, this will double up the encryption on the video/audio stream, which might be useful if your system was compromised by a state actor.
* Uses the browser's built-in AES algo, but there is dedicated JS file for the encryption logic, so you can custom-code to use your own encryption I guess.
* Does NOT work with [Meshcast](../../newly-added-parameters/and-meshcast.md), as I don't have insertable streams working server-side there yet, so there is no E2EE with Meshcast still.
* It can be used with compatible [WHIP/WHEP](../../steves-helper-apps/whip-and-whep-tooling.md) services, but most WHIP/WHEP services won't support insertable streams. Still, some do, and that's probably the main reason why I bothered to add this all in.
* The default crypto key used will be hard coded, public, and not secure, but if you provide a [`&password`](and-password.md) it will use that as the secure cipher phrase instead.
* The encoder and decoder algo will fail-safely, rather than fail-securely; I can change this if needed, but it allows for broader peer compatibility and user friendliness. I have more work to do on visually indicating the state of this all, and to allow for more customization, but I'll wait on that until there is more feedback I guess.
* Not all browsers support this, so in those cases, it may fail safely, if possible; otherwise it will just fail completely.
## Related
[and-password.md](and-password.md)
---
description: Added to the URL, when not assigned to a group, you don't hear or see anything
---
# &groupmode
Sender-Side Option! ([`&push`](../../source-settings/push.md), [`&room`](../../general-settings/room.md))
## Details
`&groupmode` changes the way [groups](../../general-settings/and-group.md) work when not in a group.
With `&groupmode` added to your URL, when not assigned to a group, you don't hear or see anything. This also goes for remote participants who are not in a group - you will not see or hear them if they are not in a group, even if you also are not in a group.
The default normally with VDO.Ninja is that if not in a group, you see and hear everyone. This remains true if not using `&groupmode`, even if others in the room are. Others may not be able to see or hear you though, if they have `&groupmode` enabled, and you haven't picked a group. So, `&groupmode` only impacts the local user, and will not impact remote connections.
The [Comms app](../../steves-helper-apps/comms.md) uses `&groupmode` by default.
## Related
[and-group.md](../../general-settings/and-group.md)
[and-groupview.md](and-groupview.md)
[and-groupaudio.md](../../general-settings/and-groupaudio.md)
---
description: >-
The same as &group, except it lets you see those groups without actually
needing to join them with your mic/camera
---
# &groupview
General Option! ([`&push`](../../source-settings/push.md), [`&room`](../../general-settings/room.md), [`&view`](../view-parameters/view.md), [`&scene`](../view-parameters/scene.md))
## Aliases
* `&viewgroup`
* `&gv`
## Options
Example: `&groupview=Groupname`
Value
Description
1
adds the guest or director to group 1
2
adds the guest or director to group 2
3,4,5,6
adds the guest or director to group 3, 4, 5 and 6
(string)
creates/adds the guest or director to a custom group
## Details
`&groupview` is the same as [`&group`](../../general-settings/and-group.md), except it lets you see those groups without actually needing to join them with your mic/camera. (There's no button in the directors/guest view for this, since there isn't a need yet for that.)
You can change the view-only groups via the API (http/IFrame) or using the [Comms app](../../steves-helper-apps/comms.md), which has been updated with buttons for this option. the HTTP documentation: [https://github.com/steveseguin/Companion-Ninja/blob/main/README.md#api-commands](https://github.com/steveseguin/Companion-Ninja/blob/main/README.md#api-commands)
You can now use the HTTP/WSS API to both join and leave a group; not just toggle said state. Both the view-group function and regular group function.
## Related
[and-group.md](../../general-settings/and-group.md)
[and-groupaudio.md](../../general-settings/and-groupaudio.md)
[and-groupmode.md](and-groupmode.md)
---
description: Option for a custom hang-up message
---
# &hangupmessage
Sender-Side Option! ([`&push`](../../source-settings/push.md))
## Aliases
* `&hum`
## Options
Example: `&hangupmessage=bye`
(URL encoded string)
the message the guest will see when hanging up
## Details
Option for a custom hang-up message. `&hangupmessage` takes a URL encoded string. So it can be just "bye", or it can be some HTML, as shown in the link.
eg:
[https://vdo.ninja/?hum=bye%3Cimg%20src%3D%22.%2Fmedia%2Flogo\_cropped.png%22%3E\&push=ZimFGxM](https://vdo.ninja/?hum=bye%3Cimg%20src%3D%22.%2Fmedia%2Flogo\_cropped.png%22%3E\&push=ZimFGxM)
## Related
[and-humb64-alpha.md](and-humb64-alpha.md)
[and-welcome.md](../../newly-added-parameters/and-welcome.md)
[and-welcomeimage.md](and-welcomeimage.md)
---
description: >-
The same as &hangupmessage, except this takes an input as a base64 encoded
string
---
# &humb64
Sender-Side Option! ([`&push`](../../source-settings/push.md))
## Options
Example: `&humb64=YnllJTNDaW1nJTIwc3JjJTNEJTIyLiUyRm1lZGlhJTJGbG9nb19jcm9wcGVkLnBuZyUyMiUzRQ==`
(base64 encoded string)
the message the guest will see when hanging up
## Details
`&humb64` is the same as [`&hangupmessage`](and-hangupmessage-alpha.md), except this new option takes an input as a base64 encoded string. VDO.Ninja will decode the base64 on load.
Base64 values are less likely to get parsed by apps like Slack incorrectly, so safer to share. If feeling lazy, you can also just use [invite.cam](https://invite.cam/), and encode the entire link itself; has a similar effect.
eg:
[https://vdo.ninja/?push=khnCsjS\&wc\&humb64=YnllJTNDaW1nJTIwc3JjJTNEJTIyLiUyRm1lZGlhJTJGbG9nb19jcm9wcGVkLnBuZyUyMiUzRQ](https://vdo.ninja/?push=khnCsjS\&wc\&humb64=YnllJTNDaW1nJTIwc3JjJTNEJTIyLiUyRm1lZGlhJTJGbG9nb19jcm9wcGVkLnBuZyUyMiUzRQ)
## Related
[and-hangupmessage-alpha.md](and-hangupmessage-alpha.md)
---
description: The same as &label, except it asks the user still for a user name
---
# &labelsuggestion
General Option! ([`&push`](../../source-settings/push.md), [`&room`](../../general-settings/room.md), [`&view`](../view-parameters/view.md), [`&scene`](../view-parameters/scene.md), [`&solo`](../mixer-scene-parameters/and-solo.md))
## Aliases
* `&defaultlabel`
* `&ls`
## Options
Example: `&labelsuggestion=Steve`
Value
Description
(string)
Sets the label if the user leaves the prompt blank
(no value given)
Asks the guest for a label
## Details
`&labelsuggestion` is the same as [`&label`](../../general-settings/label.md), except it asks the user still for a user name. If they leave it blank or cancel the prompt asking for a name, it will use the default label.
[https://vdo.ninja/?labelsuggestion=guest\&webcam](https://vdo.ninja/?labelsuggestion=guest\&webcam)
Once the user enters their label, `&label=username` is added to the URL, so if they reload, they won't be asked again for the label. `&label` takes priority over `&labelsuggestion`.
## Related
[label.md](../../general-settings/label.md)
[showlabels.md](../design-parameters/showlabels.md)
[and-screensharelabel.md](../../newly-added-parameters/and-screensharelabel.md)
---
description: A mic only button shows if a guest joining a room
---
# &miconlyoption
Sender-Side Option! ([`&push`](../../source-settings/push.md), [`&room`](../../general-settings/room.md))
## Aliases
* `&moo`
## Details
Based on user feedback, I'm testing the concept of a "join with mic-only" button. You can enable it with `&miconlyoption`. It's exactly the same as join with video, except the video device is not selected by default. When used, a mic only button shows if a guest joining a room, and if [`&audiodevice=0`](../../source-settings/audiodevice.md) is not present. Hoping this will give more users courage to click the join button, but if it causes issues, I may revert.
For testing at [https://vdo.ninja/?room=someetestroomhere\&moo](https://vdo.ninja/?room=someetestroomhere\&moo)
## Related
[miconly.md](../../source-settings/miconly.md)
[audiodevice.md](../../source-settings/audiodevice.md)
---
description: Sets a password to view a stream or to join a room
---
# &password
General Option! ([`&push`](../../source-settings/push.md), [`&room`](../../general-settings/room.md), [`&view`](../view-parameters/view.md), [`&director`](../../viewers-settings/director.md))
## Aliases
* `&pass`
* `&pw`
* `&p`
## Options
Example: `&password=PASSWORD123`
Value
Description
(no value given)
prompts you to select a password
(string)
1 to 49-characters long: aLphaNumEric-characters; case sensitive.
## Details
To make your stream or your room more secure, you can set a password by adding `&password=xxx` to the URL.
If no password value is provided via the URL parameter, the system will prompt for one when connecting.
You will want to add the password value to the URL if loading it into OBS.
Passwords apply to both Stream IDs and Room IDs.
Please use alphanumeric-characters only; spaces or other characters may cause the mechanism to fail.
**Passwords are CASE-SENSITIVE**; mobile users should watch-out for auto-capitalization when entering them.
Adding [`&hash=HASH_VALUE`](../../newly-added-parameters/and-hash.md) will act as if `&password=PASSWORD` was added.
Use this link to get the hash for the password:
[https://vdo.ninja/examples/changepass.html](https://vdo.ninja/examples/changepass.html)
## Related
[and-hash.md](../../newly-added-parameters/and-hash.md)
[codirector.md](../../director-settings/codirector.md)
[and-prompt.md](../settings-parameters/and-prompt.md)
[and-maindirectorpassword.md](../director-parameters/and-maindirectorpassword.md)
---
description: >-
Will save that stream ID to local storage and reuse it every time &permaid is
used without a stream ID
---
# &permaid
Sender-Side Option! ([`&room`](../../general-settings/room.md))
## Options
Example: `&permaid=StreamID`
Value
Description
(no value given)
creates a randomly generated stream ID
(string)
1 to 49-characters long: aLphaNumEric-characters; case sensitive.
## Details
If using `&permaid=streamidhere` to specify the stream ID, rather than just [`&push`](../../source-settings/push.md), will save that stream ID to local storage and reuse it every time `&permaid` is used without a stream ID.
You could also just use `&permaid` on its own initially, which will auto assign a unique stream ID and save that generated one to local storage, which makes it easier to use one invite for many users, but have VDO.Ninja manage the stream ID assignments.
If not using `&permaid`, it will just default to using `&push` with a random ID. (this avoids 'stream already in use' mishaps)
## Related
[push.md](../../source-settings/push.md)
---
description: The same as &welcome, except this takes an input as a base64 encoded string
---
# &welcomeb64
Sender-Side Option! ([`&push`](../../source-settings/push.md))
## Options
Example: `&welcome64=SGVsbG8=`
(base64 encoded string)
the message the guest will see when joining the room
## Details
`&welcome64` is the same as [`&welcome`](../../newly-added-parameters/and-welcome.md), except this new option takes an input as a base64 encoded string. VDO.Ninja will decode the base64 on load.
Base64 values are less likely to get parsed by apps like Slack incorrectly, so safer to share. If feeling lazy, you can also just use [invite.cam](https://invite.cam/), and encode the entire link itself; has a similar effect.
eg:
[https://vdo.ninja/?push=khnCsjS\&wc\&welcomeb64=SGVsbG8](https://vdo.ninja/?push=khnCsjS\&wc\&welcomeb64=SGVsbG8)
## Related
[and-welcome.md](../../newly-added-parameters/and-welcome.md)
---
description: Lets you specify an image that appears for a few seconds once a guest joins
---
# &welcomeimage
Sender-Side Option! ([`&push`](../../source-settings/push.md))
## Aliases
* `&welcomeimg`
## Options
Example: `&welcomeimage=https://vdo.ninja/alpha/media/old_logo.png`
| Value | Description |
| ----- | ---------------- |
| (URL) | URL of the image |
## Details
`&welcomeimage` lets you specify a welcome image (URL) that appears for a few seconds before fading away once a guest joins.
Example:
[`https://vdo.ninja/?welcomeimage=https://vdo.ninja/alpha/media/old_logo.png&webcam`](https://vdo.ninja/?welcomeimage=https://vdo.ninja/alpha/media/old\_logo.png\&webcam)
## Related
[and-welcome.md](../../newly-added-parameters/and-welcome.md)
[and-hangupmessage-alpha.md](and-hangupmessage-alpha.md)
---
description: >-
Stream ID, create a room, password, labels, groups, devices, auto-start,
welcoming guests, sharing a website/file
---
# Setup Parameters
They are separated in two groups: [general options](./#general-options) (push and view) and [source side](./#source-side-options) (push) options.
## General options
You can add them to both, source ([`&push`](../../source-settings/push.md)) and viewer ([`&view`](../view-parameters/view.md), [`&scene`](../view-parameters/scene.md) or [`&solo`](../mixer-scene-parameters/and-solo.md)) sides.
Outputs the audio to the specified audio output device, rather than the default
\*NEW IN [VERSION 24](../../releases/v24.md)
## Source side options
You have to add them to the source side ([`&push`](../../source-settings/push.md)).
Specifies a negative timezone value in minutes for a TURN server
---
description: Will optimize the mobile experience for more capable smartphones
---
# &flagship
Sender-Side Option! ([`&push`](../../source-settings/push.md))
## Details
[`https://vdo.ninja/alpha/?flagship`](https://vdo.ninja/alpha/?flagship)
Been playing around a new flag called `&flagship`, which will optimize the mobile experience for more capable smartphones; essentially, streaming higher quality video to other guests versus the normal mobile-performance mode.
Can be used to try to have a mobile phone push closer-to-desktop quality out, to other guests. The quality is only slightly worse than what a desktop user would push out I think. Just add `&flagship` to the guest invite links to trigger.
If you don't include `&flagship`, I've still made some performance tweak, such as increasing the default bitrate from 200-kbps to 350-kbps with just one other guest in the room; with two other, its 250-kbps; after that, it starts to drop down a lot again though. I need to organize my thoughts a bit more on all this, but so far I think it's an improvement.
I've also modified the non-flagship mode, for low-end mobile devices, to use the [`&limittotalbitrate`](../video-bitrate-parameters/limittotalbitrate.md) flag by default (500-kbps). [`&limittotalbitrate`](../video-bitrate-parameters/limittotalbitrate.md) hasn't been that heavily tested yet, but it's part of v22 and might be better than [`&totalroombitrate`](../video-bitrate-parameters/totalroombitrate.md); currently I'll increasingly use them together I think though. They are both the same concept, except one is viewer-side controlled, and the other is sender-side controlled; both limit the bitrate that guests in the room see based on the number of guests in the room.
## Related
[and-notmobile.md](and-notmobile.md)
[and-forceios.md](../mobile-parameters/and-forceios.md)
---
description: Scales down the meshcast video output via the URL
---
# &meshcastscale
Meshcast Option! / Sender-Side Option! ([`&meshcast`](../../newly-added-parameters/and-meshcast.md), [`&push`](../../source-settings/push.md))
## Aliases
* `&mcscale`
## Options
Example: `&meshcastscale=50`
Value
Description
(percentage 1 to 100)
will scale down the video to the percentage given
## Details
The `&meshcastscale` parameter will scale down the Meshcast video output via the URL, post camera capture setup. Because of how Meshcast works, this is a sender-side parameter. You may wish to use this to lower the resolution if your camera has a fixed capture resolution.
Alternatively, if you need to dynamically adjust the resolution, that option already exists via camera settings via width/height slider adjustments.
[https://vdo.ninja/?meshcast\&meshcastscale=50](https://vdo.ninja/?meshcast\&meshcastscale=50)
## Related
[and-meshcast.md](../../newly-added-parameters/and-meshcast.md)
[scale.md](../view-parameters/scale.md)
---
description: Optimizes a guest/push link for a mobile device to help reduce CPU issues
---
# &mobile
Sender-Side Option! ([`&push`](../../source-settings/push.md))
## Details
`&mobile` will optimize a guest/push link for a mobile device. It might help reduce CPU issues.
There are [`&flagship`](and-flagship.md) and [`&forceios`](../mobile-parameters/and-forceios.md) as two options to configure mobile devices, but `&mobile` and [`¬mobile`](and-notmobile.md) are more generic options.
[`¬mobile`](and-notmobile.md) might be able to improve video quality (in case you want to override the automatic defaults, which already detects if a device is mobile or not).
## Related
[and-notmobile.md](and-notmobile.md)
[and-flagship.md](and-flagship.md)
[and-forceios.md](../mobile-parameters/and-forceios.md)
---
description: Optimizes a guest/push link for a mobile device to improve video quality
---
# ¬mobile
Sender-Side Option! ([`&push`](../../source-settings/push.md))
## Details
`¬mobile` might be able to improve video quality (in case you want to override the automatic defaults, which already detects if a device is mobile or not).
[`&mobile`](and-mobile.md) will optimize a guest/push link for a mobile device. It might help reduce CPU issues.
There are [`&flagship`](and-flagship.md) and [`&forceios`](../mobile-parameters/and-forceios.md) as two options to configure mobile devices, but `&mobile` and [`¬mobile`](and-notmobile.md) are more generic options.
## Related
[and-flagship.md](and-flagship.md)
[and-mobile.md](and-mobile.md)
---
description: >-
Allows a guest to control their total room video bitrate dynamically from the
settings panel (under video settings)
---
# &controlroombitrate
Sender-Side Option! ([`&push`](../../source-settings/push.md))
## Aliases
* `&crb`
## Details
Allows a guest to control their total room video bitrate dynamically from the settings panel (under video settings).
A slider appears in the guest’s settings menu.
This feature could be useful for guests that have limited CPU or Network bandwidth to self-regulate.
Lowering this slider will reduce the video bitrate of incoming video streams.
It will not allow the guest to increase the room bitrate's limits; only lower them.
You need to be a publisher to access this value (as the settings button is needed).
Consider using [`&totalroombitrate`](totalroombitrate.md) if you wish to increase the bitrate higher than the default max of \~ 500-kbps.
## Related
[roombitrate.md](roombitrate.md)
[totalroombitrate.md](totalroombitrate.md)
---
description: Judges the available bandwidth of a sender's connection
---
# &maxbandwidth
Sender-Side Option! ([`&push`](../../source-settings/push.md))
## Options
Example: `&maxbandwidth=80`
Value
Description
(percentage 1 to 100)
the connection never uses more than that amount of the available reported bandwidth
## Details
Made a new bitrate option called `&maxbandwidth`, which differs from other commands as it leverages a chromium (chrome/edge/brave/electron) feature to judge the available bandwidth of a sender's connection. Passing a value to it as the sender (a percentage; 1 to 100 ideally), you can try to ensure the connection never uses more than that amount of the available reported bandwidth.
So the notion is, if you want to set the invite link bitrate to 50-mbps, but one guest only has only a 20-mbps connection, `&maxbandwidth=80` will try to limit the bitrate to around 16-mbps. I sometimes will tell people to set the bit rate to about 80% of what their connection can allow, as higher than that can result in some frame stutter when there is packet loss, since the connection lacks headroom to recover. This command will try to do it automatically, for all the viewers of a stream.
My goal here is to use it with the [Mixer App](../../steves-helper-apps/mixer-app.md) or [Versus.cam](../../steves-helper-apps/versus.cam.md), so eSports users can crank out high bitrates with less tinkering per guest. I have no idea how well it will work in practice so far.
The upcoming and standalone replacement vor vdo.ninja/monitor:
[https://versus.cam/](https://versus.cam/)
## Related
[and-outboundvideobitrate.md](and-outboundvideobitrate.md)
[and-outboundaudiobitrate.md](../../source-settings/and-outboundaudiobitrate.md)
---
description: Limits the max video bitrate out for this publisher, per stream out
---
# &maxvideobitrate
Sender-Side Option! ([`&push`](../../source-settings/push.md))
## Aliases
* `&maxbitrate`
* `&mvb`
## Options
Example: `&maxvideobitrate=8000`
| Value | Description |
| ------------------------ | ---------------------------------------- |
| (positive integer value) | max allowed video bitrate per stream out |
## Details
Useful if you are a director and you wish to prevent guests from pulling more than 500-kbps (LQ) or 1200-kbps (HQ) when in [broadcast](../view-parameters/broadcast.md) mode.
This is NOT the same as setting the target bitrate as a publisher; this just sets a max limit that viewers can pull video streams at.
Please see [`&totalroombitrate`](totalroombitrate.md) or [`&limittotalbitrate`](limittotalbitrate.md), as well.
Set to 600-kbps, 200-kbps, or 80-kbps if the goal is to reduce CPU load also. (2x, 3x, or 4x down-scaling is applied at those bitrate limits).
## Related
[and-outboundvideobitrate.md](and-outboundvideobitrate.md)
[limittotalbitrate.md](limittotalbitrate.md)
[bitrate.md](bitrate.md)
[totalroombitrate.md](totalroombitrate.md)
---
description: Target video bitrate and max bitrate for outgoing video streams
---
# &outboundvideobitrate
Sender-Side Option! ([`&push`](../../source-settings/push.md))
## Aliases
* `&ovb`
## Options
Example: `&outboundvideobitrate=4000`
| Value | Description |
| --------------- | ------------------ |
| (integer value) | value will be kbps |
## Details
Target video bitrate and max bitrate for outgoing video streams.
Sets the viewer's bitrate and overrides the [`&videobitrate`](bitrate.md) parameter. It won't override the room's total bitrate parameter, as that's a dynamically set bitrate, so **to get higher bitrate in group rooms you still need to use** [`&totalroombitrate`](totalroombitrate.md).
## Related
[and-outboundaudiobitrate.md](../../source-settings/and-outboundaudiobitrate.md)
---
description: Sets both &totalscenebitrate and &totalroombitrate flags
---
# &totalbitrate
Viewer-Side Option! ([`&scene`](../view-parameters/scene.md), [`&room`](../../general-settings/room.md), [`&view`](../view-parameters/view.md), [`&solo`](../mixer-scene-parameters/and-solo.md))
## Aliases
* `&tb`
## Options
Example: `&totalbitrate=3000`
Value
Description
(integer value)
max. video bitrate in kbps a scene/room uses
## Details
`&totalbitrate` sets both [`&totalscenebitrate`](and-totalscenebitrate.md) and [`&totalroombitrate`](totalroombitrate.md) flags. Not quite sure how well it will work, but since a scene and a guest are exclusive possibilities, it's a bit of a flexible way to just learn one flag to do it all, as I realize all the options can get confusing.
[`&totalscenebitrate`](and-totalscenebitrate.md) and [`&totalroombitrate`](totalroombitrate.md) limit the total incoming bitrate, dividing up the bandwidth available to each video being played back. There are nuances in differences, with the main one being [`&totalroombitrate`](totalroombitrate.md) is for a guest link and [`&totalscenebitrate`](and-totalscenebitrate.md) is for a scene/view link.
## Related
[and-totalscenebitrate.md](and-totalscenebitrate.md)
[totalroombitrate.md](totalroombitrate.md)
---
description: Max. video bitrate a scene uses
---
# &totalscenebitrate
Viewer-Side Option! ([`&view`](../view-parameters/view.md), [`&scene`](../view-parameters/scene.md), [`&room`](../../general-settings/room.md))
## Aliases
* `&tsb`
* `&maxtotalscenebitrate`
* `&mtsb`
## Options
Example: `&totalscenebitrate=4000`
| Value | Description |
| --------------- | --------------------------------------- |
| (integer value) | max. video bitrate in kbps a scene uses |
## Details
Mainly added to help offer another way to optimize performance and limit inbound bandwidth used, since why not.
This is similar to [`&totalroombitrate`](totalroombitrate.md), but `&totalscenebitrate` applies to scenes and faux-room scenes instead. That is, it splits the total bitrate available for playback by the number of videos in the scene. It's a way to keep the inbound bitrate below a certain threshold. If [`&videobitrate`](bitrate.md) is also used, [`&videobitrate`](bitrate.md) becomes a max limit on any individual video, so you can set `&totalscenebitrate=6000` and [`&videobitrate=2000`](bitrate.md), to keep all videos below 2-mbps each, but potentially go lower if more than 3 videos are present.
## Related
[totalroombitrate.md](totalroombitrate.md)
[and-totalbitrate.md](and-totalbitrate.md)
[bitrate.md](bitrate.md)
---
description: >-
Lets you set the target bitrate for a guest when they 'zoom in' (fullscreen)
on a video
---
# &zoomedbitrate
Viewer-Side Option! ([`&view`](../view-parameters/view.md), [`&room`](../../general-settings/room.md))
## Aliases
* `&zb`
## Options
Example: `&zoomedbitrate=2000`
| Value | Description |
| ---------------- | ---------------------------------------------- |
| (no value given) | zoomed bitrate = 2500-kbps instead of 600-kbps |
| (integer value) | zoomed bitrate in kbps |
## Details
Lets you set the target bitrate for a guest in a room when they 'zoom in' on a video using the full-window icon in the top-right of a video.
The idea is, you might want to still have a group call, but occasionally share a high resolution screen. This will increase the load a lot on the guest who is being zoomed-in on, but it's an option if increasing [`&totalroombitrate`](totalroombitrate.md) is not acceptable.
Using the flag unset increases the bitrate from 600-kbps to 2500-kbps.
## Related
[totalroombitrate.md](totalroombitrate.md)
---
description: Sets the "desired target" bitrate in kbps
---
# &videobitrate
Viewer-Side Option! ([`&view`](../view-parameters/view.md), [`&scene`](../view-parameters/scene.md), [`&room`](../../general-settings/room.md))
## Aliases
* `&bitrate`
* `&vb`
## Options
Example: `&videobitrate=6000`
| Value | Description |
| --------------- | --------------- |
| (integer value) | bitrate in kbps |
## Details
`&videobitrate` sets the target video bitrate of a video feed in a solo link or the video feeds in a scene.
This parameter is only for scenes and solo links. Use [`&totalroombitrate`](totalroombitrate.md) for example to set up the video bitrate for guests in a room.
Default value will target around **2500**-kbps.
The maximum achievable bitrate is around 60,000-kbps (60-mbps).
**Lowering** the bitrate can sometimes **reduce CPU load**, **bandwidth**, and **stuttering** issues
You might want to increase the bitrate for game streams, to ensure smooth frame rates.
Not compatible with **Firefox**.
## Related
[video-bitrate-for-push-view-links.md](../../guides/video-bitrate-for-push-view-links.md)
[audiobitrate.md](../view-parameters/audiobitrate.md)
---
description: Limits the total outbound bitrate
---
# &limittotalbitrate
Sender-Side Option! / Director Option! ([`&push`](../../source-settings/push.md), [`&room`](../../general-settings/room.md), [`&director`](../../viewers-settings/director.md))
## Aliases
* `<b`
## Options
Example: `&limittotalbitrate=2000` or `&limittotalbitrate=2000,1000`
| Value | Description |
| ------------------------ | ---------------------------------------- |
| (positive integer value) | max total outbound video bitrate in kbps |
| `1000,500` | Desktop bitrate, Smartphone bitrate |
## Details
_Tries_ to limit the total outbound bitrate to some max total value, via the publisher's side. This could be useful if you are broadcasting video as a director to the room, but only have a fixed amount of upload bandwidth or CPU.
`&limittotalbitrate` can now take two values; the second of which gets used if the device is a 'mobile' device, while the first gets used otherwise. ie: `&limittotalbitrate=1000,500`
Useful if you don't know if the guest is going to join via Desktop or via Smartphone, and you wish to avoid overloading a mobile device.
### Director
When using the `&limittotalbitrate` option as a [director](../../viewers-settings/director.md), the room settings will include a new slider to let you dynamically change that value.
This lets the director set a maximum total bandwidth outbound from them to the guests; useful if you set the total room bitrate to something high. Combined, you can ensure the guests as high quality as possible from you, without causing your OBS RTMP output or whatever to get smashed.
### Mixer App
When using the [Mixer App](../../steves-helper-apps/mixer-app.md) ([vdo.ninja/alpha/mixer](https://vdo.ninja/alpha/mixer)), the `&limittotalbitrate` value was set to 350-kbps before, but now I have it set to 1500-kbps. Guests in the Mixer App should as a result now see the director's broadcast output in 3x higher quality now, for better or worse. I may adjust the default value in the mixer based on user issue reports.
The slider doesn't appear if not using the `&limittotalbitrate` value in the URL (or if not using the Mixer App). It's just too confusing to explain to include it by default.
## Related
[totalroombitrate.md](totalroombitrate.md)
[roombitrate.md](roombitrate.md)
---
description: >-
Video bitrate reduced when the video is not visible in OBS (not active in a
scene)
---
# &optimize
Viewer-Side Option! ([`&view`](../view-parameters/view.md), [`&scene`](../view-parameters/scene.md), [`&room`](../../general-settings/room.md))
## Options
Example: `&optimize=1000`
| Value | Description |
| ---------------- | --------------------------------------------------------------------- |
| (integer value) | value in kbps |
| (no value given) | 600-kbps |
| `0` | disables the video track when not considered visible in a scene (OBS) |
## Details
`&optimize` reduces the video bitrate to 600-kbps when the video is not visible in OBS (not active in a scene). This is mainly there to help with reducing load for OBS and for guests. It can take a few seconds for the bitrate to ramp back up after it becomes active again.
This does not work with iPhone-sourced video streams.
## Related
[bitrate.md](bitrate.md)
---
description: Changing the bitrate of the outgoing and incoming video and for rooms
---
# Video Bitrate Parameters
They are separated in two groups: [source side](./#source-side-options) (push) options for the sender of the video and [viewer side](./#viewer-side-options) (view) options for the viewer of the video. Some of them are especially for rooms.
## Source side options
You have to add them to the source side ([`&push`](../../source-settings/push.md)).
Judges the available bandwidth of a sender's connection
## **Viewer side options**
You have to add them to the viewer side ([`&room`](../../general-settings/room.md) or [`&view`](../view-parameters/view.md) or [`&scene`](../view-parameters/scene.md) or [`&solo`](../mixer-scene-parameters/and-solo.md)).
Lets you manually set the video bitrate for screen-shares
## Related
[video-parameters](../video-parameters/)
[video-bitrate-in-rooms.md](../../guides/video-bitrate-in-rooms.md)
[video-bitrate-for-push-view-links.md](../../guides/video-bitrate-for-push-view-links.md)
---
description: >-
Limits any guest viewer in the group chat room from pulling the video stream
at more than the specified bitrate value
---
# &roombitrate
Sender-Side Option! ([`&push`](../../source-settings/push.md))
## Aliases
* `&roomvideobitrate`
* `&rbr`
## Options
Example: `&roombitrate=200`
| Value | Description |
| ----------------------------- | -------------------------------------------------------------- |
| `0` | disables access to your video for other guests in a group room |
| (some positive integer value) | max. allowed bitrate |
## Details
Limits any guest viewer in the group chat room from pulling the video stream at more than the specified bitrate value.
Does not impact what the director sees and does not limit the quality of what OBS has access to.
This is like [`&maxvideobitrate`](and-maxvideobitrate.md), but `&roombitrate` only applies to fellow group room guests.
Practically, a guest normally won't pull more than 1200-kbps and that's only if they click the HQ full-window button.
Set to 600-kbps, 200-kbps, or 80-kbps if the goal is to reduce CPU load. (2x, 3x, or 4x down-scaling is applied at those bitrate limits)
## Related
[totalroombitrate.md](totalroombitrate.md)
[and-controlroombitrate.md](and-controlroombitrate.md)
[and-maxvideobitrate.md](and-maxvideobitrate.md)
[video-bitrate-in-rooms.md](../../guides/video-bitrate-in-rooms.md)
---
description: The total bitrate a guest in a room can view video streams with
---
# &totalroombitrate
Viewer-Side Option! ([`&view`](../view-parameters/view.md), [`&scene`](../view-parameters/scene.md), [`&room`](../../general-settings/room.md))
Director Option! ([`&director`](../../viewers-settings/director.md))
## Aliases
* `&totalroomvideobitrate`
* `&trb`
## Options
Example: `&totalroombitrate=4000` or `&totalroombitrate=2000,1000`
| Value | Description |
| --------------- | ---------------------------------------------- |
| (integer value) | set this to be the total combined room bitrate |
| `1000,500` | Desktop bitrate, Smartphone bitrate |
## Details
The total bitrate a guest in a room can view video streams with; their combined bitrate total of all inbound video streams.
The default value is 500-kbps.
Split between the number of streams that guest is viewing.
So for example, with 6-guests in a room, the default of 500-kbps will have each guest requesting 100-kbps from each other. 5 streams x 100-kbps.
### Two values
`&totalroombitrate` can take two values; the second of which gets used if the device is a 'mobile' device, while the first gets used otherwise. ie: `&totalroombitrate=1000,500`
Useful if you don't know if the guest is going to join via Desktop or via Smartphone, and you wish to avoid overloading a mobile device.
Please note the difference between `&totalroombitrate` and [`&totalscenebitrate`](and-totalscenebitrate.md). `&totalroombitrate`controls what the total bitrate for guests in a room is limited to. [`&totalscenebitrate`](and-totalscenebitrate.md), on the other hand, is what you will want if you want to do the same for a view-link, added to OBS, for example.
### Limitations
Total room bitrate does not override any limits other guests in the room may have set to limit their outbound bandwidth.
Mobile devices are also coded to typically refuse requests of higher bitrates by other guests, even with a high total room bitrate set. Mobile devices will quickly overheat if publishing to many guests using software-encoding, so they are treated somewhat special.
In general, setting a high total room bitrate will increase the CPU and network requirements of the group room. Higher bitrates mean higher resolution, which means higher compute loads, so some computers may become overloaded. The default of 500-kbps seems low, but it was carefully selected to reduce such issues as much as reasonable.
Consider using [`&broadcast`](../view-parameters/broadcast.md), combined with either a powerful host computer or a service like [Meshcast.io](https://meshcast.io/) if you'd like to share high quality video to a larger room. A high total room bitrate value may cause severe problems in large rooms or on slower computers.
### Director's ability to control
If the director joins the room, they automatically set the default total room bitrate for every guest that joins the room; guests will match the director's value. This feature may even override the URL-parameter that any guest might have added to their URL already, depending on version of VDO.Ninja. (still being tweaked based on user feedback)
The director can also dynamically change their total room bitrate value using a slider that appears when pressing the room-settings button in the lower control bar. This will instantly change the total room bitrate value for all guests.
 (1).png>)
There is a toggle in the director's room which adds `&trb=2000` to the guest's invite link.
## Related
[roombitrate.md](roombitrate.md)
[and-totalbitrate.md](and-totalbitrate.md)
[and-controlroombitrate.md](and-controlroombitrate.md)
[video-bitrate-in-rooms.md](../../guides/video-bitrate-in-rooms.md)
---
description: Changes the aspect ratio on the publisher side
---
# &aspectratio
Sender-Side Option! ([`&push`](../../source-settings/push.md))
## Aliases
* `&ar`
## Options
Example: `&aspectratio=1.77777` or `&aspectratio=landscape`
| Value | Description |
| ---------------- | ------------------------------- |
| `landscape` | aspect ratio of 16:9 (1.777777) |
| `portrait` | aspect ratio of 9:16 (0.5625) |
| `square` | aspect ratio of 1:1 (1) |
| `1.33333` | aspect ratio of 4:3 |
| (decimal number) | aspect ratio |
## Details
`&aspectratio` changes the aspect ratio on the publisher side. Floating point value; 1.777777 is common; not supported by all browsers.
[https://vdo.ninja/?webcam\&aspectratio=1.33333](https://vdo.ninja/?webcam\&aspectratio=1.33333)
You can also change the aspect ratio via the video settings menu. (1) (1).png>)
If using `&aspectratio`, it will keep the [height](../../source-settings/and-height.md) constant, and vary width, unless [`&width`](../../source-settings/and-width.md) is set, which will then be the fixed constant.
### Screen-share
`&aspectratio` works with screen-shares, so you can force crop an incoming screen-share to be a certain aspect ratio. If [`&screenshareaspectratio`](../screen-share-parameters/and-screenshareaspectratio.md) is used it will apply to just screen-shares. If [`&screenshareaspectratio`](../screen-share-parameters/and-screenshareaspectratio.md) does not have a value passed, it's assumed to be set as "default", which overrides `&aspectratio` option, if used also.
## Related
[and-screenshareaspectratio.md](../screen-share-parameters/and-screenshareaspectratio.md)
[and-quality.md](and-quality.md)
[and-width.md](../../source-settings/and-width.md)
[and-height.md](../../source-settings/and-height.md)
---
description: Adds the ability to select an image, instead of a video device
---
# &avatar
Sender-Side Option! ([`&push`](../../source-settings/push.md))
\* on [https://vdo.ninja/beta/](https://vdo.ninja/beta/) and [https://vdo.ninja/alpha/](https://vdo.ninja/alpha/)
## Options
Example: `&avatar=default`
Value
Description
(no value given)
adds the ability to select an image, instead of a video device
(encoded URL)
pre-selects the chosen image as an avatar
default
will pre-select the default avatar, rather than leaving it un-selected
## Details
`&avatar` adds the ability to select an image, instead of a video device. The image will trigger when the video is muted or no video device is selected. A default avatar image is provided, but you can select your own from disk. `&avatar=default` will pre-select the default avatar, rather than leaving it un-selected.
You can toggle it for the guest's invite link in the director's room:
You can encode your URL here:
[https://www.urlencoder.org/](https://www.urlencoder.org/)
### Director
Choosing the default avatar / placeholder image is activated for the director on default
## Related
[and-waitimage.md](../newly-added-parameters/and-waitimage.md)
[and-bgimage.md](../design-parameters/and-bgimage.md)
---
description: Video playback is disabled
---
# &blind
General Option! ([`&push`](../../source-settings/push.md), [`&room`](../../general-settings/room.md), [`&view`](../view-parameters/view.md), [`&scene`](../view-parameters/scene.md))
## Details
Video playback is disabled in VDO.Ninja.
## Related
[deafen.md](../../general-settings/deafen.md)
---
description: Same as &buffer, but instead includes the round-trip-time
---
# &buffer2
Viewer-Side Option! ([`&view`](../view-parameters/view.md), [`&scene`](../view-parameters/scene.md), [`&room`](../../general-settings/room.md))
## Options
Example: `&buffer2=500`
| Value | Description |
| --------------- | ----------- |
| (numeric value) | delay in ms |
## Details
`&buffer2=500` is the same as [`&buffer`](../view-parameters/buffer.md), but instead also tells the system to include the round-trip-time in the buffer delay calculation. This way 500-ms of buffer on a connection that has a 200ms ping time will result in a smaller 300-ms buffer, leading to an end-to-end playout delay of \~500ms.
It won't work that well with [Meshcast](../../newly-added-parameters/and-meshcast.md).
It's not super precise, but on a stable connection maybe within 20-ms of flux?
## Related
[buffer.md](../view-parameters/buffer.md)
[sync.md](../view-parameters/sync.md)
---
description: '=motion prioritizes frame rate; =detail prioritizes resolution'
---
# &contenthint
Sender-Side Option! ([`&push`](../../source-settings/push.md))
## Aliases
* `&hint`
* `&contenttype`
* `&content`
## Options
Example: `&contenthint=detail`
| Value | Description |
| -------- | ---------------------------------------------- |
| `detail` | will prioritize **resolution** over frame rate |
| `motion` | will prioritize **frame rate** over resolution |
#### Additional value options
Depending on browser and version, there may be additional values you can pass, such as `text`. Please see the following link for possible options that your browser may offer:
[https://developer.mozilla.org/en-US/docs/Web/API/MediaStreamTrack/contentHint](https://developer.mozilla.org/en-US/docs/Web/API/MediaStreamTrack/contentHint)
## Details
`&contenthint` can customize how you want VDO.Ninja to balance resolution vs frame rate, specifically when bitrate or CPU is insufficient to offer both at the same time.
The two options for video are `detail` or `motion`. Screen-shares generally tend towards `detail` by default, and camera sources are tend towards `motion` by default. `detail` will try to prioritize resolution over frame rate, so the frame rate may drop a lot used. `motion` will try to maximize frame rate, but may drop the resolution a lot. There's no way to force both on as there's no magic bullet if your CPU or network cannot keep up.
For more information on how to lock or maximize the resolution of a video feed, please see the following guide:
[how-do-i-lock-the-resolution.md](../../guides/how-do-i-lock-the-resolution.md)
There is [`&screensharecontenthint`](../screen-share-parameters/and-screensharecontenthint.md) if you want the parameter to only affect screen-shares.
### Addressing core causes of lower quality
If facing poor video quality, you might also want to try increasing your bitrate or improving your network's connection quality, such as moving off of WiFi and onto Ethernet. Sometimes changing codecs, such as to h264 or av1, can help improve quality depending on the cause.
If your CPU is overloaded, h264 might use less CPU than other codecs. You can also consider using \&meshcast to reduce CPU usage if sharing to multiple viewers at a time. Changing browsers might also help, such as trying Chrome, Firefox, or even Safari.
If using [`&codec=vp9`](../view-parameters/codec.md) on the viewer side, the frame rate may drop as low as even 5-fps.
This parameter has been tested on Chrome, but other browsers may vary in behavior. Safari seems to just ignore things, for example.
## Related
[and-screensharecontenthint.md](../screen-share-parameters/and-screensharecontenthint.md)
---
description: Will show the audio and the video of the director but not of the guests
---
# &directoronly
Viewer-Side Option! ([`&scene`](../view-parameters/scene.md), [`&room`](../../general-settings/room.md), [`&view`](../view-parameters/view.md), [`&solo`](../mixer-scene-parameters/and-solo.md))
## Aliases
* `&directorsonly`
* `&do`
## Details
`&directoronly` will show the audio and video of the director but not of the guests. It is basically the same as [`&broadcast`](../view-parameters/broadcast.md) but the guests can't hear each other. It is just the same as doing [`&view=DirectorStreamID`](../view-parameters/view.md), but without having to know the stream ID for the director.
It will actually connect to any director, including co-directors, not just the main one.
[`&view`](../view-parameters/view.md), [`&include`](../mixer-scene-parameters/and-include.md), [`&exclude`](../view-parameters/and-exclude.md) have a lower priority to `&directoronly`. So if there are two directors, you can do `&directoronly&exclude=coDirector123`, so that the codirector doesn't connect.
I changed the toggle in the director's room for "Guests hear others" from [`&view=`](../view-parameters/view.md) to `&directoronly`. The point of this change is that the [director](../../viewers-settings/director.md) can now still talk to those in the room.
Purpose of change: I had a user who wanted [`&broadcast`](../view-parameters/broadcast.md), but also not have the guests hear each other. It's a bit of a hassle to do [`&view=DirectorStreamID`](../view-parameters/view.md), and the toggle is labelled to be misleading by saying "guests", not "everyone".
You can use `&directoronly` to replace [`&broadcast`](../view-parameters/broadcast.md) if you don't want the guests hearing each other.
## Related
[broadcast.md](../view-parameters/broadcast.md)
[view.md](../view-parameters/view.md)
---
description: Sets the target frame rate of the video in frames per second
---
# &fps
Sender-Side Option! ([`&push`](../../source-settings/push.md))
## Aliases
* `&framerate`
* `&fr`
## Options
Example: `&fps=60`
| Value | Description |
| ----------------------------- | ------------------------------ |
| (some positive integer value) | Frame rate (frames per second) |
## Details
`&fps` specifies a target frame rate for the video capture, in frames per second; it is specified on the sender's side. The actual frame rate that's encoded and sent to the viewers may be less than the captured frame rate, sometimes quite a bit lower.
In most cases, if the target captured frame rate isn't supported, VDO.Ninja will throw an error. As a result, \&fps is considered pretty strict and isn't recommended for most normal use cases.
If the camera cannot support the targetted frame rate, **it will likely fail**. Use [`&maxframerate`](../../source-settings/and-maxframerate.md) instead if you are okay with the system to fallback onto a different frame rate, as it is less strict compared to `&fps`.
Limiting the frame rate can reduce the CPU load and the bandwidth, as the encoded video frame rate will try to match the capture the captured frame rate. The higher the encoded frame rate, the more CPU is typically used. 30-fps is fairly standard, although VDO.Ninja targets 60-fps by default.
You can change the frame rate dynamically, as the sender, via the settings -> video options; if your browser and device supports it that is. The viewer cannot change or request a specific frame rate, but they can specify [`&contenthint`](and-contenthint.md), which indicates whether they prefer higher resolution vs higher frame rates.
[`&codec=av1`](../view-parameters/codec.md#av1) on the viewer side may achieve more stable encoded frame rates than [`&codec=h264`](../view-parameters/codec.md#h264) or [`&codec=vp8`](../view-parameters/codec.md#vp8), which are normally the defaults. Higher bitrates and more stable network conditions can also help ensure more stable frame rates of the actually streamed video. The encoded frame rate is often a bit less than what is captured, especially when dealing with packet loss.
Unless using [`&chunked`](../../newly-added-parameters/and-chunked.md) mode or a WHIP/WHEP source, it generally isn't possible to force a specific encoded frame rate. The system will try to keep the frame rate that's encoded and sent close to the captured frame rate, but it may drop due to packet loss, CPU limitations, or during moments of insufficient bitrate.
If screen sharing, window, vs. tab, vs. display capture methods can result in different max frame rates. Refer to the screen sharing section for details, but consider experimenting with different methods and browsers to find something that works for you. If screen sharing a game, consider setting the bitrate to at least 12- to 20-mbps, to keep the encoded frame rates steady.
#### Compatibility and flicker with 24, 25, 50, and 144-hz frame rates
24-fps capture devices may fail, so it is recommended to target 30- or 60-fps is possible. If in the UK or a country that has 50-hz lights or displays, you may wish to capture at 25-fps or 50-fps to avoid flicker caused by a mismatch between your display and the lights in the room. 30-fps or 60-fps is pretty standard for modern online video though.
If your display is set to 144-hz or some other odd frame rate, it is suggested to set your display to 120-hz or some multiple of 25- or 30-hz, depending on your location, to also avoid flicker with the camera's capture rate.
#### Higher than 60-fps, such as 120-fps
Capturing video higher than 60-fps, such as 120-fps, is supported in certain situations, such as if screen sharing an entire display that has higher 120-hz set. Normally however, the video encoding is limited to 60-fps max, so capturing at a higher frame rate doesn't make sense.
If using [`&chunked`](../../newly-added-parameters/and-chunked.md) mode on the sender's link however, chunked mode supports higher than 60-fps encoding, such as 120-fps. Chunked mode is considered an experimental option though, but it has been tested between two Windows 11 systems on a LAN running with Chrome.
[Raspberry.Ninja](../../steves-helper-apps/raspberry.ninja/) or using a remote WHIP/WHEP stream as a source may also unlock the option for higher than 60-fps streaming, but this isn't a suggested approach to the problem.
## Related
[and-maxframerate.md](../../source-settings/and-maxframerate.md)
[screensharefps.md](../../source-settings/screensharefps.md)
[and-contenthint.md](and-contenthint.md)
---
description: Can be used to pass a list of background images via the URL
---
# &imagelist
Sender-Side Option! ([`&push`](../../source-settings/push.md))
## Options
Example: `&imagelist=%5B%22https%3A%2F%2Fvdo.ninja%2Fmedia%2Fold_logo.png%22%2C%22https%3A%2F%2Fvdo.ninja%2Fmedia%2Fbg_sample.webp%22%2C%22https%3A%2F%2Fvdo.ninja%2Fmedia%2Fbg_sample2.webp%22%5D`
Value
Description
(URL)
Passes a list of images via the URL
## Details
Added options to host your own default background images for the virtual background effect. `&imagelist=xxxx` can be used to pass a list of images via the URL.
Code to generate the list properly can be found here: [https://jsfiddle.net/steveseguin/w7z28kgb/](https://jsfiddle.net/steveseguin/w7z28kgb/) (images must be cross origin enabled) - at the base of index.html, if self-hosting VDO.Ninja, you can hard-code the list of images as well.
When selecting a background image, you'll get a gentle glow around the selected image now. There's also a horizontal scroll bar, if the number of images listed are too much to fit.
### Complicated? It's simple if using Imgur (free hosting service)
If looking for a free image host, I think [Imgur.com](https://imgur.com) offers free image hosting that is CORS friendly. The URLs it provides are also seemingly safe to use without URL encoding. You can just replace the `XXXXXXX` in the link below, with your Imgur provided ID value, and it might get you going.
Example: `&imagelist=[%22https://i.imgur.com/XXXXXXX.png%22]`
### Mirroring issues
By default, the image may be mirrored to the publisher, as webcam previews are by default mirrored in VDO.Ninja. The image will not be mirrored in the output however; just in the preview.
You can disable the mirroring on the preview though; use `&nomirror` on the URL as a parameter.
## Related
[effects.md](../../source-settings/effects.md)
---
description: Will disable the mini-preview functionality
---
# &largepreview
Sender-Side Option! ([`&push`](../../source-settings/push.md))
## Details
If you want the VDO.Ninja self-preview to not be mini-sized in [broadcast](../view-parameters/broadcast.md) mode, which might be the case on mobile, you can try using [`&minipreview=0`](../../source-settings/and-minipreview.md) or `&largepreview`. These flags will disable the mini-preview functionality, keeping the preview the same size as other videos.
## Related
[and-minipreview.md](../../source-settings/and-minipreview.md)
[and-minipreview-1.md](and-minipreview-1.md)
[and-preview.md](../../source-settings/and-preview.md)
[and-nopreview.md](../../source-settings/and-nopreview.md)
[broadcast.md](../view-parameters/broadcast.md)
---
description: Used to position where the mini preview is located by default on screen
---
# &minipreviewoffset
Sender-Side Option! ([`&push`](../../source-settings/push.md))
## Aliases
* `&mpo`
## Options
Example: `&minipreviewoffset=60`
Value
Description
(no value given) | 0
left-most side of the screen
40
center of the screen
(integer value) -20 to 120
defines the position of the mini preview
## Details
Added `&minipreviewoffset` accepts an integer value, `-20` to `120`, which is used to position where the [mini preview](../../source-settings/and-minipreview.md) is located by default on screen. `40` would imply center of the screen, as the mini preview is about 20% of the screen size. `0` (or just `&minipreviewoffset`) is the left-most side of the screen.
&minipreviewoffset=40
## Related
[and-minipreview.md](../../source-settings/and-minipreview.md)
---
description: Disables all video playback from room directors
---
# &nodirectorvideo
Viewer-Side Option! ([`&view`](../view-parameters/view.md), [`&scene`](../view-parameters/scene.md), [`&room`](../../general-settings/room.md))
## Details
`&nodirectorvideo` is just like [`&novideo`](and-novideo.md) (disables all video playback on the local computer), except it only applies to incoming connections from room directors. So, if your are using the [Mixer App](../../steves-helper-apps/mixer-app.md) with OBS, but you want to exclude the video of yourself from the OBS, this potentially could be an easy way to do that.
## Related
[and-novideo.md](and-novideo.md)
[and-nodirectoraudio.md](../audio-parameters/and-nodirectoraudio.md)
[director.md](../../viewers-settings/director.md)
[mixer-app.md](../../steves-helper-apps/mixer-app.md)
---
description: Disables all video playback on the local computer
---
# &novideo
Viewer-Side Option! ([`&view`](../view-parameters/view.md), [`&scene`](../view-parameters/scene.md), [`&room`](../../general-settings/room.md))
## Aliases
* `&nv`
* `&hidevideo`
* [`&showonly`](novideo.md)
## Details
`&novideo` disables all video playback on the local computer. Useful for reducing the CPU and network load on other connect peers if voice-chat is sufficient.
* Join a group-room as audio-only, to limit load on the guests.
When used together with [`&noaudio`](../view-parameters/noaudio.md) (`&novideo&noaudio`), prevents guest room member from seeing or hearing other member's audio or video feeds.
* Useful for directors who may wish to only issue commands or text chat, but not need to see video or audio.
You can pass a comma separated list of stream IDs that will be excluded, so that they specifically will play video. `?novideo=guest1a,guest2a` will only allow video from guest1a and guest2a to play.
Video tracks are blocked and do not form any connection when using peer-to-peer, not taking up bandwidth or system load, but they also cannot be re-enabled without reconnecting. Video tracks from WHIP-based sources, Iframes, or some non-standard sources may still allow video tracks to connect, using up bandwidth, but will not be rendered. Check the connection stats for that stream ID to confirm.
Use [`&broadcast`](../view-parameters/broadcast.md) or [`&showonly`](novideo.md) if you want to disable all videos except any stream IDs listed.
## Related
[noaudio.md](../view-parameters/noaudio.md)
[novideo.md](novideo.md)
[and-nodirectorvideo.md](and-nodirectorvideo.md)
---
description: Presets the quality setting for a guest
---
# &quality
Sender-Side Option! ([`&push`](../../source-settings/push.md))
## Aliases
* `&q`
## Options
Example: `&quality=0`
| Value | Description |
| ----------------------- | ------------------------------------------------------------------------- |
| `0` \| (no value given) | about 1080p60, depending on hardware |
| `1` | about 720p60, depending on hardware |
| `2` | about 360p30, depending on hardware |
| `-1` (device's default) | useful in allowing the screen share at the same resolution as the display |
## Details
Presets the "quality" setting for a guest. Not "strict" and is less likely to give errors than explicit resolution requests.
Without using `&quality` on the URL a guest can change the "quality" when setting up the camera:
Use [`&width`](../../source-settings/and-width.md) and [`&height`](../../source-settings/and-height.md) to get a higher resolution than 1920x1080.
There is a toggle in the director's room guest's invite link customization which adds `&q`:
## Related
[screensharequality.md](../../source-settings/screensharequality.md)
[and-mediasettings.md](../../newly-added-parameters/and-mediasettings.md)
[and-width.md](../../source-settings/and-width.md)
[and-height.md](../../source-settings/and-height.md)
---
description: Should 'up to' double the amount of playback video resolution
---
# &sharper
Viewer-Side Option! ([`&scene`](../view-parameters/scene.md), [`&room`](../../general-settings/room.md), [`&view`](../view-parameters/view.md), [`&solo`](../mixer-scene-parameters/and-solo.md))
## Aliases
* `&sharpen`
* [`&dpi=2`](../view-parameters/dpi.md)
## Details
`&sharper` is now an alias of [`&dpi=2`](../view-parameters/dpi.md), which should 'up to' double the amount of playback video resolution, if the dynamic resolution optimization is enabled at least, in certain cases. This is a lot like [`&scale=100`](../view-parameters/scale.md), but perhaps _slightly_ more efficient in some cases. This is mainly for when you intend to have a large screen-share in a scene, where you don't want the tiny guest videos to be a 100% scale, but 50% scale is fine (up from 25% scale). [`&dpi`](../view-parameters/dpi.md) already exists on production, but by adding these aliases, I hope it's more discoverable.
As an alternative to `&sharper`, I've also added [`&sharperscreen`](../screen-share-parameters/and-sharperscreen.md), which sets [`&scale=100`](../view-parameters/scale.md), but _only_ for screen-shares (virtual cameras not included). This is probably even more efficient than [`&scale=100`](../view-parameters/scale.md) or `&sharper`, and it's designed for when screen-sharing a lot of text. Text looks a bit soft when streaming video at 1:1 pixel resolution.
It's recommended to only use these parameters within the context of a scene link, and not on guest links, due to the higher CPU / bandwidth it may use.
## Related
[and-sharperscreen.md](../screen-share-parameters/and-sharperscreen.md)
[dpi.md](../view-parameters/dpi.md)
[scale.md](../view-parameters/scale.md)
---
description: Plays video back as a series of full-window images
---
# &slideshow
Viewer-Side Option! ([`&scene`](../view-parameters/scene.md), [`&room`](../../general-settings/room.md), [`&view`](../view-parameters/view.md), [`&solo`](../mixer-scene-parameters/and-solo.md))
## Details
This option decodes incoming video (first video to load), but plays them back as series of full-window images. That is, a single image element, that gets updated 24 times a second, instead of playing the video back within an efficient video element. I have no idea why you might want this option, as it pretty crude up and uses up a lot of CPU, but you can right-click to save a single frame from the video to disk, as a PNG file. This might be useful if you need to take a lot of snap shots of some video and don't want to have to hassle with cropping a window-grab. Quality of the images is pretty high; near lossless.
## Related
[and-postimage.md](../settings-parameters/and-postimage.md)
---
description: Does the same thing as &scale but you pass the height in pixels
---
# &viewheight
Viewer-Side Option! ([`&scene`](../view-parameters/scene.md), [`&room`](../../general-settings/room.md), [`&view`](../view-parameters/view.md), [`&solo`](../mixer-scene-parameters/and-solo.md))
## Aliases
* `&vh`
## Options
Example: `&viewheight=1080`
| Value | Description |
| --------------- | ---------------------- |
| (value integer) | video height in pixels |
## Details
Added new viewer-side parameters that can be used in place of [`&scale`](../view-parameters/scale.md): `&viewheight=180` and [`&viewwidth=320`](and-viewwidth.md), which effectively does the same thing as [`&scale`](../view-parameters/scale.md), but instead you pass a resolution.
It's important to note, that due to flexibility to request width/heights that are not aspect-ratio compatible, and due to bitrate/quality resolution limitations, these values are just 'max' target resolution values; the actual resolution you get could be still less. They also do not impact the actual capture resolution of the remote sender's camera, so its purely for requesting a specific downscaled resolution. This command applies to all video elements in a view port, and it disables the auto-scaler functionality.
Similarly, also added the option to the IFRAME API to request different down-scaled resolutions dynamically, per connection, if you want greater programmatic control vs static URL options.
## Related
[and-viewwidth.md](and-viewwidth.md)
[scale.md](../view-parameters/scale.md)
[and-noscale.md](../../newly-added-parameters/and-noscale.md)
---
description: Does the same thing as &scale but you pass the width in pixels
---
# &viewwidth
Viewer-Side Option! ([`&scene`](../view-parameters/scene.md), [`&room`](../../general-settings/room.md), [`&view`](../view-parameters/view.md), [`&solo`](../mixer-scene-parameters/and-solo.md))
## Aliases
* `&vw`
## Options
Example: `&viewwidth=1920`
| Value | Description |
| --------------- | --------------------- |
| (value integer) | video width in pixels |
## Details
Added new viewer-side parameters that can be used in place of [`&scale`](../view-parameters/scale.md): [`&viewheight=180`](and-viewheight.md) and `&viewwidth=320`, which effectively does the same thing as [`&scale`](../view-parameters/scale.md), but instead you pass a resolution.
It's important to note, that due to flexibility to request width/heights that are not aspect-ratio compatible, and due to bitrate/quality resolution limitations, these values are just 'max' target resolution values; the actual resolution you get could be still less. They also do not impact the actual capture resolution of the remote sender's camera, so its purely for requesting a specific downscaled resolution. This command applies to all video elements in a view port, and it disables the auto-scaler functionality.
Similarly, also added the option to the IFRAME API to request different down-scaled resolutions dynamically, per connection, if you want greater programmatic control vs static URL options.
## Related
[and-viewheight.md](and-viewheight.md)
[scale.md](../view-parameters/scale.md)
[and-noscale.md](../../newly-added-parameters/and-noscale.md)
---
description: Only shows any stream ID that is listed
---
# &showonly
Viewer-Side Option! ([`&view`](../view-parameters/view.md), [`&scene`](../view-parameters/scene.md), [`&room`](../../general-settings/room.md))
## Aliases
* [`&novideo`](and-novideo.md)
* `&nv`
* `&hidevideo`
## Options
Example: `&showonly=streamID1,streamID2`
Value
Description
(string value)
the stream IDs to view; can be a comma separated list
## Details
`&showonly` only shows any stream IDs that are listed. Useful for reducing the CPU and network load on other connect peers if voice-chat is sufficient.
* Useful for a large group room where you want everyone in the room to see only the OBS Virtualcam output.
* Consider using [`&broadcast`](../view-parameters/broadcast.md) option instead of this flag as it is better suited for presenting a single feed to a group than using `&showonly` alone.
This is actually just an alias of [`&novideo`](and-novideo.md).
## Related
[broadcast.md](../view-parameters/broadcast.md)
[and-novideo.md](and-novideo.md)
---
description: >-
Resolution, FPS, effects, self preview, mute video, PTZ, codec, buffer,
broadcast, scale
---
# Video Parameters
They are separated in three groups: [general options](./#general-options) (push and view), [source side](./#source-side-options) (push) options and [viewer side](./#viewer-side-options) (view) options.
If you want to change the bitrate:
[video-bitrate-parameters](../video-bitrate-parameters/ "mention")
## General options
You can add them to both, source ([`&push`](../../source-settings/push.md)) and viewer ([`&view`](../view-parameters/view.md), [`&scene`](../view-parameters/scene.md) or [`&solo`](../mixer-scene-parameters/and-solo.md)) sides.
\*NEW IN [VERSION 24](../../releases/v24.md)
## **Viewer side options**
You have to add them to the viewer side ([`&room`](../../general-settings/room.md) or [`&view`](../view-parameters/view.md), [`&scene`](../view-parameters/scene.md)or [`&solo`](../mixer-scene-parameters/and-solo.md)).
A useful flag to allow the director to present their own video to the group, often used in conjunction with a virtual webcam or Meshcast. It allows for larger groups rooms by reducing load on guests
A useful flag to allow the director to present their own video to the group, often used in conjunction with a virtual webcam or Meshcast. It allows for larger groups rooms by reducing load on guests
Plays video back as a series of full-window images
\*NEW IN [VERSION 24](../../releases/v24.md)
## Related
[video-bitrate-parameters](../video-bitrate-parameters/)
---
description: >-
Auto-hides remote guests videos when added, if those guests are not speaking
actively
---
# &activespeaker
Viewer-Side Option! ([`&view`](view.md), [`&scene`](scene.md), [`&room`](../../general-settings/room.md))
## Aliases
* `&sas`
* `&speakerview`
## Options
Example: `&activespeaker=1`
| Value | Description |
| ----------------------- | --------------------------------------------------------------------------------------- |
| `1` \| (no value given) | will only show one speaker at a time; the loudest or last-loud speaker |
| `2` | will show whoever is talking; mixed together; if no one is talking, just shows yourself |
| `3` | the same as `1`, but it will not switch to show audio-only sources (just video only) |
| `4` | the same as `2`, but it will not switch to show audio-only sources (just video only) |
In all four cases, if someone else is talking/active, your local preview will become a [mini-preview](../../source-settings/and-minipreview.md) in the top right.
## Related
[and-motiondetection-alpha.md](../mixer-scene-parameters/and-motiondetection-alpha.md)
---
description: Shifts audio channels 0 and 1 up channels, based on the offset value
---
# &channeloffset
Viewer-Side Option! ([`&view`](view.md), [`&scene`](scene.md), [`&room`](../../general-settings/room.md))
## Options
Example: `&channeloffset=1`
| Value | Description |
| --------------- | ------------------------------------------------------------ |
| (numeric value) | Number of channels to shift the audio, starting at channel 0 |
## Details
`&channeloffset` shifts audio channels 0 and 1 up channels, based on the offset value you set.
Total channels is assumed to be 8 if this is used and not otherwise specified.
Does not work with all audio output devices and may require experimentation.
Best to use this with a mono input, as stereo channel shifting can cause issues - simpler that way.
Please see here for detailed testing results with different audio devices: [https://docs.google.com/spreadsheets/d/1R-y7xZ2BCn-GzTlwqq63H8lorXecO02DU9Hu4twuhuA/](https://docs.google.com/spreadsheets/d/1R-y7xZ2BCn-GzTlwqq63H8lorXecO02DU9Hu4twuhuA/)
## Related
[and-inputchannels.md](../audio-parameters/and-inputchannels.md)
[and-channels.md](and-channels.md)
[and-channeloffset-1.md](../audio-parameters/and-channeloffset-1.md)
---
description: Specifies the number of output audio channels you wish to mix up or down to
---
# &channels
Viewer-Side Option! ([`&view`](view.md), [`&scene`](scene.md), [`&room`](../../general-settings/room.md))
## Options
Example: `&channels=4`
| Value | Description |
| --------------- | ------------------------------- |
| (integer value) | number of audio output channels |
## Details
Left and right is available for most users; channels 1 and 2
* Up to 6-channels is possible, if your output device supports it.
* On Windows, you might need to select 5.1 surround sound with your device in the Windows audio settings.
* On macOS, you might want to consider using SoundFlower, as it seems the most correct with its routing.
Designed to be used with [`&channeloffset`](and-channeloffset.md).
Please see here for detailed testing results with different audio devices: [https://docs.google.com/spreadsheets/d/1R-y7xZ2BCn-GzTlwqq63H8lorXecO02DU9Hu4twuhuA/](https://docs.google.com/spreadsheets/d/1R-y7xZ2BCn-GzTlwqq63H8lorXecO02DU9Hu4twuhuA/)
If looking to set the number of input channels, rather than output, please see [`&inputchannels`](../audio-parameters/and-inputchannels.md) instead.
## Related
[and-channeloffset.md](and-channeloffset.md)
[and-inputchannels.md](../audio-parameters/and-inputchannels.md)
[and-channeloffset-1.md](../audio-parameters/and-channeloffset-1.md)
---
description: Same concept as &view, except does the opposite
---
# &exclude
Viewer-Side Option! ([`&view`](view.md), [`&scene`](scene.md), [`&room`](../../general-settings/room.md))
## Aliases
* `&ex`
## Options
Example: `&exclude=StreamID1,StreamID2`
Value
Description
(string value)
stream ID to view; can be a comma-separated list of IDs
## Details
Any stream ID listed as a value will **NOT** be played or requested.
Example usage:
`https://vdo.ninja/?room=myroom123&exclude=stream121,sidestream321`
Excluding a stream ID will prevent even a peer connection.
No video, audio, or chat can be had.
---
description: Maximum packet size of audio
---
# &maxptime
Viewer-Side Option! ([`&view`](view.md), [`&scene`](scene.md), [`&room`](../../general-settings/room.md))
## Options
Example: `&maxptime=60`
| Value | Description |
| --------------- | --------------------- |
| (integer value) | max packet size in ms |
## Details
If you do not know what this is, you definitely don't want to touch it.
60-ms is common. 30-ms is reasonable.
Optimized already, but it's available for experimentation and fun if desired.
## Related
[and-ptime.md](and-ptime.md)
[minptime.md](minptime.md)
---
description: Limits the number of remote peer connections that are publishers
---
# &maxpublishers
Viewer-Side Option! ([`&view`](view.md), [`&scene`](scene.md), [`&room`](../../general-settings/room.md))
## Aliases
* `&mp`
## Options
Example: `&maxpublishers=7`
| Value | Description |
| --------------- | --------------------------------------- |
| (integer value) | limit number of remote peer connections |
## Details
Limits the number of remote peer connections that are publishers.
## Related
[and-maxconnections.md](../../source-settings/and-maxconnections.md)
[and-maxviewers.md](../../source-settings/and-maxviewers.md)
---
description: >-
Disables or adjusts the sensitivity of the VP8/VP9 Codec packet loss 'fix' for
OBS
---
# &obsfix
Viewer-Side Option! ([`&view`](view.md), [`&scene`](scene.md), [`&room`](../../general-settings/room.md))
## Options
Example: `&obsfix=5`
| Value | Description |
| ---------------- | ------------------------------------------------------- |
| (integer value) | adjust the sensitivity of the packet loss 'fix' for OBS |
| (no value given) | defaults to 15 |
| `0` \| `off` | Turns it off |
## Details
It's on by default and set to `15` if only using OBS and if using the VP8/VP9 video [codec](../../advanced-settings.md#codec).
* There is a bug in OBS where the VP8 codec (default in most cases) does not handle packet loss events. This function attempts fixes its.
* You can disable this 'fix' by passing it the value `0` or `off`.
* When on, it will trigger a key frame request to combat pixel smearing caused by packet loss and poor network conditions.
* Triggers around every 3-seconds if needed; may not activate often with very light packet loss.
* May lower video quality, or may not be desirable, so this flag lets you disable it.
* Stream pushers can open the debug/stats menu and manually send key frames also.
* VP9 is far less prone to packet loss issues, but it can still happen with heavy packet loss.
* Increasing the integer value passed to `&obsfix` will reduce the frequency and sensitivity of the key frame request.
---
description: Pans the outgoing audio left or right, allowing for spatial audio group chats
---
# &panning
Viewer-Side Option! ([`&view`](view.md), [`&scene`](scene.md), [`&room`](../../general-settings/room.md))
## Aliases
* `&pan`
## Options
Example: `&panning=120`
| Value | Description |
| ------------------------ | ------------------------------------------------------------- |
| (no value given) \| `90` | has the audio centered, but published as a mono-stereo stream |
| (0-89) | pans the audio left |
| (91-180) | pans the audio right |
| `-1` | panning will be randomized |
## Details
The default, if no value is passed, is to have the audio centered, but published as a mono-stereo stream.
To pan the audio left, pass a value of 0 to 89.
To center, pass 90 or leave blank.
To pan the audio right, pass a value of 91 to 180.
0 is the most left, while 180 is the most right.
If negative 1 is passed `&panning=-1`, then the panning will be randomized; center weighted a bit. This allows for a group-room experience where everyone in the room to have a different spatial position, making it easier to have larger group discussions where guests may sound similar to each other.
You may need to use [`&stereo`](../../general-settings/stereo.md) as a flag, or variants of it on the publisher and/or viewer's side, to ensure the audio is transmitted as stereo as well.
Please also note, the volume is gained up or down digitally to compensate for the value changes of mixing and panning; it attempts to retain the same loudness and avoid clipping. Please report issues or provide feedback if you encounter problems with it.
Also note, the audio can be dynamically panned left or right thereafter by the IFRAME API. For VR-applications, this could provide for some interesting user experiences.
## Related
[stereo.md](../../general-settings/stereo.md)
---
description: Optimizes the video mixer for 9:16 videos
---
# &portrait
Viewer-Side Option! ([`&view`](view.md), [`&scene`](scene.md), [`&room`](../../general-settings/room.md))
## Aliases
* `&916`
* `&vertical`
## Details
Optimize the auto-mixer to work with video streams that are in portrait mode (versus landscape).
Can be used together with [`&cover`](cover.md) to get a better effect.
For example:
`https://vdo.ninja/?scene&room=roomname&portrait&cover`
## Related
[cover.md](cover.md)
[and-square.md](../../newly-added-parameters/and-square.md)
[and-rotate.md](../design-parameters/and-rotate.md)
[and-43.md](../../newly-added-parameters/and-43.md)
---
description: Audio packet size
---
# &ptime
Viewer-Side Option! ([`&view`](view.md), [`&scene`](scene.md), [`&room`](../../general-settings/room.md))
## Options
Example: `&ptime=40`
| Value | Description |
| --------------- | ----------------------- |
| (integer value) | audio packet size in ms |
## Details
If you do not know what this is, you definitely don't want to touch it.
## Related
[minptime.md](minptime.md)
[and-maxptime.md](and-maxptime.md)
---
description: Audio playback sample-rate, in hz
---
# &samplerate
Viewer-Side Option! ([`&view`](view.md), [`&scene`](scene.md), [`&room`](../../general-settings/room.md))
## Aliases
* `&sr`
## Options
Example: `&samplerate=48000`
| Value | Description |
| --------------- | ----------------- |
| (integer value) | sample-rate in hz |
## Details
`&samplerate` sets the audio playback sample-rate in Hz (not capture or transmission sample-rate).
This is mainly for debugging audio distortion or clicking issues.
Sometimes it can remove clicking when used, even if set to the typical 48000 value.
---
description: >-
Outputs the audio to the specified audio output device, rather than the
default
---
# &sink
General Option! ([`&push`](../../source-settings/push.md), [`&room`](../../general-settings/room.md), [`&view`](view.md), [`&scene`](scene.md))
## Options
Example: `&sink=1dee4206f5deb75973e33f7078d4c1539782e29e255799d59b8b61a855d17bea`
| Value | Description |
| -------------- | ------------------------------------------------------------------ |
| (string value) | device ID ([https://vdo.ninja/devices](https://vdo.ninja/devices)) |
## Details
Device IDs are tied to the browser + domain + cookie session combination.
Outputs the audio to the specified audio output device, rather than the default.
Designed to be used in conjunction with [https://vdo.ninja/electron.](https://vdo.ninja/electron)
You can find out the string value of your audio output device here: [https://vdo.ninja/devices](https://vdo.ninja/devices)
## Related
[and-audiooutput.md](../setup-parameters/and-audiooutput.md)
---
description: Videos in a group scene will slide around the screen when being re-arranged
---
# &animated
Viewer-Side Option! ([`&view`](view.md), [`&scene`](scene.md), [`&room`](../../general-settings/room.md))
## Aliases
* `&animate`
## Options
Example: `&animated=false`
| Value | Description |
| ------------------------------- | ---------------------------------------------------------------- |
| (no value given) | videos in a group scene will slide around when being re-arranged |
| `false` \| `0` \| `no` \| `off` | disables the animated effect |
## Details
Videos in a group scene will slide around the screen when being re-arranged, such as when a new video gets added to the scene.
In the newest version of VDO.Ninja `&animated` is on by default. You can disable it with `&animated=0`. There is also a toggle in the director's room to disable it in the guest's invite URL.
Mobile phone users will not have this effect enabled by default, but most other guest and scene types will.
You can force enable this animation effect by adding `&animated` to the URL, or you can force disable the effect by passing false, such as `&animated=false` , or passing `0`, `no`, or `off`.
## Related
[fadein.md](fadein.md)
---
description: Manually sets the audio bitrate in kbps
---
# &audiobitrate
Viewer-Side Option! ([`&view`](view.md), [`&scene`](scene.md), [`&room`](../../general-settings/room.md))
## Aliases
* `&ab`
## Options
Example: `&audiobitrate=128`
| Value | Description |
| --------------- | --------------- |
| (integer value) | bitrate in kbps |
## Details
The default is around 32-kbps per track with a mono-channel (VBR on by default).
The audio codec used is OPUS and the target sample rate is 48khz.
510-kbps is the highest value allowed, with around 300-kbps the highest value for a mono-channel track.
For voice, the default audio bitrate is sufficient for most users, however 64- to 80-kbps may offer an audible improvement. For music, you may wish to go higher.
For reference, music streaming providers will use around 64- to 128-kbps as their default.
When an audio bitrate is manually specified, CBR is enabled by default.
Setting the audio bitrate to be very high can sometimes cause video bitrates on weak connections to become stuck at around 30-kbps.dio on mobile devices.
### Considerations
If you are using the [Echo-Cancellation (`&aec`)](../../source-settings/aec.md) and [`&denoise`](../../source-settings/and-denoise.md) filters, audio quality may still sound like telephone quality in some cases, even with an increased bitrate. These filters are on by default.
Filtering out echos and noise can impact the audio quality, so while these filters are effective in what they do, the harder they have to work, the more the audio will sound like a telephone call.
Finding ways to eliminate background noise, hum, and feedback can improve audio quality, as the echo/noise filters will then not need to activate or be used with such strength. You can of course disable those filters entirely, which when combined with a higher audio bitrate, will get you closer to what sounds like a raw audio recording; this assumes feedback isn't an issue of course.
[bitrate.md](../video-bitrate-parameters/bitrate.md)
[stereo.md](../../general-settings/stereo.md)
---
description: >-
A useful flag to allow the director to present their own video to the group,
often used in conjunction with a virtual webcam or Meshcast. It allows for
larger groups rooms by reducing load on guests
---
# &broadcast
Viewer-Side Option! ([`&view`](view.md), [`&scene`](scene.md), [`&room`](../../general-settings/room.md))
## Aliases
* `&bc`
## Options
Example: `&broadcast=StreamID`
Value
Description
(no value given)
Only play-back the director's stream
(stream ID)
You can pass an optional stream-ID to specify the stream's source manually. If no value is passed, the source will be the room's director video out feed.
## Details
This command is like using [`&showonly=directorsStreamID`](../video-parameters/novideo.md) but with some extras tweaks that might be appropriate to a larger group room.
In essence, `&broadcast` only allows the playback of video-tracks and [shared-websites](../../source-settings/and-website.md) that originate from the main director. You may not know the stream ID of the main director ahead of time, so this parameter handles that for you automatically as well.
You can pass a stream ID as a value, which will specify the video source to be from a guest (or co-director), rather than the main director. You cannot pass multiple stream IDs to the `&broadcast` flag; just one. If needing more, consider using the [`&showonly`](../video-parameters/novideo.md) flag instead.
You add `&broadcast` to the guest invite links. You do not add this to the director or scene links.
Configuring VDO.Ninja in a broadcast group mode
#### Why might you want to use this option?
In `&broadcast` mode, only the director is sharing video to the guests of the group room, so only the director has the burden of encoding multiple video streams and uploading them to guests. This is great if your guests are primarily on mobile-devices, have slow-Internet, or it is a larger room; otherwise each guest would be sharing video with each other guest as well.
When used with Meshcast, the director can reduce their own system burden even further. You can achieve fairly large group rooms with modest system requirements this way.
To ensure the guests see all that's needed, if the director selects their Virtual Camera output as their video source, then all the guests in the room will be able to see the live output of that virtual camera stream. The source of this virtual camera feed could be the main OBS output mix, or a specific [custom scene mix](https://github.com/exeldro/obs-virtual-cam-filter) that's design just for the guests.
#### Default settings and styles that are applied when \&broadcast is used
* The guest's self-preview becomes a mini-preview, rather than the normal large self-preview. You can disable the preview all together by using [`&nopreview`.](../../source-settings/and-nopreview.md)
* While `&broadcast` disables the video from other guests, it does not disable or impact their audio, so guests should still be able to hear each other.
* [`&showlist`](../../source-settings/showlist.md) is enabled by default for the guests, which provides a list of those in the room to the guests. `&showlist=0` can hide this, when added to the guest link; useful if you want a cleaner output for the guests.
* The header bar, with basic stats, is shown by default. [`&noheader`](../design-parameters/and-hideheader.md) can be added to the guest links, which will hide this top bar, room name and the stats.
* It hides the audio-only playback elements of other guests in the room, so it's not possible to mute or control the volume, as a guest, or other guests, when `&broadcast` is set. This is akin to having [`&style=1`](../../advanced-settings.md#style)set.
You can some-what imitate the `&broadcast` parameter using something like :
`&showonly=DirectorStreamID&noiframe=DirectorStreamID&minipreview&style=1`
#### Performance considerations
While the `&broadcast` flag is great for reducing the load on guests in a room, it will put all the load onto the director instead.
* Consider using NVEnc or other hardware-encoders to encode any RTMP streams in your studio software to reduce CPU load there. This frees up more CPU for VDO.Ninja.
* Make sure you have a capable computer; an AMD 5900x CPU is recommend for most users using this mode without Meshcast, allowing for medium-sized group rooms with some headroom to spare.
* A quad-core computer might only be able to support 1 or 2 guests adequately in this mode, although using Meshcast can help overcome that limitation.
* If you would like the guests to see even higher quality video, consider using [`&totalroombitrate=2500`](../video-bitrate-parameters/totalroombitrate.md) as an option to greatly improve the video quality. This also will greatly also increase the load on the director, so good internet and a powerful CPU will be needed.
#### Using `&broadcast` mode with Meshcast as a source
* Using a service like meshcast.io, along with the [`&website`](../../source-settings/and-website.md) sharing option, can also greatly reduce load on the director and guests. The website sharing function works with other video content delivery networks, not just Meshcast.io, so you have choices.
* When the director shares a website, their own low-latency VDO.Ninja audio remains active, so audio doubling could happen if the website contains their audio also. You'll want to mute either the website's audio or the director's VDO.Ninja audio, to avoid this issue. To also avoid echo-cancellation issues and audio delays, it is recommended to mute the website audio, as VDO.Ninja's audio will have not have those issues.
* You may want to add [`&novideo`](../video-parameters/and-novideo.md) to the guest invite links if you only intend to share video via the website sharing function. This ensures the director's VDO.Ninja video-track doesn't appear, as VDO.Ninja can't always tell if a website contains a video track or not, and so may show the director's video alongside the shared website in some cases otherwise.
* In more recent versions of VDO.Ninja (v22), Meshcast is available built-into VDO.Ninja via the [`&meshcast`](../../newly-added-parameters/and-meshcast.md) parameter, which sends both audio and video over meshcast in sync, without concerns of echo cancellation or audio doubling. Just add `&meshcast` to the director's URL to use this mode; the director's audio and video will auto-publish via Meshcast without needing to visit meshcast.io.
* The director's ability to share a website (meshcast.io link) is via a button found in the director's control bar. The director doesn't need to use [`&website`](../../source-settings/and-website.md) parameter since a website sharing functionality has its own dedicated button in the director's control room.
 (1) (1).png>)
* If using meshcast.io and the website share functionality, rather than `&meshcast`, you will want to mute the Meshcast source to avoid echo cancellation or audio-doubling. The meshcast.io source page has options to do so there, but you can also add [`&mute`](../../source-settings/and-mute.md) to the meshcast.io when sharing it, to have it auto-mute on playback for the guests.
Understanding Meshcast as a tool for VDO.Ninja
An older video, but it gets some basics across still about \&broadcast mode
## Related
[novideo.md](../video-parameters/novideo.md)
[and-largepreview.md](../video-parameters/and-largepreview.md)
---
description: Sets the video buffer
---
# &buffer
Viewer-Side Option! ([`&view`](view.md), [`&scene`](scene.md), [`&room`](../../general-settings/room.md))
## Options
Example: `&buffer=500`
| Value | Description |
| --------------- | ----------- |
| (numeric value) | delay in ms |
## Details
This feature will increase the size of the audio and video _playout delay_ by means of tweaking the webRTC _jitter buffer_ pipeline (or a related buffer).
This can effectively be used as a way to delay the incoming video and audio by around 4-seconds. It's compatible with modern Chromium-based browsers, likely Firefox, but not Safari.
While in theory this option can also help to improve video and audio quality, as a larger playback buffer should help reduce the effects of network jitter and packet loss, it's not a miracle solution in this regard. Adding 200-ms of buffer delay using this feature is worth trying however, as some users have reported it has helped improve their connections.
The problem is that the browser doesn't fully make use of the available buffer if set high, and so it's largely used as mainly a hint. Network conditions, memory limits and other factors may impact the results as well.
Older versions of Chromium allowed upwards of 15-seconds of buffering, with recent versions of Chromium allowing up to just 4-seconds.
### Chunked-mode
If using the `&chunked` transfer mode, the method and function of the `&buffer` option is different than normal. There is not hard coded limit on what delay you can add, as it that uses it a custom buffering solution that isn't controlled by the browser. You can set the delay to be whatever you want; minutes even, assuming you have the memory for it.
Using `&buffer` with `&chunked` mode can improve quality, however more than a few seconds is probably not advisable.
#### Example values
`&buffer=0` will force the audio to be in sync with the video, with the video playing back with minimal delay.
`&buffer=100` will add a 100-ms time delay to the video, on top of any existing delay.
`&buffer=200` can help reduce video problems, such as frame jitter, with 200-ms of added delay.
* This feature will only work if playing the video in Chrome or Chromium-based browsers of around version 80 and newer.
* OBS v27.1.3 or older (on PC) uses v75 though, so you will need to update to OBS 27.2 or newer to use it there.
* The Electron Capture app also supports the `&buffer` command, along with vMix using a compatible Chromium version.
* Using the `&buffer` command may stop [Echo Cancellation](../../source-settings/aec.md) from working due to the audio delay this feature produces.
* Beyond 3-seconds of buffering may cause audio/video sync issues.
You can refer to the [`&sync`](sync.md) command if you wish to delay the audio, relative to the video. `&buffer` will try to keep the audio and video in sync, which might always be desired.
## Chunked mode
When using \&buffer with a stream that is being sent using chunked-mode ([\&chunked](../../newly-added-parameters/and-chunked.md)), the method of buffering will be different as it doesn't rely on the built-in system playout webRTC buffer delay function.
The practical benefit of using \&chunked mode with \&buffer is that you can have buffers that are minutes long, up to whatever your system's resources can handle.
As well, the buffering works to buffer the stream, in a way similar to HLS or RTMP buffering.
The default buffer is around 1-second actually when using \&chunked mode, as it requires a buffer to avoid playback issues. If the buffer underruns, the stream may fail.
Please refer to \&chunked mode for more details, but it could be an option for you if your goal is to improve the quality of streams when facing high-packet loss. It's only compatible with Chromium-based browsers; not Firefox or Safari as of yet.
## Update in [v23](../../releases/v23.md)
The option to right click a remote video and add/adjust the [`&buffer`](buffer.md) delay for that specific video dynamically.
## Related
[and-buffer2.md](../video-parameters/and-buffer2.md)
[sync.md](sync.md)
---
description: Sets the codec to encode the video
---
# &codec
Viewer-Side Option! ([`&view`](view.md), [`&scene`](scene.md), [`&room`](../../general-settings/room.md))
## Aliases
* `&videocodec`
* `&codecs`
## Options
Example: `&codec=h264`
Comma separated values that define the order of preferred video codecs if the primary one fails
### Example usage
`https://vdo.ninja/?view=abc123`**`&codec=h264`**
`https://vdo.ninja/?room=xxx7654&scene&bitrate=2000`**`&codec=vp9`**
The `&codec` parameter is added to the viewer-side; so the [`&view`](view.md) or [`&scene`](scene.md) link.
### **Description**
Video that is captured by a camera is compressed and sent over VDO.Ninja. The default codec is left up to the peer-connection to decide on, where the viewer and the sender agree on what is best automatically.
Normally VP8 is selected, which is an older codec that uses little CPU, but isn't as efficient as some others. Some mobile devices may hardware-encoder VP8, such as Google Pixel phones, but the vast majority will use software (CPU) to encode VP8.
H264 is the second most common codec automatically selected, which is popular with Apple-devices and many Android devices. H264 is commonly hardware-encoded, which \*sometimes\* uses less CPU and battery power, but hardware-encoding is more fickle than software-based encoding.
VP9 and AV1 are more modern codecs, with AV1 only supported by Chromium-based browsers using Version 90 or newer, although. VP9 may not be available on older Apple devices, but is becoming more available. It is not common to find VP9 or AV1 hardware encoded currently.
Hardware-encoding has pros and cons. A device generally has limited hardware-encoders, and they are also normally more problematic, including compatibility issues.
**If running into problems with video distortion, switching the codec to VP9 may resolve the issue, although at the cost of higher-CPU load.**
## Details
### **H264**
H264 may offer hardware encoding for better battery life with mobile and embedded devices. In these causes, it is often used automatically by VDO.Ninja. Support for H264 on Android devices is hit and miss though, so if enabling it, be prepared for it to potentially result in no video playback.
iOS devices should generally use H264, but the max resolution supported then is 1280x720p30 with iOS 14 and under. With iOS 15, 1080p30 is supported, but I'm not entirely sure if 1080p30 is hardware-encoded as the phone will get quite warm at that resolution.
macOS systems generally prefer H264 and will sometimes hardware-encode. It seems to use less CPU resources decoding H264 versus other codecs, so give it a go if facing CPU issues on your mac.
As for Windows PCs, if using a Chromium-based browsers (Chrome/Edge), your system may choose to use hardware-encoding when using publishing via a H264. This typically happens at 360p or higher resolutions, but it may not always happen. You can check to see if you are hardware-encoding by checking your video out stats, via `CTRL + Left-Click` on your video: "External Encoder" would likely indicate hardware acceleration of some sort.
If you have an Nvidia graphics card, you may be limited to two or three H264 hardware encoders, which could cause problems if you intend to use NVEnc for RTMP streaming also. AMD hardware encoders may limit bitrate.
On PC, while H264 encoding will use less CPU than other codecs, hardware-encoders may actually use more CPU than the software-based ones.
H264 doesn't seem to offer the picture quality, at least when screen sharing, but it seems more resistant to rainbow puke in OBS 27.1 and older.
Firefox on Apple M1 chips may not support H264. OperaGX may also not support H264.
#### Customizing H264 further
Starting with VDO.Ninja [v20](../../release-notes/v20.md), you can specify the flavour of H264 being used with the [`&h264profile`](../../newly-added-parameters/and-h264profile.md) flag.
Using that parameter without specifying a particular H264 profile ID will trigger the software OpenH264 encoder to be used, blocking any hardware H264 encoder. On Windows, OpenH264 may actually use less CPU than the a hardware encoder and may side step video glitching issues.
Definitely worth trying to use this flag, in combination with `&codec=h264`, if you're looking to inch out every bit of performance, but testing is needed if going this direction.
### **VP8**
VP8 is the default codec selected in most cases, even though Apple devices may default to H264.
OBS on PC does not handle packet loss well when using VP8, while the [Electron Capture](https://github.com/steveseguin/electroncapture) app handles VP8 very well.
iOS devices can stream at 1080p30 or 720p60 when using VP8, but they get warm in doing so.
Google Pixel smartphones may default to VP8, using hardware-encoding, but may also face video distortion with some browsers as a result. Switching to VP9 may fix the issue.
VP8 generally uses more CPU than H264, but not by a lot. Maybe there's a 5 to 15% difference? You may wish to consider using H264 if CPU load is an issue as a result.
VP8 is highly compatible these days between devices and browsers.
### **VP9**
VP9 offers better compression than VP8, but it is also more CPU-intensive to use. It might use 25 to 30% more CPU than H264, but can offer potentially a cleaner image than VP8 or H264, especially with screen-shares.
VP9 seems to reduce the chance of "rainbow puke" video problems in OBS Studio vs VP8.
Do not feel compelled to stream at HD resolutions; even 540p can look good and runs much cooler.
VP9 is often not hardware encoded, so it may solve video distortion issues that persist with H264 or even VP8.
### **AV1**
AV1 is the most advanced codec, but also the most CPU-intensive to use.
Requires Chrome v90 or newer on both publisher and viewer to work. The Electron Capture app 2.6.0 and newer supports AV1, as well. OBS Studio v27.2 and newer \*may\* also support it, but as of the time of this writing, that hasn't been confirmed.
Experimental at this point in time and may not perform well, but if very bandwidth constrained, it is a worthwhile option.
### WEBP
[webp.md](webp.md)
### HARDWARE
The parameter `&codec=hardware` is Android-specific and is the same as doing `&codec=h264`[`&h264profile`](../../newly-added-parameters/and-h264profile.md), but perhaps easier to remember. Worth trying if your android phone is struggling to publish video at a high enough quality into OBS. I may expand on this feature to be smarter.
### Comma seperated - update in [v23](../../releases/v23.md)
`&codec` can now accept comma separated values that define the order of preferred video codecs if the primary one fails. You might want this it you want AV1 to be the main codec, falling back to H264 rather than VP8 if not supported. ie: `&codec=av1,h264`
## Related
[and-h264profile.md](../../newly-added-parameters/and-h264profile.md)
[webp.md](webp.md)
[and-recordcodec.md](../recording-parameters/and-recordcodec.md)
---
description: >-
Has the videos fully "cover" their assigned areas, even if it means cropping
the video
---
# &cover
Viewer-Side Option! ([`&view`](view.md), [`&scene`](scene.md), [`&room`](../../general-settings/room.md))
## Details
Can be used to have a video be zoomed in and cropped, so it fills its window area completely. Useful if you don't want any gaps between videos.
On the left you see two video feeds in a scene without using `&cover` and on the right with using `&cover`:
## Related
[and-portrait.md](and-portrait.md)
[and-square.md](../../newly-added-parameters/and-square.md)
[rounded.md](../design-parameters/rounded.md)
---
description: Overrides the automatically selected Device Pixel Ratio
---
# &dpi
Viewer-Side Option! ([`&view`](view.md), [`&scene`](scene.md), [`&room`](../../general-settings/room.md))
## Aliases
* `&dpr`
## Options
Example: `&dpi=2`
| Value | Description |
| ----------------- | --------------------------- |
| `1` | Set Device Pixel Ratio to 1 |
| `2` | Set Device Pixel Ratio to 2 |
| `3` | Set Device Pixel Ratio to 3 |
| (integer value X) | Set Device Pixel Ratio to X |
## Details
This allows a user to override the automatically selected Device Pixel Ratio value. It is often either 1 or 2 by default, depending on your display's DPI setting.
An accurate DPI value is important for calculating the correct requested resolution of a video. For high density displays, you'll want to have a higher resolution of video, especially in the case of the Electron Capture app, where the reported resolution isn't the same as the displayed resolution.
Changing this value can provide for higher quality or lower quality video on playback, a bit like changing the [`&scale`](scale.md) value, but dynamic to the current window-size of the video being played back.
## Related
[and-sharper.md](../video-parameters/and-sharper.md)
[and-sharperscreen.md](../screen-share-parameters/and-sharperscreen.md)
[scale.md](scale.md)
---
description: >-
Tells the remote source that you would like them to prioritize the audio
stream over other streams
---
# &enhance
Viewer-Side Option! ([`&view`](view.md), [`&scene`](scene.md), [`&room`](../../general-settings/room.md))
## Details
Tells the remote source that you would like them to prioritize the audio stream over other streams.
* May not be compatible with all remote sources; depends on the browser they have
* Prioritizing audio may cause problems elsewhere, such as for other viewers or for video streams
* Prioritization applies to both encoding and networking sending of audio packets
* May override custom ptime values
* This option may be useful in reducing audio 'clicking', but likely will be just as effective as a placebo
For advanced users, this sets the following of the audio's stream: `networkPriority = "high";` `priority = "high";` `adaptivePtime = true;`
For more details, please see:
[https://www.w3.org/TR/webrtc-priority/#dom-rtcrtpencodingparameters-networkpriority](https://www.w3.org/TR/webrtc-priority/#dom-rtcrtpencodingparameters-networkpriority)
---
description: Has videos fade in smoothly
---
# &fadein
Viewer-Side Option! ([`&view`](view.md), [`&scene`](scene.md), [`&room`](../../general-settings/room.md))
## Values
Example: `&fadein=400`
| Value | Description |
| ---------------- | ------------------------------------- |
| (no value given) | fades in video in 500-ms |
| (value in ms) | value in ms for the fade in animation |
## Details
Has videos fade in smoothly in 500-ms. You can pass a custom fade in time in milliseconds.
Also available as a director's room toggle for scenes.
## Related
[animated.md](animated.md)
---
description: Let you set font-size of the closed captions and stream labels
---
# &fontsize
General Option! ([`&push`](../../source-settings/push.md), [`&room`](../../general-settings/room.md), [`&view`](view.md), [`&scene`](scene.md))
## Aliases
* `&labelsize`
* `&sizelabel`
## Options
Example: `&fontsize=70`
| Value | Description |
| --------------- | ------------------------------- |
| (integer value) | font size value as a percentage |
## Details
Lets you set font-size of the [guest labels](../design-parameters/showlabels.md) or [closed captions](../settings-parameters/and-closedcaptions.md).
## Related
[and-closedcaptions.md](../settings-parameters/and-closedcaptions.md)
[showlabels.md](../design-parameters/showlabels.md)
---
description: This tells the remote publishers to send keyframes at a specified rate
---
# &keyframerate
Viewer-Side Option! ([`&view`](view.md), [`&scene`](scene.md), [`&room`](../../general-settings/room.md))
## Aliases
* `&keyframeinterval`
* `&keyframe`
* `&kfi`
## Options
Example: `&keyframerate=2000`
| Value | Description |
| --------------- | -------------- |
| (integer value) | interval in ms |
## Details
`&keyframerate` tells the remote publishers to send keyframes at a specified rate.
Could be useful if packet loss is causing a lot frame corruption.
If you make it less than 1000-ms, you will face a pretty steep drop in video quality.
It may not work at all if set too low; under 500-ms didn't work at all in my testing.
---
description: Disables the auto-mixer, allowing for a custom mixer to be used
---
# &manual
Viewer-Side Option! ([`&view`](view.md), [`&scene`](scene.md), [`&room`](../../general-settings/room.md))
## Details
This is an advanced feature, for primarily developers, who wish to utilize their own auto-mixing code or perhaps are not using VDO.Ninja for video/audio specifically.
`session.rpcs` is an object that can be queried for a list of active receiving peer sessions. `session.rpcs[UUID].videoElement.srcObject` contains video/audio data if available.
## Related
[iframe-api-documentation.md](../../guides/iframe-api-documentation.md)
---
description: Minimum packet size of audio
---
# &minptime
Viewer-Side Option! ([`&view`](view.md), [`&scene`](scene.md), [`&room`](../../general-settings/room.md))
## Options
Example: `&minptime=20`
| Value | Description |
| --------------- | ------------------------- |
| (integer value) | minimum audio packet size |
## Details
If you do not know what this is, you definitely don't want to touch it.
Minimum packet size of audio in ms. 10-ms is lowest that you can set in Chromium I think.
Optimized already, but it's available for experimentation and fun if desired.
## Related
[and-ptime.md](and-ptime.md)
[and-maxptime.md](and-maxptime.md)
---
description: Has the inbound audio playback as mono audio
---
# &mono
Viewer-Side Option! ([`&view`](view.md), [`&scene`](scene.md), [`&room`](../../general-settings/room.md))
## Details
If using [`&proaudio`](../audio-parameters/and-proaudio.md), this will retain the publishing benefits of [`&proaudio`](../audio-parameters/and-proaudio.md), while keeping the audio as mono instead of stereo.
Audio bitrates may be reduced from 256-kbps to 128-kbps, if not explicitly stated, in some cases.
In Version 22 `&mono` also works with Firefox.
To set the source to mono, see [`&monomic`](../audio-parameters/and-monomic.md).
## Related
[and-monomic.md](../audio-parameters/and-monomic.md)
[stereo.md](../../general-settings/stereo.md)
---
description: Delivers video only streams; audio playback is disabled
---
# &noaudio
Viewer-Side Option! ([`&view`](view.md), [`&scene`](scene.md), [`&room`](../../general-settings/room.md))
## Aliases
* `&na`
* `&hideaudio`
## Details
Delivers video only streams; audio playback is disabled for all incoming streams. `&noaudio` also hides the speaker button.
You can pass a comma separated list of stream IDs that will be excluded, so that they specifically will play audio. `?noaudio=guest1a,guest2a` will only allow audio from guest1a and guest2a to play
External Iframes may or may not be muted by default if using \&noaudio. While I try to mute frames when possible, like embedded Youtube videos, there may be still some Iframe sources I cannot mute.
`&exludeaudio` can also be used to specify certain stream IDs that will NOT play audio, so the inverse of `&noaudio`
If you want to be able to unmute the speaker button during production, use [`&mutespeaker`](../../source-settings/and-mutespeaker.md) instead of `&noaudio`.
[`&deafen`](../../general-settings/deafen.md) also disables monitoring your own audio, then it's impossible to get any sound from VDO.Ninja.
## Related
[and-nodirectoraudio.md](../audio-parameters/and-nodirectoraudio.md)
[and-mutespeaker.md](../../source-settings/and-mutespeaker.md)
[deafen.md](../../general-settings/deafen.md)
[and-novideo.md](../video-parameters/and-novideo.md)
---
description: Random video loading order
---
# &randomize
Viewer-Side Option! ([`&view`](view.md), [`&scene`](scene.md), [`&room`](../../general-settings/room.md))
## Aliases
* `&random`
## Details
Forces the videos in a room to have a random loading order.
---
description: Scales the video resolution of the inbound video by the given percent
---
# &scale
Viewer-Side Option! ([`&view`](view.md), [`&scene`](scene.md), [`&room`](../../general-settings/room.md))
## Options
Example: `&scale=100`
| Value | Description |
| --------------------------------- | ------------------------------------------------------------------ |
| (integer value between 0 and 100) | scale the incoming video feed by this percentage |
| `100` | doesn't allow the incoming video feed to scale down the resolution |
## Details
Example: If the video inbound has a resolution of 1920x1080, `&scale=50` would limit the resolution to 960x540 instead.
The nice thing about this is that it doesn't matter which resolution their camera supports; the scale is software based and doesn't care about resolutions or aspect ratios.
This can help a viewer reduce frame stuttering, CPU load, and improve frame rates, without having to have the guest rejoin the stream.
Requires the publisher of the stream to support dynamic scaling; Firefox and Chrome should be supported.
There is a toggle in the director's room to add `&scale=100` to the scene URL:
## Related
[and-sharper.md](../video-parameters/and-sharper.md)
[and-sharperscreen.md](../screen-share-parameters/and-sharperscreen.md)
[dpi.md](dpi.md)
---
description: Defines the link to be treated like a scene
---
# &scene
Viewer-Side Option! ([`&room`](../../general-settings/room.md))
## Aliases
* `&scn`
## Options
Example: `&scene=2` or `&scene=choosethename`
| Value | Description |
| ----------------------- | ------------------------------------------------------- |
| `0` \| (no value given) | auto-add all videos to the scene; they can't be removed |
| `1` | empty by default; manually add videos in |
| (string) | like `&scene=1`, but videos are not preloaded |
## Details
Must be used in conjunction with the [`&room`](../../general-settings/room.md) parameter.
By adding `&scene` to a room URL, it tells VDO.Ninja that this is no [`&push`](../../source-settings/push.md) connection.
`&scene=0` by default has all videos in the room automatically added to the scene. They cannot be removed.
* `&scene=1` by default has no videos added to the scene. Videos need to be added manually by the director. Videos not yet added to the scene are connected, and streaming at around 400-kbps, so when they become active they appear immediately. Bitrate will ramp up after a second to the target bitrate of, normally, 2500-kbps or whatever is set via the URL.
 (1).png>)
* `&scene=2` is like `&scene=1`, except the video streams that are not yet added to the scene are disabled with 0-bitrate used. They are connected, but not actively streaming any video data, so it takes a moment longer for videos to appear once added.
* `&scene=N`, where `N` is a string or integer - it's just like `&scene=2`. There are buttons marked S3, S4, .. S8 in the director's room to control these scene types. If they are not already there, new buttons for them will be created automatically when used. See the video below.
* When using a scene, if you manually specify a video via the [`&view`](view.md) parameter, it automatically is added to the scene.
* Audio of videos in scenes can be controlled by the director: volume and mute are options.
* In [v17.2](../../release-notes/v17-release-notes.md) of VDO.Ninja, if using [`&view`](view.md) in a scene link, the director won't be able to remotely control the scene. This applies to solo links.
* In [v18](../../release-notes/v18.md), you can create custom scenes, as per the video below.
## Related
[room.md](../../general-settings/room.md)
[and-solo.md](../mixer-scene-parameters/and-solo.md)
---
description: >-
Tells VDO.Ninja to not block VDO.Ninja from attempting to run when using
Streamlabs for MacOS
---
# &streamlabs
Viewer-Side Option! ([`&view`](view.md), [`&scene`](scene.md), [`&room`](../../general-settings/room.md))
## Details
Tells VDO.Ninja to not block VDO.Ninja from attempting to run when using Streamlabs for MacOS.
For normal OBS users, update to OBS 26.1.2 on MacOS to obtain native support for VDO.Ninja in OBS.
Streamlabs doesn't yet have full support for VDO.Ninja; consider the [Electron Capture](../../steves-helper-apps/electron-capture.md) app if it fails to work well.
---
description: Sets an offset (in ms) for the automatic audio sync fix node
---
# &sync
Viewer-Side Option! ([`&view`](view.md), [`&scene`](scene.md), [`&room`](../../general-settings/room.md))
## Options
Example: `&sync=50`
| Value | Description |
| --------------- | ----------- |
| (integer value) | value in ms |
## Details
`&sync=X` will set an offset in milliseconds for the audio stream.
[`&buffer=0`](../../advanced-settings.md#buffer) or `&sync=0` will do the same thing: it will try to auto-sync video and audio.
Tiny negative offsets _may_ work, like `&sync=-25` is possible, but large negative offsets will not work.
No clue if it is supported in OBS or not; works in Chromium/Chrome v76 or newer tho. Useful if the video device has a large delay that needs compensating for that isn't fixed automatically.
`&sync=500` without the [`&buffer`](buffer.md) command also will only add an audio delay; there will be no additional video buffer or delay.
Using may stop [Echo Cancellation](../../source-settings/aec.md) from working.
## Related
[buffer.md](buffer.md)
[and-buffer2.md](../video-parameters/and-buffer2.md)
---
description: Sets the audio bitrate to be variable, instead of constant
---
# &vbr
Viewer-Side Option! ([`&view`](view.md), [`&scene`](scene.md), [`&room`](../../general-settings/room.md))
## Details
Sets the audio bitrate to be variable, instead of constant, but only when an audio bitrate is manually specified.
By default, Chrome uses a variable bitrate with a cap at around 32-kbps with mono-audio.
When manually specifying a bitrate, Chrome keeps the audio bitrate pretty constant, even if VBR is turned on.
## Related
[audiobitrate.md](audiobitrate.md)
---
description: Defines the stream(s) you are receiving, by their stream IDs
---
# &view
Viewer-Side Option! ([`&scene`](scene.md), [`&room`](../../general-settings/room.md))
## Aliases
* `&streamid`
* `&pull`
* `&v`
## Options
Example: `&view=StreamID1,StreamID2`
Value
Description
(string value)
stream ID to view; can be a comma-separated list of IDs
(no value given)
in a room, you don't see any other guests including the director
## Details
`&view` defines the stream or streams you are receiving, by their stream IDs.
[https://vdo.ninja/?push=streamid](https://vdo.ninja/?push=streamid)
[https://vdo.ninja/?view=streamid](https://vdo.ninja/?view=streamid)
Optional if you are publishing a stream using [`&push`](../../source-settings/push.md).
If the `&view` parameter is not added, the default behaviour will occur.
If the `&view` parameter is provided, it will try to play any stream listed.
If the `&view` parameter is provided, but no values are provided, no streams will play; only publishing will be allowed.
This is useful is you wish to publish a video into a group chat room, but only view video from specific known participants.
This is also useful if you wish to create ad-hoc group chat sessions without using a group room.
Videos will auto-load when they are available if not already.
You can use `&view` in a room combined with [`&scene`](scene.md) or [`&solo`](../mixer-scene-parameters/and-solo.md) to watch one or more specified video feeds of the room:
`https://vdo.ninja/?room=roomname&scene&view=streamid1,streamid2`
## Related
[multi-person-chat.md](../../getting-started/multi-person-chat.md)
[push.md](../../source-settings/push.md)
[scene.md](scene.md)
[and-include.md](../mixer-scene-parameters/and-include.md)
---
description: Custom video codec for broadcasts
---
# &webp
Viewer-Side Option! ([`&view`](view.md), [`&scene`](scene.md), [`&room`](../../general-settings/room.md))
V22: Sender-Side Option! ([`&push`](../../source-settings/push.md))
## Aliases
* `&images`
## Options
Example: `&webp=jpeg`
| Value | Description |
| ---------------- | ----------------- |
| (no value given) | webp image format |
| `jpeg` | jpeg image format |
## Details
#### Changes on Version 22 of VDO.Ninja
The `&webp` mode has been modified a bit. Main change is that you now enable it by add `&webp` to the sender's URL, and [`&codec=webp`](codec.md) to the viewer's URL (otherwise, it falls back to normal video mode). No need for [`&broadcast`](broadcast.md) anymore. (as a reminder, this mode sends the video as a series of low-quality images, rather than a more efficient video stream).
I've removed the toggle in the director's room for this `&webp` feature, as [`&chunked`](../../newly-added-parameters/and-chunked.md) mode is replacing its purpose there, but you might still want to use this mode when the viewer-side does not support video playback or hardware acceleration. Specifically, this option lets you bring motion images (aka, crude video) into the streamlabs mobile app, as a browser source, where other forms of video decoding is not supported.
#### Version 21 and backwards
In Version 21 and backwards it must be used with [`&broadcast`](broadcast.md) on the viewer side but the director doesn't need to be the designated broadcaster.
The Electron Capture app should work to allow for webp-based broadcasting even if the tab is not visible, as tab throttling is disabled with that application.
This is essentially a stream of webp-based images sent over the webRTC data-channels.
The quality by default is limited in both frame rate and resolution, as this custom video codec is very inefficient at higher resolutions and frame-rates.
Based on my testing, the webp mode is only efficient if you are keeping the bitrates under like 2 mbps, so the higher qualities make little sense IMO outside of some niche use cases as they use up a lot of bandwidth.
If you have issues with Webp-mode, or find the quality or CPU savings not sufficient, you can check out the [`&meshcast`](../../newly-added-parameters/and-meshcast.md) integration instead. It's a relatively new supported addition to VDO.Ninja.
#### Details
Default quality is 270p @ 10-fps webp. You can change this with [`&webpquality`](webpquality.md) to increase resolution and max frame rate.
The default frame rate is a target, but if the connection cannot keep up, a lower frame rate will be used. This ensures the lowest latency possible.
Compression quality is set to 66% in all cases. This seems the best bang for buck.
This mode can work with audio, which uses the normal audio mode for transport. Audio and these motion images stay roughly in sync.
[iframe-api-documentation.md](../../guides/iframe-api-documentation.md)
## Related
[webpquality.md](webpquality.md)
[codec.md](codec.md)
[and-chunked.md](../../newly-added-parameters/and-chunked.md)
---
description: Quality setting for the &webp option
---
# &webpquality
Viewer-Side Option! ([`&view`](view.md), [`&scene`](scene.md), [`&room`](../../general-settings/room.md))
V22: Sender-Side Option! ([`&push`](../../source-settings/push.md))
## Aliases
* `&webpq`
* `&wq`
## Options
Example: `&webpquality=1`
| Value | Description |
| ----- | -------------- |
| `0` | 1080p |
| `1` | 720p |
| `2` | 540p |
| `3` | 360p |
| `4` | 270p |
| `5` | 270p @ 15-fps |
| `6` | 270p @ 5-fps |
| `7` | 270p @ 2.5-fps |
| `8` | 360p @ 1-fps |
## Details
You add this parameter to the director (or designated broadcaster) and it then sets the quality target for the [`&webp`](../../advanced-settings.md#webp) mode.
Default is 270p @ 10-fps.
Compression quality is set to 66% in all cases. This seems the best bang for buck. Unless specified, this is also webp.
## Related
[webp.md](webp.md)
---
description: >-
Accepts the special token without needing to specify the cloudflare.vdo.ninja
part if using &whipout instead
---
# &cftoken
[WHIP Option](../../steves-helper-apps/whip-and-whep-tooling.md) / Sender-Side Option! ([`&push`](../../source-settings/push.md))
## Aliases
* `&cft`
## Options
Example: `&cftoken=token`
Value
Description
(string value)
Accepts the special token without needing to specify the cloudflare.vdo.ninja part if using &whipout instead
## Details
If using a cloudflare.com WHIP URL on the sender side, I'll guess at the WHEP link - seems to be working so far. (built this logic into VDO.Ninja directly and works automatically). This of course still implies a unique whip URL per guest.
To make using Cloudflare easier though, I've also created the WHIP end point `cloudflare.vdo.ninja`, which takes a Cloudflare API token, instead of a stream token.
This special end point will auto-create a unique WHEP URL. The official cloudflare.com whip endpoint can only be used by one sender at a time, but this API special endpoint and token approach can be used by many senders at a time. It automatically generates unique WHIP/WHEP when used, in the same way Meshcast does, so no need for unique invite urls per guest.
I've created a page to generate the required special api token; the page also provides further information on this all: [https://vdo.ninja/alpha/cloudflare](https://vdo.ninja/alpha/cloudflare)
`&cftoken` accepts the special token without needing to specify the cloudflare.vdo.ninja part if using [`&whipout`](and-whipout.md) instead.
I focused mainly on adding Cloudflare support first, as it has good pricing for its WHIP/WHEP service, it doesn't require deploying anything, and it has a lot of features (RTMP, SRT, recording, API). It's not 100% cooked yet though, so it's just on alpha currently for testing.
## Related
[whip-and-whep-tooling.md](../../steves-helper-apps/whip-and-whep-tooling.md)
[and-whipout.md](and-whipout.md)
---
description: >-
Useful for publishing to WHIP broadcast servers that support scalable video
modes
---
# &svc
[WHIP Option](../../steves-helper-apps/whip-and-whep-tooling.md) / Sender-Side Option! ([`&push`](../../source-settings/push.md))
## Aliases
* `&scalabilitymode`
## Options
Example: `&svc=L1T3`
Value
Description
(SVC value)
Takes an SVC value, with L1T3 being the most universal option, but other options exist
## Details
`&svc` is useful for publishing to WHIP broadcast servers that support scalable video modes. Takes an SVC value, with `L1T3` being the most universal option, but other options exist. You'll get an error when publishing if you use an invalid one.
There are SVC scalable options to the WHIP output option on [https://vdo.ninja/whip](https://vdo.ninja/whip), making it easy to select a compatible SVC mode if desired.
Experiment with this feature here:
[https://webrtc.github.io/samples/src/content/extensions/svc/](https://webrtc.github.io/samples/src/content/extensions/svc/)
## Related
[whip-and-whep-tooling.md](../../steves-helper-apps/whip-and-whep-tooling.md)
---
description: Publish directly from OBS (or other) to VDO.Ninja without a virtual camera
---
# &whipview
Viewer-Side Option! ([`&scene`](../view-parameters/scene.md), [`&room`](../../general-settings/room.md), [`&director`](../../viewers-settings/director.md))
## Aliases
* `&whip`
## Options
Example: `&whipview=bearertoken`
| Value | Description |
| -------------- | --------------------- |
| (string value) | bearer token from OBS |
## Details
Added experimental "WHIP" support to VDO.Ninja, which means in the near future you'll be able to publish directly from OBS to VDO.Ninja without a virtual camera. There's some big caveats to it all, so I don't recommend it over the normal method to most users, but we'll see how it evolves.
To publish use: [https://whip.vdo.ninja/bearertoken](https://whip.vdo.ninja/bearertoken)
To view use: [https://vdo.ninja/?whip=bearertoken](https://vdo.ninja/?whip=bearertoken)
You can also go to [https://vdo.ninja/alpha/whip](https://vdo.ninja/alpha/whip) for a page to help auto-generate basic VDO.Ninja WHIP links for you.
You have to use a version of OBS that contains WHIP support to get OBS to WHIP working. As of April 2023, these are some builds of OBS that support WHIP:
[https://github.com/obsproject/obs-studio/suites/12263428876/artifacts/649328007](https://github.com/obsproject/obs-studio/suites/12263428876/artifacts/649328007) win (x64)
[https://github.com/obsproject/obs-studio/suites/12263428876/artifacts/649328001](https://github.com/obsproject/obs-studio/suites/12263428876/artifacts/649328001) mac (arm)
[https://github.com/obsproject/obs-studio/actions/runs/4711358202?pr=7926](https://github.com/obsproject/obs-studio/actions/runs/4711358202?pr=7926) (others here)
Hopefully WHIP support will be in OBS officially sometime soon. WHIP support is already added to many other applications and services, and VDO.Ninja will do its best to ensure compatibility as the situation evolves.
See this video for details how to set up OBS WHIP to VDO.Ninja:
Publishing from OBS directly to VDO.Ninja
I've refined the WHIP service on `vdo.ninja/alpha/?whipview=xxx`, making it as robust as I can I think, so if some third-party WHIP client/app doesn't work with it, it may not an issue with VDO.Ninja. In those cases it will be up to the client to ensure full support of the WHIP specification, else it may not work with VDO.Ninja.
## Related
[publish-from-obs-into-vdo.ninja.md](../../guides/publish-from-obs-into-vdo.ninja.md)
---
description: Publish directly from OBS (or other) to VDO.Ninja without a virtual camera
---
# &whipout
Sender-Side Option! ([`&push`](../../source-settings/push.md), [`&room`](../../general-settings/room.md))
## Aliases
* `&whippush`
* `&pushwhip`
## Options
Example: `&whipout=bearertoken`
| Value | Description |
| -------------- | --------------------- |
| (string value) | bearer token from OBS |
## Details
Added experimental "WHIP" support to VDO.Ninja, which means in the near future you'll be able to publish directly from OBS to VDO.Ninja without a virtual camera. There's some big caveats to it all, so I don't recommend it over the normal method to most users, but we'll see how it evolves.
To publish use: [https://whip.vdo.ninja/bearertoken](https://whip.vdo.ninja/bearertoken)
To view use: [https://vdo.ninja/?whip=bearertoken](https://vdo.ninja/?whip=bearertoken)
You can also go to [https://vdo.ninja/alpha/whip](https://vdo.ninja/alpha/whip) for a page to help auto-generate basic VDO.Ninja WHIP links for you.
You have to use a version of OBS that contains WHIP support to get OBS to WHIP working. As of April 2023, these are some builds of OBS that support WHIP:
[https://github.com/obsproject/obs-studio/suites/12263428876/artifacts/649328007](https://github.com/obsproject/obs-studio/suites/12263428876/artifacts/649328007) win (x64)
[https://github.com/obsproject/obs-studio/suites/12263428876/artifacts/649328001](https://github.com/obsproject/obs-studio/suites/12263428876/artifacts/649328001) mac (arm)
[https://github.com/obsproject/obs-studio/actions/runs/4711358202?pr=7926](https://github.com/obsproject/obs-studio/actions/runs/4711358202?pr=7926) (others here)
Hopefully WHIP support will be in OBS officially sometime soon. WHIP support is already added to many other applications and services, and VDO.Ninja will do its best to ensure compatibility as the situation evolves.
See this video for details how to set up OBS WHIP to VDO.Ninja:
Publishing from OBS directly to VDO.Ninja
A goal for a while has been to allow anyone to drop-in their own Meshcast replacement, using a third-party WHIP/WHEP server/service. That is, publish to a whip-service, and have viewers of the stream get the WHEP-view link, so they can view via WHEP instead of p2p. I've achieved this finally; close enough at least.
There's a few requirements to make it work though, so either an API wrapper is needed or a set of rules needs to be followed:
\-- If your WHIP server returns an exposed "WHEP" field in the POST response header, with the URL to the WHEP view link, it will use that WHEP link. You just need to then specify the `&whipout` URL on the sender side then.
\-- This should let you make your own Meshcast service with minimal work; the open-source WHIP API code I released the other day further makes it pretty easy.
I've refined the WHIP service on `vdo.ninja/alpha/?whipview=xxx`, making it as robust as I can I think, so if some third-party WHIP client/app doesn't work with it, it may not an issue with VDO.Ninja. In those cases it will be up to the client to ensure full support of the WHIP specification, else it may not work with VDO.Ninja.
## Related
[whip-and-whep-tooling.md](../../steves-helper-apps/whip-and-whep-tooling.md)
[and-whip.md](and-whip.md)
---
description: Lets you specify the WHIP audio bitrate (kbps)
---
# &whipoutaudiobitrate
[WHIP Option](../../steves-helper-apps/whip-and-whep-tooling.md) / Sender-Side Option! ([`&push`](../../source-settings/push.md))
## Aliases
* `&woab`
## Options
Example: `&whipoutaudiobitrate=128`
| Value | Description |
| --------------- | --------------------- |
| (integer value) | audio bitrate in kbps |
## Details
`&whipoutaudiobitrate` lets you specify the WHIP audio bitrate (kbps).
## Related
[and-whip.md](and-whip.md)
[audiobitrate.md](../view-parameters/audiobitrate.md)
[and-whipoutvideobitrate.md](and-whipoutvideobitrate.md)
---
description: Lets you specify the WHIP video output codec
---
# &whipoutcodec
[WHIP Option](../../steves-helper-apps/whip-and-whep-tooling.md) / Sender-Side Option! ([`&push`](../../source-settings/push.md))
## Aliases
* `&woc`
## Options
Example: `&whipoutcodec=av1`
| Value | Description |
| ------ | ----------- |
| `av1` | av1 codec |
| `h264` | h264 codec |
| `vp8` | vp8 |
## Details
Added `&whipoutcodec=` lets you specify the WHIP video output codec. It can take multiple values; if not used, the default at the moment is open264.
## Related
[and-whip.md](and-whip.md)
[codec.md](../view-parameters/codec.md)
[publish-from-obs-into-vdo.ninja.md](../../guides/publish-from-obs-into-vdo.ninja.md)
---
description: Scales down the WHIP video output via the URL
---
# &whipoutscale
[WHIP Option](../../steves-helper-apps/whip-and-whep-tooling.md) / Sender-Side Option! ([`&push`](../../source-settings/push.md))
## Aliases
* `&woscale`
## Options
Example: `&whipoutscale=50`
Value
Description
(percentage 1 to 100)
will scale down the video to the percentage given
## Details
The `&whipoutscale` parameter will scale down the WHIP video output via the URL, post camera capture setup. You may wish to use this to lower the resolution if your camera has a fixed capture resolution.
Alternatively, if you need to dynamically adjust the resolution, that option already exists via camera settings via width/height slider adjustments.
## Related
[whip-and-whep-tooling.md](../../steves-helper-apps/whip-and-whep-tooling.md)
[and-whip.md](and-whip.md)
---
description: Option to change outbound screen-share video bitrate of WHIP
---
# &whipoutscreensharebitrate
[WHIP Option](../../steves-helper-apps/whip-and-whep-tooling.md) / Sender-Side Option! ([`&push`](../../source-settings/push.md))
## Aliases
* `&wossbitrate`
## Options
Example: `&whipoutscreensharebitrate=2000`
Value
Description
(integer value)
publishing screen share WHIP video bitrate in kbps
## Details
`&whipoutscreensharebitrate` controls the outbound screen-share video bitrate of the [`&whip`](and-whip.md) parameter while screen-sharing via WHIP. It will override the [`&whipoutvideobitrate`](and-whipoutvideobitrate.md) if the video is a screen-share.
## Related
[whip-and-whep-tooling.md](../../steves-helper-apps/whip-and-whep-tooling.md)
[and-whip.md](and-whip.md)
---
description: Option to change codec of the WHIP while screen-sharing
---
# &whipoutscreensharecodec
[WHIP Option](../../steves-helper-apps/whip-and-whep-tooling.md) / Sender-Side Option! ([`&push`](../../source-settings/push.md))
## Aliases
* `&wosscodec`
## Options
Example: `&whipoutscreensharecodec=h264`
Value
Description
h264
h264 codec
vp8
vp8 codec
vp9
vp9 codec
42e01f
open h264 codec
(xxxxxx)
h264 profile IDs
## Details
Adding `&whipoutscreensharecodec` to the publisher's side gives the option to change the publishing codec while screen-sharing via WHIP.
There's 4 codec options currently, including the default option:
* The unspecified default, which is software h264.
* There's also `h264`, which is what the browser then sets. This could include hardware encoding, but that will not work with Firefox or Safari viewers then.
* `vp8` is pretty compatible, so if the default codec doesn't work, you can try that.
* `vp9` is also available, which has better compression/quality, but not fully compatible with all devices.
* av1 and SVC are not yet supported, but that is planned at some point.
## Related
[whip-and-whep-tooling.md](../../steves-helper-apps/whip-and-whep-tooling.md)
[and-whip.md](and-whip.md)
[and-whipoutcodec.md](and-whipoutcodec.md)
---
description: Lets you specify the WHIP video bitrate (kbps)
---
# &whipoutvideobitrate
[WHIP Option](../../steves-helper-apps/whip-and-whep-tooling.md) / Sender-Side Option! ([`&push`](../../source-settings/push.md))
## Aliases
* `&wovb`
## Options
Example: `&whipoutvideobitrate=6000`
| Value | Description |
| --------------- | --------------------- |
| (integer value) | video bitrate in kbps |
## Details
`&whipoutaudiobitrate` lets you specify the WHIP video bitrate (kbps).
## Related
[and-whip.md](and-whip.md)
[bitrate.md](../video-bitrate-parameters/bitrate.md)
[and-whipoutaudiobitrate.md](and-whipoutaudiobitrate.md)
---
description: Options for the &whip parameter
---
# WHIP Parameters
**WHIP Parameters** are specific to the[ WHIP and WHEP tooling](../../steves-helper-apps/whip-and-whep-tooling.md).
## Viewer side options
Useful for publishing to WHIP broadcast servers that support scalable video modes
\*NEW IN [VERSION 24](../../releases/v24.md)
---
description: '"The stream ID you are publishing to is already in use" and other such errors'
---
# Already in use or claimed errors
### "The stream ID you are publishing to is already in use"
Understanding[ stream IDs](../getting-started/stream-ids.md) will help potentially avoid these errors in the future, but the basic notion is any media stream being published over VDO.Ninja needs to register itself with a stream ID. This is specified by using the [`&push`](../source-settings/push.md) URL parameter, such as `&push=STREAMID`.
The moment you connect to the system or start streaming, your stream ID gets registered to your connection, and so as long as you remain connected and online, you keep that stream ID. If you close the browser, hang up, or lose your Internet connection, then your stream ID unregisters automatically as well.
If a stream ID you are trying to claim is already in use by another stream, and that other connection is still actively online, then you'll get an error about it being already in use. In this case, you will need to wait for that other user to hang up or disconnect before you can attempt to register the stream ID yourself.
There are some subtleties to the above, such as if using passwords or self-hosted instances of VDO.Ninja, then stream IDs are isolated to their own unique realm, allowing you to use the same stream ID as someone else from a different realm. So if a stream ID is already in use, you can just change or add a password, and that will resolve the issue.
Of course, when you want to invite several people to a group room, you can't have different passwords, so you will want each guest to have their own unique stream ID still. By default with VDO.Ninja, if you do not use `&push` in the URL to specify a stream ID, then VDO.Ninja will auto generate a random stream ID for the guest. The system will also auto add the `&push=STREAMID` parameter to the guest's URL, so if the guest refreshes their page, they will keep the same stream ID.
The above is where there are sometimes issues, as if you join a room without a `&push` value specified, and then after connecting connecting you copy/share your URL with someone else, your URL might now contain your stream ID. When you then share it with someone else, they won't be able to connect as you are already using the stream ID that is specified.
In the above case, when distributing invite URLs to guests, either ensure each guest has a unique stream ID assigned to them, or ensure that there is no `&push` parameter added to the URL, allowing the system to generate a random stream ID for each guest.
Manually creating a stream ID for each guest is recommended if you want each guest to appear in the same solo-view-link every time they re-join, as otherwise they may have a random new stream ID everytime they join. Many show producers will use a spreadsheet to keep track of who has what stream ID, their settings, and the corresponding invite link. Some of these spreadsheets are pretty sophisticated, with the ability to generate obfuscated invite links based on a few parameters.
If manually creating stream IDs, please just note that they need to be alphanumeric, with no special characters, are should be ideally less than roughly 30-characters long. If using a password, the uniqueness of the stream ID doesn't matter so much, but if not using a password, please ensure you create unique values that can't be easily guessed or accidentally duplicated by someone else.
Additional tools and options are available to create and assign stream IDs, such as [`&permaid`](../advanced-settings/setup-parameters/and-permaid.md), and other methods to store stream IDs via local user storage, but those options are out of the scope of this article.
### "The room is already claimed by someone"
This error indicates that there is already someone in a group room that has joined the room in the role of a director. The first director to join a room claims the room as theirs, and it remains theirs until they go offline or close their browser, as the room is assigned to their active connection. Another director will then be able to claim the room then, once the main director disconnects.
Claiming a room doesn't inherently mean much, other than anyone who joins the room will only acknowledge them as the main director. Acknowledging someone as a director will simply mean that director has certain privileges when requesting actions of a guest or scene. A validated director can ask a guest to hang up, for example, while otherwise such a request will be rejected.
Since VDO.Ninja is built on the concept of peer to peer connections, claiming a room is the same concept as claiming a stream ID, and those claims are tied to your active connections. Everything beyond that is really a matter of peers agreeing to a certain set of rules amongst themselves. If someone does claim a room and forgets to close their browser, you'll need to close that browser, change rooms, or change room passwords if you wish to have someone else become the main director.
# Appearing then disappearing guest
In this case, it sounds like the remote guest is failing to create a WebRTC peer connection with the director.
The handshake works, so each other knows someone is trying to join, but they are unable to find themselves. The system will time out and try again, when this occurs, causing the guest's box to continually partially appear, and then go away again.
This is sometimes caused by blocked UDP traffic, where the TURN relay servers are unable to help for some reason. Security software, privacy-focused VPNs, corporate firewalls, and certain browser extensions are common causes.
Sometimes other guests in the room will see the problematic guest, and in this case, there could just be a network routing issue. Peer to peer connections across the Internet are not common, with most clients these days talking to servers instead, so residential to residential connections may occasionally fail due to bad Internet routes or caches.
Things that often work:
* Switch browsers, with Firefox being a common winner when Chrome fails. Perhaps also try Edge or even the [Electron Capture app](../steves-helper-apps/electron-capture.md).
* Use a VPN designed for streaming, such as [speedify.com](https://speedify.com/). Free VPNs exist as Chrome extensions, if you need something quick.
* Switch networks; if using WiFi, switch to Cellular, and vice-versa.
* If behind a corporate firewall, have the IT administrators allow WebRTC traffic, or use a different.
* [Meshcast.io](../steves-helper-apps/meshcast.io.md) is a server-based WebRTC system, and it may work in place of VDO.Ninja for simple needs.
* If nothing above works, join the Discord support community for personalized help at [discord.vdo.ninja](https://discord.vdo.ninja).
---
description: >-
ATEM devices don't support HDCP, which some HDMI input devices require.
Disabling HDCP with some HDMI splitters can resolve the issue.
---
# ATEM not working with Firestick
One user reports that their ATEM extreme wasn't working with an Amazon Firestick via HDMI.
Due to HDCP, it turns out you need to use an HDMI splitter that bypasses HDCP for it to work, else you'll just get a black screen. The ATEM does not support HDCP, so you need a way to disable it, and some splitters can offer that.
Taking a look at the Firestick HD Max and VDO.Ninja
### Background and more information
In a YouTube video, it was demonstrated that a Firestick, such as the 4K Max, can play VDO.Ninja videos at full-screen with a clean output. AV1 is even supported to some degree with the 4K Max, which offers excellent color reproduction versus VP8 or H264.
Given the price of a Firestick versus something like an SBC (ie: Orange Pi 5), it's an appealing option to use as a source for an ATEM device, like an ATEM mini. ATEMs don't have browser source support on their own, making a hack like this necessary.
Needing to disable HDCP may also apply to other HDMI input devices when paired with a Firestick, Chromecast, or other media dongle.
If using this setup with an overlay, like [Social Stream](../steves-helper-apps/social-stream-ninja/), you may want to use `&chroma` on the featured chat overlays to enable the green background. From there, you should be able to chroma-filter out the green in the ATEM device, providing transparency.
It's also possible to use OBS to output a source to an ATEM device, via HDMI output on your computer. You'll still need to use a green screen if wanting transparencies of course.
Lastly, you can use IFrames and the VDO.Ninja mixer app to create custom scenes and layouts with transparencies in a browser source, if you wanted to do the mixing that way, avoiding the need for Chroma keying. Just please note that a Firestick or other low-powered dongle don't seem to handle multiple videos and complex effects all that well, or even full HD video for that matter. You may want to get a NUC device or powerful SBC to do more complex mixes that feed out into an ATEM of such.
# Audio Clicking / Popping
Bluetooth microphones can cause clicking/popping.
[VDO.Ninja](https://vdo.ninja/) uses 48kHz audio (48000hz), so any software you are using with VDO.Ninja should ideally also use 48-KHz. If using a different sample rate, the browser or app will try to convert it as needed, but this doesn't always go smoothly. Very high sample rates are especially troublesome on some systems, so having your system be end-to-end setup in 48khz audio is suggested and reduce any additional audio processing overhead.
If using any virtual audio cables or pro audio gear, try to increase the audio buffer packet sizes, as buffer-under issues can cause audio distortion. Too small an audio buffer on some mic preamps or virtual audio cables can lead to clicking or distortion.
Having the playback audio device and the microphone capture device set to 48000hz, and no more than 24-bit, is recommended. You can adjust these settings in the Windows audio settings. Devices like a FiiO DAC can sometimes have the audio sample rate be very high, and that can cause buffer underruns and clicking problems.
Restarting OBS or addressing heavy CPU load may also help prevent buffer underruns, which sometimes appear in the OBS logs as a max buffer reached error. Make sure the computer isn't running near 100% load to ensure it's not just overloaded.
As well, starting OBS Studio in admin mode can also fix issues with audio as well, although I'm not entirely sure why this works sometimes.
Some surround sound headphones, like those by Logitech, can also cause audio problems; robotic noises, distortion, etc. Disabling surround sound mode often fixes such issues.
If using a MacOS system, ensure your computer is plugged into the power outlet and not on battery power. Systems running on batteries can sometimes have issues.
Consider reducing the resolution and bitrate of videos, as this can help free up CPU load. An overloaded system could perhaps stress the audio encoder/decoder pipeline out.
Do not use Wi-Fi if streaming high-quality music; packet loss can cause clipping. Use wired Ethernet on both ends of the connection instead.
For either the sender or viewer of a stream, make sure you are not using up more than \~80% of your total upload bandwidth. Using 100% of your bandwidth will cause packets to stall and possibly be skipped, leading to missed frames and audio clicking.
If dealing with audio distortion or robotic voices, sample rates of the system
You can also try adding some URL parameters to the viewer and sender linkes to see if it helps. A few parameters to try that might help are the following:
[`&noaudioprocessing`](../general-settings/noaudioprocessing.md)
[`&samplerate=48000`](../advanced-settings/view-parameters/and-samplerate.md)
[`&micsamplerate=48000`](../other-parameters.md)
# Audio is delayed in OBS
Might be caused by a Browser-source related bug in OBS.
Fully restart OBS and see if that clears the issue.
You can try to bring in audio via [https://vdo.ninja/electron](https://vdo.ninja/electron) instead. [`&novideo`](../advanced-settings/video-parameters/and-novideo.md) can be used to ingest just the audio. Route the audio to a virtual audio device and then bring that into OBS as an audio device. Should be in sync this way.
VDO.Ninja uses 48000khz sample rate for audio; using this sample rate whenever possible can help keep things in sync.
Try to avoid overloading your CPU or using too many browser source elements in OBS; OBS Browser Source can get overwhelmed.
VMix could be an alternative to OBS if problems persist; Vmix supports VDO.Ninja also.
---
description: Several possible causes of audio not working in Windows are listed
---
# Audio over VDO.Ninja isn't working
### OBS isn't set to capture audio
If using OBS for audio playback, be sure that you select "Control Audio via OBS" in the browser source to capture the audio. You won't be able to hear the audio by default this way, but OBS should show the audio level meters moving, signifying the audio is being captured.
### OBS may be having a max buffer issue
Restarting the computer or OBS can sometimes resolve issues where OBS stops capturing audio via browser sources or sometimes other audio soures.
Some users report that the audio may sound distorted or out of sync as well, but often there may be no audio at all.
Starting OBS in adminstirator mode, if using Windows, may help. Reducing the CPU load on your computer may also also help.
### Sample rates or invalid audio settings
If however you are testing VDO.Ninja and audio isn't working at all, from browser to browser, yet you see your mic-level loudness green indicator moving in VDO.Ninja as you speak, double check your Windows audio settings. In particular, high sample rates, like 384-khz sample rates, 32-bit depth audio playback, or other professional audio device settings in Windows may cause problems with audio playback.
To avoid issues, set your audio playback devices (specifically to the audio playback device) to 24-bit or 16-bit audio, with an audio sample rate of 48,000-hz, or as close to it as possible. If you mic-source isn't working, also check to make sure your microphone is 16 or 24-bit capture mode, and isn't in ASIO mode.
Surround sound or multi-channel audio, for both the microphone and audio playback devices, can cause audio problems with the browser. Disable surround sound, limiting audio playback to stereo 2.0 channels, and try again.
If using a remote virtual desktop, such as a server-hosted version of Windows, be sure the Windows audio service is enabled; you might be able to turn this on via `services.msc` , accessible via the `Windows Key + R` run prompt.
Also check that the default audio device in Windows is as expected and that any select audio output device in VDO.Ninja is pointed to the right location. Bluetooth devices may sometimes be problematic, especially on mobile, so try to avoid Bluetooth if possible.
In some cases, adding `&noap` to the URL for the sender or/and reciever of the audio may help, as this will disable web-audio node processing in VDO.Ninja, which may fail when using invalid sample rates of an overly stressed CPU.
### Not all playback devices support audio
Some media devices, like the Magewell Director Mini, may not support audio via VDO.Ninja, and only video. Please also ensure the video is playing, as some devices may pause a media track until there is a user-gesture, which woudl prevent audio from playing in cases.
### Echo cancellation
Sometimes if there is background audio being captured, the system will remove that audio thinking it is an echo of feedback. If this background audio contains your microphone audio, your microphone audio may be removed. You can disable echo cancellation in this case, or resolve the core issue.
[echo-or-feedback-issues.md](echo-or-feedback-issues.md)
### External USB / Lightning audio
If using an external audio device on mobile, like via USB, it's suggested to use a TRRS audio input adapter, with the your microphone connected to that.
[https://www.youtube.com/watch?v=BBus\_S8iJUE](https://www.youtube.com/watch?v=BBus\_S8iJUE\&feature=youtu.be)
If on Android, using Firefox might work well without the need of TRRS however.
### If using the native mobile app
If using the native VDO.Ninja mobile app, please note that screen sharing might only contain microphone-sourced audio -- the system audio won't be detected at the moment. This will hopefully change soon, but there is no timeline as to when it will be working.
---
description: Browsers may prevent videos from auto-playing on initial page load
---
# Autoplay doesn't work in Chrome or vMix v77
Since 2017, Browsers have required users "interact" with a website in some way before videos will be allowed to auto-play. You can modify Chrome to allow for auto-play, but it's not super easy to do.
In OBS and the Electron Capture app, auto-play is allowed.
vMix v77 does not support auto-play, which must be an oversight on their behalf... right?? haha. A complaint has been filed regardless; voice your own request for the feature here: [https://forums.vmix.com/posts/t22181-CEF-V77-browser-setting](https://forums.vmix.com/posts/t22181-CEF-V77-browser-setting).
A full-screen-sized play button will show up to help accommodate the need for user gestures before auto playing videos.
**TL;DR;** you have a few options:
* use the Electron Capture app or OBS Studio to play videos; these apps have gesture-requirements disabled
* in Chrome, go to: `chrome://settings/content/sound?search=sound` and add vdo.ninja to the list of "allowed to play sound" list
* add `&noaudio` to your VDO.Ninja view link, so no audio track loads -- without audio, the video should auto-play.
* try adding `--autoplay-policy=no-user-gesture-required` to the Chrome/Chromium command line to have the auto-play policy changed on load (this may not work with recent versions of Chrome though)
* make sure there are no Adblockers installed or other extensions install; sometimes these may interfere with auto-playing
# Blue spinning window
_**If you are experiencing this issue and you are using MacOS, please refer to the MacOS specific section**_
If this happens, there could be numerous reasons.
* Check that you have hardware-acceleration turned on, within OBS, and have updated your graphic drivers.
* Ensure that you are not behind a VPN or firewall. Symmetrical firewalls may block OBS.Ninja traffic.
* If on macOS, use the Electron Capture application instead of the Browser source used by OBS (Also ensure you are running OBS v26.1.2 or newer!).
* Try using a VPN, such as Speedify, to bypass any networking firewalls that your ISP may have enabled.
* Check [test.webrtc.org](https://test.webrtc.org/).
#### Are you using cellular?
* If you are on cellular, try connecting to Wi-Fi instead.
* Ensure your are using a compatible browser (Safari on iOS or Chrome on Android).
* Older iOS devices do not work.
* Check [test.webrtc.org](https://test.webrtc.org/).
#### Are you on IPv6?
Check to make sure your TURN server supports IPv6. The ones I provide _should_ support it though. Check [test.webrtc.org](https://test.webrtc.org/).
#### Are you using an iPhone?
There are numerous issues with iOS devices; see the [iOS help section](https://github.com/steveseguin/obsninja/wiki/FAQ#ios) for more info. Check [test.webrtc.org](https://test.webrtc.org/).
#### Are you within a condo building or corporate office?
Firewalls may be setup that block traffic of this type. Talk to your network administrator Other problems? Check [test.webrtc.org](https://test.webrtc.org/) and see if anything is marked as "RED". You can also try different networks and see if that helps.
In the meantime, [OBS.Ninja/old](https://obs.ninja/old) is up, and will remain up until I can resolve all the issues with the new release. This may solve your issue temporarily. So if you have this problem , where you see the fullscreen video, but it is just grey and spinning, then it could be a network issue.
---
description: My camera isn't appearing in Chrome on macOS anymore. why?
---
# Camera on macOS doesn't show?
If your camera isn't appearing in Chrome on macOS, there are several possible reasons and solutions you can try:
#### 1. Check Camera Permissions
Ensure that Chrome has permission to access the camera:
* Open **System Preferences** > **Security & Privacy** > **Privacy**.
* Select **Camera** from the left-hand menu.
* Ensure that **Google Chrome** is checked.
#### 2. Update Chrome
Make sure you're using the latest version of Chrome:
* Open Chrome and go to **Settings** > **About Chrome**.
* Chrome will automatically check for updates and install them if available.
#### 3. Check Site Permissions
Verify that the website has permission to use your camera:
* Open the website where you are trying to use the camera.
* Click the **lock icon** in the address bar.
* Ensure that **Camera, and also the microphone if needed,** is set to **Allow**.
#### 4. Restart Chrome
Sometimes, a simple restart of Chrome can resolve the issue:
* Close Chrome completely.
* Open Chrome again and check if the camera works.
* Or just restart the computer to ensure Chrome has completely been restarted
#### 5. Check for Conflicting Applications
Ensure no other application is using the camera:
* Close any other applications that might be using the camera (e.g., Zoom, Skype, Discord).
* A camera can only be used by one application at a time, so closing other applications may help
#### 6. Reset Chrome Settings
Resetting Chrome settings can help resolve the issue if it's due to a misconfiguration:
* Open **Settings** > **Advanced** > **Reset settings**.
* Click **Restore settings to their original defaults** and confirm.
#### 7. Test Camera in Another App
Verify that your camera works with other applications:
* Open an application like **Photo Booth** or **Facetime** and check if the camera works.
#### 8. Reinstall Chrome
If the above steps don't work, try reinstalling Chrome:
* Uninstall Chrome from your Mac.
* Download the latest version from Google Chrome's website and reinstall it.
#### 9. Check macOS Updates
Ensure your macOS is up to date:
* Open **System Preferences** > **Software Update**.
* Install any available updates.
#### 10. Hardware Issues
If the camera still doesn't appear, there might be a hardware issue:
* Try connecting an external webcam if you have one.
* If the external camera works, it may indicate an issue with the built-in camera.
* Try plugging the camera into another USB port or such
* Make sure any HDMI adapter has an input that's compatible with the browser, so 8-bit, 30 or 60-fps, and not requiring special drivers to use
#### 11. Browser Extensions
Disable any browser extensions that might be interfering with the camera:
* Go to **chrome://extensions/** and disable extensions one by one to identify if any of them are causing the issue.
#### 12. Try another browser instead
Firefox or Safari or another Chromium-based browser might work, if Chrome does not.
#### 13. Use a virtual camera as an adapter
If your camera works with OBS, perhaps use that to load the camera and then use the OBS Virtual Camera as the camera source.
* Some cameras are only compatible with OBS, and may not work with the browser
#### 14. Some virtual camera drivers on macOS are limited to 1080p30
Many virtual camera drivers on macOS are limited to 1080p30, and in fact, may only work at that specific resolution. If using a virtual camera or a pass-thru camera source, make sure it's outputting 8-bit 1080p 30fps video, to ensure maximum compatibility.
* Vertical or portrait modes are often not supported by virtual camera drivers on macOS
* Chrome and most browsers do not support higher than 60-fps, nor h264-based video devices
#### 15. Try on a Windows PC or an iOS 17 device that has USB 3.0
While a last resort, changing host hardware may work. Windows is popular with live streaming applications due to greater software and hardware compatibly, and if compelled to keep in the Apple ecosystem, you may find your device works with newer iPhones / iPads, which have a USB 3.0 port.
---
description: >-
For those on macOS, if the camera works in Safari, but not Chrome, try the
following options
---
# Camera works in Safari; not Chrome
### Check if its VDO.Ninja specific or browser-wide
Often the camera will not just fail ot load in VDO.Ninja, but fail to load with any web app in Chrome or browser.
You can confirm its not VDO.Ninja specific by going to the following page and seeing if the camera works with this simple camera app: [https://webrtc.github.io/samples/src/content/devices/input-output/](https://webrtc.github.io/samples/src/content/devices/input-output/)
If it fails only within VDO.Ninja, make sure you've enabled the Camera and Microphone permissions for VDO.Ninja.
Make sure VDO.Ninja has access to the camera and microphone
### Close other apps or restart the computer
Sometimes another app is using the camera, and closing all other apps or restarting the operating system can fix it up. You cannot use your camera in OBS and in Chrome at the same time, for example.
### Force close the camera app
You can try running the following from your Terminal in MacOS:
```
sudo killall appleh13camerad
sudo killall VDCAssistant
sudo killall AppleCameraAssistant
```
You can also close the camera app in MacOS via
```
Apple Logo > Force Quit > Select All Apps > (find 'Camera process') -> Force Quit.
```
### Turn off hardware acceleration
In Chrome, you can turn off "Use hardware acceeleration when available" in the `chrome://settings/system` page. You'll want to restart the browser after
### Make sure Chrome has access to your microphone and camera
Go to your Security & Privacy page in your MacOS settings, select the privacy tab, and make sure Google Chrome has access to your camera and microphone.
### Reinstall Chrome
Do a full and complete uninstall of Chrome and then re-install. Perhaps try using the Chrome Beta version. Also make sure not to have any browser extensions install, as they can conflict.
### Try a different camera
Maybe your camera is not working or compatible, for whatever reason. Try a different camera and see if it works.
### Update or reinstall your macOS
As a last resort, reinstalling the system fresh might be an option.
# Can't auto-start screen sharing
Browsers won't let you auto-start a screen share, as it will require a user's input to select the source. You can configure the screen share pop up to show certain screen share options instead of others, but you'll still need to manually select which source to capture.
There are still some other options though that might work for your use case:
* The[ Electron Capture app](../steves-helper-apps/electron-capture.md) can be configured to allow for automatic screen sharing, which is useful if you want to start the screen share from command line or as a quickstart icon.
* OBS Studio can be used for screen capturing, and then when needed, you can have VDO.Ninja auto-select the OBS Virtual Camera as a source, since it can be selected automatically as a web camera.
* If you don't want to have to start OBS or are already running it, there's a virtual camera driver that will let you select screen shares as a source. [See here](https://github.com/rdp/screen-capture-recorder-to-video-windows-free).
# Can't capture an application's audio when screen-sharing
**Chrome** only supports audio capture from a TAB or from the DESKTOP. If you would like to capture the audio from a desktop application, two popular options include VB Virtual Cable for Windows or Loopback for macOS.
**Firefox** and **Safari** only support Desktop audio capture, so Chrome (Edge/Brave) are generally recommended instead.
To capture an application's audio, and not the entire desktop, you can use a virtual audio cable.
On **Windows**, VB Cable is a free option, you can use it with Windows' built-in "mixer" app to push the audio from the application to the virtual cable. From there, you can bring the audio into VDO.Ninja as needed. There's also Voicemeeter, which offers more advanced routing and features for Windows users.
With **macOS**, Loopback is a wonderful app that makes capturing audio from an application easy, but it is non-free. For a list of free options for macOS, please see here: [https://docs.vdo.ninja/platform-specific-issues/macos#capturing-audio](https://docs.vdo.ninja/platform-specific-issues/macos#capturing-audio)
For a detailed guide on how to capture an application's audio, please see here: [https://docs.vdo.ninja/guides/audio](https://docs.vdo.ninja/guides/audio)
There are other methods and software alternatives out there to solving this problem, although.
---
description: >-
Can't load camera both in both VDO.Ninja and OBS (or other app) at the same
time
---
# Can't load camera both in OBS and VDON
If using a physical camera in OBS, or using a physical camera in [VDO.Ninja](https://vdo.ninja/), it can't be used by a second app.
If using the camera with [VDO.Ninja](https://vdo.ninja/), you can use it with other websites within the same browser though. So you can use the web version of Discord with [VDO.Ninja](https://vdo.ninja/); no issues with that.
#### However if you need to load the camera up in two different desktop apps, try the following:
* Open up a second OBS instance, and load your camera in that instead.
* Enable its Virtual Camera.
* Select the Virtual Camera in [VDO.Ninja](https://vdo.ninja/).
* Select the Virtual Camera now also in the first OBS instance (or other app).
Your camera \*may\* now be working in both apps; this has been tested with OBS and VDO.NInja on Windows 11 anyways.
_Example:_
Demo of it working
#### If that doesn't work, another option that works well:
* Just pull your video into OBS from VDO.Ninja. It uses up a bit more CPU, but it simplifies things to just use [VDO.Ninja](https://vdo.ninja/) as the source for OBS.
* You can also always use the Virtual Camera from OBS to load the VDO.Ninja camera feed into another app.
---
description: Can't load camera from local webserver issues and how to resolve them.
---
# Can't load camera from non-SSL host
The Chrome / Edge / Chromium browsers will not allow access to media devices (camera / microphone) without SSL enabled.
Possible solutions include switching to https, accessing the site from http://localhost, or enabling the `unsafely-treat-insecure-origin-as-secure` browser switch.
The browser flag, which works with Chromium-based browsers, can be accessed from: _**chrome://flags/#unsafely-treat-insecure-origin-as-secure.**_ Specify the hostname and the IP address that you will be accessing, such as https://192.168.1.15:8080. Enable the option, and then restart the browser.
#unsafely-treat-insecure-origin-as-secure
More advanced users can try using **openssl** to generate self-signed certificates, and using them with their local webserver to enable SSL, assuming you have access to the webserver.
```
openssl req -nodes -new -x509 -keyout key.pem -out cert.pem
```
If you can access the site via http://localhost, or http://127.0.0.1, that may work also. This could be possible if hosting VDO.Ninja locally, and accessing it via a local webserver. If you have Python installed, you could get away using it to host VDO.Ninja in this way.
```
git clone https://github.com/steveseguin/vdoninja
cd vdoninja
python -m http.server 8000
```
When accessing VDO.Ninja in this way, make sure the remote computer that may also be accessing VDO.Ninja is using the same "salt". To debug this, you can try adding \&salt=vdo.ninja to all the VDO.Ninja links, as that will mnually assign all the links to use the same salt. The salt is used in the encryption process for site isolation and increased privacy/security when not using the official VDO.Ninja deployment.
---
description: Some games may need settings tweaked to be captured properly with the browser
---
# Can't screen capture certain games
If you're struggling to capture a game with VDO.Ninja using the browser, a list of options are below.
* Disable Fullscreen Optimizations: Right-click the game's .exe file, go to Properties > Compatibility, and check "Disable fullscreen optimizations"
* Sometimes you want to even uncheck "Disable fullscreen optimizations", so try both ways
* Restart the game after applying changes.
* Run as Administrator: Try running both the game and your capture software as administrator.
* Compatibility Mode: Run the game in compatibility mode for an earlier version of Windows.
* Run the game in windowed or borderless windowed mode
* Consider using OBS Studio to capture the game with, and then output the captured video to VDO.Ninja using the OBS Virtual Camera.
* Sound can be captured with a virtual audio device in conjunction with the the OBS audio monitoring output option.
* If using hybrid graphics, such as two graphics cards, try to run the game on the same graphics card as the system / browser.
* Try window capture or full-screen capture, or try with a different browser.
* If using Window capture, you can capture the game's audio with the use of a virtual audio device, like Voicemeeter.
* Display capture tends to offer better frame rates than window capture
* Use an HDMI splitter and an HDMI to USB adapter to capture the output sent to your monitor.
* Update your graphics card drivers
* If using a browser such as Opera GX, it may throttle or disable VDO.Ninja when gaming.
* The Electron Capture application, or a different browser, are better choices
---
description: >-
Some applications don't like being screen captured by Chrome; there are some
options however
---
# Can't screen share Adobe Lightroom
**Disable Hardware Acceleration:**
* Sometimes, hardware acceleration in either Chrome or Lightroom can cause issues. Try disabling hardware acceleration in Chrome by going to `chrome://settings` > Advanced > System > uncheck "Use hardware acceleration when available". Also, check if there's an option to disable hardware acceleration in Lightroom
**Try a Different Browser:**
* Test if the issue persists with other browsers like Mozilla Firefox or Microsoft Edge. This can help determine if the problem is specific to Chrome.
**Use Windowed Mode:**
* If Lightroom is in full-screen mode, try switching to windowed mode. Some applications don't share their display properly when in full-screen.
**Use Display Capture in Chrome instead of Window Capture**
* While this option may reveal more of your desktop than desired, if using a secondary screen to host the Lightroom application, it may still be a suitable solution.
**Use OBS and it's Virtual Camera:**
* You can use OBS to capture lightroom, and from there output it to VDO.Ninja via the OBS Virtual Camera. You would select the virtual camera in VDO.Ninjas a camera source, instead of a screen share source. OBS has more advanced screen capture options than Chrome does.
---
description: Accessing the wide-angle or zoom lens on your camera
---
# Can't select a camera lens on mobile
Some camera lenses are not easily accessible in native mobile applications, and many are not available at all in the browser.
The [native app versions](../steves-helper-apps/native-mobile-app-versions.md) of VDO.Ninja may sometimes offer additional lens options not found in the browser, but adding all options is still a work-in-progress.
On Android, you can try Firefox Mobile as well as Chrome or other browsers to see if your camera lens appears there. Some manufacturers offer better support for their cameras than others, making lens selection more accessible to browsers and app developers.
Sometimes you can zoom in and the cameras will switch automatically, but this is rare.
### Digital zoom
There is the option to digitally zoom with VDO.Ninja, [\&effects=7](../source-settings/effects.md), will allow you to adjust the digital zoom via the browser. This isn't an ideal solution, but it may work in some cases where optical zoom isn't available.
### Smartphones that support more than one rear camera
Below is a non-exhaustive short list of smartphones that appear to support more than one rear camera in the browser:
* Samsung Galaxy S23 v13.0 supports 2 front, 2 rear
* Samsung Galaxy S24 v14.0 supports 2 front, 2 rear
* Samsung Galaxy S24 Ultra v14.0 supports 2 front, 2 rear
* Samsung Galaxy S22 Ultra v12.0 supports 2 front, 2 rear
* Samsung Galaxy A52 v11.0 supports 2 front, 2 rear
* Huawei P30 v9.0 (/w MS Edge) supports 1 front, 4 rear
* iPhone 15 Pro v17.0 and iPhone 15 Pro Max supports:
* back triple camera
* back dual wide camera
* back ultra wide camera
* back dual camera
* back camera
* back telephoto camera
* front camera
* iPhone 15 v17.4 supports:
* back dual wide camera
* back ultra wide camera
* back camera
* front camera
* iPhone 14 v16 supports:
* back camera
* back ultra wide camera
* desk view camera
* back dual wide camera
* front camera
* iPhone 14 Pro v16 supports
* back camera
* back telephoto camera
* back ultra wide camera
* desk view camera
* front camera
* iPhone 13 v16 supports
* back camera
* back ultra wide camera
* desk view camera
* front camera
This list was based on results obtained using BrowserStack.com, so cloud-hosted devices. There may be errors with the results obtained, however you can check yourself on BrowserStack usually for free if a camera is supported or if the results have changed.
The iPhone 15 Pro offers extensive camera options
### WHIP mode
VDO.Ninja supports the [WHIP](../advanced-settings/whip-parameters/and-whip.md) streaming protocol, so if there is a native camera app that has proper WHIP-output support, and has the camera features you are looking for, using that can be used with VDO.Ninja.
Currently WHIP support in VDO.Ninja is a bit experimental, but the publishing URL for a WHIP-enabled device to stream to is:
_`https://whip.vdo.ninja/STREAMIDHERE`_
To view a WHIP stream then on VDO.Ninja, have open the following link in your browser:
_`https://vdo.ninja/alpha/?whip=STREAMIDHERE`_
### Lens adapter
There are camera lens adapters available for smartphones for fairly cheap; anywhere from $3 on aliexpress to $20 on Amazon. While not the best solution, it may be a solution available in a pinch that works across all mobile applications and services.
### USB external cameras
With the newest development builds of the Android native app of VDO.Ninja, many external (USB/UVC) cameras are supported.
With iPhones/iPads, USB-based models (iPhone 15 Pro) seem to support some USB video devices as well, via the USB 3.0 port.
Developments around USB/External camera support is ever evolving.
---
description: iPhones don't allow the user to select the audio output destination by default
---
# Can't select audio output on iOS
While iOS devices have so far not allowed the user to select the audio output destination of VDO.Ninja via Safari, there are some experimental options in the Advanced settings menu of Safari.
You can access such experimental option via Settings -> Safari ->Advanced -> Allow speaker device selection, as seen in the below screen capture.
There is no guarantee this will work, and maybe it will be enabled by default in the future.
There are some other experimental options as well that you can enable on iOS, such as AV1 and H265 codec support, and perhaps in the future Screen Capture will work, too. iPadOS tends to have more functionality available, such as external USB video device support (as of iPadOS 17), as least compared to the iOS 16 at time of writing.
---
description: Some common problems and solutions with screen sharing
---
# Can't share my screen
### Windows
If using a Windows PC, and you can't see one or all of your screens to share, consider setting your display's resolution to 1080p or/and disabling any HDR (high dynamic range) on that display.
If using a laptop, the display you may wish to capture needs to be on the same GPU that the capturing is happening. Some laptops with dual graphics systems will have issues. Using an HDMI to USB adapter that has an HDMI splitter built-in is a cheap hardware-solution.
### Electron Capture
If using the Electron Capture app, please consider loading that app with Elevated privilege's, which can be done via command line or via right-clicking the app and selecting the option to elevate from the context menu.
### macOS
If on macOS, please be sure to give your browser system-level access in macOS to access your screen.
Chrome will let you share tabs, windows, and the entire screen, although audio capture is only available via Virtual Audio device (ie: Loopback) or tab-capture.
Safari has very limited options; it lets you capture the entire screen, and that is mostly it.
### iOS
If on iOS, there isn't an option available to screen share from within the browser or native iOS app, but you can wirelessly airplay your screen to a computer, and then window capture that output.
Better than Airplay though, if you can connect your iPhone to a mac via USB, QuickTime supports USB-connected access to an iPhone's camera. This does not require any downloads and offers a high-quality stream. Using a virtual audio device, you can even capture IOS audio with this method.
Please refer to this guide for more details:
[https://docs.vdo.ninja/guides/screen-share-your-iphone-ipad](https://docs.vdo.ninja/guides/screen-share-your-iphone-ipad)
### Android
For Android users, downloading the VDO.Ninja APK file will let you screen share on Android, however you can't screen share via the browser on Android.
The Android app is available here: [https://docs.vdo.ninja/getting-started/native-mobile-app-versions](https://docs.vdo.ninja/getting-started/native-mobile-app-versions)
---
description: When screen sharing, the mouse cursor causes visual glitches or trailing
---
# Cursor shows trailing or artifacting
If using Chrome, launch Chrome from command line using the flag:
`--enable-features=AllowWgcDesktopCapturer`
There is an issue in some versions of Chrome where the mouse cursor can cause visual issues while screen sharing.
Another option is to use a different browser; Firefox is a safe alternative if the issue is specific to Chrome. Browsers like Edge and Opera also use Chromium, so likely you will see the same issue across Chrome, Edge, and Opera, while Firefox does not use Chromium. You might lose some audio support options when using Firefox however.
If the issue is just that the cursor shows while screen sharing, see:
# Cursor shows when screen-sharing
Most browsers do not allow the mouse cursor to be hidden when screen sharing.
For gaming, this can be an obvious problem.
If you're a gamer comfortable with AutoHotKey, you can hide the cursor with it using a custom hotkey. You can download the free script to do this here: [https://github.com/steveseguin/hide-cursor](https://github.com/steveseguin/hide-cursor), which works with Windows and is preset to toggle the cursor with WinKey+Click.
You can use OBS to capture the game and use the OBS Virtual Camera to share the screen with VDO.Ninja that way. This might result in more stable game play capture, but it is added work.
You can setup the OBS Virtual Camera to output a specific scene or screen-share, rather than the current active scene, using this filter:
[https://obsproject.com/forum/resources/virtual-cam-filter.1142/](https://obsproject.com/forum/resources/virtual-cam-filter.1142/)
If you prefer not to use OBS at all, there are numerous screen-sharing tools that can turn your screen into a virtual camera. Below is a link to a free one for Windows:
[https://github.com/rdp/screen-capture-recorder-to-video-windows-free](https://github.com/rdp/screen-capture-recorder-to-video-windows-free)
Another paid option is to use an application that can toggle the visibility of the mouse cursor off and on. The paid app YoloMouse might be an option for gamers, as you can hotkey buttons to select different styles of cursors. If you select an invisible cursor, then you can hide the cursor on-demand with hotkeys.
Eventually cursor-visibility control will be available for Chrome, but for now, it will be a bit more hassle.
---
description: >-
Blackmagic Decklink support isn't compatible with Google Chrome (chromium)
browsers, but support is still possible.
---
# Decklink support?
Chrome continues to be incompatible with Blackmagic Decklink video sources, however there still are solutions.
* Someone says Firefox works for them, but not Chrome, so perhaps try Firefox with VDO.Ninja
* Bringing the Decklink into OBS, and then into Chrome via the OBS Virtual Camera seems like a popular approach.
* It's possible to bring in Decklink via OBS using WHIP webrtc output, which is compatible with VDO.Ninja if there is no NAT firewall blocking the connection.
* An option on this page ([https://whip.vdo.ninja/](https://whip.vdo.ninja/)), shows the WHIP ingestion URL and will offer a view-link.
* I also have WHIP working with [https://meshcast.io/](https://meshcast.io/), if needed, but this may limit bitrates. Details on WHIP publishing should be available on meshcast.io.
* Raspberry Ninja as a command-line tool for VDO.Ninja that I am able to support myself, [https://raspberry.ninja/](https://raspberry.ninja/), and it is compatible with a large array of input sources.
* Basic Decklink support could be added probably within a few minutes, but it's not as easy to use as the browser-based version of VDO.Ninja.
* I don't have Decklink device to actually test support with here, and Windows compatibility may be challenging, but it may be worth considering for your needs.
Please advocate to both Decklink and the Chromium development teams for proper Decklink support, as this has been a long-standing issue without either party addressing the issue yet.
---
description: Guests are sometimes able to hear themselves
---
# Echo or feedback issues
Dealing with feedback is challenging, as the reasons are numerous, but not always obvious. Below are some common causes:
* Headphones are too loud. This is especially true if you've disabled echo cancellation or enabled the [`&proaudio`](../advanced-settings/audio-parameters/and-proaudio.md)/[`&stereo`](../general-settings/stereo.md) modes.
* Using Safari as it has poor AEC abilities; use Chrome instead. Safari struggles when a room has bad reverb issues, so changing locations might also help, if forced to use Safari.
* [`&proaudio`](../general-settings/stereo.md) or [`&stereo`](../general-settings/stereo.md) mode is being used. This mode will disable echo-cancellation and so you must use headphones in this mode. As noted above, if using this mode, lower your headphone volume or/and use closed-back headphones.
* Screen-sharing the desktop /w audio capture on, especially in the case of a group room, will create nasty feedback for others. You can add [`&sstype=3`](../newly-added-parameters/and-screensharetype.md) to the guest's invite link to try to prevent this issue, but otherwise you may need to use a virtual audio cable to limit what application's audio gets recorded. Details on that here: [https://docs.vdo.ninja/guides/audio](https://docs.vdo.ninja/guides/audio)
* Incorrect OBS configuration is common, especially if the echo is only heard in the RTMP broadcast or recording, and not by those using VDO.Ninja themselves
* Having two browser tabs open (such as one with the YouTube output playing) will cause echo. Echo cancellation only works within the same tab that the audio is played back and captured, and only if the echo is not prolonged.
You can use an experimental Chrome feature to solve this issue though. Go to [chrome://flags/#chrome-wide-echo-cancellation](chrome://flags/#chrome-wide-echo-cancellation) and enable Chrome Wide Echo Cancellation, to see if it helps.
* Having two devices connected to VDO.Ninja near each other, or sometimes even in the same house, can create echo. Phones have very sensitive microphones and can pick up the audio of others who might also be on the group call.
* Enabling certain advanced web-audio effects, such as per-video-specific audio output destinations can break echo cancellation.
* Playing an IFrame within VDO.Ninja (website share) may not have that IFrame's audio cancelled out by the echo-cancellation features.
* If only appearing in the OBS recording or stream, check to make sure you are not capturing the desktop's audio in OBS. This can happen if not using "Control audio via OBS" in the OBS Browser source, capturing a screen-share into OBS, or trying to record the director's room audio with OBS.
#### Troubleshooting
A good way to troubleshoot is to mute one person at a time in a room, seeing if muting any specific single person solves the issue for everyone else.
Normally the person who isn't hearing any echo or feedback is the cause.
If you identify that person, triple check that they are using Chrome and not Safari, make sure they are wearing headphones and that the audio is correctly playing into them, and have them close all other browser tabs and applications.
If the issue is only within OBS, this is likely an issue with OBS and not VDO.Ninja. Try disabling all global audio devices, muting audio devices in OBS one at a time, and double checking the advanced audio mixing settings.
---
description: Permission denied when trying to access the camera or microphone
---
# Enable Camera / Microphone permissions
Once camera / microphone permission have been denied, often accidentally, the browser won't let VDO.Ninja ask for it again. You'll need to manually change the permission to fix it, or use a different browser. How to change the permission depends on the browser and operation system.
I've provided links to some guides. If these guides are helpful for you, I'll offer a guide in [VDO.Ninja](https://vdo.ninja/) to help future users when I detect permissions have been denied.
### _**How to change a site's camera & microphone permissions**_
[https://support.google.com/chrome/answer/2693767?hl=en\&co=GENIE.Platform%3DAndroid\&oco=0](https://support.google.com/chrome/answer/2693767?hl=en\&co=GENIE.Platform%3DAndroid\&oco=0)
### **Android - Chrome Browser**
1. On your Android device, open the Chrome app
2. To the right of the address bar, tap More -> Settings
3. Tap Site Settings
4. Tap Microphone or Camera
5. Tap to turn the microphone or camera on or off; If you see the site you want to use under Blocked, tap the site -> Access your microphone -> Allow
**If you’ve turned off microphone access on your device**, you can [control your app permissions on Android](https://support.google.com/googleplay/answer/6270602?hl=en) to use your mic.
**If you're using a Chrome device at work or school**, your network administrator can set camera and microphone settings for you. In that case, you can't change them here. [Learn about using a managed Chrome device](https://support.google.com/chromebook/answer/1331549).
### **Chrome Desktop**
1. Open Chrome
2. At the top right, click More -> Settings
3. Click Privacy and security -> Site settings -> Camera or Microphone
4. Select the option you want as your default setting
\- Review your blocked and allowed sites
\- To remove an existing exception or permission: To the right of the site, click Delete
\- To allow a site that you already blocked: Under "Not allowed," select the site's name and change the camera or microphone permission to "Allow."
If you still have issues, try a different browser; perhaps Firefox.
### **Firefox Desktop**
[https://support.mozilla.org/en-US/kb/how-manage-your-camera-and-microphone-permissions](https://support.mozilla.org/en-US/kb/how-manage-your-camera-and-microphone-permissions)
### **Firefox Mobile**
In Firefox Mobile, you can try going to **Settings** -> **Site permissions** -> **exceptions** (at bottom) -> **VDO.Ninja**, and then manually set the permissions for the camera and microphone to **enabled**.
If Firefox Mobile still gives you issues afterwards, try in incognito mode, try a different browser, or fully restart the device.
### Vivaldi / Brave / Opera
You can try following the same steps needed for Chrome above, however if that fails, ensure VDO.Ninja is not being loaded via an IFrame.
In the case of [invite.cam](https://invite.cam/) for example, which loads VDO.Ninja via an IFrame, you may need to give microphone and camera permissions to both the invite.cam and VDO.Ninja domains.
You can visit [invite.cam](https://invite.cam/) and [vdo.ninja](https://vdo.ninja/), and for each domain, ensure the microphone and camera permissions are set to allow.
### **iOS**
On an iPhone, it's a bit more complicated:
[https://gagonfamilymedicine.com/how-to-give-an-app-permission-to-access-your-microphone-on-an-iphone-or-ipad/](https://gagonfamilymedicine.com/how-to-give-an-app-permission-to-access-your-microphone-on-an-iphone-or-ipad/)
If the issue persists, fully close Safari and try again. Sometimes updating your version of iOS and restarting can help solve issues with camera permissions as well.
### IFrame permissions not provided
If embedding VDO.Ninja into a site as an IFrame, you'll not be allowed access to camera or microphones unless that IFRAME-element has allowed said permissions.
See the documentation for more details
[iframe-api-documentation.md](../guides/iframe-api-documentation.md)
### Try safe mode
Adding [`&safemode`](../newly-added-parameters/and-safemode.md) or [`&videodevice=0`](../source-settings/videodevice.md)[`&audiodevice=0`](../source-settings/audiodevice.md) to the [https://vdo.ninja/](https://vdo.ninja/) link can either try the camera in safe mode or disable the camera/microphone completely.
In either mode, you might be able to bypass the initial camera selection page, or start the system with the default camera settings.
If you are able to start the session in this mode, you can go to the VDO.Ninja gear icon (settings), click on User settings, and then clear the local storage. You can then retry, refreshing the page, and try to connect again.
---
description: >-
If screen sharing, you may see a frame rate drop once VDO.Ninja loses focus.
This background app-throttling can normally be disabled
---
# FPS drop if app not in focus
Chrome and Chromium-based browsers will sometimes throttle or limit the resources available to browser tabs that are not visible or in the background. This can result in a frame rate loss, often when using digital effects (green screen), when screen sharing, or using VDO.Ninja while gaming.
### Windows process throttling (efficiency mode)
If the issue is with Windows itself throttling the tab or application, you can open the Task Process manager (`Ctrl + Shift + Esc`), expand the processes for the browser application, and click on the VDO.Ninja tab process.
You can right-click it and disable efficiency mode if it is on.
### Chromium background tab throttling
Disabling throttling for Chrome can be done in different ways; the methods to control throttling seem to change every couple years however.
Some flags you can try disable in Chrome are the following:
`chrome://flags/#calculate-native-win-occlusion`
`chrome://flags/#enable-throttle-display-none-and-visibility-hidden-cross-origin-iframes`
You can also go into your browser's settings and search for "performance" or go to `chrome://settings/system` , and at the bottom, you might see performance setting options.
Disable the efficiency mode, or customize as desired, and that might help with performance of VDO.Ninja when gaming with the tab in the background.
### Electron Capture
If you can't get things to improve, you can try the [Electron Capture app](../steves-helper-apps/electron-capture.md) for screen sharing or for VDO.Ninja. It's optimized to not throttle in most cases, and it can be pinned on top of other applications if occlusion is a cause of throttling.
Get Electron Capture here. Enable elevated privs if screen sharing with it
### OBS Virtual Camera
If screen sharing is getting low frame rates still, you can try using OBS to screen capture your game or application, and use it's virtual camera output as the source for VDO.Ninja.
OBS with its Virtual Camera can maintain a higher steady frame rate than most browsers can when screen sharing. You can use a virtual audio cable to capture the games/application audio, if needed.
# Getting “Overconstrained" Camera Error
If you get an Overconstrained error, it typically means the webcam or camera device has settings that are not compatible with VDO.Ninja code. With every camera being different, and everyone wanting high-quality video, it's a game of whack-a-mole to address each specific instance.
Some ideas though:
* You can try unplugging and reconnecting the device, and then trying again.
* You can use a different browser: Chrome, Firefox, Opera, etc.
* Do not try to specific a manual resolution; perhaps try the defaults.
* Do not use the camera in other applications at the same time.
* Try installing SnapCam or OBS virtual cam and try to select that; use it as an intermediary device.
* Uninstall NDI Tools, as it sometimes can cause issues or conflicts.
# Hosted your own TURN server?
For a guide on deploying your own TURN server on a Ubuntu server, see the below link: [https://github.com/steveseguin/vdo.ninja/blob/master/turnserver.md](https://github.com/steveseguin/vdo.ninja/blob/master/turnserver.md)
The benefits of a turn server include Increased security when actively used (less chance of IP leaking) and better network compatibility. Without a TURN server, about 10% of remote guests will not be able to connect with each other. In some cases, at the cost of added latency, a TURN server can also provide better video quality by means of forcing TCP data transfer.
I do offer a basic TURN server for VDO.Ninja users, but it is costly to operate and maintain. Deploying your own can offer better reliability and it frees up potential resources for other VDO.Ninja users. Please do not abuse it.
Google Cloud offers a free small server for life, so it’s possible to do this for free, so long as you keep it all private. GCP also often comes with a $300 free credit tier, even though GCP is a bit expensive for heavy usage in the long-run. It doesn't support IPv6 either, but it does have a good network backbone (\~20-cents per gig).
Twilio offers a paid TURN server service, which works well, but it's hard to setup for non-coders and it is twice the cost of Google to operating (40-cents per gig).
Another alternative to a TURN server is to bypass the NAT firewall that your OBS computer uses. You can do this in the network's router settings, normally by setting the DMZ to point to the IP address of your computer. This is dangerous, as it exposes you to the internet, but without a firewall you are less likely to need a STUN or TURN server.
Another option is to run OBS in the cloud on a virtual workstation, where you can open specific ports without the concern of a personal-computer hack. Some guests will still need a TURN server, but the likelihood is dramatically reduced.
You can also have remote guests who are needing a TURN server to install a VPN, like Speedify, which can bypass firewalls and other issues that might otherwise require a TURN server. Enabling TCP-mode within Speedify or other VPN service can also help combat packet loss, at the cost of added latency.
If going the VPN route, you also have the ability to secure your privacy/IP-address more securely; in some cases, more so than even a TURN server. See this article for more information there: [https://www.expressvpn.com/webrtc-leak-test](https://www.expressvpn.com/webrtc-leak-test)
# Is the VDO.Ninja server down?
The "V" in VDO.Ninja, in the top left, will go red as an indication that the client cannot talk to the VDO.Ninja server. It will _NOT_ try to reconnect automatically, although that is a coming feature I will add eventually.
If on mobile and you tab away from the site, the server connection may be lost.
If the O is red, then you will need to REFRESH the page to reconnect. I'll fix this hassle eventually.
However, if the server goes down, the video stream will NOT stop if already start, as the video stream does not go thru the server. If the server goes down it just means that no one new can connect to the stream anymore, but if already connected, you are fine. I may also fix this in the future, but I don't see the urgency for it.
The video stream happens over a direct peer connection. This connection can be pretty unstable as cellular phones are not the most reliable things in the world. If a video stream dies, it is not the server's fault, but a failure of the peers to hold a reliable connection open.
Auto-reconnecting does depend on the server though. When connected over a high quality LAN , two devices really shouldn't see their connection fail though, but if it happens often, please let me know.
There is a **backup** **server** at[ https://backup.vdo.ninja](https://backup.vdo.ninja) if the main VDO.Ninja does ever go down.
---
description: Known issues or problems, bugs, and limitations
---
# Known issues
Known issues that are most critical and up-to-date are normally listed on the main page of [VDO.Ninja](https://vdo.ninja/).
You can also refer to the #report-bugs channel on [Discord](https://discord.com/invite/cKkj5nN8pH), to see recently reported issues. I push bug fixes daily to beta, at [https://vdo.ninja/beta](https://vdo.ninja/beta), so give that a shot if you find a bug on the main release.
Below are some links to third parties, for a list of known issues that commonly will apply to VDO.Ninja as well. They might have some issues not yet reported here and are often up to date.
[https://docs.agora.io/en/All/web\_sdk\_compatibility?platform=Web](https://docs.agora.io/en/All/web\_sdk\_compatibility?platform=Web)
[https://github.com/twilio/twilio-video.js/blob/master/COMMON\_ISSUES.md](https://github.com/twilio/twilio-video.js/blob/master/COMMON\_ISSUES.md)
[https://support.twilio.com/hc/en-us/articles/223180908-Troubleshooting-Common-Problems-with-the-Twilio-Voice-JavaScript-SDK](https://support.twilio.com/hc/en-us/articles/223180908-Troubleshooting-Common-Problems-with-the-Twilio-Voice-JavaScript-SDK)
[https://github.com/webrtc/samples/issues](https://github.com/webrtc/samples/issues)
[https://bugs.chromium.org/p/chromium/issues/list?q=webrtc%20type%3DBug\&can=2\&sort=-pri](https://bugs.chromium.org/p/chromium/issues/list?q=webrtc%20type%3DBug\&can=2\&sort=-pri)
Time fixes all wounds, even with Apple products.
Below are more possible/past issues, although the list is not often curated and can be assumed to be out of date.
* Grey video loaded from guest in room. Try adding [`&scale=100`](../advanced-settings/view-parameters/scale.md) and remove any bitrate limits set. If the issue persists, try a different video codec ([`&codec=vp9`](../advanced-settings/view-parameters/codec.md), for example) or ask the guest to connect with [`&quality=2`](../advanced-settings/video-parameters/and-quality.md) (smooth and cool).
* OBS browser sources crash, turning all black. This can happen after refreshing/editing a browser source URL or just randomly. Restarting OBS can fix the issue, but to prevent the issue, try using:
`"C:\Program Files\obs-studio\bin\64bit\obs64.exe" --enable-media-stream --disable-gpu-process-crash-limit`
You can add \`--`` disable-gpu-process-crash-limit` `` to the OBS start up properties as a way to avoid this. There will still be an issue. You can also use the Electron Capture app instead of the OBS browser source.
* All green or all purple video from a mobile device (Pixel, Samsung Galaxy) can sometimes happen with certain resolutions or orientations. Using `&scale=100` or `&scale=95` can sometimes help (viewer side), but also changing the video codec to `&codec=vp8` might help.
* OBS on PC can have video become corrupted if there is moderate or heavy packet loss. Changing the video codec to vp9 or h264 can fix it for moderate packet loss, but for heavy packet loss using the Electron Capture app is suggested. You can also issue keyframes with the rainbow puke button in the Director's room or refresh the viewing page, but it's a temporary fix. Ideally, fixing the packet loss itself is the ideal solution.
* Streamlabs (SLOBS) on macOS does not currently support VDO.Ninja directly; you'll need to use the Electron Capture app or the normal OBS version instead.
* OBS on PC can sometimes run into a Max Buffer Limit Reached error, which can cause the audio to become delayed by seconds or simply stop being captured at all. Using the Electron Capture app to capture audio can avoid this problem.
* Some browser-extensions will cause webRTC to fail. Try loading VDO.Ninja in incognito mode or try using the Electron Capture app instead.
* On most modern browsers, a user will need to click the browser window before the video will play. This goes for VMIX and for Firefox/Chrome. This is not the case for OBS or the Electron Capture app, however.
* Android 11 users using Chrome may need to push the app to the background, and then foreground it again, to unfreeze the video camera when it loads or changes camera sources.
* iOS (iPhone) users using Safari 13 may sometimes not send audio.
* iOS (iPhone) users sometimes cannot access their camera until they close all other Safari browser tabs. If it still does not work, using the native iOS app on the App Store may work; "Capture for VDO.Ninja".
* Chrome on iOS only works for iOS 14.3 and newer. It will not work with VDO.Ninja on older iOS versions.
* iOS 12 and newer is required for VDO.Ninja to work; older iPads may not work as a result.
* Firefox on Android has numerous bugs that may cause connections to not always work; more prone to happen in larger group rooms.
* Setting an audio bitrate to 64-kbps or higher can cause video to get stuck at near-zero bitrate. I've tried to account for this bug, but setting a higher video bitrate seems to help avoid the issue as well.
* Bluetooth headphones on macOS, especially when using battery power, can cause audio-clicking on outbound audio.
* Safari on macOS does not have the greatest noise or echo-cancellation, causing poor audio performance. Use a Chromium-based browser instead for the best audio quality.
# Loading circle shows in OBS or browser
The loading circle will appear in a VDO.Ninja view link if a video does not auto-load within several seconds or so.
It will be removed once the video connects, and won't re-appear unless the browser source/page is refreshed.
You can hide this loading circle by default by adding [`&cleanoutput`](../advanced-settings/design-parameters/cleanoutput.md) to the URL of the view link.
example: [`https://vdo.ninja/?view=ABC123abc&cleanoutput`](https://vdo.ninja/?view=ABC123abc\&cleanoutput)
This will hide other non-essentially UI elements as well, such as any error messages. In most cases, when a view link is loaded into OBS, most non-essentially elements are hidden by default.
It is also possible to customize the loading circle with other images.
# Loss of audio when OBS minimized
Some users have reported their audio recording of VDO.Ninja stops or becomes choppy once OBS Studio is taken out of focus or minimized.
One solution is to run OBS Studio in Administrator mode. You can do this by first ensuring OBS is closed, and then holding SHIFT, right-click the OBS Studio icon; select `Run as administrator` from the menu that appears.
Another option is to use the [electron-capture.md](../steves-helper-apps/electron-capture.md "mention") to capture VDO.Ninja, instead of OBS browser source.
# Low frame rates
There are several reasons you may be experiencing low frame rates, including:
* If you are on MacOS using StreamLabs OBS, then the frame rates will be bad because of a bug in StreamLabs for Mac (consider the Electron Capture app instead).
* Try switching on "Enable Browser Source Hardware Acceleration" on in Advanced settings of OBS.
* If you are using Cellular / 4G, then the quality of the video may be poor due to the TURN server being in the USA or overloaded.
* Lights in your room are too dim maybe; try to make your room much brighter.
* Resolution is set to high, so selecting a lower resolution might help. This is especially true for H264 streams.
* Your Internet may be very slow or unstable. Try maybe Speedify.com and DO NOT use Wi-Fi.
* Make sure your CPU is not running near 100%. An overloaded computer or network will lag.
* Lower the resolution of OBS Ninja; select "Smooth and Cool" or 640x360 during camera selection.
Regardless, putting your own version of the HTML server up will not make it any faster.
To debug what the issue is, determine if it is faster when going from Chrome tab to Chrome tab on the same computer. If not, then it is nothing to do with servers.
If you are using a Mac with StreamLabs, you might be better off using the [Electron Capture app](https://github.com/steveseguin/electroncapture) instead.
---
description: If your microphone drops out after a few seconds
---
# Mic audio dropping out
### One possible solution:
One user had an issue where their microphone audio would drop out now and then; not just in VDO.Ninja, but in all browser-based web apps.
They resolved the issue by **disabling** certain WebRTC audio processing options in the browser
**In Chrome**,
From `chrome://flags` we disable:
`#enable-webrtc-allow-input-volume-adjustment`
`#chrome-wide-echo-cancellation`
_ℹ️ This also might be a useful option if using a USB mic that has the audio volume controls changing against your will, such as with a Blue Yeti._
**In Firefox**, we disable:
`media.getusermedia.aec_enabled`
`media.getusermedia.agc_enabled`
`media.getusermedia.noise_enabled`
`media.getusermedia.hpf_enabled`
### iPhone issues
iPhone 14 phones in particular have been pretty buggy with Audio, along with older versions of iOS across all iOS devices.
Make sure to update your iOS device if possible, use the newest version of VDO.Ninja (perhaps even the alpha version at [https://vdo.ninja/alpha/](https://vdo.ninja/alpha/)), and disable any audio processing in VDO.Ninja by adding [`&noap`](../general-settings/noaudioprocessing.md) to the URL.
### Bluetooth or microphones connected to a USB hub
It is not recommended to use Bluetooth audio devices with VDO.Ninja. In the past, there were drop outs when using AirPods on a battery-powered Macbook, for example. Constant Bluetooth range / connectivity issues can also cause VDO.Ninja to potentially lose the connection to the microphone.
USB Hubs are not all created equal, and some may cause USB devices to drop in and out. For this reason, connect your microphone and cameras directly to computer, bypassing USB hubs if possible.
### Inbound mobile calls or background notifications
Audio captured from a microphone may be paused or stopped if there is an inbound phone calls or system notifications. I suppose this is a mobile security consideration, but after a notification alert, the microphone may sometimes not be re-activivated, either due to a system-bug or other.
For this reason, disable notifications, inbound calls, etc, while streaming on mobile with VDO.Ninja.
### Packet loss or an over-stressed computer
Computers that are running at near 100% CPU load can fail to encode audio streams, audio drop outs may occur during a call as a result. Please consider reducing the CPU load on your system to avoid this issue.
Heavy network packet loss, such as a bad WiFi connection can also cause audio drop outs. Completely connection losses are possible also, particularly if behind a corporate firewall or VPN service that is throttling or restricting WebRTC services.
# Mic stops on MacOS when OBS opens
If the microphone stops working in VDO.Ninja when OBS Studio is open, on MacOS, considering using Safari instead of Chrome or other browser.
One user with this issue noted the problem resolved itself when they used Safari instead of Chrome.
They also noted that opening OBS with the scene first, then launching VDO.Ninja in the Chrome browser, also resolved the issue. Safari was indifferent to order.
Some users on Google noted that they re-selected their microphone permissions in the browser to resolve the issue as well, so there may be some system-level permissions issue at play here.
It's perhaps possible a virtual audio cable might also help, if the issue is a shared device issue. Using the monitor audio output of OBS as an input to the virtual audio cable, or using an application like Loopback for MacOS, might be a way to bypass the issue.
---
description: The mic's gain won't stay still or the auto-gain won't turn off
---
# Mic's volume keeps changing
Some microphones, like the Blue Yeti, Wave XLR, Samsun Q2U, or Scarlett Solo XLR interface, may have issues with Chrome (Chromium) and the mic's gain auto-changing on its own. This may cause clipping in certain cases or it may interfere with other applications that may also be using the microphone.
You can also add [`&autogain=0`](../source-settings/autogain.md) to the VDO.NInja invite link to disable the auto-gain. You can also toggle the auto-gain from the VDO.Ninja settings menu, or if a guest, the room's director can remotely toggle the guest's auto-gain via: advanced options -> audio settings -> auto gain control.
Disabling the auto-gain functionality in VDO.Ninja may cause the audio level to be rather low, so it will be up to you then to manually set the gain accordingly. VDO.Ninja offers manual gain if needed.
An additional option to addressing this issue seems to be installing a browser extension that with disable auto-gain automatically within Chrome. ([https://chrome.google.com/webstore/detail/disable-automatic-gain-co/clpapnmmlmecieknddelobgikompchkk](https://chrome.google.com/webstore/detail/disable-automatic-gain-co/clpapnmmlmecieknddelobgikompchkk))
If the above options do not work, another option perhaps is to use a single virtual audio cable for all your applications instead of access the microphone directly. In this case, you'd send the mic audio to that virtual audio device, which allows you to have a single point of control for gain. There's numerous virtual audio cables out there, including Voicemeeter and Virtual Audio Cable.
For more information on this topic, you can see discussions here, [https://support.google.com/chrome/thread/7542181?hl=en\&msgid=79691143](https://support.google.com/chrome/thread/7542181?hl=en\&msgid=79691143), and more recently here, [https://support.google.com/chrome/thread/210106028/google-chrome-constantly-auto-adjusting-microphone-levels-solved](https://support.google.com/chrome/thread/210106028/google-chrome-constantly-auto-adjusting-microphone-levels-solved).
---
description: >-
If you trying to add your video to OBS or Streamlabs, but instead of video you
see buttons saying something like "Add camera" or "Share camera", double check
your browser source links.
---
# No video in OBS, just an "Add camera" button
If see the VDO.Ninja menu, instead of a video, it is typically caused by having your PUSH link used as a VIEW link in OBS or Streamlabs's browser source.
To fix, you should be able to just replace the `?push=` part of the URL with `?view=`.
A push link is for the sender to use, so to send video from your phone or computer to OBS.
A view link is used for viewing a video in OBS or other studio software.
VDO.Ninja will respond differently to whether a push or view link is provided, as each has a different role.
If you still see the VDO.Ninja menu or website, check to make sure your link is correct. Your links should start with `https://vdo.ninja/?`
If you forget the `?`, or have other errors in the URL, the website might load in an error state. This error state may sometimes be the VDO.Ninja website, perhaps with no images showing, or other graphical issues.
If still having problems after, ensure the stream ID value for both the view and the push parameters of the sender and viewer links are the same. You should have only at most one push-link open per stream ID as well; more than one will show an error that the stream ID is already in use.
---
description: >-
OBS Studio is just black in the browser source; potentially you hear audio,
but nothing else.
---
# Nothing shows up in OBS or it is choppy
 (1) (1) (1) (1) (1) (1) (1) (1) (1) (1) (1) (1) (1) (1) (1) (1) (1) (1) (1) (1) (1) (1) (1) (1) (1) (1) (1) (1) (1) (1) (1) (1).png>)
## macOS
Please be aware that OBS v24 to v26.0 does not natively support VDO.Ninja, but version 26.1.2 and newer does.
If using an Android smartphone, try using Firefox instead of Chrome, or a different browser in general.
If you're in Iran or China, WebRTC may be blocked; try using a VPN.
Use the Electron Capture app if you are using a non-compatible version of OBS. > [Get it here](https://github.com/steveseguin/electroncapture) <
## Windows
Ensure that the “Enable Browser Source Hardware Acceleration” checkbox is checked in the advanced settings. If you still get just black video when it’s checked, then you can try:
* Uncheck the Hardware Acceleration checkbox -- does it work now? If so, it may be choppy and will use more CPU, but perhaps still usable. If the problem is that it's choppy, ensure that hardware-acceleration is checked.
* If using an Android mobile smartphone as a camera source, try using Firefox Mobile or a few different browsers. If that fails, try the [native Android app version](https://docs.vdo.ninja/platform-specific-issues/android), if your needs are simple. This is often the case with Samsung A-series smartphones, although the Galaxy A12 especially seems to have issues.
* If you're in Iran, China or another sanctioned/censored country, WebRTC may be blocked; try using a VPN.
* If on cellular, try switching to a different network.
* If behind a corporate firewall, try using cellular instead.
* If you're using PFSense or a PiHole for home network security, try bypassing it or using a different network; most users using PFSense have security set to overkill, blocking everything.
* Updating your graphics card drivers, especially after a fresh install, can sometimes help.
* Run OBS Studio as an Administrator.
* If your computer is running at 100% CPU / GPU load, try lowering the resolution of the browser source element to 1280x720 or lower; 640x360 should use little CPU, even if hardware-acceleration is disabled. H264 as a codec will also use less CPU / GPU than other options, normally.
* Try specifying a custom frame rate of 30 in the browser source options in OBS
* Go to the windows setting for “Graphics Settings”. You may see OBS or SLOBS under programs listed for “graphics performance preference”. Make sure OBS or SLOBS is set to “high performance”. Turn on hardware accelerated GPU scheduling.
* Update OBS Studio to the newest version. When doing so, fully uninstall the old version before installing the new version. If you are up to date, try the beta release or just re-install.
* If using OBS 64-bit, try installing the 32-bit version instead of OBS.
* Switch the GPU used by OBS if using an NVidia GPU; settings in the Nvidia control center. If you can, perhaps try disabling the integrated graphics card in the BIOS and using only the discrete graphics solution.
* If using a laptop, check out this article: [https://obsproject.com/wiki/Laptop-Troubleshooting#for-nvidia-based-laptops](https://obsproject.com/wiki/Laptop-Troubleshooting#for-nvidia-based-laptops). Also consider disabling power-saving mode and plugging the power into the wall directly.
* Enable Compatibility Mode for OBS; this setting is available via right-clicking the OBS icon and clicking properties.
* Try a different video codec; perhaps [`&codec=h264`](../advanced-settings/view-parameters/codec.md) or `&codec=vp9`, which can be added to the view links. Android phones in particular might have problems.
* In the OBS Settings -> Advanced menu, disable Browser source hardware acceleration, and then restart. If it works then, the above GPU-related options should work. Otherwise, it might be a firewall, VPN, or privacy software.
* Check to make sure you are not behind a corporate firewall or on a VPN (see Network issues below). Sometimes using a Firewall can actually help, such as if the guest is in mainland China, where a VPN service (like ExpressVPN) has been able to bypass the Great Firewall of China.
* Disable any anti-virus or other security software. If using PFSense firewall, ensure you are whitelisting the IP address of the remote camera source or allowing webRTC-related UDP traffic. While use PFSense may still work, if you do not open the correct ports, frame loss may be significant if relying on the public TURN servers for high-bandwidth data transit.
* If the video is choppy, be sure there is no packet loss. Adding `&stats` to the VDO.Ninja URL link will display the stats in the OBS Browser source, on top of the video. A high-packet loss, higher than 0.3%, can result in signifcant frame loss, while 3% packet loss is nearly unusable.
* You can also download the Electron Capture app, and use that instead of OBS browser source: [https://github.com/steveseguin/electroncapture](https://www.google.com/url?q=https://github.com/steveseguin/electroncapture\&sa=D\&source=editors\&ust=1619943104618000\&usg=AOvVaw2vbHW2zTdxaCofB42QQ\_fT)
* Make sure you have not disabled webRTC with your browser; you can confirm you have webRTC disabled with your browser(s) here: [https://browserleaks.com/webrtc](https://browserleaks.com/webrtc)
* As a final resort, consider using a Cloud-hosted version of OBS instead, such as on Paperspace or AWS /w Parsec installed.
If the hardware-acceleration checkbox is not checked, check it and restart. Does it work now?
## Network issues
We provide a speed test to see if the connection works at all,[ https://vdo.ninja/speedtest ](https://vdo.ninja/speedtest) You should be able to see your video streamed back at you. If not, there might be a network problem.
You can visit [https://browserleaks.com/webrtc](https://browserleaks.com/webrtc) or [https://networktest.twilio.com/](https://networktest.twilio.com/) for tools to help debug issues that might be impacting your network, such as Firewalls or incompatible browsers.
---
description: >-
Why are the resolution and framerate sometimes not the same as my OBS output
settings?
---
# OBS Virtual Camera has low FPS
If you open an OBS Virtual Camera device in VDO.Ninja before starting the output in OBS, the OBS virtual camera will default to 1080p 30fps. If you start OBS first, it will use whatever is set as the Output resolution and framerate in OBS Studio's options, under Settings -> Video.
So, make sure the set OBS to 60-fps and then start the OBS Virtual camera before starting Chrome and/or VDO.Ninja. If you don't do this, you may be capturing at 30-fps max.
You may also have low frame rates if you are using the OBS virtual camera straight from OBS rather than by adding a filter to the video source. Filters may reduce the frame rate by 30% or so in my testing. Instead, considering opening two instances of OBS instead, if that is needed.
Of course, frame rates with VDO.Ninja can also be low if you don't have the video bitrate set high enough; for gaming, you might want to consider adding [`&videobitrate=20000`](../advanced-settings/video-bitrate-parameters/bitrate.md) to the view link. You can also try different video codecs, such as [`&codec=h264`](../advanced-settings/view-parameters/codec.md). If you are on a WiFi or weak Internet connection, that also can limit the frame rate of a stream due to heavy packet loss.
---
description: Mobile and laptop devices may overheat under prolong use
---
# Overheating
[VDO.Ninja](https://vdo.ninja/) offers a lot of power and unconstrained video quality. Some devices however will overheat if pushed for prolonged periods though, as they were not designed necessary for professional streaming video applications in mind.
Still, there are steps you can take to minimize the heat generated by devices with software settings and configurations.
### Lowering the quality
The viewer has control over the requested quality. 1080p video on a mobile device uses up a lot of power, including by data-transmission and the video encoding itself. Try using a lowering resolution, either by adding [`&quality=2`](../advanced-settings/video-parameters/and-quality.md) to the publisher's link or by adding [`&scale=50`](../advanced-settings/view-parameters/scale.md) to the viewer link.
The same goes for video bitrates; the default is around 2500-kbps, but perhaps try 1500-kbps instead. For example, `https://vdo.ninja/?view=MYSTREAM&codec=h264&scale=50&bitrate=1500`
### Hardware encoders on mobile devices
Some mobile devices have support for hardware-based H264 video encoding. An iOS device has three 720p30 hardware encoders, for example, while Android devices are hit and miss.
To reduce heat for mobile devices, try using [`&codec=h264`](../advanced-settings/view-parameters/codec.md) on the viewer side to request the video has h264 format. If the mobile publishing device supports it, it will use the hardware encoder for publishing. This will increase the chance for corrupted video, such as all-green flashes of video, but it should greatly reduce heat and power consumption.
Normally H264 will be used automatically if the hardware-device has a hardware-decoder, but this might not always be the case. Just double check, as VP8, VP9, and AV1 are rarely hardware-encoded. Keep in mind iOS devices are limited to 720p30 when using H264 hardware encoding, but can do 1080p30 with VP8 in software; life is full of trade-offs it seems.
When it comes to hardware encoding on laptops, H264 encoders sometimes kick-in, but the vast majority of the the time the browser will choose to still encode H264 video using a software-encoder. For the best chance of it working, use a Chromium-browser, like Chrome.
It should be noted that hardware encoders are finite in availability -- this means that they are often not something you can rely on when in a group-video call with multiple peers requesting video streams. If using an Nvidia GPU, you might be limited to 2 or 3 hardware encoders, just like an iOS device, which doesn't work well if streaming to many viewers.
The VP9 codec offers higher quality than most default codecs, but it also uses higher CPU load. AV1 may be even worse, so sometimes H264 is best. Just something to be aware of.
Currently a web-browser does not allow a single video encoder to share video with multiple guests, at least not at low-latency. This is a limitation that will be addressed in the future, but it's a current limitation now.
### Meshcast.io and server-based restreaming
VDO.Ninja is peer-to-peer-based, which works great for linking one camera to one viewer. The more viewers though, as mentioned, the more load is created on that guest. Just the act of uploading data uses power, so mobile devices are also quite poor at restreaming to multiple viewers even if encoding video wasn't already an issue. This is why the video quality on mobile devices between guests is set very low by default.
[Meshcast.io](https://meshcast.io/) is by the same creator as VDO.Ninja, but it's a server-based solution to sharing low-latency video. It has a lower-maximum video quality, it isn't peer-to-peer-based, and it has numerous other short comings, but it does allow a mobile device to encode just one video stream, upload just one video stream, and still share that video with numerous viewers. Feel free to experiment with it, it's free, and if more quality and reliability is needed, there are paid options that are similar to it available. The cost of restreaming with a server-solution is about 15-cents per GB, depending on quality of the service. This is why Meshcast.io needs to limit it's video quality to afford a free-offering; server solutions are expensive!
### Group rooms, multiple-scenes, or multiple viewers
Every viewer of a stream adds to the heat and load experienced by the publisher of that stream. To reduce heat as much as possible, only allow one viewer of a stream to be active. Group-scenes, multiple-guests in a room, and multiple view-links each consistent as an active viewer. There are ways to optimize in these situations, but they may not be obvious. ([`&optimize=0`](../advanced-settings/video-bitrate-parameters/optimize.md), for example).
In the case of an iOS device, since it only has 3 hardware encoders, the device will switch to VP8-software mode or just stop working all together if those get exhausted. iOS devices are rather poor at software-encoding video, especially at higher resolutions, so be careful.
You can force-limit the number of connections and viewers with the [`&maxconnections=1`](../source-settings/and-maxconnections.md) parameter, added to the publisher's URL. If you are accidentally viewing the video stream multiple times, this will help prevent more than one viewer from having access.
### Start with a full-battery
Charging a mobile phone creates heat. If you start charging your device after you've already started streaming, that will increase the heat. Try starting with the phone already at a 100% full-charge to avoid even more unnecessary heat.
### Smartphone add-on heatsink and fan
Professional cameras do often include a small fan inside them to reduce heat. Consider buying a heatsink that can be mounted onto the back of your smartphone, with an optional fan to turn on if it starts getting hot. These are not super common, probably not super effective, but they can be had for not much money.
Sometimes a thick protective case can insulate a smartphone, making it hotter than needed, too.
I've done a YouTube video demoing how cooling your smartphone can reduce heat and also improve performance, as a hot phone my throttle the performance. See below:
### Web apps are intentionally limited on mobile devices
It is not possible to change between apps, screen-share, or turn off the display when using a web-app, like VDO.Ninja. You can turn down the screen brightness manually on your phone though, which will be nearly as effective.
Also, If you use `?push=STREAMIDGOESHERE&cleanoutput&nopreview&chroma=000&view` as a publishing link, you can hide pretty much everything on the screen, and if using an OLED display, this should reduce power usage. This is a great option if you wanted to set your phone up as a dedicated webcam and were worried about the screen generating heat.
### Native mobile app of VDO.Ninja
There are native Android and iOS app versions of VDO.Ninja, but they are very limited at the moment. They can be used to turn a phone into a dedicated webcam, and that's about the only they are good at. The Android app supports screen-sharing, which is the main advantage of using it.
Until the native apps are further developed, they are not great options for most users. They may still however use less CPU and may generate less heat though, just due to how basic they are in function.
Download the mobile app versions here: [https://docs.vdo.ninja/getting-started/native-mobile-app-versions](https://docs.vdo.ninja/getting-started/native-mobile-app-versions)
Please contact steve at `steve@seguin.email` or via discord ([discord.vdo.ninja](https://discord.vdo.ninja)) if you'd like to contribute to development of these native versions. The cost, time, and skill requirements for their continued development are quite steep.
### Laptops and Macbooks
Older 2011-era Apple notebooks are prone to overheating. Even newer generation Macbooks can overheat if stressed. Normally these systems throttle the CPU to be MUCH slower when they get too hot, so it may appear like there is a network issue.
Ensure you are not running a laptop at 100% CPU load, make sure it has plenty of cool ventilation, ensure the fans are clean and not full of dust, start with a full battery and keep the computer plugged in
### Raspberry Pi, Nvidia Jetson, and dedicated hardware-encoders
VDO.Ninja has limited support for hardware encoders. Hardware encoders greatly reduce heat, but they are often poorly suited for low-latency video that requires tolerant packet-loss capabilities and dynamic resolutions. Green/purple/grey coloring of video, lost frames, and distorted video blocks are common when using hardware-encoders at very-low latencies.
There is support for the Raspberry Pi, both software-encoder and hardware-encoder options, but the hardware-encoded option is the most limited and challenging. The current project supporting this offering is here: [https://github.com/steveseguin/raspberry\_ninja](https://github.com/steveseguin/raspberry\_ninja)
Like with the native mobile app versions, the capabilities of this option is very limited. It does not support group-rooms and it does not yet support multiple viewers. Since many are using the Raspberry Pi wirelessly, it must also be said that it has very poor support of packet loss recovery -- the video will often not be smooth, especially if the WiFi signal is not very strong.
Using a Chromium browser with a Raspberry Pi, in software-encoded mode, will probably give more reliable results, but also generate a lot of heat and limit the maximum video resolution a lot.
Just as a consideration though, the Nvidia Jetson development boards support higher resolutions and seem to have better support for dynamic video and packet loss recovery. These products are a bit more expensive, but tend to work better than a Raspberry Pi when it comes to encoding HD video. I have a support for the Hardware-encoding capabilities of a Jetson here, buried away alongside the files for the Raspberry Pi: [https://github.com/steveseguin/raspberry\_ninja](https://github.com/steveseguin/raspberry\_ninja) It's pretty basic support also currently, but has a lot of potential.
In the future, more professional video-centric hardware encoding options with built-in LTE/5G transmitters will support VDO.Ninja in a basic publish-only mode. This advancement will be due to the adoption of community standards for publishing low-latency video, although don't hold your breath for progress here.
---
description: When data is lost or delayed during transfer between peers
---
# Packet Loss
Packet loss can cause low quality video, audio distortion, clicking, and is the cause for numerous other video problems.
WiFi is often the main contributor to packet loss, but it's not the only cause. Still, eliminate WiFi as a possible culprit by removing it from your setup and from the guest's setup.
An Ethernet connection is highly recommended over WiFi.
#### That said, there are things to try still if WiFi is needed:
* Make sure the guest is plugged in and powered; battery mode with some laptops can cause issues.
* Try to sit closer to the WiFi router and try to limit the traffic on the network; the more that's going through the air, the more packet loss.
* If the guest can use the 4G LTE instead of WiFi (tethered via USB), that will often be much better than WiFi.
* The guest can also Tether their 4G LTE /w their WiFi using bonding apps like Speedify or with hardware from Peplink; these services can give you more control over network settings.
* If using a smartphone, consider using a USB to Ethernet adapter instead. I have a video demonstrating how to do this here: [https://www.youtube.com/watch?v=abCuANblE5w](https://www.youtube.com/watch?v=abCuANblE5w)
* Some users have mentioned that reducing their network's MTU size, or the size of their packets, has helped reduce packet loss over bad WiFi. You'll need to experiment with this, but 800 to 1000 might be in the range you can try in this case.
* Improving the Wi-Fi network, such as switching network bands (5hz / 2.4ghz), buying a mesh-based multi-node access point setup for larger homes, changing network channels to account for frequency interference, updating to Wifi-6 or newer technologies, and moving the closer to the access point.
### If the issue isn't WiFi related
* Try to have the guest use a different browser. For example, if using Firefox, use Chrome, and vice versa. Some browsers are optimized for privacy over performance, and that may hinder video quality, and even Chrome can sometime be configured in a way that hinders VDO.Ninja from working well.
* Disable any Anti-virus software or any security software that may disable WebRTC IP leaking.
* Advanced network firewalls, like _pfsense_, may block UDP packets or force traffic through a TURN relay server. VDO.Ninja uses mainly UDP packets in the high port range.
* If your connection with a guest is going thru a TURN relay server, such as perhaps due to a security or privacy setting, resolving that may fix issues. VDO.Ninja offers publicly accessible and free TURN servers as part of its service, but these may introduce packet loss. You can always host your own TURN servers instead, but avoiding them if not needed is usually the best option.
* Restart your Internet router; sometimes a router or network equipment just needs a good reset or update.
* If your router is double-natted, such as if you have a router plugged into another router at home, it can cause VDO.Ninja to send video via relay servers instead of the preferred direct peer to peer. Commonly, to address this, either set the second router as an AP access point instead, or configure the first router to be in bridge mode.
#### Routing issues
Sometimes two peers just can't get a good connection, while with other peers they can. This is often largely dependent on your ISPs, and it can be challenging to fix.
* Host your OBS Studio on a premium cloud server, like Amazon AWS Workspaces or Google GCP. These providers have good networks optimized for most users to access, and hosting a VPN, TURN server, or the entire OBS Studio can help you control for network routing issues.
* Forcing the TURN relay servers into use may help at times; adding [`&relay`](../general-settings/and-relay.md) to the links can enable this mode. It may add some latency though, as the video traffic will take a longer, but different, network routing path that may be more reliable. Hosting your own TURN server on a local premium server, and specifying VDO.Ninja to use it, has been a good solution for some.
* As mentioned above, you can also use a VPN, perhaps one with the server is hosted on a local Google Cloud server or perhaps use a VPN service that offers local edge network access onto a premium network. If all guests connect via the VPN, you'll have more control over the routing quality.
* Change your ISP (Internet provider) to another provider; this maybe needed on either your end or the remote guest's end. Some network providers, especially consumer-grade residential providers, can have really bad packet loss issues, especially during the evening hours.
* Use cellular connections instead, especially if the issue is intermittent and perhaps only during peak Internet usage hours. Cellular connections are optimized for audio and live streaming, and so while they may have limited bandwidth or be expensive, they can also be the last refuge of hope sometimes. This is especially true of 5G connections.
* If your router or connection supports IPv6, but you don't have it enabled, try enabling it. Sometimes if limiting yourself to IPv4 or IPv6, your ISP may send your traffic through an IPv4<>IPv6 translation server, which could introduce delays, throttling, and packet loss.
* Some cellular providers limit and throttle UDP packets, which are used by VDO.Ninja. Using a service such as Speedify, in TCP-mode, can bypass this limitation by wrapping the UDP packets as TCP and relaying them thru servers. Check with the cellular provider before purchasing a SIM card to ensure they do not throttle UDP packets as well, if intending to travel.
* As mentioned before, sometimes the TURN relay severs get used, and this might be the case with cellular connections or corporate firewalls; hosting your own TURN server or finding a way to bypass them can sometimes help improve the quality of connections.
#### More generic options to try
* Using [`&chunked`](../newly-added-parameters/and-chunked.md) mode on the sender's side can enable an alternative way of sending video data, but this option is only supported by Chrome and other Chromium-based browsers. It also is fairly CPU intensive and may require some tweaking of bitrates and buffers to have it work well for you situation
* Try using [`&codec=av1`](../advanced-settings/view-parameters/codec.md#av1) on the viewer side; this won't solve packet loss issues, but the AV1 codec is more efficient than the default codecs, and so it may offer better video quality despite the packet loss.
* Try adding [`&buffer=500`](../advanced-settings/view-parameters/buffer.md) to the viewer link, as this might allow for more time for lost packets to arrive.
* Reduce the bitrate of your video streams. If your connection can only handle 30-mbps in and 10-mbps out, trying to push it to do more will cause network thrashing and packet loss. In this case, try to ensure that your connection's up and download links are not saturated by more than 80% of their tested max capacity. Leaving some headroom will reduce latency and packet loss, ultimately leading to better quality.
* Consider using Meshcast or a WHIP/WHEP server-based SFU provider, and use that with VDO.Ninja instead of a direct peer-to-peer connection. I have a [guide for setting up Cloudflare ](https://cloudflare.vdo.ninja/)to be used in this regard, but any WHIP+WHEP SFU can work. This can provide more advanced buffering and SVC options not available with direct browser to browser options.
* Use [Raspberry.Ninja](../steves-helper-apps/raspberry.ninja/) or OBS Studio's WHIP output as a video source, instead of the browser. Raspberry.Ninja in particular supports double redundant video streams for added error correction, and while it uses more bandwidth, it can tolerate heavy packet loss and force a specified video quality. While packet loss will still exist, you might find the outcome is more to your liking.
* If screen sharing, you can use [`&contenthint=detail`](../advanced-settings/video-parameters/and-contenthint.md), which can tell the system to prioritize frame resolution, than frame rate. While this isn't suitable for gaming, it might be a good option for screen shares, where packet loss might otherwise might text unreadable.
### Audio issues due to packet loss
* Turning down the audio bitrate ([`&audiobitrate=128`](../advanced-settings/view-parameters/audiobitrate.md)) will be less prone to clicking issues vs something high, like 256-kbps. The default is 32-kbps.
* You can add [`&enhance`](../advanced-settings/view-parameters/enhance.md) on the viewer side to try to prioritize the audio over the video. This might help with audio clicking issues.
* Using [`&audiocodec=red`](../advanced-settings/audio-parameters/minptime-1.md#red) on the viewer side can increase the amount of error correction data being sent, reducing packet loss. This will double the audio bandwidth, but that shoulnd't be an issue for most modern connections.
### Youtube Video guide on packet loss + VDO.Ninja
I have a video talking about packet loss, with details on how to setup Speedify as well: [https://www.youtube.com/watch?v=je2ljlvLzlYAnd](https://www.youtube.com/watch?v=je2ljlvLzlYAnd)
## Connection testing tools and statistics
There is a speedtest that the local user can try out to give them feedback on their packet loss. This is a special speedtest, different than normal tests, as it does not test for available bandwidth, but network quality and packet loss: [https://vdo.ninja/speedtest](https://vdo.ninja/speedtest)
If you'd like to remotely test a guest's connection, you can also have them perform the VDO.Ninja pre-check test. This is a comprehensive system and network test, which allows you to review the results of the guest remotely: [https://vdo.ninja/check](https://vdo.ninja/check)
You can also do a peer-to-peer test by just making a VDO.Ninja connection with the guest. If you hold down CTRL (cmd) and click on their video, you'll see the stats. Packet loss is a listed stat, as well as the candidate type. If a guest is connecting to you via RELAY candidate type, that implies there is a firewall or security setting blocking a direct peer to peer connection. Addressing this will likely resolve your issues.
When doing a pre-check or speed test, make sure to test during the hours of the day you intend to go live. Mornings will often have less packet loss than evenings, with around 7pm to 10pm being especially bad.
### Asking ChatGPT about it..
_So I asked ChatGPT about improving the network quality between two peers, and its response is below._
Understanding the root causes of UDP packet loss across different network paths can be quite complex, particularly because the internet is a mesh of countless routes, and performance can be affected by a multitude of factors that are often beyond the control of end users. Here are some points to consider when trying to diagnose these issues:
1. **Path Specifics**: Even if all users have good connections to a common server like Google's, the path packets take to reach your specific service might be vastly different. This can be due to the routing policies of ISPs, peering agreements, or simply the geographic distance the packets need to travel.
2. **Network Congestion**: One of the most common causes of packet loss and latency is network congestion. This can occur at any point along the path and can be temporary (like peak usage times) or could indicate a more chronic issue with a particular segment of the network.
3. **Quality of Service (QoS)**: ISPs may implement QoS policies that prioritize certain types of traffic over others. For instance, UDP traffic may be deprioritized in favor of TCP traffic, which could negatively impact applications that rely on UDP.
4. **NAT and Firewall Configuration**: Users behind strict NATs or firewalls might experience connection issues if certain ports are blocked or if the NAT type is restrictive (Symmetric NAT), which can cause problems for UDP traffic in particular.
5. **Hardware Issues**: Problems with user hardware (like routers or modems) or even the quality of the local network (like Wi-Fi interference) can cause increased packet loss.
6. **ISP Issues**: Issues within an ISP's network, such as faulty routing, misconfigured equipment, or even under-provisioned transit links, can lead to increased latency and packet loss.
7. **Server Performance**: On your end, the server's performance and its connection to the internet could also affect the user experience. Overloaded servers or servers with a poor connection to the backbone can be a bottleneck.
8. **Packet Inspection**: Some ISPs may perform deep packet inspection which can introduce latency and potentially drop packets if they are deemed to be non-essential or if they match certain patterns.
9. **Transit Providers**: Different users may have different transit providers between them and your server, which can result in different latency and packet loss characteristics.
To diagnose these issues, you could:
* Implement more detailed logging and monitoring on your server to see if there are patterns in the connectivity issues.
* Ask users to run traceroutes and path analysis tools from their location to your server and back to determine where delays or losses are occurring.
* Use network diagnostic tools that can simulate UDP traffic and measure performance across different network paths.
* If feasible, provide alternative connection points or relay servers in different geographical locations to see if routing through these points improves performance.
Ultimately, diagnosing network performance issues often requires cooperation from ISPs and a deep dive into network performance metrics. Tools like MTR (My Traceroute) can be more informative than a simple traceroute as they provide information on packet loss at each hop and over time, which can help in pinpointing where issues are occurring.
#### 👍🍀
# Common errors and known issues
* [atem-not-working-with-firestick.md](atem-not-working-with-firestick.md "mention")
* [very-old-iphone-support.md](very-old-iphone-support.md "mention")
* [cant-select-audio-output-on-ios.md](cant-select-audio-output-on-ios.md "mention")
* [screen-share-is-just-a-black-video.md](screen-share-is-just-a-black-video.md "mention")
* [mic-audio-dropping-out.md](mic-audio-dropping-out.md "mention")
* [loss-of-audio-when-obs-minimized.md](loss-of-audio-when-obs-minimized.md "mention")
* [known-issues.md](known-issues.md "mention")
* [echo-or-feedback-issues.md](echo-or-feedback-issues.md "mention")
* [works-on-wifi-but-not-on-4g.md](works-on-wifi-but-not-on-4g.md "mention")
* [cant-capture-an-applications-audio-when-screen-sharing.md](cant-capture-an-applications-audio-when-screen-sharing.md "mention")
* [cant-load-camera-both-in-obs-and-vdon.md](cant-load-camera-both-in-obs-and-vdon.md "mention")
* [cant-select-a-camera-lens-on-mobile.md](cant-select-a-camera-lens-on-mobile.md "mention")
* [no-video-in-obs-just-an-add-camera-button.md](no-video-in-obs-just-an-add-camera-button.md "mention")
* [audio-over-vdo.ninja-isnt-working.md](audio-over-vdo.ninja-isnt-working.md "mention")
* [loading-circle-shows-in-obs-or-browser.md](loading-circle-shows-in-obs-or-browser.md "mention")
* [appearing-then-disappearing-guest.md](appearing-then-disappearing-guest.md "mention")
* [cant-auto-start-screen-sharing.md](cant-auto-start-screen-sharing.md "mention")
* [audio-clicking-popping.md](audio-clicking-popping.md "mention")
* [cant-share-my-screen.md](cant-share-my-screen.md "mention")
* [nothing-shows-up-in-obs-or-it-is-choppy.md](nothing-shows-up-in-obs-or-it-is-choppy.md "mention")
* [already-in-use-or-claimed-errors.md](already-in-use-or-claimed-errors.md "mention")
* [blue-spinning-window.md](blue-spinning-window.md "mention")
* [cursor-shows-trailing-or-artifacting.md](cursor-shows-trailing-or-artifacting.md "mention")
* [packet-loss.md](packet-loss.md "mention")
* [overheating.md](overheating.md "mention")
* [audio-is-delayed-in-obs.md](audio-is-delayed-in-obs.md "mention")
* [vmix-high-cpu.md](vmix-high-cpu.md "mention")
* [obs-virtual-camera-low-has-fps.md](obs-virtual-camera-low-has-fps.md "mention")
* [virtual-camera-not-working-on-mac.md](virtual-camera-not-working-on-mac.md "mention")
* [mic-stops-on-macos-when-obs-opens.md](mic-stops-on-macos-when-obs-opens.md "mention")
* [video-is-pixelated.md](video-is-pixelated.md "mention")
* [video-freezes-mid-stream.md](video-freezes-mid-stream.md "mention")
* [webcam-freezes-after-a-time.md](webcam-freezes-after-a-time.md "mention")
* [is-the-obs.ninja-server-down.md](is-the-obs.ninja-server-down.md "mention")
* [hosted-your-own-turn-server.md](hosted-your-own-turn-server.md "mention")
* [why-cant-i-screen-share-from-certain-devices.md](why-cant-i-screen-share-from-certain-devices.md "mention")
* [cursor-shows-when-screen-sharing.md](cursor-shows-when-screen-sharing.md "mention")
* [getting-overconstrained-camera-error.md](getting-overconstrained-camera-error.md "mention")
* [autoplay-doesnt-work-in-chrome-or-vmix-v77.md](autoplay-doesnt-work-in-chrome-or-vmix-v77.md "mention")
* [low-frame-rates.md](low-frame-rates.md "mention")
* [there-are-black-borders-around-the-video-in-obs..md](there-are-black-borders-around-the-video-in-obs..md "mention")
* [virtual-camera-not-working-on-mac.md](virtual-camera-not-working-on-mac.md "mention")
* [mics-volume-keeps-changing.md](mics-volume-keeps-changing.md "mention")
* [enable-camera-microphone-permissions.md](enable-camera-microphone-permissions.md "mention")
* [fps-drop-if-app-not-in-focus.md](fps-drop-if-app-not-in-focus.md "mention")
* [surround-sound-error-when-screen-sharing-with-usb-headset.md](surround-sound-error-when-screen-sharing-with-usb-headset.md "mention")
* [relay-candidate-being-selected.md](relay-candidate-being-selected.md "mention")
---
description: >-
When a relay candidate is selected, the connection is being forwarded
(securely) via a hosted TURN relay server, rather than directly via peer to
peer. This can add latency and limit the video quality
---
# Relay candidate being selected
There's many reasons why one client might not be able to make a direct connection with another client, resulting in their connections being relayed thru a TURN server, or perhaps failing entirely. Being in relay mode can sometimes hurt quality, add latency, and use up limited Internet bandwidth.
Some common reasons, with some solutions, are listed below.
### Cellular connections
If on cellular, some cellular providers will configure the system to not support peer to peer networking or UDP-traffic. Some others will also throttle UDP-traffic, which is what VDO.Ninja uses, and they may stop the UDP-traffic entirely after a few seconds or moments.
* Use a VPN service, such as Speedify, and consider enabling TCP encapsulation mode if UDP throttling is an issue. If you host a VPN service yourself, perhaps near your studio host computer, you can minimize performance and latency concerns
* Change networks
### Browser issues, settings, or extension
A common cause is a browser setting or extension that is causing the issue.
* Try a different browser, such as Firefox, Chrome, or Edge
* Update your browser
* Try incognito mode
* Disable your browser extensions or disable security options; some can block WebRTC
* Allow IP leaking in your browser settings or extension
* Ensure WebRTC is not disabled in your browser
* De-Googled browsers or highly secured/privacy focused browsers can cause issues
* You are using Safari and rejected microphone permissions
### Other common causes with potential solution
These issues can be hard to judge, especially if they are issues on the remote guest's side
* Corporate firewalls blocking WebRTC or UDP traffic
* Ask your IT department for a solution, perhaps be given an isolated network space.
* Use a VPN, preferably something hosted close by to reduce performance issues
* Host your own TURN / STUN server, close to or within the corporate network, and specify it to be used within VDO.Ninja.
* pfSense firewalls will block WebRTC or UDP traffic.
* Modify your firewall settings to allow those two options.
* Symmetrical firewalls, such as with some fiber internet services, may cause issues.
* Contact your ISP if this is the case.
* You are using Safari and you have rejected the microphone permissions
* Safari, such as on iPhone, will require microphone permissions to allow private IP address sharing. Rejecting that will force the TURN servers into use.
* To avoid this, provide VDO.Ninja permissions to the microphone always, via the Safari settings.
* Strict security software installed
* Try from a different computer on the same network to see if its a local software issue
* If using WHIP / WHEP, some third party applications may not support NAT traversal, lacking STUN server support, as it can be a lot of adding coding work. In these cases, VDO.Ninja might use a TURN server to assist things along, but it's far from ideal.
* Host your own TURN server locally, and specify it in VDO.Ninja.
* Reach out to the developers / support staff and ask for help
* STUN servers are being block. The STUN servers are hosted by Google, so if they are blocked, TURN might be the fallback.
* You can specify your own STUN servers if needed via URL parameters
* Endless other reasons...
### Doubled up NAT firewalls
In the following example diagram. we see a Main Router, a travel router, smartphone, production laptop, and a gaming desktop.
An example diagram, for reference
The smartphone and the production laptop will be able to make a direct peer to peer connection, obtaining HOST candidates, since they are connected to the same router.
The gaming desktop however will struggle to make a peer to peer connection with the laptop on the other router, since they are on different networks. As a result, the connection might end up going thru the relay server, on the Internet, which is a disappointing result given the opportunity for a much better connection.
To fix such a scenario, some options:
* **RECOMMENDED SOLUTION:** Connect all devices to the main router instead.
* Or alternatively, remove the main router, and connect all devices to the travel router instead, if feasible.
* **RECOMMENDED SOLUTION:** Replace the travel router with an ethernet switch, and if needed, add a wireless access point for the smartphone to connect to.
* Enable and point the travel router's DMZ at the production laptop's local IP address; this makes the travel router transparent to the gaming desktop. Just be sure to disable the DMZ mode when done.
* Move all devices to the same router, using the main router or the travel router\* for all devices.
\*Assuming you connect the gaming laptop to the travel router instead, another issue might occur, and that is any VDO.Ninja user you try to connect to on the Internet may end up in relay mode with you. We can solve this issue potentially by putting our main router into bridge mode, which is often available as an option on cable modems in its gateway settings.
The recommended solutions have the benefit of ensuring all the clients, even clients on the Internet, can establish a peer to peer connection with any other client on the network. This wouldn't be the case for example if we simply used the DMZ mode, as the smartphone would not be able to connect to clients on the Internet in a direct p2p mode.
### Ports used by VDO.Ninja
TCP 443 and 3478 UDP are the most important ports to have open, if behind a strict firewall. These allow for WebSockets, STUN, and TURN, but they alone will not allow for direct peer to peer traffic.
The actual media in direct peer to peer WebRTC (RTP/RTCP packets) is sent over random high-numbered UDP ports. These ports are negotiated by the ICE (Interactive Connectivity Establishment) process, which uses the STUN/TURN servers to help figure out how the peers can connect to each other.
If you want to allow peer to peer traffic, and are dealing with something more complex than a NAT firewall, like PFSense Firewall, UDP ports 49152–65535 are commonly suggested to opened to allow peer to peer traffic. You might need to open lower as well though, along with port TCP 443 and UDP 3478.
These high-numbered UDP ports used are dynamically chosen by the browser, and there isn't much control on VDO.Ninja's side to control that. Since you are also dealing with peer to peer mode, unless you know the IP address of each guest you intend to connect to, you can't easily unblock based on IP address either. This isn't the case if using a TURN relay server of course, but that's not direct p2p then.
### Final comments and advice
Identifying which client is the problem can go a long way to troubleshooting.
Don't be afraid to try from different networks, computers, browsers, or other remote clients.
Advanced users can always just deploy their own TURN server locally or nearby, and specify it via VDO.Ninja. Hosting it yourself can reduce latency, improve performance, and improve security (no IP leaking). Using relay mode doesn't need to be a bad thing!
Join the Discord if still stuck and need help: [https://discord.vdo.ninja ](https://discord.vdo.ninja)
---
description: Some causes and solutions for robotic audio issues
---
# Robotic audio
### There are a variety of possible reasons for robotic audio distortion, either in OBS Studio, the browser, or with the system itself. Below is a list of different causes and solutions.
One user reported that their _MyAsus_-software had an AI Noise-Cancelling Speaker set to ON for default audio output device (depicted in the attached image). Switching the setting to OFF resolved the issue.
Another user found that starting OBS in Administrator mode fixed the issue. They noticed the issue more often when the OBS browser source was put into the background or minimized, so some performance / system priority setting may have been the cause.
OBS as well may have issues with the log file reporting "Max audio buffering reached!". Try to reduce your computer's CPU load, or perhaps consider upgrading to a newer computer. You can also try capturing the audio and video with the[ Electron Capture app](../steves-helper-apps/electron-capture.md) instead of the OBS Browser source, which may avoid some issues with OBS browser source audio capture.
Checking the audio sample rate on your system can help as well. High sample rates, like 384-khz for either the microphone or default system device may cause the issue. As well, a 32-bit audio sample rate, versus 16-/24-bit, may cause it as well. VDO.Ninja works best at 48-khz and either 16- or 24-bit. Users with FiiO audio DACs may encounter this issue, for example.
Very high packet loss may cause distorted audio as well. Adding `&enhance&red` to the view/scene link may help, but chances are reducing the packet loss is your best bet instead. If using a VPN or behind a strict firewall that is forcing the relay servers to be used, address that if possible.
If using a virtual audio cable, or a pro-audio mixer, issues with audio buffers can cause clicking, but also perhaps audio distortion. Increasing the audio buffer with your virutal audio cable may help.
Surround sound headphones, like 5.1 / 7.1 Logitech/Corsair gaming headsets may cause disorted audio as well. Set the headphones and speakers to 2.0 stereo audio, disabing any surround sound effect, or perhaps change headsets.
Echo-cancellation can cause robotic audio effects, for example, having two tabs of VDO.Ninja open on the same computer can cause feedback loops that may be cancelling each other out. As well, having a mobile phone or a second computer near by that is also streaming into a VDO.Ninja group may create a feedback loop that also can result in echo-cancellation issues.
Some versions of VDO.Ninja may be more prone to issues than others. https://vdo.ninja/v23/ is an older version for example that you may want to try, but there are a variety of others. If you notice the robotic audio issue is version-specific, please report the issue on Discord (https://discord.vdo.ninja).
Adding `&noap` to the VDO.Ninja URL can disable web-audio processing in VDO.Ninja, and if a computer is heavily overloaded, disabling web-audio may help with robotic audio effects caused by audio buffer underruns.
---
description: When screen-sharing, your local preview and output is black
---
# Screen-share is just a black video
Google Chrome's HWA setting
If the video preview when screen sharing is black, try disabling or enabling the browser's hardware acceleration. This can be found in the Google settings -> system menu.
If sharing a Netflix, Prime Video, or other content that is protected by content-protection, such as DRM/HDCP, the screen share may be black also. You can try screen sharing using the window, display, or tab methods to see if one works where the others fail, or you can try display grabbing with OBS Studio instead, but VDO.Ninja itself doesn't offer methods intended to bypass content copy protection.
---
description: >-
Some surround sound headphones can cause VDO.Ninja to have audio problems,
including failed screen sharing
---
# Surround sound error when screen sharing with USB headset
Surround sound or multi-channel audio, for either the microphone and audio playback device, can cause audio problems with the browser. For example, screen sharing may trigger an unreadable error, mentioning surround sound as a likely cause.
Unplugging or using a different USB headset in this case can often solve the issue.
Another option is to disabling surround sound in the Windows, or typically, the Logitech/Corsair settings. By limiting audio playback to stereo 2.0 channels, you can avoid complications encountered with surround sound playback or capture not properly being converted to something the browser understands. How to do this might depend on your audio device or the driver it uses.
In one past Reddit post, someone mentioned going to [**chrome://flags/**](chrome://flags/) and turning off **Override software rendering list** fixed their issue. I've not been able to test or confirm this though, since I do not have surround sound headphones.
For Logitech surround headphones specifically, the following old Reddit post mentions a fix for problematic surround sound and Chrome, along with a fix. I think this might have worked for one VDO.Ninja user in the past, but it's been a couple years now. Perhaps also update your drivers.
Another possible fault is that the audio quality in Windows is too high; 384-khz or 32-bit audio may cause issues, for example. You might also have issues with ASIO-based drivers, DSD systems, and multi-channel audio systems. In these cases, set the audio output and microphone input in Windows to at most 24-bit at 48-khz stereo; VDO.Ninja doesn't typically offer better audio quality than this anyways.
Looking at the code, this error message is triggered when "NotReadableError" is reported by the browser, I think when screen sharing with audio. So, I suppose you can also screen-share without audio maybe, and then perhaps select a virtual audio device for the audio after the fact instead if you still need a window's audio. However, this is cumbersome to do.
Google or such might offer a solution as well, since this probably isn't a VDO.Ninja-specific issue. That said, you can try adding [`&inputchannels=2`](../advanced-settings/audio-parameters/and-inputchannels.md) to the guest/push links, to see if that helps at all. But beyond that, I'm not sure this can be addressed via VDO.Ninja's code itself.
# There are black borders around the video in OBS.
If a black border appears around the video, check that the custom CSS settings in the browser source has not been modified from the default setting:
```css
body { background-color: rgba(0, 0, 0, 0); margin: 0px auto; overflow: hidden; }
```
If you changed the default CSS settings, then you'll need to change them back to get rid of any background.
Also, ideally the width/height in OBS Browser source should be the same aspect ratio as the video. 1280x720 (not 800x600) This will fit the window to the video.
_original issue thread:_ [_Reddit: Advice on adding to OBS_](https://www.reddit.com/r/OBSNinja/comments/g1xyoi/advice\_on\_adding\_to\_obs/)
---
description: old iPhone errors, such as "cannot verify server identity" or
---
# Very old iPhone support
An iPhone 5s /w iOS 11 (or newer) is the technical minimum requirement for [VDO.Ninja](https://vdo.ninja), as Apple's webKit lacks the proper webRTC support in older iOS versions. Older iPhones/iPads can't update to newer iOS versions, so they are out of luck. iPhone 3G, 3Gs, 4, 4s, and iPhone 5 are not supported as a result, and many older iPads are also not supported.
I'd strongly recommend at least iOS 16 be used either way, as older versions of iOS have serious limitations and bugs. Starting with iOS 13 things started to be at least usable though, so an iPhone 6s is the recommended minimum, but don't expect a bug-free experience.
If using the native iOS app of VDO.Ninja, while I used to support iOS 11 with it, newer releases of the native app may require a newer iOS version. If using an iPhone 6 for example then, while it may not work with the native app, it might still at least work with the Safari web-app version.
Older Android phones tend to work usually though, as I think Google added support for WebRTC earlier on than Apple did, but you might be limited in terms of maximum quality or face heat issues on such old phones.
# Video freezes mid-stream
If the stream or camera _freezes_ after a while, there could be many reasons. Let's explore some causes and solutions below.
### Camera / USB issues
If cycling the camera to a different camera, or refreshing the camera via the settings menu, fixes the issue, then this normally implies the issue is with the camera or its USB connection.
As a stop-gap solution, the director has the remote control ability to toggle the camera of a guest to unfreeze it. This can be done without the guest's permission even if the [`&consent`](../source-settings/consent.md) flag is added to the guest's URL ahead of time. In a pinch, this can at least give the director some comfort to go live, fixing any stuck camera within a few seconds themselves, versus asking the guest to refresh their page.
If not using a group room, the publisher of a stream can also refresh their own camera via the settings menu, and clicking the refresh icon next to the camera.
To fix the problem though, a bit of troubleshooting may be needed. More often than not, if using a USB 3.x camera, the cause is a USB-related issue.
* Try a different USB 3.0 cable; ideally a short cable that conforms to the USB 3.1 specification or newer.
* Do not plug any USB camera into a USB hub, dock, or use it alongside other high-bandwidth USB devices.
* Try a different USB port; try them all if needed; a blue USB 3.0 port is normally required.
* Reduce the frame rate and/or resolution of the camera. Lowering the bandwidth over the USB connection may help. 1280x720 @ 30fps is recommend trying, if possible.
* Update the drivers on the computer, especially those for the USB controller and camera. Update the operating system as well, if needed, re-installing old drivers if possible.
* If using an AMD motherboard, update the BIOS of your motherboard, and perhaps set your PCIe lane speed to Gen3, instead of Gen4.
* If using a laptop in particular, ensure the USB port is not set to go to sleep; this would be a Windows setting. Also, enabling _Performance Mode and being plugged into the wall,_ may help as well. See the below images:
### Internet /connection issues
If the issue is not fixed by toggling your camera, make sure your internet connection is stable and you're device is not overloaded. Bad connections, network firewalls, or VPNs can cause the video to lose connection and then reconnect, causing the picture to appear to freeze for several seconds or longer.
VDO.Ninja requires a solid Internet connection with no interfering services to work its best. On some networks, especially during prime-time evening hours of the day, connections can drop out for seconds at the time constantly.
Mobile devices may also have the video freeze for a few moments at a time if switching between cellular networks and WiFi networks, but in these cases things will auto-reconnect within a few seconds normally.
Services like [https://speedify.com](https://speedify.cm) can offer a VPN with bonding, designed for streaming, and it can help avoid network issues on mobile networks, where IP addresses or wireless connections constantly are changing.
### iPhone specific issues
Regarding mobile, iOS users can only send video to 3 viewers at a time if using the H264 hardware encoder. Newer versions of VDO.Ninja will try to keep track of how many H264 streams are being used, and revert to VP8-software-based encoding when the hardware encoders are maxed out, however VP8 encoding can cause iPhones to get very warm. If forcing H264 with an iPhone or iPad, and you max them out, you might cause videos to freeze or go black though.
View links and scenes can sometimes can use an iPhone H264's encoder, even if the video isn't visible in OBS. If having issues, try to avoid forcing the H264 encoder or using it sparingly for only the active sources. If using [`&broadcast`](../advanced-settings/view-parameters/broadcast.md) mode, only the director and scenes could possibly contribute to using an H264 encoder; other guests won't have access to the guest's video stream, so they won't count towards this H264 encoder total.
### H264 specific issues
Some Windows computers that can offer H264 hardware encoding with AMD or Nvidia GPUs run into the same limitations that an iPhone device may have. That is, if more than 2 or 3 video streams are being published that use H264 encoding, the hardware encoder on those devices may fail.
If someone if using OBS to publish H264 video via RTMP using Nvidia's NVenc, while also publishing H264 video to VDO.Ninja, conflicts may arise, and video streams may fail. This shouldn't happen really, but in theory, it's something to be aware of.
---
description: When the video turns into a rainbow puke with distorted colors
---
# Video stream looks corrupted
Update: This issue of rainbow puke impacted OBS v25 and older, but is no longer an issue for most users.
If having issues with the video being very low quality, this is often due to high packet loss caused by weak WiFi or other network issue. More info: [https://www.youtube.com/watch?v=je2ljlvLzlY](https://www.youtube.com/watch?v=je2ljlvLzlY)
**DO NOT USE WIFI**. Have everyone connect to stable wired Internet whenever possible.
"Pixelation" (as seen here: [https://imgur.com/oKEPOvu](https://imgur.com/oKEPOvu)) is a difficult issue to troubleshoot as there are several potential upstream configurations which can ultimately lead to high packet loss which is the primary cause. Here are some potential fixes and configurations that may assist in lowering packet loss:
* Change the video codec or video encoder used: h264, VP8, and VP9 are options. VP9 seems to handle packet loss the best within OBS, but it also creates the most CPU load. VP8 handles packet loss the worst in OBS.
* Use Speedify.com (in AUTO or TCP mode).
* Use the Electron Capture app instead of OBS to capture video. The Electron Capture app uses a newer version of Chromium, which works far better than OBS when dealing with packet loss related issues.
* Lowering the framerate or resolution, especially for those using H264, can provide smoother video, and perhaps with less distortion.
* You can increase the jitter buffer size by using the [`&buffer`](../advanced-settings/view-parameters/buffer.md) URL parameter; such as "[https://obs.ninja?view=abs\&buffer=300](https://obs.ninja/?view=abs\&buffer=300)". This only works if using Chrome/Chromium v76 or newer though; OBS v25 currently uses Chromium v75 and so is not yet compatible.
* You connect two peers via TCP, instead of UDP, which will ensure there is no packet loss. This option is for more advanced users and requires a compatible TURN server (or VPN). Please use your own TURN servers for this option if so, as the bandwidth costs can be quite high for me.
* You can scale down the video while viewing with [`&scale=50`](../advanced-settings/view-parameters/scale.md) to potentially reduce stutter and reduce the frequency of frame corruption.
* Normally the video should "fix itself" after a moment of so, but if not that is likely a bug in the browser used for decoding. If in OBS you can toggle the visibility of the element to try to trigger a resolution. I've also provided a "SEND KEYFRAME" button in the hidden stats menu that lets the publish do this from their end.
* Mentioning this again, but connect over wired ETHERNET if possible and avoid wireless connections, including WiFi networks. DSL connections are also often quite poor. Do so for both OBS and the video-connected device for optimal results. Even 4G LTE is better than Wi-Fi in many cases.
* Do not watch a 4K Netflix or Youtube video while streaming; it will increase network congestion and can cause packet loss and buffer-bloat.
* If you have LOW QUALITY video, or low resolution or low bitrates, that perhaps can be adjusted. Please see below re: [bitrates and resolutions](https://github.com/steveseguin/obsninja/wiki/FAQ#bnr)
* Ensure your computer and remote computer are not maxing out their CPU power. If they are, have them lower the resolution and bitrate.
---
description: >-
If the OBS Virtual Camera is not appearing in Chrome or your browser after
installing OBS on MacOS, you may need to enable screen recording permissions
---
# Virtual camera not working on Mac
If using OBS Virtual Camera or other virtual camera on MacOS (Apple) system, please note that there are a list of applications that are not supported.
### Apps that will **not** work
* Bluejeans Events
* Safari
* Tencent Meeting
* FaceTime
* Photo Booth
Please see the follow official guide for more details on these and other problematic apps.
Official documentation
### General tips to using the Virtual Camera
If using Windows or if you have just installed OBS, please restart your browser fully or restart the computer first, to ensure its properly loaded and available to all applications.
The Google Chrome usually works with most virtual cameras. If you are having problems with it, you can also try another browser.
Please also be sure to START the virtual camera before selecting or opening it in VDO.Ninja. If you open it in VDO.Ninja before starting it, the resolution and/or frame rate may be wrong.
## Enabling permissions for Virtual Camera on MacOS
If the OBS Virtual Camera is not appearing in Chrome or your browser after installing OBS on MacOS, you may need to enable screen recording permissions.
1. Open your System Preferences; you can find this via the Apple logo in the top left corner of your desktop.
2. Click Privacy & Security and then Screen Recording.
3. For OBS, enable the permission.
_If OBS isn't listed, click the + button, enter your system's password, and navigate to OBS in the Application settings. Select it and enable._
4. Quit and relaunch OBS.
If OBS isn't listed, press the + button, navigate to it, and select it
---
description: Some ideas on how to reduce total system load on a vMix system using VDO.Ninja
---
# vMix High CPU
vMix is a great studio mixer, although some users find the CPU load can get a bit high at times. Below are some options that might help to reduce that load, with solutions generally targetting vMix, but could perhaps be applicable to other studio mixing software.
* Browser sized at 1920x1080 can stress vMix out; try 1280x720 or lower to reduce the total load.
* Ensure GPU hardware acceleration is enabled; particularly for the browser source.
* Using the H264 codec may reduce CPU; adding `&codec=h264` to the view link may help.
* Disabling de-interlacing, sharpening, or aliasing of the browser source might free up some load.
* Electron Capture or Vingester.app can be used instead of the vMix browser source; they can use window capture, which can reduce the CPU load.
* If you have a spare computer, Vingester.app has a VDO.Ninja to NDI output option, which can perhaps help with distributing load if the browser source is causing issues.
* Lowering the frame rate of the browser source and incoming VDO.Ninja videos might help reduce CPU load. `&maxframerate=30`, for example, on the guest link can help cap the frame rate.
* The director of a room can adjust settings of incoming videos via the video settings options under advanced settings. This includes the max resolution, frame rate, and aspect ratio of incoming videos.
* Updating your graphics card drivers can sometimes help.
* If acting as a VDO.Ninja director, consider hosting the director on a different computer than vMix. If not possible, consider using `&meshcast` with the director's link to use `&meshcast` to help reduce the CPU load when in larger group rooms.
* Try to use your local camera as a source in vMix, rather than bringing your local video into vMix with VDO.Ninja. Using a virtual camera, like Snapcamera, OBS Virtual Camera, Manycam, or such can allow a webcam to be accessed using the browser and vMix at the same time.
* Avoid using multiple group scene link, unless solo-view links. Instead, consider using the VDO.Ninja mixer app to use a single group scene link, switching between different layouts using the mixer interface. (The Mixer app is relatively new, as of May 2022, so still undergoing feature enhancements).
There are additional other options available to reduce CPU / GPU / Network load when using VDO.Ninja; this list is specific to vMix issues.
---
description: >-
Some laptops will put the webcam to sleep for a moment to save power, causing
freezing
---
# Webcam freezes after a time
If using a laptop with a USB camera, it's possible the the system is putting the camera to sleep for a split second; just enough to cause the video to freeze. This is definitely a possible cause if on a laptop, but might not be an issue for a desktop user. Enabling performance mode in the Windows power options might help things, but you can also disable USB power savings selectively.
One place to is in the Windows Power Options settings, which you can find in the Power and Sleep settings pane.
You can also try disabling the "Allow the computer to turn off this device to save power" options in the Windows Device Manager for each USB device/host controller. (uncheck them)
If the problem isn't resolved, you can still reload the camera with the refresh button in the VDO.Ninja settings menu when it happens. This just reloads the camera and should fix the problem until it happens again.
The director of a room can also refresh a camera remotely of a guest, when it freezes, via the video settings of the guest.
If it's a common occurrence, you can load the camera into OBS or SnapCamera and then bring the video into VDO.Ninja as a virtual camera device. While VDO.Ninja does try to automatically reconnect devices when they become disconnected, it sometimes isn't alerted by the browser that the camera has glitched. OBS or Snapcamera might handle these conditions better.
Another reason for a camera freezing randomily is that it may be a bad USB 3.0 cable or a USB 3.0 hub that is overloaded with other USB devices already. Plug any camera directly into the back of the computer, on a dedicated USB 3.0 port, with a high quality USB 3.0 or better cable. Unplug other unneeded USB devices.
If this doesn't work, it probably isn't related to your camera, and may be instead related to your network.
For more reasons why a video may freeze during a stream, see the following:
[video-freezes-mid-stream.md](video-freezes-mid-stream.md)
# Can't screen-share from certain devices
The Screen sharing feature is highly dependent on the operating system of the device whose screen you are trying to capture.
* Chrome browser used on a PC is most compatible, fully supporting screen sharing with audio.
* Firefox on PC supports screen sharing, but it cannot screen share with audio.
* Safari on iOS does not yet support it officially, although it does support it with the "technical builds" designed for developers. Until Apple officially supports, there isn't much I can do there easily.
* Android does not support it and it is doubtful that it will in the near future.
In either case, you can use Native mobile apps to solve this problem, as the native apps let you screen share using iOS and Android. However, the native apps are pretty basic right now, and may lack many features and may even lack system-audio capture.
There's other tricks as well to get screen sharing working on mobile, such as using Quicktime via USB.
[native-mobile-app-versions.md](../steves-helper-apps/native-mobile-app-versions.md)
[screen-share-your-iphone-ipad.md](../guides/screen-share-your-iphone-ipad.md)
---
description: >-
Sometimes 4G or 5G, or even some corporate networks, block VDO.Ninja from
working
---
# Works on WiFi but not on 4G
When using 4G or 5G Internet, some network providers have firewalls or network routing settings that make it very hard to establish direct peer to peer connections with others.
If a director of a room, you may see guests join and then disconnected repeatedly, with video and audio never actually showing. This means the peer connection has failed, and is constantly retrying. The issue should go away though if the guest user changes networks; switching to WiFi for example or a different ISP provider.
VDO.Ninja uses TURN servers to bypass most 4G-related network issues, offering solutions to network traversal, TCP, UDP, and IPv6 routing issues. Sometimes, in rare cares, even this isn't enough.
There are solutions usually.
1. One option is to try adding `&privacy&tz=-60` or `&privacy&tcp&tz=300` to the guest's URL. This attempts to force the TURN servers into action, with a couple different configurations set. Sometimes, especially in the case of active firewalls, this can fix the issue.
2. Using speedify.com on the mobile device often will solve the problem. It's a paid service that's free to try, but it's well worth buying if it works. It creates a VPN designed for live video that solves many issues mobile 4G devices commonly face.
3. If you're an advanced user, setting up your own TURN server that is tweaked to your specific scenario and problem is an option. Please do let me know what works for you in this regard though, as I'd be keen to add such support to VDO.Ninja's TURN network also.
Please note, if you have self-deployed VDO.Ninja onto your own servers, it becomes your responsibility to deploy your own TURN servers or purchase TURN services from a third-party. Any TURN server access provided currently by VDO.Ninja for private deployments is out of generosity and isn't a guaranteed service.
---
description: Hides the invite URL options in the Director's room
---
# &cleandirector
Director Option! ([`&director`](../viewers-settings/director.md))
## Aliases
* `&cdv`
## Details
Hides the invite URL options in the Director's control center.
Allows for a cleaner looking interface. Useful if using IFrames maybe.
## Related
[director.md](../viewers-settings/director.md)
[cleanoutput.md](../advanced-settings/design-parameters/cleanoutput.md)
[cleanish.md](../advanced-settings/design-parameters/cleanish.md)
---
description: >-
Allows assistant directors to have access to the director's room, with a
subset of control
---
# &codirector
Director Option! ([`&director`](../viewers-settings/director.md))
## Aliases
* `&directorpassword`
* `&dirpass`
* `&dp`
## Options
Example: `&codirector=DirectorPassword`
Value
Description
(no value given)
the site will prompt you for a password on load
(alpha numeric value)
password for the directors
## Details
The basic idea is there is a URL parameter called `&codirector` that you need to add to all the director links used.
For example, `https://vdo.ninja/?director=MYROOMNAME&codirector=DirectorPWD123`
So long as all the directors have `&codirector=DirectorPWD123` added to their URLs, they all share a common director's password, and so they all treat each other as valid directors.
If the passwords don't match, the first director into the room will be the real director, and the others will be rejected.
If you don't enter a password via the URL, the site will prompt you for a password on load.
### Description
Using this flag, the director can set a director's password (or prompt the user for one). Any other director that joins the room, who also has a matching director's password set, will be granted co-director controls.
A co-director has nearly all the same controls and powers as the main director, except they cannot control the main director, nor kick them out of the room. They also have a few features unavailable to them at present, such as solo-talk, as those currently would conflict with the main director's ability to use those features.
The first director to join the room is the main director, and so their password is the 'correct' password.
A co-director cannot force-disconnect the main director.
If the main director does not have `&codirector={somepassword}` in their URL, nor enabled co-director mode via the room-settings menu, then remote co-directors will not be able to join.
The co-director mode is still evolving, and certain things like shared-state between all the directors may still be missing.
Starting with [v20](../release-notes/v20.md) of VDO.Ninja, a co-director invite link will be available via the room settings button, along with the option to customize permissions.
### Optional - Enable via Room Settings
You can also enable the co-director mode by checking the "Add co-directors .." option in the room settings menu. This will provide you a link with the `&codirector` invite link already generated.
This will only work while the check-box is selected, so be sure to re-enable it if reloading the page without `&codirector` added to your own link.
###  (3).png>)
### Warnings
Do not confuse the room password with the director's password; if they are the same, you potentially allow a mischievous guest to have access that they should not have.
Co-directors will not be able to join as co-directors unless the main director has enabled the co-director option via the room setting's checkbox or by having a matching `&codirector=xxx` parameter in their own link.
If the main director leaves and re-joins, or a new director joins, all the co-directors will need to be re-checked. It's possible that a network outage could have a co-director and the main director to switch roles, depending on who re-connected.
If you copy and paste the main director's URL to a new browser/tab, be sure to remove the [`&push=STREAMID`](../source-settings/push.md) portion of the URL. If you do not, you will get an error about the stream ID being already in use. Each co-director and guest needs their own unique stream ID.
If using the [`&queue`](../general-settings/queue.md) parameter with co-directors, you may need to use [`&view=STREAMID`](../advanced-settings/view-parameters/view.md) to allow the co-director to bypass the queue, else they won't be able to be validated since they will be stuck in the queue. There is more info about this in the [queue's documentation](../general-settings/queue.md).
## Related
[director.md](../viewers-settings/director.md)
[and-hidecodirectors.md](../advanced-settings/director-parameters/and-hidecodirectors.md)
[and-maindirectorpassword.md](../advanced-settings/director-parameters/and-maindirectorpassword.md)
---
description: Remote MIDI control
---
# &midiremote
General Option! ([`&push`](../source-settings/push.md), [`&room`](../general-settings/room.md), [`&view`](../advanced-settings/view-parameters/view.md), [`&scene`](../advanced-settings/view-parameters/scene.md))
## Aliases
* `&remotemidi`
## Options
Example: `&midiremote=4`
## Details
This lets you route all MIDI messages from one computer to another computer, with the purpose of remote triggering the VDO.Ninja hotkeys.
```
https://vdo.ninja/beta/?midiremote=4&director=ROOMNAMEHERE
https://vdo.ninja/beta/?room=ROOMNAMEHERE&midiout=1&vd=0&ad=0&push&autostart&label=MIDI_CONTROLLER
```
* `&midiremote={reference &midi's values; 1 to 4}`
See [`&midi`](../midi-settings/midi.md) for a link to the page with more information on available hotkeys.
How to remote control with MIDI
## Related
[midi.md](../midi-settings/midi.md)
---
description: Quick director access to a list of rooms for transfering guests
---
# &rooms
Director Option! ([`&director`](../viewers-settings/director.md))
## Options
Example: `&rooms=room1,room2,room3`
Value
Description
(string value)
adds the rooms to the guest transfer buttons to the director control bar (comma separated)
## Details
[https://vdo.ninja/?director=ROOMID\&rooms=ROOMID2,ROOMID3,ROOMID4](https://vdo.ninja/?director=ROOMID\&rooms=ROOMID2,ROOMID3,ROOMID4)
The link above would add "_ROOMID2_", "_ROOMID3_", "_ROOMID4_" guest transfer buttons to the director control bar.
Pressing any of these buttons will arm the transfer buttons beneath each caller with the chosen room name, allowing callers to be quickly moved from one room to another.
Arming can be disabled by clicking the room name again. If the current room is in the list it will be ignored.
If [`&cleanoutput`](../advanced-settings/design-parameters/cleanoutput.md) is enabled, rooms parameter is ignored.
## Related
[room.md](../general-settings/room.md)
[rooms](../getting-started/rooms/)
[transfer-rooms.md](../getting-started/rooms/transfer-rooms.md)
---
description: Puts guests into sub-groups, so they only see others in the same group
---
# &group
General Option! ([`&push`](../source-settings/push.md), [`&room`](room.md), [`&view`](../advanced-settings/view-parameters/view.md), [`&scene`](../advanced-settings/view-parameters/scene.md))
## Aliases
* `&groups`
## Options
Example: `&group=Groupname`
Value
Description
1
adds the guest or director to group 1
2
adds the guest or director to group 2
3,4,5,6
adds the guest or director to group 3, 4, 5 and 6
(string)
creates/adds the guest or director to a custom group
## Details
The idea is, you can put guests of a room into sub-groups. When added to a sub group, those guests will only be able to see and hear others in that same sub group.
Guests can be assigned to multiple subgroups. Groups can be specified via the URL using `&group=1,5,6` or/and the director can dynamically assign sub-groups, as seen in the below image.
If not in a group, that guest will still see/hear everyone, regardless of which group they are in, even if a guest in another group may not be able to see/hear that guest back.
Scenes can be put into groups as well, via the URL group option, such `&group=3`, but the director will not be able to dynamically change which group a scene is in. Not yet at least.
Using this group function is an alternative to transfer rooms, however it's perhaps less secure, as a guest could just tinker with their URL parameters or just refresh their page to perhaps see everyone in the room again.
[`&groupaudio`](and-groupaudio.md) can be used to enable audio in-between different groups, instead of audio being group-specific. Useful for blind-dating show formats or such.
### New in Version 22
Custom groups used by remote guests now show in the director's view, just like custom scenes do. If you use `&groups=group,test,vdo`, new group buttons will appear.
With [`&groupmode`](../advanced-settings/setup-parameters/and-groupmode.md) added to your URL, when not assigned to a group, you don't hear or see anything. This also goes for remote participants who are not in a group - you will not see or hear them if they are not in a group, even if you also are not in a group.
## Related
[and-groupaudio.md](and-groupaudio.md)
[and-groupview.md](../advanced-settings/setup-parameters/and-groupview.md)
[and-groupmode.md](../advanced-settings/setup-parameters/and-groupmode.md)
[rooms.md](../director-settings/rooms.md)
---
description: Tells the system to not filter out audio streams when using &group
---
# &groupaudio
General Option! ([`&push`](../source-settings/push.md), [`&room`](room.md), [`&view`](../advanced-settings/view-parameters/view.md), [`&scene`](../advanced-settings/view-parameters/scene.md))
## Aliases
* `&ga`
## Details
This just enables the guest or scene to not filter out audio streams that are contained in other sub-groups.
By default a stream assigned to one group won't be visible or audible to those in another group. `&groupaudio` prevents audio from being filtered, but keeps the video filtering in place.
## Related
[and-group.md](and-group.md)
[and-groupmode.md](../advanced-settings/setup-parameters/and-groupmode.md)
---
description: Filters ICE candidates
---
# &icefilter
General Option! ([`&push`](../source-settings/push.md), [`&room`](room.md), [`&view`](../advanced-settings/view-parameters/view.md), [`&scene`](../advanced-settings/view-parameters/scene.md))
## Options
Example: `&icefilter=tcp`
Value
Description
tcp
Filters TCP ICE candidates
udp
Filters UDP ICE candidates
host
Filters HOST ICE candidates
## Details
Filters out ICE candidates that do not include the specified word in the candidate string.
Added for advanced use-cases and testing purposes.
This is an advanced parameter that can stop your links from working correctly.
---
description: Hides the mouse cursor over videos at a CSS level
---
# &nocursor
General Option! ([`&push`](../source-settings/push.md), [`&room`](room.md), [`&view`](../advanced-settings/view-parameters/view.md), [`&scene`](../advanced-settings/view-parameters/scene.md))
## Details
This does not hide the mouse cursor for Chrome-based screen capture, as Chrome [does not yet support that](https://developer.mozilla.org/en-US/docs/Web/API/MediaTrackConstraints/cursor#browser\_compatibility). This feature is designed for hiding the mouse when using the [Electron Capture](../steves-helper-apps/electron-capture.md) app, to avoid mousing over the capture area by accident.
Works better in Windows than on macOS, due to OS-level limitations.
If you're looking to hide the cursor while screen-recording, consider using OBS to capture and OBS Virtual Cam as the source into VDO.Ninja. You can also check out: [https://github.com/rdp/screen-capture-recorder-to-video-windows-free](https://github.com/rdp/screen-capture-recorder-to-video-windows-free) as an option to turn a screen into a virtual camera without needing OBS.
## Related
[cursor-shows-when-screen-sharing.md](../common-errors-and-known-issues/cursor-shows-when-screen-sharing.md)
[cursor.md](../source-settings/cursor.md)
---
description: Forces TURN relay server into use
---
# &relay
General Option! ([`&push`](../source-settings/push.md), [`&room`](room.md), [`&view`](../advanced-settings/view-parameters/view.md), [`&scene`](../advanced-settings/view-parameters/scene.md))
## Aliases
* `&private`
* `&privacy`
## Details
Forcing relay mode is provided for testing and emergency purposes. It will typically increase latency; sometimes by a lot.
Alternatives to relay mode include:
* Using wired Ethernet instead of Wi-Fi will also reduce packet loss.
* A VPN service, like Speedify, will likely be better than using a TURN server.
Uses of relay mode include:
* Can potentially reduce packet loss with some guests on bad connections.
* Some peer to peer connections over residential networks struggle, and introducing a relay server can help avoid those issues.
* Has the advantage of hiding your IP address from peers.
You can [deploy your own TURN server](https://github.com/steveseguin/obsninja/blob/master/turnserver.md) if intending to use this feature a lot or needing more bandwidth.
Please feel free to donate to VDO.Ninja to help support the provided TURN servers.
Currently TURN servers are deployed numerous countries around the world.
Ports that a TURN server may use include 443, 3478, and potentially others.
More information on what TURN is [here](https://en.wikipedia.org/wiki/Traversal\_Using\_Relays\_around\_NAT)
### Difference between `&relay` and `&privacy`
If using `&privacy` on the URL (using TURN server), with the intent being to hide your IP address, a page will prompt you if an IFrame tries to load, asking if you wish to continue.
Using `&relay` will not do this behavior, despite using the turn server none-the-less; so `&privacy` is evolving to be a bit more strict than `&relay` alone.
It will even show if loaded into OBS, as privacy trumps there. (IFrames can steal IP address, etc.).
You can also just use [`&nowebsite`](../source-settings/nowebsite.md), to disable IFrames from loading at all (always existed as an option).
Certain known sites are excepted; YouTube, Twitch, Vimeo, etc. will not ask for confirmation.
## Related
[turn.md](turn.md)
---
description: Shows the connection/media stats window by default
---
# &stats
General Option! ([`&push`](../source-settings/push.md), [`&room`](room.md), [`&view`](../advanced-settings/view-parameters/view.md), [`&scene`](../advanced-settings/view-parameters/scene.md))
## Details
Adding `&stats` to a URL shows the connection/media stats window.
On desktop, you can hold `CTRL` (or `CMD`) and `Left-Click` a video to get its stats.
On Version 22 you can `Right-Click` -> Stats on a video feed to get its stats.
On mobile, you can just rapidly touch the display to trigger the stats window instead.
The `&stats` URL parameter is for those like vMix users who might not be able to interact with the browser source.
---
description: Forces TCP mode
---
# &tcp
General Option! ([`&push`](../source-settings/push.md), [`&room`](room.md), [`&view`](../advanced-settings/view-parameters/view.md), [`&scene`](../advanced-settings/view-parameters/scene.md))
## Details
Forces TCP mode if connected to a TURN server.
Versus the default, which may be UDP or TCP.
## Related
[turn.md](turn.md)
---
description: Remote control API (HTTP-GET / WSS-based)
---
# &api
General Option! ([`&push`](../source-settings/push.md), [`&room`](room.md), [`&view`](../advanced-settings/view-parameters/view.md), [`&scene`](../advanced-settings/view-parameters/scene.md))
## Aliases
* `&osc`
## Options
Example: `&api=SomeAPIKey`
Value
Description
(key)
API KEY to control VDO.Ninja remotely
## Details
You can use this parameter to enable the HTTP/WSS remote control API for VDO.Ninja. You pass a API KEY value to the parameter, and if it matches the remote control's API KEY, then the remote control interface will be able to send commands to your VDO.Ninja session.
You can control guests in the director's room, or you can control your local microphone and camera, as examples.
Please see [https://github.com/steveseguin/Companion-Ninja](https://github.com/steveseguin/Companion-Ninja) for documentation and details of this command. There is a module for Bitfocus's Companion available, along with HTTP and WSS API endpoints.
Please see [https://companion.vdo.ninja](https://companion.vdo.ninja) for a sample interface to test this command out with. The Companion module is available here: [https://github.com/bitfocus/companion-module-vdo-ninja](https://github.com/bitfocus/companion-module-vdo-ninja)
## Related
[hotkey-support](../guides/hotkey-support/)
[how-to-control-vdo.ninja-with-touch-portal.md](../guides/hotkey-support/how-to-control-vdo.ninja-with-touch-portal.md)
---
description: Shows or hides the chat button
---
# &chatbutton
Sender-Side Option! ([`&push`](../source-settings/push.md))
## Aliases
* `&cb`
* `&chat`
## Options
Example: `&chatbutton=0`
| Value | Description |
| ----- | --------------------- |
| `0` | hides the chat button |
| `1` | shows the chat button |
## Details
Adding `&chatbutton=0` or `1` hides or shows the chat button on the control bar.
## Related
[nomicbutton.md](../viewers-settings/nomicbutton.md)
[and-novideobutton.md](../viewers-settings/and-novideobutton.md)
---
description: Audio playback is muted
---
# &deafen
General Option! ([`&push`](../source-settings/push.md), [`&room`](room.md), [`&view`](../advanced-settings/view-parameters/view.md), [`&scene`](../advanced-settings/view-parameters/scene.md))
## Aliases
* `&deaf`
## Details
Audio playback is muted in VDO.Ninja. If you just want to mute the speaker button temporarily use [`&mutespeaker`](../source-settings/and-mutespeaker.md).
## Related
[and-mutespeaker.md](../source-settings/and-mutespeaker.md)
[noaudio.md](../advanced-settings/view-parameters/noaudio.md)
[and-blind.md](../advanced-settings/video-parameters/and-blind.md)
---
description: Sets a display name label
---
# &label
General Option! ([`&push`](../source-settings/push.md), [`&room`](room.md), [`&view`](../advanced-settings/view-parameters/view.md), [`&scene`](../advanced-settings/view-parameters/scene.md))
## Aliases
* `&l`
## Options
Example: `&label=Steve`
| Value | Description |
| ----------------- | -------------------------------------------------- |
| (no value given) | It will prompt the user for a Display Name on load |
| (string) | Sets the label for the guest/browser tab |
| `TITLEn\SUBTITLE` | [Multiple lines](label.md#multiple-lines-on-alpha) |
## Details
`&label` sets a display name label to the stream ID.
* Uses the label in OBS Studio if dragging the link into OBS Studio.
* Will change the name of the Browser tab to the Label specified.
.png>)
* Shows up in the connection debug Stats window.
 (2).png>)
* If left blank, it will prompt the user for a Display Name on load.
 (1).png>)
* You can use [`&showlabels`](../advanced-settings/design-parameters/showlabels.md) to show the labels in the video sources.
### Multiple lines
Until I figure out a better way of doing this, I've enabled a way to have a display name be on multiple-lines in VDO.Ninja.
`&label=DisplayNameHere\nSubtitleHere` Note the use of as a line break ie:
```
https://vdo.ninja/?label=Steve_Seguin\n(he/him)\nhttps://twitch.tv/vdoninja&push=JaAiVEH
https://vdo.ninja/?view=JaAiVEH&showlabels
```
So it's not super obvious how to do this currently, so I think the next goal will be to add the option to let a guest enter their own sub-title, etc, when joining, using dedicated input fields. But until then, I hope this still helps. You can stylize the sub-label within OBS's CSS section, targeting the following CSS, but please note I'll probably be tweaking the CSS/HTML as well in the future:
```
.video-label>span:nth-child(2) {
font-size: 50%;
display: block;
text-align: center;
}
```
## Related
[showlabels.md](../advanced-settings/design-parameters/showlabels.md)
[and-screensharelabel.md](../newly-added-parameters/and-screensharelabel.md)
[and-labelsuggestion.md](../advanced-settings/setup-parameters/and-labelsuggestion.md)
---
description: Disables all webaudio audio-processing pipelines
---
# &noaudioprocessing
General Option! ([`&push`](../source-settings/push.md), [`&room`](room.md), [`&view`](../advanced-settings/view-parameters/view.md), [`&scene`](../advanced-settings/view-parameters/scene.md))
## Aliases
* `&noap`
## Details
`&noaudioprocessing` disables the web-audio audio processing pipelines of both inbound and outbound audio. This is not the same as disabling echo-cancellation, denoise, or auto-gain; those are not web-audio-based.
Disabling the web-audio processing pipeline can help reduce audio distortion, clicking, and some echo-cancellation issues, especially if your CPU is overloaded.
The web-audio pipeline is like a chain of audio-plugins, loaded into Javascript, which does custom audio processing. This includes the low-cut filters, limiting, compression, audio-visualizers, active-speaker, director-side gain and mute control, and more.
This audio pipeline can start to have problems though if the CPU is overloaded. This can result in odd issues, including clicking. This pipeline is disabled by default in scenes, but it's usually enabled by default for most guest types.
Disabling audio processing will disable many features, such as audio-visualizers, gain control, and loudness-monitoring API functions.
The ability to remotely mute a guest as a director (along with [`&audiogain=0`](../advanced-settings/audio-parameters/and-audiogain.md)) will not work if audio processing is disabled.
---
description: Support for piesocket.com
---
# &pie
General Option! ([`&push`](../source-settings/push.md), [`&room`](room.md), [`&view`](../advanced-settings/view-parameters/view.md), [`&scene`](../advanced-settings/view-parameters/scene.md))
## Options
Example: `&pie=YourPiesocketAPIKey`
Value
Description
(API_KEY)
the only parameter is your own piesocket.com API key
## Details
Third-party handshake-server service option. If using piesocket, you can just do `&pie=APKKEY` to use that service, without deploying any code or servers yourself.
At the time of originally adding this feature, PieSocket was a free service. That has since changed (Dec 2021). VDO.Ninja is not affiliated with PieSocket and never has been. We have no recommendation on whether you should use them or not.
For a free handshake-server though, please instead consider hosting your own on Google Cloud or Amazon AWS with a free micro-server instance. The following server code is compatible with VDO.Ninja: [https://github.com/steveseguin/websocket\_server](https://github.com/steveseguin/websocket\_server)
---
description: A basic guest queuing and approving system
---
# &queue
Director and/or Sender Option! ([`&director`](../viewers-settings/director.md), [`&push`](../source-settings/push.md), [`&room`](room.md))
## Details
`&queue` lets the room's director review guests who join a room.
The option can be used in one of two ways; either as a powerful screening room or as a simple approval system, depending on if the `&queue` option is also used on the director's URL.
`&queue` was changed in v24 to not allow the guest to see the director's video, until the director activates the guest with their pink activate-guest button. Otherwise, it's the same as before. Use [`&screen`](../advanced-settings/guest-queuing-parameters/and-screen-alpha.md) for the old version.
If used on the director's URL, as well as the guest's URL, guests are added to a queue as they join, and the director can connect to those guests with a button in their lower control bar. This feature prevents the director's computer from being overwhelmed with connections.
The guests will not be able to see anyone, until they are transferred or approved. Once approved, the director will be able to see them, and they will be able to see the director.
Guests can be disconnected and they can then rejoin the queue, but when they do they will be at the end of the queue again.
This system can support hundreds of guests in queue, but it is not advisable to use this system if you expect thousands of guests to join.
Looking for feedback!
### Using `&queue` on both director + guest links
The `&queue` option can be added to both the director URL and the guest URL, or just the guest's URL.
Example director link:
```
https://vdo.ninja?director=roomname&queue
```
Corresponding room link:
```
https://vdo.ninja/?room=roomname&queue
```
When `&queue` is added both the guests' links and director's link, there will be a new 'wait list' button added to the director's view, which when pressed, will load the next guest in queue in the director's room. The guest will be able to see the director and only the director then.
The director can add more guests this way, kicking out those they don't want, and continue to cycle thru the queue of guests as they join the room. This setup is designed as a screening room, where the director is expected to transfer the guests to the main production room when appropriate.
When transferred, the guest will no longer be considered in 'a queue' and will be able to see everyone in the new room they were transferred to, and vice versa. The guest will not know which room they were transferred to, and will be unable to rejoin without joining the queue again. You can use the "change URL" button in the director's room if you wish to permanent-transfer a guest to a new link.
This setup is ideal for when dozens or hundreds of guests may try joining a room. The director can load a few guests at a time, preventing their system from being overloaded. Relying on a transfer room prevents the main room from being attacked as well.
### Using `&queue` on just the guest invite link
When `&queue` is added to just the invite link for a guest, and not added to the director's link also, the guest will auto-load for the director, and only for the director. There is no wait-list.
The director will have a button for each joined guest titled "Activate Guest", which will pressed, will accept the guest into the current room as if a normal guest. They will see other activated guests in the room, without needing to be transferred to another room.
This approach to just adding `&queue` to the guest invite links, and not putting the room itself into a screening room, is well suited when you are only expecting just a few guests to join, and not dozens or hundreds, since the director will auto-load the video of each guest who joins.
Since it's possible for a user to just remove `&queue` from their URL when joining, bypassing the need for activation, this method is considered less secure versus the use of the screening room where users are transferred to the main room instead.
### Exempt certain connections from the queue automatically
As a director, you can use [`&view`](../advanced-settings/view-parameters/view.md) in the URL to specify stream IDs that you wish to connect normally, bypassing the queue.
For example:
[`https://vdo.ninja/?director=MyRoom123&codirector&queue&push=mainDirector123&view=coDirectorStreamID123`](https://vdo.ninja/?director=MyRoom123\&codirector\&queue\&push=mainDirector123\&view=coDirectorStreamID123)
[`https://vdo.ninja/?director=MyRoom123&codirector&queue&push=coDirectorID123&view=mainDirector123`](https://vdo.ninja/?director=MyRoom123\&codirector\&queue\&push=coDirectorID123\&view=mainDirector123)
The above links allows a co-director join the room, despite the main director and co-director being in queuing-mode. By specifying each other's stream ID as a listed view value, they can both bypass each other's queue together.
`&view` can accept a list of stream IDs. When in `&queue` mode, `&view` allows connections to join that are not listed, but only if they are brought in via the queue. This makes it a bit of a special case for `&view`, where it otherwise is pretty strict about who connects or not.
### Other queue modes
The "queue" mode, when applied only to the guest-link, has been extended with new options. These modes do not apply when you have `&queue` also on the director's link, however, rather just when added to the guest-invite link only.
These options might be appealing for screening guests when either you don't want to use a transfer room or don't expect too many guests to be in queue.
[and-screen-alpha.md](../advanced-settings/guest-queuing-parameters/and-screen-alpha.md "mention")
[and-hold-alpha.md](../advanced-settings/guest-queuing-parameters/and-hold-alpha.md "mention")
[and-holdwithvideo-alpha.md](../advanced-settings/guest-queuing-parameters/and-holdwithvideo-alpha.md "mention")
## Related
[and-screen-alpha.md](../advanced-settings/guest-queuing-parameters/and-screen-alpha.md)
[and-hold-alpha.md](../advanced-settings/guest-queuing-parameters/and-hold-alpha.md)
[and-holdwithvideo-alpha.md](../advanced-settings/guest-queuing-parameters/and-holdwithvideo-alpha.md)
[and-queuetransfer.md](../advanced-settings/settings-parameters/and-queuetransfer.md)
---
description: Allows remote operation of the zoom and focus, and access to statistics
---
# &remote
General Option! ([`&push`](../source-settings/push.md), [`&room`](room.md), [`&view`](../advanced-settings/view-parameters/view.md), [`&scene`](../advanced-settings/view-parameters/scene.md))
## Aliases
* `&rem`
## Options
Example: `&remote=somepasscode`
| Value | Description |
| --------------------- | -------------------------------------------------------------- |
| (some passcode value) | this string will have to match on both sides of the connection |
## Details
**Android** devices **only**!
Must be enabled by both the sender and viewer with identical passcodes in order to work. This is a security precaution. If you pass no value to `&remote`, it will still work, so long as both sides leave it blank.
In some ways, the `&remote` function gives permissions to a viewer that would otherwise be restricted to a director or the sender themselves.
A director of a room can remotely change focus/zoom of a participant without needing the `&remote` command. This applies to both the main director and any co-director, and that's accessible via their per-guest video settings options.
There is a toggle in the director's room which adds `&remote` to the guest's invite link. (2).png>)
### Remote Zooming using `&remote`
Use the mouse wheel over the video you wish to zoom in or out of as a viewer. The sender needs to support zoom, which often is limited to some webcams and Android devices.
### Remote Focus using `&remote`
Remote focus may also work as well by holding `CTRL` (or Command) while using the mouse wheel. The sender needs to support focus for this to work, which often is limited to some webcams and Android devices. It's sometime listed as "focus distance" in the senders video settings menu.
To check if a device supports zoom or focus, go to [https://vdo.ninja/supports](https://vdo.ninja/supports). It will show whether your browser and the selected camera supports focus/zoom.
If you are the one publishing with an Android device, you can hold the screen down and move your finger up or down to zoom in and out as well; you don't need a remote user or the settings menu to do this.
### Remote Statistics using `&remote`
A bit less accessible, but using `&remote` also gives the viewer permission to request statistic information. The monitoring tool, also used by the VDO.Ninja speed-test, makes use of the `&remote` flag to remote access stats.
[https://vdo.ninja/monitor](https://vdo.ninja/monitor)
Example usage:
Monitoring Link: `https://vdo.ninja/monitor?sid=BaGpHmu,stevetest123`
It will pull statistics data from the sender of a video stream and visualize it, allowing for remote monitoring of stream quality. For this command to work though, the publisher needs to add `&remote` to their URL to allow for remote access.
This reason for needing `&remote` is privacy related, as the statistical information being shared with the monitor page could include information like browser or system data of remote viewers unconnected to the monitoring user. While likely unneeded, adding `&remote=somePassword` to both the monitoring and push links will further increase security with a password check.
The VDO.Ninja speed test ([https://vdo.ninja/speedtest](https://vdo.ninja/speedtest)) has a link at the bottom of the page, which is all already configured to provide remote monitoring of speed test results without needing to play with any parameters or settings.
In regards to `&sid`, you can pass multiple stream IDs, and so long as each remote sender of that stream ID has `&remote` added to their URL, the monitoring page will be able to monitor all those outbound streams.
Nacks per second is similar to packet loss, and so a high nack loss rate implies a restriction on network quality. "quality limitation reason" may also be stated, which can imply whether the CPU or Network is the bottleneck in achieving maximum quality.
If viewers of a stream ID being monitor have a label assigned ([`&label`](label.md)), then that will appear as a label on the monitor page besides the graph, identifying it.
### Remote on Basic Push and View Links
When using the `&remote` control option, the viewer can now remotely hang-up the sender via the right-click menu. The sender needs to remote control enabled for this to work of course.
`&remote`, if used on a push link without a password added, it will now allow the remote viewer limited control (hangup, focus, zoom, detailed stats), even if they don't have `&remote` added to their URL also. When using `&remote`, the option to "reload" the remote browser is now available, so you can potentially reload a remote unattended session that contains`&autostart&webcam`..png>)
---
description: Sets a room ID for the session to join
---
# &room
General Option! ([`&push`](../source-settings/push.md), [`&scene`](../advanced-settings/view-parameters/scene.md), [`&solo`](../advanced-settings/mixer-scene-parameters/and-solo.md))
## Aliases
* `&roomid`
* `&r`
## Options
Example: `&room=RoomID`
Value
Description
(string)
1 to 49-characters long: aLphaNumEric-characters; case sensitive.
## Details
Rooms broadcast to all participants who have joined.
Rooms are complemented by the [`&director=roomname`](../viewers-settings/director.md) function. Directors can have oversight of a room.
Rooms limit the viewing bitrate that guests of a room can request. OBS does not have these viewing limits though.
Rooms have no forced limit on the number of guests allowed, but practically 10 is about the limit I'd recommend.
Adding [`&showonly=xxx`](../advanced-settings/video-parameters/and-novideo.md) and [`&roombitrate=0`](../advanced-settings/video-bitrate-parameters/roombitrate.md) to the guest's URL can be used to help increase the capacity of rooms to 30 or more.
An alternative to a `&room` is a [_faux-room_](../getting-started/multi-person-chat.md), which can be done with:
`https://vdo.ninja/?push=aaa&view=bbb,ccc,ddd`
## Additional info
There's a documentation page dedicated to rooms [here](../getting-started/rooms/).
There's also a video below looking at what sort of performance and system load there is when using an unoptimized group room.
You can reduce CPU load using the [`&broadcast`](../advanced-settings/view-parameters/broadcast.md) flag, if hosting a larger room.
You can also [transfer guests between group rooms](../getting-started/rooms/transfer-rooms.md), using the transfer function that the director has.
## Related
[rooms](../getting-started/rooms/)
[transfer-rooms.md](../getting-started/rooms/transfer-rooms.md)
[director.md](../viewers-settings/director.md)
---
description: >-
Sets the audio mode to stereo and changes default audio settings to improve
audio quality
---
# &stereo
General Option! ([`&push`](../source-settings/push.md), [`&room`](room.md), [`&view`](../advanced-settings/view-parameters/view.md), [`&scene`](../advanced-settings/view-parameters/scene.md))
## Aliases
* `&s`
* [`&proaudio`](../advanced-settings/audio-parameters/and-proaudio.md)
## Options
Example: `&stereo=1`
Value
Description
(no value given)
It behaves like 3 or 1, depending on if you are a guest or not
0
will try to down-mix your mic to mono. Does not enable any pro-audio settings
1
enables it for both push and view (if used on both links)
2
enables it just for viewing requests and not publishing requests
3
enables it for just publishing requests and not viewing requests
4
enables 5.1-multichannel audio support (Experimental and may require a Chrome flag to be set)
5
This is the default if nothing is set. It behaves like 3 or 1, depending on if you are a guest or not
## Details
Adding `&stereo` to the URL will apply audio-specific setting presets. For inbound audio streams, it can be used to increase the audio bitrate from 32-kbps to 256-kbps. For outbound streams, it will disable echo-cancellation and noise-reduction. When applied to both the outbound and inbound sides of an audio stream, it will also enable stereo audio if available.
There are a variety of different modes that apply different combination of presets. You can also override any preset with other URL parameters, such as [`&audiobitrate`](../advanced-settings/view-parameters/audiobitrate.md), [`&outboundaudiobitrate`](../source-settings/and-outboundaudiobitrate.md), and [`&aec=1`](../source-settings/aec.md).
If using a microphone, wearing headphones is strongly recommended if using this parameter, along with knowledge of correctly setting your microphone gain settings. Echo and feedback issues can occur if this option is used incorrectly.
When using this option in a group room, you can't simply just apply this URL option to the director and have it apply to all guests. You will need to add the flag to each guest and to each scene-link to enable the pro-audio stereo mode. Depending on the value you pass to the URL parameter, you will get slightly different outcomes.
### More Details
`&stereo` and `&proaudio` currently do the same thing, so they are just aliases of each other. When used, they can be used to setup the audio transfer pipeline to allow for unprocessed, high-bitrate, stereo audio.
Use of this option is generally for advanced users who understand the consequences of enabling this. High-quality audio can cause audio clicking, reduced video quality, feedback issues, low volume levels, and higher background noise levels.
For stereo-channel support to work, you will want both the viewer AND the publisher of the stream to have the respective `&stereo` flag add to their URL.
You can customize things further using [`&aec`](../source-settings/aec.md), [`&ag`](../source-settings/autogain.md), [`&dn`](../source-settings/and-denoise.md), [`&ab`](../advanced-settings/view-parameters/audiobitrate.md) and [`&mono`](../advanced-settings/view-parameters/mono.md). These flags will override the presets applied by the `&stereo` flag. Please note, depending on your browser, enabling `&aec`, `&ag`, or `&dn` can force disable stereo audio.
The most powerful mode is `stereo=1` , which if enabled:
* Turns off audio normalization or auto-gain when publishing ([`&push`](../source-settings/push.md))
* Turns off noise-cancellation when publishing
* Turns off echo-cancellation when publishing
* Enables higher audio bitrate playback, up to 256-kbps, when listening ([`&view`](../advanced-settings/view-parameters/view.md))
If the parameter is used, but left without a value, it is treated as a special case (either 1 or 3). Please see follow link for more info:
[https://docs.google.com/spreadsheets/d/e/2PACX-1vS7Up5jgXPcmg\_tN52JLgXBZG3wfHB3pZDQWimzxixiuRIDbeMdmU11fgrMpdYFT6yy4Igrkc9hnReY/pubhtml](https://docs.google.com/spreadsheets/d/e/2PACX-1vS7Up5jgXPcmg\_tN52JLgXBZG3wfHB3pZDQWimzxixiuRIDbeMdmU11fgrMpdYFT6yy4Igrkc9hnReY/pubhtml)
| Option | alias | aec | autogain | denoise | stereo playback | stereo output | default ab in | max ab out | limited ab in | cbr |
| :---------: | ----- | ----- | -------- | ------- | --------------- | ------------- | ------------- | ---------- | ------------- | ---- |
| `&stereo=0` | off | on | on | on | _off_ | _no_ | 32 | 510 | 510 | _no_ |
| `&stereo=1` | both | _off_ | _off_ | _off_ | on | yes | 256 | 510 | 510 | yes |
| `&stereo=2` | in | on | on | on | on | _no_ | 256 | 510 | 510 | yes |
| `&stereo=3` | out | _off_ | _off_ | _off_ | _off_ | yes | 32 | 510 | 510 | _no_ |
| `&stereo=4` | multi | _off_ | _off_ | _off_ | on (5.1) | yes | 256 | 510 | 510 | yes |
### Newbie mode
The default mode when `&stereo` is used alone is `&stereo=5`, which acts like either `&stereo=3` or `&stereo=1`, depending on whether the link its applied to is a room guest or not. This option will make the most sense for most users.
| Option | Context | alias | aec | autogain | denoise | stereo playback | stereo output | default ab in | max ab out | limited ab in | cbr |
| ----------- | ----------- | ----- | ----- | -------- | ------- | --------------- | ------------- | ------------- | ---------- | ------------- | ---- |
| `&stereo=5` | Regular/OBS | 5 | _off_ | _off_ | _off_ | on | yes | 256 | 510 | 510 | yes |
| `&stereo=5` | Director | 5 | _off_ | _off_ | _off_ | on | yes | 32 | 510 | 510 | _no_ |
| `&stereo=5` | Room Guest | 5 | _off_ | _off_ | _off_ | _off_ | yes | 32 | 510 | 510 | _no_ |
### iOS Devices
| Option | alias | aec | autogain | denoise | stereo playback | stereo output | default ab in | max ab out | limited ab in | cbr |
| ----------- | ----- | --- | -------- | ------- | --------------- | ------------- | ------------- | ---------- | ------------- | ---- |
| iOS devices | | on | on | on | _off_ | _off_ | 32 | 32 | 32 | _no_ |
Just for reference, the audio codec used by VDO.Ninja is OPUS (48khz), which can provide high-fidelity music transfer when the audio bitrate is set to 80-kbps per channel or higher. The default audio bitrate used is 32-kbps VBR, which is sufficient for most voice applications. Increasing the audio bitrate to a near-lossless 500-kbps or something may end up causing more problems than anything, but that is supported if needed.
### WHIP
`&stereo` now works with the WHIP output, so if enabled, you'll publish stereo 2.0 with a default audio bitrate of around 80 to 100-kbps; otherwise the default is mono at around 60kbps. These defaults bitrates might be changed own the road.
### &stereo=8
7.1 surround sound audio is being supported now, in a technical sense, although really only if the source is a server stream. To use, add `&stereo=8` on the viewer end. (5.1 multi channel was around supported with `&stereo=4` I think)
## Related
[audiobitrate.md](../advanced-settings/view-parameters/audiobitrate.md)
[and-outboundaudiobitrate.md](../source-settings/and-outboundaudiobitrate.md)
[and-screensharestereo.md](../newly-added-parameters/and-screensharestereo.md)
---
description: Allows a user to save and then later restore their streaming session settings
---
# &sticky
General Option! ([`&push`](../source-settings/push.md), [`&room`](room.md), [`&view`](../advanced-settings/view-parameters/view.md), [`&scene`](../advanced-settings/view-parameters/scene.md))
## Details
Allows a user to save and then later restore their streaming session settings via the use of local storage.
Clearing the browser's cache will clear the settings.
This will not work if the site is wrapped as an IFRAME.
The user will be prompted with a pop-up when they return to the site, after using `&sticky`, to see if they wish to recover their previous settings. These settings are those stored in the URL only, so it essentially loads the previously used URL.
There is a toggle in the director's room which adds `&sticky` to the guest's invite link.
### New in [v23](../releases/v23.md)
Added a little "pin" icon to the end of the copy/view link when sharing your camera. Pressing it is the same as using `&sticky` on your URL, as next time you visit VDO.Ninja it will ask you if you wish to reload your [`&push`](../source-settings/push.md) link.
`&sticky` and the "save room" button won't work for links loaded in OBS Studio anymore - there isn't a usecase for this really, and using `&sticky` there just complicates things for some users.
## Related
[and-clearstorage.md](../advanced-settings/settings-parameters/and-clearstorage.md)
---
description: Lets you specify a STUN server for webRTC negotiation
---
# &stun
General Option! ([`&push`](../source-settings/push.md), [`&room`](room.md), [`&view`](../advanced-settings/view-parameters/view.md), [`&scene`](../advanced-settings/view-parameters/scene.md))
## Details
This parameter lets you specify a STUN server for webRTC negotiation. The default STUN servers use those provided by Google (and recently also Cloudflare), at `stun:stun.l.google.com:19302`, but with this command you can set your own.
`&stun` will overwrite the existing STUN values provided by VDO.Ninja. If you wish to keep the existing STUN server options, adding additional options, or if you wish to add multiple custom STUN servers, you can use the related [`&addstun`](../newly-added-parameters/and-addstun.md) parameter. This is the same idea, but when used it won't overwrite the existing STUN options.
Using `&stun` and [`&addstun`](../newly-added-parameters/and-addstun.md) together will let you specify two custom STUN servers.
Setting `&stun` to false will clear the default STUN servers.
If your STUN server requires a password, you can pass the STUN server address with semi-comma separated values in the form `&stun=USERNAME;PASSWORD;ADDRESS`
Basic sample usage of `&stun`:
[`https://vdo.ninja/?push&stun=stun:stun4.l.google.com:19302`](https://vdo.ninja/?push\&stun=stun:stun4.l.google.com:19302)
### About STUN servers
A STUN (Session Traversal Utilities for NAT) server is used to discover a device's public IP address and port, especially when it is behind a Network Address Translator (NAT), facilitating peer-to-peer communication in technologies like WebRTC.
If your browser has disabled WebRTC IP leaking, then the STUN servers may be pretty useless, as the only IP your browser will share with other peers is any obtained from the relay server.
Without a STUN server though, you will still share your local IP, the HOST candidate type, as well as any RELAY candidates obtained from available turn servers.
The magic with VDO.Ninja and peer-to-peer webRTC is largely made possible by STUN servers.
### More about SRFLX vs PRFLX candidate modes
When dealing with ICE (Interactive Connectivity Establishment) candidates, you may encounter terms like "srflx" and "prflx," which refer to different types of ICE candidates. ICE is a protocol used for establishing peer-to-peer communication sessions, often for real-time audio and video communication.
1. **srflx (Server Reflexive)**:
* Server reflexive candidates are created when a device behind a Network Address Translator (NAT) sends a request to a STUN (Session Traversal Utilities for NAT) server. The STUN server then sends a response back, and this response contains a reflexive candidate. This reflexive candidate represents the public IP and port of the NAT device.
* Srflx candidates are used to traverse NATs and allow the devices on both sides to find a route to communicate through the NAT.
* Srflx is the most common candidate type seen when making a connection with another remote peer on the Internet, via VDO.Ninja.
2. **prflx (Peer Reflexive)**:
* Peer reflexive candidates are also a result of communication with a STUN server, but unlike server reflexive candidates, they represent the reflexive address of the remote peer, not the local device. In other words, they are the public IP and port of the other side, as observed by the STUN server.
* Prflx candidates can be helpful in situations where a WebRTC peer wants to communicate with another peer, and it needs to discover the public address of that peer to establish direct communication.
* Prflx are not common among VDO.Ninja connections, but may be seen when tethering, using a symmetrical firewall, or other non-common networking setups.
In summary, srflx and prflx candidates both involve the use of STUN servers to discover reflexive addresses, but srflx represents the public address of the local device (behind NAT), while prflx represents the public address of the remote peer. These types of candidates are crucial for WebRTC communication because they help establish peer-to-peer connections across NAT devices and firewalls.
## Related
[and-addstun.md](../newly-added-parameters/and-addstun.md)
[turn.md](turn.md)
---
description: Shows a help-screen on the guest joining
---
# &tips
Sender-Side Option! ([`&push`](../source-settings/push.md))
## Details
Shows a help-screen on the guest joining.
Also available as a director room toggle to add to the guest's invite link.
---
description: Lets you specify a custom TURN server or disable all TURN servers
---
# &turn
General Option! ([`&push`](../source-settings/push.md), [`&room`](room.md), [`&view`](../advanced-settings/view-parameters/view.md), [`&scene`](../advanced-settings/view-parameters/scene.md), [`&director`](../viewers-settings/director.md))
## Options
Example: `&turn=steve;setupYourOwnPlease;turn:turn.vdo.ninja:443`
Value
Description
(user;pwd;turnserveraddress)
Set this TURN server to turnserveraddress with username user and password pwd
false | off
Disable the use of the TURN servers
## Details
Several TURN servers are provided by Steve for free, for now, and these are automatically selected based on your geographic location. You may wish to use your own privately hosted TURN server instead though, and the `&turn` is one flexible way to select it.
### Locations
* Canada
* Germany
* USA
* France/UK
### **Example Usage**
`https://vdo.ninja/?turn=steve;setupYourOwnPlease;turn:turn.vdo.ninja:443&relay`
Note the use of `turn:`, and in the case of TLS/SSL, `turns:`
### **More Info**
TURN Servers are designed to help certain users connect when they are behind a firewall or other network restriction. About 1 in 10 users need a TURN server to use VDO.Ninja; if you are having problems, check to see if they are using the TURN server.
Sometimes, rarely, using your own TURN server can improve video quality for some users, if the public network routing is very bad and the TURN server is hosted on a high-quality private network, like Google Cloud. Details are provided in the code repo no how to deploy your own (turnserver.md).
TURN servers are NOT something you can use to share one video stream with multiple viewers. (That is an SFU server, which is out of scope of this article.) A TURN server acts like a middle-man, routing the encrypted data between two peers, mainly when those two peers are unable to speak directly themselves.
Using a TURN server can also hide your IP address from other peers. You will need to use [`&relay`](and-relay.md) to FORCE the TURN server to be enabled, as otherwise the system will still try to use a direct p2p connection, instead of the TURN server. You may want to add turn and relay flags to both the viewer and the sender side, to ensure things are correctly set.
[https://vdo.ninja/speedtest](https://vdo.ninja/speedtest) performs a connection test using the TURN server. It will select the closest public TURN server to you. At peak hours, these TURN servers might have lower performance compared to at off-peak hours, so consider hosting your own TURN server if absolute maximum performance is needed.
You can check to see if you are using the TURN server by checking the connection stats window (`Left-Click` + `CTRL` while viewing a video. In this stats display, "Relay" implies connected to a TURN server. HOST implies connected via a LAN. SRFLX/PRFLX implies connected directly via [STUN](stun.md).
### Installing your own TURN server
Details on how to setup and deploy your own TURN server is here, although there are also plenty of guides online for this, too:
[https://github.com/steveseguin/vdo.ninja/blob/develop/turnserver.md](https://github.com/steveseguin/vdo.ninja/blob/develop/turnserver.md)
It is possible to store credentials for your TURN server on a server, pulling them as needed via an API, such as from Twilio's API. It is also possible to hard-code the credentials into the app itself. Both these options require self-deploying the website code however.
## Related
[and-tcp.md](and-tcp.md)
[hosted-your-own-turn-server.md](../common-errors-and-known-issues/hosted-your-own-turn-server.md)
[and-relay.md](and-relay.md)
[and-tz.md](../newly-added-parameters/and-tz.md)
# 4K
Sending a 4K video feed with VDO.Ninja is very CPU intensive. Be prepared to use all of 8 real cpu cores (not threads).
## How VDO.Ninja handles video quality
VDO.Ninja has 3 predefined [`&quality`](../source-settings/quality.md) levels:
* `&quality=0` tries to do 1080p (1920x1080 @ 60fps)
* `&quality=1` is the default. It tries to select 720p (1280x720 @ 30fps ) for both screen capture and webcam.
* `&quality=2` tries to do 360p (640x360 @ 30 fps).
By “trying”, I mean that if the resolution is not available, VDO.Ninja defaults to another resolution that the camera supports instead. This way, no errors are thrown and a compatible stream is sent, even if it’s not exactly what you might have desired.
VDO.Ninja is however capable of doing higher resolutions and custom resolutions however; you just need to manually specify the resolution you want. When you manually specify a resolution, if it doesn’t work, an error is thrown.
While I could make a selectable option for 4K in the user interface, another problem with 4K is that it requires a LOT of CPU power to encode. Most users will always select the highest resolution allowed, not understanding that it might actually be a bad idea. Maxing out your CPU can actually result in worse quality with lower frame rates than selecting a lower, safer, resolution.
## Pushing 4K resolution

That all said, you can give “4K” a go by adding `&width=3840&height=2160` to the invite link.
For example then, `https://vdo.ninja/?push=inviteGuest123&width=3840&height=2160`
If the guest does not support 4K, this will give an error to the guest, stating that the video device is over-constrained.
The default frame rate is 60-fps, although if their device does not support that, it will use a lower support frame rate. If you manually specify a frame rate, and the camera or display does not support it, it will also give an error.
## What about the bitrate?
Next, while you might have selected 4K, with the exception of static video screen shares, you cannot transfer 4K video with the default video bitrates set. For action, you will need closer to 40-mbps video bitrates set on the viewer’s end. For talking head videos, you will want over 10-mbps and possibly even more. Without a high enough bitrate set, the video will not stream at 4K and more than likely not maintain 60-fps.
To set a target bitrate add [`&videobitrate=20000`](../advanced-settings/view-parameters/bitrate.md) for 20-mbps for example. This goes on the viewer link.
## Performance issues
As a result, to successfully stream 4K video, you generally need a computer system with 8 real CPU cores or more, running at 3.6ghz or higher. A modern AMD 3900X-series CPU or Intel 9900K CPU are ideal for this task, but a quad-core laptop will not be. You might be able to get away with lesser bitrates and lesser CPU requirements if just screen-sharing text, but it still is not for the faint of heart.
Lastly, macOS users may find that 4K is simply not possible or very difficult. If you do manage to get it working, it might only operate at 5-fps or so. I don’t quite know why this is, but if you intend on sharing 4K video, you might be better off using a Windows PC. It seems to perform better.
# High-def camera
You can customize the playback of videos by added parameters to the VDO.Ninja URL links, along with many other aspects. The default video bitrate of most modern browsers is around 2500-kbps, which is okay, but we can achieve higher video quality if we manually set this to something even higher.
`https://vdo.ninja/?view=streamid&videobitrate=6000`
You’ll notice that we added [`&videobitrate=6000`](../advanced-settings/view-parameters/bitrate.md) to the viewer’s side and not the publishing side. The viewer gets to control the bitrate; every viewer can set their own custom video bitrate in fact.
On the publishing side, the default target resolution is already a high 1280x720 @ 60-fps, but we can set this higher by adding [`&quality=0`](../source-settings/quality.md) to the push link. This will have the publisher’s side try to make available a 1920x1080 video stream, if their camera or video device supports it. If not, it will fall back to 720p. `https://vdo.ninja/?push=streamid&quality=0`
For 1080p60 gaming, you’ll want to set the video bitrate to 12000-kbps or higher, as lower bitrates might cause the frame rate to be quite low otherwise. Otherwise, for talking head-type videos, the default video bitrate is often going to be adequate.
Higher resolution streams, especially 1080p60, requires a LOT of CPU power. Having 4-CPU cores is generally recommend for 1080p60 video streams, and 6 to 8 cores are recommended if you are intending ti game at the same time.
Using Ethernet instead of Wi-Fi will also help to ensure the frame loss at these higher resolutions is managable. At higher resolutions, frame rates are more likely to be unstable.
4K30 video is achievable with VDO.Ninja, with a fast enough computer and with very high video bitrates; often in the realm of 30 to 40-mbps.
As VDO.Ninja dynamically adjusts video resolution and bitrate to match the available Internet connection bandwidth availability, sometimes 1280x720 video resolutions won’t be maintainable. You can run the [https://vdo.ninja/speedtest](https://vdo.ninja/speedtest) to see if you are able to hit at least 2000-kbps, which is about what is needed for smooth 720p video.
---
description: Some basic options to achieve higher quality video
---
# Even higher quality video
You can customize the capture resolution and playback quality of videos by adding parameters to the VDO.Ninja URL.
### Viewer side options
The default video bitrate of most modern browsers is around 2500-kbps, which is okay, but we can achieve higher video quality if we manually set this to something even higher.
[`https://vdo.ninja/?view=streamid&videobitrate=6000`](https://vdo.ninja/?view=streamid\&videobitrate=6000)
You’ll notice that we added [`&videobitrate=6000`](../advanced-settings/video-bitrate-parameters/bitrate.md) to the viewer’s side and not the publishing side. The viewer gets to control the bitrate; every viewer can set their own custom video bitrate in fact. (For some games, a bitrate of 20000-kbps may be needed, but normally that's overkill though, and can actually increase frame loss if it is higher than your connection can handle.)
You can also play with different video codecs; [`&codec=av1`](../advanced-settings/view-parameters/codec.md#av1) is a viewer side option and tends to offer better colors and quality than the default vp8 or h264 codecs, but av1 will use a up a lot more CPU.
Another viewer side option is [`&scale=100`](../advanced-settings/view-parameters/scale.md), which will disable dynamic fit-to-window scaling optimizations. This is especially valuable if wanting to downlscale 4K to 1080p video, as otherwise VDO.Ninja would limit the resolution to the size of the OBS Browser source window. It can also help when there is more than one video on screen, but do note that disabling the auto-scale optimizations to achieve better quality will increase the CPU and network load for all parties.
Sometimes adding some sharpness to the video as a digital video effect in OBS can help improve video quality, especially for video containing fine-text, like a screen share or video overlay. By default text might look a bit soft with VDO.Ninja, and sharpening can resolve it.
 (1) (1) (1) (2).png>)
### Sender side options
On the publishing side, the _default_ target resolution is already 1280x720 @ 60-fps, but we can set this higher by adding [`&quality=0`](../advanced-settings/video-parameters/and-quality.md) to the push link. This will have the publisher’s side try to make available a 1920x1080 video stream, if their camera or video device supports it. If not, it will fall back to 1280x720p. [`https://vdo.ninja/?push=streamid&quality=0`](https://vdo.ninja/?push=streamid\&quality=0)
For 1080p60 gaming, you’ll want to set the video bitrate to 12000-kbps or higher, as lower bitrates might cause the frame rate to be quite low otherwise. Otherwise, for talking head-type videos, the default video bitrate is often going to be adequate.
Higher resolution streams, especially 1080p60, requires a LOT of CPU power. Having 4-CPU cores is generally recommend for 1080p60 video streams, and 6 to 8 cores are recommended if you are intending to game at the same time.
Up to 4K or beyond is possible as well, but you'll need to manually specify the capture resolution with [`&width`](../source-settings/and-width.md) and [`&height`](../source-settings/and-height.md) instead, and it will require significantly more CPU and network bandwidth than even 1080p. You can also gently ask for a specific frame rate with [`&maxframerate=60`](../source-settings/and-maxframerate.md), which is sometimes needed with certain iPhones to force 60-fps at 1080p.
### Connection Quality
As VDO.Ninja dynamically also adjusts video resolution and bitrate to match the available Internet connection bandwidth availability, sometimes 1280x720 video resolutions won’t be maintainable. You can run the [https://vdo.ninja/speedtest](https://vdo.ninja/speedtest) to see if you are able to hit at least 2000-kbps, which is about what is needed for smooth 720p video.
Using Ethernet instead of Wi-Fi will also help to ensure the quality and frame loss at these higher resolutions is obtainable. At higher resolutions, frame rates are more likely to be unstable and the resolution might be throttled to something lower. Packet loss will impact the quality of a video stream quite a bit, and in rare cases, you may need to use [`&relay`](../general-settings/and-relay.md) or [`&meshcast`](../newly-added-parameters/and-meshcast.md) mode to assist in overcoming network throttling or routing issues.
### Group Room Settings
When in a group room, specifically as a guest or director sharing video with another guest, the video will be limited to 500-kbps by default.
The director can increase the total room bitrate using a slider under the room settings menu; the button for is found in the director's lower menu bar.
You can also use [`&totalroombitrate=4000`](../advanced-settings/video-bitrate-parameters/totalroombitrate.md) to set a higher room bitrate via the URL, as well as experiment with other bitrate options or trying out [`&meshcast`](../newly-added-parameters/and-meshcast.md). Setting the room bitrate too high though can cause everyone in the room to have problems, specifically with overloaded CPUs or network bandwidth saturation. 500-kbps is the default for a reason.
# Mobile phone camera into webcam
This set of instructions will work for Windows, Mac1 and Linux2.
## Simple Steps
1. Go to [https://vdo.ninja/?push](https://vdo.ninja/?push) with your mobile phone and start sharing your camera.
2. Add your VDO.Ninja ‘view’ link as a Browser Source in OBS in a Scene.
1. Select the "Control audio via OBS" option to bring audio in.
2. Resize the source as you see fit.
3. Configure OBS' Virtual Camera to use the Scene or Source as the Output Selection
4. Select “Start Virtual Camera” in OBS.
5. Open your 3rd party program and choose “OBS Virtual Camera” as the Video input.
Detailed steps of how to perform this setup and include audio from the device are explained [here](../guides/use-vdo.ninja-as-a-webcam-for-google-hangouts-zoom-and-more.md).
## Use Cases
OBS VirtualCam is fully compatible with VDO.Ninja and is useful for connecting MULTIPLE different OBS mixers together remotely, so you can take turn producing a show. You can also use it to turn your smartphone into a webcam. You can also share your “live show” with a small group of friends, perhaps those who are also in the show with you, so everyone has a real-time view of the show that is going on.
## Notes
Sometimes you may need to stop/restart the OBS VirtualCam if it starts crashing your computer. If you see nothing but “GREY”, then you need to start it before using it. See “How to use”. If you see just black, its probably because you haven’t put anything into OBS yet.
# Multi-Person Chat
## Two-Person Chat
While you can achieve a multi-person chat with a [group room](rooms/), you can also do it without it.
For example, `https://vdo.ninja/?view=id2&push=id1`
You’ll notice that here we have the link both a PUSH and VIEW parameter. This allows us to view a remote video and publish our own video to others within a single browser tab. This has the advantage over using two browser tabs as echo-cancellation will work with this approach. It is also compatible with mobile devices where two browser tabs isn’t likely feasible.
The downside of this approach is that you’ll need to create a custom link for every person. In this case,
`https://vdo.ninja/?view=id2&push=id1` and `https://vdo.ninja/?view=id1&push=id2`
If you go with a simple group room instead, you won’t need to personalize links in this way, but rather just have a single link for multiple guests.
For example, `https://vdo.ninja/?room=yourroomname`
or for something even cleaner, `https://vdo.ninja/yourroomname`
## Three-Person Chat
To create a 3-person setup, you can list multiple streams IDs as VIEW values alongside the PUSH value into three different personalized links.
`https://vdo.ninja/?view=id1,id2&push=id3`
`https://vdo.ninja/?view=id1,id3&push=id2`
`https://vdo.ninja/?view=id2,id3&push=id1`
# Getting started
Bring remote video and audio streams into your video production software for free. Low-latency and high-quality, VDO.Ninja is flexible tool ideal for the COVID era of remote participation. As a beginner to VDO.Ninja you should take a look at these pages:
* [vdo.ninja-basics.md](vdo.ninja-basics.md "mention")
* [stream-ids.md](stream-ids.md "mention")
* [the-power-of-the-url-parameter.md](the-power-of-the-url-parameter.md "mention")
* [multi-person-chat.md](multi-person-chat.md "mention")
* [rooms](rooms/ "mention")
* [high-quality-camera.md](high-quality-camera.md "mention")
* [mobile-phone-camera-into-webcam.md](mobile-phone-camera-into-webcam.md "mention")
* [cheat-sheet-of-basic-parameters](../advanced-settings/cheat-sheet-of-basic-parameters/ "mention")
---
description: Details and links if interested in making a gift to the developer of VDO.Ninja
---
# Sponsor ❤
[VDO.Ninja](https://vdo.ninja/) is a passion project and is free to use.
If you'd like to donate as a way of saying thank you, please visit Steve Seguin's [GitHub Sponsors](https://github.com/sponsors/steveseguin) page. Donations are appreciated.
While GitHub Sponsors is the main way to donate, there is also [PayPal](https://paypal.me/steveseguin) and [buymeacoffee](https://www.buymeacoffee.com/steveseguin). Some crypto options are also listed on the GitHub Sponsors page, including Bitcoin and Ethereum. If you wish to contribute financially in other ways, please contact Steve directly: [steve@seguin.email](mailto:steve@seguin.email)
If you do make a gift, be sure to let **@steve** know on Discord so he can thank you personally.
User feedback, bug reports, and suggestions are great ways to contribute to the project; they are highly-valued. Spreading the word of VDO.Ninja to those who may find it useful is also greatly appreciated. Community involvement, such as helping to support other users, writing user-guides, and even showcasing what you've made with VDO.Ninja is also appreciated.
If you'd like to grab a VDO.Ninja branded sticker or mug, there is a merch store with a 0% commission fee set. It won't financially support the project, but it's always motivating to see them randomly in a stream. [https://zero.vdo.ninja](https://zero.vdo.ninja).
# What are stream IDs?
Stream IDs are not magical in any way and can be manually or automatically created and reused.
Use [`https://vdo.ninja/?push=STREAMID`](https://vdo.ninja/?\&push=STREAMID) to publish a video and [`https://vdo.ninja/?view=STREAMID`](https://vdo.ninja/?\&view=STREAMID) to remotely view it. If you don't manually specify a stream ID, VDO.Ninja will sometimes generate one for you. You can reuse the generated stream ID if you wish.
Stream IDs only exist when they are actively used; once you stop using a stream ID, it no longer exists until it is used again.
### Additional technical details of stream IDs
* When in a group room, a stream ID can only be accessed from within that same room, unless transferred to a new room by the room's director.
* To make up a valid stream ID of your own, choose something with less than 51-characters of length and ensure it's AlpHaNuMerIc-only.
* A stream ID must not already be in active use, else you will be provided with an error stating this. This isn't the case when using a password however, as the password AND the stream ID must be the same in this case for the stream ID to be considered _already in use_. So, you technically can reuse the same stream IDs, changing only the password, if security is a concern. Even still, you should try to keep stream ID's confidential and change them when appropriate.
* You can use the [`&label`](../general-settings/label.md) property to give a name to a stream, rather than using a stream ID to do the same. Using this strategy of using securely-named stream IDs, while using labels to assign a name to a stream, will improve security and unlock new options, like lower-third display name overlays.
* A director does have a stream ID, and they can be manually assigned to a director in the same way they are assigned to any publisher.
* When a guest shares their screen, while also sharing their webcam, the screen share stream will get its own stream ID. Adding [`&ssid`](../source-settings/screenshareid.md) to the guest link can have the stream ID for that screen share be predictable, appending `_ss` as a value. Otherwise, the screen share stream may have a random stream ID.
# The power of the URL parameter
You can customize the playback of videos by adding query string parameters to the [VDO.Ninja](https://vdo.ninja/) URL links, along with many other aspects. VDO.Ninja is highly flexible in this regard, letting you achieve your desired outcome without needing to code and without additional software.
For example, a simple viewer URL link such as
```
https://vdo.ninja/?view=streamid
```
could be amended to
```
https://vdo.ninja/?view=streamid&videobitrate=500
```
which will cause the viewer to receive the publisher's video stream at a video bitrate of 500-kbps.
Multiple parameters can be appended together by using the ampersand (`&`) as a separating character.
For example, to view the video stream published at stream ID `streamid` at a video bitrate of 500-kbps and set the [`&proaudio`](../advanced-settings/audio-parameters/and-proaudio.md) parameter to `1`:
```
http://vdo.ninja/?view=streamid&videobitrate=500&proaudio=1
```
Some parameters, like [`&view`](../advanced-settings/view-parameters/view.md) will accept a comma-separated list of valid values, so you can do some rather powerful combos, such as publishing your own video (using [`&push`](../source-settings/push.md)) while also viewing multiple others videos. VDO.Ninja will auto-mix the videos together into a single layout for you:
```
http://vdo.ninja/?push=aaa&view=bbb,ccc,ddd
```
[advanced-settings.md](../advanced-settings.md)
[cheat-sheet-of-basic-parameters](../advanced-settings/cheat-sheet-of-basic-parameters/)
# VDO.Ninja basics
VDO.Ninja needs two things to work:
* Someone pushing a video feed out from their device
* Someone viewing that video feed
1. Visit [https://vdo.ninja/](https://vdo.ninja/) with your web browser (Chrome, Edge, Safari).
2. Select `Add your camera to OBS`.
3. Select your camera and audio device from the list of devices.
You will see the video feed of the device on screen.
4. Select `Start` and at the top of the screen a ‘view’ link will appear.
5. Copy this view link and send it to someone you want to have access to this feed, or place it inside an OBS browser source.

### Powered by WebRTC
[WebRTC](https://webrtc.org/) is the magic behind VDO.Ninja. While the magic sauce is so much more than that, WebRTC powers the engine. This way VDO.Ninja works everywhere there is a modern browser. MS Edge, Google Chrome, Mozilla Firefox, Safari, Opera, Vivaldi, Brave. You name it.
VDO.Ninja is a peer-to-peer system. This means for each new person viewing your feed, a new encode is processed. It also is CPU bound since encoding usually takes place on the CPU. Take care not to overload your system. Keep an eye on your CPU usage.
---
description: >-
A room allows for group chat and enables a director to control the room and
access to each stream
---
# Rooms
The rooms feature creates a virtual room where multiple devices can connect to share audio and video. It offers echo-cancellation and text-chat support as well. A room's ‘director’ can manage the guests from the control room, easily accessing individual sources for integration into OBS.
♻️ If a room isn't already in use, you can use and reuse it forever.
🔑 Adding a password will allow you to use your room, even if the same room name is already in use.
🏷️ You can change the room name anytime; just modify the URL.
✈️ If the director transfers a user to a new room, that's a temporary transfer; the user will be moved back to the original room if they reconnect/refresh.
## How does it work?
### How many people can a room support? 📈
* There is Chrome-imposed limit of about 128 peers while using video and chat connections.
* You will probably bump into video decoding limits before reaching a 128 peers limit, due to limits on the host's processor power and to a lesser degree their bandwidth.
If you want a room that can handle 30 people, it can be done. However, everyone in the group needs good internet, a fast computer, or the room needs video previews disabled for guests. The [`&broadcast`](../../advanced-settings/view-parameters/broadcast.md) feature can help accomplish this, for example.
For very large groups (i.e. larger than 40), it's generally advised that you use regular server-based chatting service, like Google Meets, and send a VDO.Ninja invite link to each person individually. This way, you can record the individual streams of those in the Google Meet at a high resolution but still have all the guests see and hear each other.
If you use OBS VirtualCam, now included with OBS v26, you can broadcast from OBS directly into the Google Hangouts or other conferencing software. To avoid audio feedback/echo issues, having the guests wear headphones is suggested.
### Privacy 🔒
* Passwords are available to keep rooms secure, but are optional.
* A room name + password combination makes the room unique. IE: a `?room=roomname&password=GeNeRaTedPaSsWoRd` and a `?room=roomname&password=ThisIsAnotherPassword` are different rooms.
### For guests.... 🧍
Guests have their own link to join a room. They will be able to see all of the other guests in the room, including themselves. Settings to restrict what sources each group member can see or hear are also available.
Guest devices present in the Room will see and hear all other present device video/audio streams.
Text-chat is available to those in the room
The video quality of those in a group room will appear low to guests, but this is to ensure more bandwidth and CPU resources are made available for the OBS's access to the stream. This can be changed with parameters such as [`&totalroombitrate`](../../advanced-settings/video-bitrate-parameters/totalroombitrate.md) which lets you increase the bitrate of a room.
### For the director... 🎬
The director will be able to view the room, without joining it themselves, and they will have controls provided that will let them modify aspects of how the room shows up in their OBS. For example, they will be able to mute certain people so they can't be heard or seen in OBS.
The director can also join the room if needed. Toggle the 'Director will also be a performer' option when creating a room. This can also be done by appending [`&showdirector`](../../viewers-settings/and-showdirector.md) to the director page URL.
The director will be provided isolated direct links to each of those video streams in the group room, allowing for fine-grain mixing control in OBS.
Using OBS Virtualcam (or the Mac equivalent), you can even let your guests view the OBS live stream with sub-100ms of latency. In this case, each guest only needs to view one video stream, the main mixed OBS stream, freeing up group resources to allow for even larger group rooms.
A director can also address a specific guest via full screen text messages, or via dedicated talkback audio.
Text Messages can be broadcast to the room from the director.
## Isolated Solo links for each Room Guest
When you create a room, the guest's feeds will show up in the director’s room. While multiple people can join the director’s room, only the first director to join has the ability to issue commands. Any one in the director room can access the isolated solo streams for each guest though.
Appended to the bottom of the video control box for each guest video is a SOLO LINK button and a link. You can copy the link with either the button or the link, or you can just drag the link (on Windows) into OBS. This gives you an independent window of that guest’s stream, at high quality.
The controls in the VDO.Ninja’s director room only will let you adjust the volume (and mute) that solo video. The ‘add to scene’ links do not apply to solo-links.
You can create a solo link by hand by doing [https://vdo.ninja/?room=RID\&view=SID\&solo](https://vdo.ninja/?room=RID\&view=SID\&solo)
[`&solo`](../../advanced-settings/mixer-scene-parameters/and-solo.md) is left blank, while the [`&view`](../../advanced-settings/view-parameters/view.md) value is specified.
Every time you view a link, in OBS or elsewhere, you increase the load on the remote guests’s computer. Pulling more than one HD feed from a remote guest is not advisable, unless they have a capable computer and good internet connection. As a director, you can disable the preview video in the control box, freeing up a small bit more bandwidth for those connected on very weak connections. (three buttons; video off / video on / binoculars for a HD preview).
---
description: A powerful tool that allows a director to move guests to a different room
---
# How to transfer guests to other rooms
Sometimes you will want to move a user from one room to another. This is often the case if wanting to pre-screen users, or if you want to create break-out rooms. It also is a way to ensure when you kick a user out of a room, they cannot be allowed back in without express permission.
 (1) (1) (1) (1) (1) (1) (1) (1) (1) (1) (1) (1) (1) (1) (1) (1) (1) (1) (1) (1) (1) (1) (1).png>)
### Details
When a user is transferred to another room, they no longer are the owner of that guest. The director of the room you transferred that guest to becomes the owner.
Only the main director can transfer users; anyone can be the director of a room -- it's first come first serve, so be sure to leave the director-window open if you wish to remain the director of a room
When a guest is transferred to a new room, they do not know which room they are transferred to. This allows for privacy and secrecy, allowing for the main landing room to act like a screening room.
The [`&queue`](../../general-settings/queue.md) command can be used in conjunction with rooms and transfer rooms. When you transfer a user from a queue, they will no longer be in any queue once transferred. When in queue, the guest will not be able to see anyone, but the director will be able to see them. When transferred out of the queue, they will be able to see everyone in the room.
If you transfer someone to a room, the passwords for both rooms need to match. This may change in the future.
If someone in a transfer room disconnects or refresh, they will end up back in the original landing room. This is for privacy and security reasons, as once a user is kicked out or disconnected, the expectation is they cannot enter the room again unless explicitly allowed. Be sure that any guest who is transferred has a stable connection; unstable mobile connections or connections using VPN services may get booted out every now and then.
### Alternative option
 (1) (1) (1) (1) (1) (1) (1) (1) (1) (1) (1) (1) (1) (1).png>)
If you'd like to transfer a user to a new room, along with a new password or setting, you can use the Change URL option instead; as seen in the image above. The guest transferred in this fashion WILL be able to see the room they were transferred to, along with any new password. If they get disconnected or if they refresh, they will stay in the new room. This is quite useful if privacy and security are not urgently needed, as it allows for more robust options.
### Creating preset room destinations for quick transfers
There's an option called [`&rooms`](../../director-settings/rooms.md), which allows the director to list multiple room names via the URL. These rooms become buttons that the director can press to pre-arm the transfer button with.
---
description: A guide on how to use Audio Filters & Bitrate in VDO.Ninja
---
# Audio Filters & Bitrate
## Filter Options
There are several Audio Filters in VDO.Ninja. Some of them are turned on by default, some are not. To activate these Audio Filters you have to add them to the source side.
So for example:
[https://vdo.ninja/?push](https://vdo.ninja/?push) (for a basic push link)
[https://vdo.ninja/?room=SOMEROOMNAME](https://vdo.ninja/?room=SOMEROOMNAME) (for a guest in a room)
* Adding [`&proaudio`](../advanced-settings/audio-parameters/and-proaudio.md) to a source link disables [Auto Gain](../source-settings/autogain.md), [Echo Cancellation](../source-settings/aec.md) and [Noise Suppression](../source-settings/and-denoise.md), sets the audio to stereo and the possible outbound audio bitrate to 256-kbps
* the [`&proaudio`](../advanced-settings/audio-parameters/and-proaudio.md) parameter is the same as the [`&stereo`](../general-settings/stereo.md) parameter
Default settings of VDO.Ninja:
There is a very useful google sheet with a matrix for the [`&proaudio`](../advanced-settings/audio-parameters/and-proaudio.md) ([`&stereo`](../general-settings/stereo.md)) parameter:
[https://docs.google.com/spreadsheets/d/1onfIh1hNR1Gh\_mthkhmezzWNUMYKMGKPrwx7T428\_hc/edit#gid=0](https://docs.google.com/spreadsheets/d/1onfIh1hNR1Gh\_mthkhmezzWNUMYKMGKPrwx7T428\_hc/edit#gid=0)
## Audio Bitrate
Options to control the audio bitrate:
1. Add `&proaudio` to the source AND view link to get 256-kbps (echo cancellation, noise suppression and auto gain are then DISABLED)
2. Add `&proaudio` to the view link to get 256-kbps (echo cancellation, noise suppression and auto gain are still ENABLED)
3. Add [`&oab=100`](../source-settings/and-outboundaudiobitrate.md) to the source link to get 100-kbps
4. Add [`&audiobitrate=200`](../advanced-settings/view-parameters/audiobitrate.md) to the view link to get 200-kbps
* `&proaudio` overrides the bitrate of `&oab` if set on the source AND view link or only on the view link -> you get 256-kbps.
* `&audiobitrate` overrides `&proaudio` and `&oab`
This also works for [`&room`](../general-settings/room.md) on the source side and [`&scene`](../advanced-settings/view-parameters/scene.md) on the view side if you are in a room.
Some examples:
1\)
[https://vdo.ninja/?push=SOMESTREAMID](https://vdo.ninja/?push=SOMESTREAMID)
[https://vdo.ninja/?view=SOMESTREAMID\&proaudio](https://vdo.ninja/?view=SOMESTREAMID\&proaudio)
\-> 256-kbps
2\)
[https://vdo.ninja/?push=SOMESTREAMID\&oab=100](https://vdo.ninja/?push=SOMESTREAMID\&oab=100)
[https://vdo.ninja/?view=SOMESTREAMID\&audiobitrate=200](https://vdo.ninja/?view=SOMESTREAMID\&audiobitrate=200)
\-> 200-kbps
3\)
[https://vdo.ninja/?push=SOMESTREAMID\&proaudio](https://vdo.ninja/?push=SOMESTREAMID\&proaudio)
[https://vdo.ninja/?view=SOMESTREAMID](https://vdo.ninja/?view=SOMESTREAMID)
\-> 32-kbps
4\)
[https://vdo.ninja/?push=SOMESTREAMID\&proaudio](https://vdo.ninja/?push=SOMESTREAMID\&proaudio)
[https://vdo.ninja/?view=SOMESTREAMID\&audiobitrate=96](https://vdo.ninja/?view=SOMESTREAMID\&audiobitrate=96)
\-> 96-kbps
To see the audio bitrate
`Right-Click -> Show Stats` or
`Control (Command) + Left-Click`
on a video source
---
description: >-
Screen sharing in browsers only allows for tab-audio or desktop-audio capture;
not window.
---
# How to capture an application's audio
This page contains the standard guide for capturing application-specific audio in Windows. Less complex methods are being developed, with some current [alternative options listed here](audio.md#other-options).
#### Guide: Routing Windows application’s audio to [VDO.Ninja](https://vdo.ninja/)
(For MacOS users, you can use [Loopback by Roguemedia](https://www.google.com/url?q=https://rogueamoeba.com/loopback/\&sa=D\&source=editors\&ust=1622130763272000\&usg=AOvVaw09b4uk6dZqBTznSzHMJcul) instead, or check out this list of free options: [https://docs.vdo.ninja/platform-specific-issues/macos#capturing-audio](https://docs.vdo.ninja/platform-specific-issues/macos#capturing-audio))
* 1\) Install the VB-Cable Virtual Audio device. ([Voicemeeter](https://vb-audio.com/Voicemeeter/) can be used instead)
[https://www.vb-audio.com/Cable/](https://www.google.com/url?q=https://www.vb-audio.com/Cable/\&sa=D\&source=editors\&ust=1622130763273000\&usg=AOvVaw3I-yLt2nEk9AOrRsJ0fH9q)

Tip: If you want to configure the VB Audio driver with custom settings, the recommended sample rate is 48000-hz, as that is the sample used by VDO.Ninja.
* 2\) Load up Window Mixer by typing in Mixer to the windows search bar:

* 3\) For the application you want, select the Output dropdown and select CABLE Input.

* 4\) We can now head over to [https://vdo.ninja](https://vdo.ninja), but we will want to add the advanced URL parameter [`&proaudio`](../advanced-settings/audio-parameters/and-proaudio.md) to the web URL, which disables echo cancellation and other digital effects. It will make the audio sound better and echo cancellation is likely not needed if capturing from a Game or Application window.
For example, [`https://vdo.ninja/?push=myStreamID&proaudio`](https://vdo.ninja/?push=myStreamID\&proaudio)
You can also add this to the view link, which increases the audio quality even more. For example, [`https://vdo.ninja/?view=myStreamID&proaudio`](https://vdo.ninja/?view=myStreamID\&proaudio)
* 5\) In VDO.Ninja, select the Cable Output device.
Tip: If you hold down `CTRL` (`Command`) while selecting inputs, you can select more than one at a time.

* 6\) A simple way to hear the audio as an output is to just unmute the video. Right-click and show the controls, if not visible, then unmute.

* 7\) Alternatively, you can also use the Sound properties for the VB cable to “listen to this device” in Windows, so you can hear the audio even if not in VDO.Ninja. This method might have lower latency than the method in step 6.

## Other options
#### Using OBS to capture audio
While this option still requires a virtual audio cable, as seen above, you can use OBS to capture the application's audio and output the audio from OBS to the virtual cable via the Monitor output in OBS.
Another way of selecting application audio for the Virtual Audio Cable
#### Publishing directly from OBS to VDO.Ninja
An alternative to using a virtual audio cable is to use OBS to capture the audio, and then publish the audio to VDO.Ninja directly using the WHIP-publishing mode.
[WHIP](../advanced-settings/whip-parameters/and-whip.md) is an experimental feature currently in OBS and may require a special version of OBS at the moment to access, but it might be included in OBS by default with the release of OBS v30 or v31.
Check out a demo YouTube video of how to accomplish this:
[Publishing from OBS directly to VDO.Ninja](https://www.youtube.com/watch?v=ynSOE2d4Z9Y)
More details will be provided as the feature develops.
Using WHIP to publish to VDO.Ninja directly from OBS
# How to capture without browser sources
### Vingester.app
Vingester.app can let you do VDO.Ninja to NDI. It uses a browser window and can be used to export a copy of the window to FFmpeg, NDI, or make the source available for window-capture. It is a bit heavy on CPU usage, but on a dedicated computer, it works quite well for hosting a few NDI streams.
[https://github.com/steveseguin/vingester](https://github.com/steveseguin/vingester)
### Electron Capture
Electron Capture is the officially supported tool for doing window capture of VDO.Ninja. It's very light weight and has quite a few command line options to batch start several windows at a time, along with support for hotkeys and other nifty VDO.Ninja specific tasks.
[https://github.com/steveseguin/electroncapture](https://github.com/steveseguin/electroncapture)
If using Electron Capture on Windows, you can currently do `Win+Tab` to switch between virtual desktops --- and sometimes this lets you can put all the VDO.Ninja windows in one desktop, and have a second desktop for vMix etc. It works with some windows setups, and in others, might just show black videos when trying to capture.
### Virtual Cameras and Virtual Audio devices
While this approach will still use a browser source, you can ingest VDO.Ninja into a browser source for an app like OBS Studio, or even something paid like ManyCam, and then export the captured video stream via their Virtual Camera features into another app that supports webcam / video input devices.
Audio can be exported directly via VDO.Ninja into a virtual audio device, either their the [`&audiooutput`](../advanced-settings/setup-parameters/and-audiooutput.md) feature, or from even the right-click context menu, where you can specify which audio output device an audio stream should be played into it. If a virtual audio cable is selected as the output destination, you can then bring that virtual audio cable into any audio application as a raw audio stream, as if it was a microphone or line-in source.
### WHEP / WHIP
There's also WHEP/WHIP output from VDO.Ninja, which is relatively a new technology/feature, and so not quite a replacement for browser sources. That said, OBS Studio is starting to support this ingestion approach, along with GStreamer, many WebRTC CDN servers and services, and perhaps over the coming years something like vMix will adopt this new technology as well. Please provide feedback and requests if using WHIP/WHEP, so i can continue to improve it.
[https://vdo.ninja/whip](https://vdo.ninja/whip)
### Raspberry.Ninja
There's also Raspberry.Ninja ([https://github.com/steveseguin/raspberry\_ninja](https://github.com/steveseguin/raspberry\_ninja)), which supports saving raw VDO.Ninja media streams to disk. While there is a bug that's blocking things from working soothingly, can technically use it to pull raw video sources from VDO.Ninja and push to not just disk, but even NDI, system sockets/pipes, RTSP servers, and much more.
While Raspberry.Ninja need more time to cook when it comes to video ingestion, it is more capable than using WHEP/WHIP alone, and supports the data-channel transport protocol, allow for dynamic settings to be applied and meta information to be transmitted, such as tally-light indicators.
### Third parties
There are some third parties that have integrated with VDO.Ninja already, which are able to pull from VDO.Ninja and make the streams available as RTSP sources or such, but I do not have access to their code sources and so cannot promote their paid services here, but you can perhaps search around to find them online.
---
description: Some cheatsheets to help you get started
---
# Cheat Sheets
#### [VDO.Ninja Basic Concepts Cheatsheet](https://github.com/steveseguin/vdo.ninja/blob/quickstart/basicconcepts/cheatsheet\_obsn\_basic\_concepts.md)
Learn the basic concepts of VDO.Ninja: Rooms, Control Center and Scenes
#### [VDO.Ninja Parameters Cheatsheet](https://github.com/steveseguin/vdo.ninja/blob/quickstart/cheatsheet/cheatsheet\_obsn\_parameters.md)
Learn how to use parameters to customize VDO.Ninja's behavior
#### [VDO.Ninja Automation Cheatsheet](https://github.com/steveseguin/vdo.ninja/blob/quickstart/automation/cheatsheet\_obsn\_automation.md)
Learn how to automate starting up VDO.Ninja, automatically join rooms and scenes with camera and audio devices already selected
#### [VDO.Ninja Mac Audio Routing w Loopback Cheatsheet (example 1)](https://github.com/steveseguin/vdo.ninja/blob/quickstart/loopbackrouting1/cheatsheet\_obsn\_loopback\_routing1.md)
Learn how to route guest and application audio on the Mac using Loopback
Author:
[Chris Marquardt](https://chrismarquardt.com/)
# How to connect a GoPro to VDO.Ninja
A GoPro itself doesn't support streaming directly to [VDO.Ninja](https://vdo.ninja/) on its own, but there are some indirect ways to do it currently.
#### Using a GoPro Hero 8 Black or newer as a USB webcam
While this approach requires a computer, you can connect a GoPro to VDO.Ninja via USB and a computer. The GoPro will appear in your browser and VDO.Ninja for live streaming anywhere.
[https://gopro.com/en/ca/news/how-to-use-gopro-for-webcam](https://gopro.com/en/ca/news/how-to-use-gopro-for-webcam)
#### Using older GoPros as a webcam using HDMI to USB adapters
You can still connect older GoPros to VDO.Ninja on a computer with an HDMI to USB adapter. While it doesn't stream wirelessly to the computer itself, that host computer can then stream the GoPro video stream to any computer in the world wirelessly and with low latency using VDO.Ninja.
[https://gopro.com/en/ca/news/how-to-use-gopro-for-webcam](https://gopro.com/en/ca/news/how-to-use-gopro-for-webcam)
#### Portable laptop-in-a-backpack option
There's also the option of putting something like a Chromebook or MacBook M1 into a backpack, and doing much the same thing -- connect the GoPro to the Chromebook with a long HDMI cable. An HDMI to USB adapter can be used to connect the HDMI to the ultralight laptop, and you can use just the normal VDO.Ninja browser to stream the HDMI video.
As mentioned previously, newer GoPros (such as a Hero 8 Black or newer), can use USB-C instead of HDMI.
If using a service such as Speedify.com on your laptop, you can bond WiFi and Cellular signals together, allowing you to save bandwidth and be truly mobile, while not dropping the video connection. Hardware cellular bonding solutions are available for professionals needing even more connection reliability.
#### Android system with HDMI input support built-in
Another option, one that I haven't tested yet myself personally, is to use an Android tablet device that supports HDMI input.
One such option is this YoloBox production, which I think you can install Chrome onto?. While I haven't tried it, if you can select the HDMI input within Chrome on that device, you might be able to stream to VDO.Ninja with an HDMI device in this way.
[https://www.amazon.ca/YoloBox-Band-Facebook-YouTube-Encoder/dp/B07PP6KHHV](https://www.amazon.ca/YoloBox-Band-Facebook-YouTube-Encoder/dp/B07PP6KHHV)
#### iPad via USB
Some iPads seem to support USB camera support, so using an HDMI to USB adapter with an iPad may allow for connecting a GoPro to VDO.Ninja on the iPad.
#### Screen-sharing the GoPro video preview on Android
Next year, I'll have some mobile apps out that support HDMI input into a mobile phone, with VDO.Ninja as an output, but at present I haven't had the time to do that.
I do however have an app that lets you _screen share_ the output of an Android device to VDO.Ninja. Using it, you can use an android phone to "preview" the GoPro output in full-screen mode, and then with the VDO.Ninja app stream that full-screen GoPro output to VDO.Ninja. This approach would not require HDMI cables.
#### Raspberry Pi or NVIDIA Jetson encoder
One option is to use a Raspberry Pi, which can ingest the HDMI video of the GoPro and stream it to VDO.Ninja over WiFi.
The code for this project is here: [https://github.com/steveseguin/raspberry\_ninja](https://github.com/steveseguin/raspberry\_ninja)
It's still a young project, and while things are functional, it's still mainly for those who are interested in tinkering.
If building your own, you might find that it can be built so small that you might be able to use it on its own as a wireless camera, and not need a GoPro at all.
#### RTMP to WHEP
Open-source projects that can be self hosted can convert RTMP into WHEP, which is compatible with VDO.Ninja. https://vdo.ninja/whep contains a WHEP player, and more and more companies are beginning to offer WHEP natively.
In the future, GoPro may support WHIP output, which would be an alternative to RTMP, and would be compatible with VDO.Ninja directly.
#### Alternatives to VDO.Ninja
Companies like StageTen.tv offer RTMP and WHIP ingest, and while it's not obvious, they can offer a clean output per guest feed for use in VDO.Ninja or OBS Studio.
Restream.io and many open-source projects offer RTMP ingestion, with a way to pull RTMP into OBS Studio, and while there would be a delay, it is an option. Some users will even publish to Twitch, and pull the Twitch stream into OBS Studio, removing ads and overlays using Twitch Turbo and CSS.
In the future, VDO.Ninja may support RTMP to VDO.Ninja directly, via its free Meshcast.io service, however this is still in the works and not official.
_Stay tuned for more options._
---
description: >-
If Wi-Fi isn't holding up for you, you can try connecting over USB or other
adapter-type instead.
---
# How to connect a smartphone to computer via USB
Demoing an Ethernet adapter for an iPhone and VDO.Ninja
Connecting your smartphone to your laptop via USB seems quite appealing, but it's not always the easiest option. Below I provided three options for tethering your phone to better Internet, with the recommended option first.
### Connecting smartphone via Ethernet
One easy option is to buy a smartphone to Ethernet adapter; this can be either USB-C, micro-USB, or Lightning port-based smartphones. These then can connect directly to your router via an Ethernet cable.
You can find details on how to buy and connect such an adapter here: [https://www.pcmag.com/how-to/connect-phone-tablet-to-internet-ethernet-cable](https://www.pcmag.com/how-to/connect-phone-tablet-to-internet-ethernet-cable)
If you'd need to be able to charge while connected, there are adapters that offer charging and Ethernet at the same time. I would recommend buying a 100-mbps adapter over a gigabit adapter, as compatibility will probably be better with the 100-mbps adapter and it is still more than sufficient. There's plenty of options on Amazon for under $20.
### Reverse tethering over USB
If you're trying to get away on a budget or don't have access to Ethernet at all, another option is do a reverse-tether to your computer. You can use your smartphone's USB cable for this, but this method is a bit challenging to setup and not all devices will probably be compatible with it.
There are many approaches to setting this up, such as this one: [https://liliputing.com/2020/03/gnirehtet-reverse-tethering-app-lets-your-android-phone-use-your-pcs-internet-connection.html](https://liliputing.com/2020/03/gnirehtet-reverse-tethering-app-lets-your-android-phone-use-your-pcs-internet-connection.html)
Many of these approaches require root-access to your Android / iPhone device and need a lot of low-level networking setup. As a result, unless your phone already has the feature supported in its settings somewhere, it may be too tricky for most users to setup. A functional paid-option may exist for this, though I'm not sure what it is.
### Reverse tethering over Wi-Fi
If you're still okay with using Wi-Fi, but just need to connect to the computer directly, you can use Windows 10 mobile hotspot option. This is pretty easy to setup, assuming you can find the correct settings on your computer for it and if you have an available Wi-Fi adapter to use as the tether. The option may not appear if you only have one network adapter. Details linked below:
---
description: >-
There are numerous free URL management tools to make using VDO.Ninja even more
flexible
---
# How to edit an invite after sending it
You can use services like [https://short.io](https://short.io) to create aliases of your invite links, leveraging those service platforms to also keep track of invites you have sent out, how many times they have been opened, and also change the VDO.Ninja settings contained in the invite after sending it.
[VDO.Ninja](https://vdo.ninja) lets you move guests between room and change the URL of a guest after they have connected, but it doesn't offer services itself that let you change the URL before the user has connected.
 (1) (1) (1).png>)
I have no relation to Short.io; it's just what service I happen to use. There are plenty of other options out there.
# External guides and how-tos
## Community show format guides and examples
* [D\&D / TTRPG session for recording or streaming](https://docs.google.com/document/d/11YMfVsOw5VNaAexDHwBl-lyEyJcePDC39yC3ZLHF\_pA/view) - by CharisSophia
* [OBS and VDO.Ninja DJ Setup Guide - Community Written Guide](https://app.box.com/s/0wzs9cxcvi4jo114wfrsmwfrpfyhjcbi)
## Screen sharing
* [How to share Desktop Audio on macOS, such as when screen sharing](https://kast.zendesk.com/hc/en-us/articles/360031463111-How-to-stream-computer-audio-on-a-Mac)
## Audio
* [Pro Audio Matrix for \&proaudio or \&stereo](https://docs.google.com/spreadsheets/d/1onfIh1hNR1Gh\_mthkhmezzWNUMYKMGKPrwx7T428\_hc/edit#gid=0)
* [Steve's personal top 3 mic recommendations for podcasting](https://docs.google.com/document/d/e/2PACX-1vSNcKW88bFYg2kNl-3ufrvidhp9z139jH7nR7FC9rsaBRwCStvTJtE9rMa8RrzgTBw8WkAqbaN7o4fb/pub)
## Video
* [How to add custom backgrounds and live video effects](https://snapcamera.snapchat.com/)
* [How to improve your video quality with some better lighting tricks](https://docs.google.com/document/d/e/2PACX-1vTs0So9I7Gx33IKLgxBlMPBTpvhc5JzLi3iFLxSeHEcGRJeSePkzyrStojFN3lEmlVmuPY9MID5DFbJ/pub)
* [How to see your camera's max resolution limit, and if it supports manual focus/zoom](https://obs.ninja/supports)
* [How to send output of your webcam only and not the entire output from OBS into VDO.Ninja](https://github.com/exeldro/obs-virtual-cam-filter)
* [How to apply a green screen to VDO.Ninja streams](https://medium.com/@lordfloofen/free-virtual-green-screen-4c27d04fc731)
* [Info on using "chrome.exe --autoplay-policy=no-user-gesture-required" to force Auto-play in Chrome](https://developers.google.com/web/updates/2017/09/autoplay-policy-changes)
## Self hosted
* [How to deploy your own TURN (relay) server](https://github.com/steveseguin/obsninja/blob/master/turnserver.md)
* [Alternative domain names and other connection methods](https://github.com/steveseguin/obsninja/blob/master/install.md)
* [Consider the IFRAME API as an alternative to self-hosting VDO.Ninja](https://github.com/steveseguin/obsninja/blob/master/IFRAME.md)
## Network
* [How to test your Internet connection quality with a video-echo test](https://obs.ninja/speedtest)
* [How to host your own RTSP server for VDO.Ninja by using OBS with the OBS-RTSP-Server plugin](https://obsproject.com/forum/resources/obs-rtspserver.1037/)
* [How to improve streaming performance and reliability with a Speedify](https://support.speedify.com/article/725-how-to-improve-streaming-via-obs-with-speedify)
* [LAN vs WAN - VDO.Ninja traffic diagram ](https://drive.google.com/file/d/1oI7NYIlf\_RurYoM0TEgJtzBJRV\_wohuh/view)- by saimiri 31
## YouTube Videos
* [Jon Myer VDO.Ninja Playlist](https://www.youtube.com/playlist?list=PL8VJWj2-XLFpFu3G35Hdm1nKZ2xn9\_0\_8)
* [Nilson1489 (German Tutorial) Basics](https://youtu.be/KX\_pYQoYWgA)
* [Nilson1489 (German Tutorial) Rooms](https://youtu.be/6nDOAW\_lzUs)
* [Record multiple sources in OBS Studio](https://youtu.be/OEHgNa49f6c)
* [Control OBS using SocialStream using Touch Portal](https://youtu.be/UNAgm8HmiMk)
* [Control VDO.Ninja with Bitfocus Companion](https://youtu.be/O08mAYkXdOE)
* [Control VDO.Ninja via Touch Portal](https://youtu.be/B\_0WBkHmjqI)
## Other
* [How to stream to a Raspberry Pi and use as a remote monitor](https://awesomeopensource.com/project/futurice/chilipie-kiosk)
* [How to obfuscate (hide) the URL parameters for guest links](http://invite.cam/)
* [How to do VDO.Ninja to NDI output](https://docs.google.com/document/d/e/2PACX-1vR9p03eK7dXMo0izaXwh4YGkBHtLgXmzOpSYMQlB-VT2s2FjlxY\_vpUzCkRZqXdqhnQLQPSoH6NZlG2/pub)
* [How to view Twitch chat while using VDO.Ninja on mobile devices](https://vdo.ninja/twitch)
* [3rd-party written How-To Guide for VDO.Ninja](https://photography.tutsplus.com/articles/how-to-easily-add-a-remote-source-to-streaming-video-with-obs-and-obsninja--cms-35885)
* [A tool to create editable URL invite links](https://short.io/)
---
description: Typically only supported with H264 video and often hit and miss
---
# Hardware-accelerated video encoding
Hardware-accelerated video encoding is a tricky topic; it can sometimes work, but when it does, it doesn't always work as hoped.
It generally only works with H264 video, but it may work with other codecs in rare cases.
On a Windows PC, a Chromium-based browser offers your best chance of it working. Every month it seems the support for hardware encoding improves, which is great. The viewer just needs to request H264 video from your computer for it to have a chance of working. [`&codec=h264`](../advanced-settings/view-parameters/codec.md)
If it works, in the video stats window (`CTRL + Click`), you'll see the video codec type to be listed as External Encoder, if the hardware acceleration is working. CPU load may not decrease always, and there isn't an easy way to tell which encoder is being used, but if it says the codec is `h264`, then it's likely still using just software.
 (1) (1).png>)
Despite software using a lot of CPU, it offers better compatibility, fewer glitches, and technically can still handle dozens of video streams at a time if your CPU is fast enough. Hardware however can be finicky, where glitching is common and a hardware encoder typically can only support three video encoding sessions at a time.
What's really strange about hardware encoding on a PC is that it may actually use MORE CPU than the software-based openH264 alternative. If your goal is to save CPU power, a hardware encoder may just introduce more problems and offer no benefit at all; at least if encoding with a PC.
You can specify whether to use software or hardware H264 by changing the H264 profile ID; this can be specified, for example, using `&h264profile=42e01f`. `42e01f` should trigger the OpenH264 software encoder, if available.
AMD systems, and some Intel systems, the default H264 hardware encoder will limit bitrates. Using VP8 or a software-based H264 encoder could allow for higher bitrates. The software VP8 encoder does seem to use more CPU than the H264 encoders, but it often is more stable, especially for screen shares.
On a MacOS system, Chrome may drop frame rates suddenly when using the H264 encoder.
On older versions of iOS, the H264 encoders can sometimes only support 720p30, while the VP8 software encoder on iOS can support 1080p. This recently changed with the iOS \~15, so newer iPhones can now support 1080p30 with H264. Your iPhone may still get very hot, so I am unsure if its actually hardware-accelerated; newer iPhones will do better than older.
In the past, iOS devices were limited by how many videos could be encoded using H264, often just three total, so keep that in mind. This might have changed with newer iPhones however; untested.
### Android
Many Android phones may not support H264 encoding in Chrome; this seems to vary based on the browser version, device chipset, and other factors. Trying to force H264 with such incompatible devices might result in no video, as the browser isn't always smart enough to know it isn't working. Chrome on Android doesn't seem to have a software-based H264 encoder.
One user has reported that while using Chrome, Brave, and Firefox with their Samsung S23+ has poor performance with video encoding, likely due to using software encoding, Microsoft's Edge browser on Android did make use of the hardware encoding. Performance in this case was near comparable to an iPhone 14 Pro's encoding performance. Users with other devices that also use a Snapdragon GPU may wish to try MS Edge if having lackluster video encoding performance.
With non-Snapdragon GPUs, such as found in entry-level and some mid-range smartphones, the hardware H264 encoder may not be available regardless of browser used. Using software-based encoders may trigger overheating or CPU throttling, especially at higher resolutions, so if you are unable to trigger hardware-encoding on a slower Android device, you may need to be content with lower resolutions and bitrates.
On the Google Pixel the H264/VP8 encoder will glitch like crazy when used in Portrait mode, however it's glitch free when using the VP9 codec via software encoding.
### Nvidia
If a director, choosing to publish video to your group with H264 might reduce some CPU load, but if using an Nvidia graphics card, you may end up forfeiting your ability to use NVenc encoding for RTMP or MKV file recording, since Nvidia only offers typically three encoders. You can unlock this limit, but the benefits of using NVenc with VDO.Ninja often provides no benefits it seems over a software H264 option.
If using a CDN-service like meshcast.io, where a server redistributes the video to a large audience, H264 is highly compatible with most viewers, but this is only true for the OpenH264 profile ID `42e01f` of H264. Hardware-encoded version of H264 may not be compatible with all browsers, such as with Safari viewers, so its not advised.
OperaGX tends to have issues with H264 encoding.
On the bright side, H264 is supported well on macOS, and it seems to use less CPU to decode than VP8. H264 on OBS 27.1 and older (for PC) offers lower packet-loss-induced "rainbow puke" than the VP8 codec, but this isn't a factor anymore with OBS 27.2 and newer. On PC, VP8 and H264 seem to use about the same CPU to decode in OBS. I'd advise you to do your own testing though.
### Minimum resolutions
For many devices that are offering hardware accelerated encoding, a minimum or specific resolution is needed, else the device may switch back to software based encoding.
Sometimes this minimum resolution is 640x360, but other times it might be 1920x1080.
### Embedded and Linux hardware-encoding support
If you're comfortable with Linux, basic publishing into VDO.Ninja is available using GStreamer and Python. The project is located here: [https://github.com/steveseguin/raspberry\_ninja/](https://github.com/steveseguin/raspberry\_ninja/)
Hardware encoding with multiple viewer per encoded stream is supported with this option, although features are limited. It is not for the faint of heart; generally this approach is still reserved for hobbyists, enthusiasts, and developers. A Raspberry Pi can publish 1080p30 to VDO.Ninja, and supports HDMI connected cameras; at least when using this project's code.
Code and quick start deployment images are available for the Raspberry Pi and Nvidia Jetson embedded development boards, along with hardware-encoding support for those platforms.
Other Linux systems are support with the provided code, but it is up to you to ensure the hardware driver and configuration is setup correctly in those cases.
The project will hopefully keep expanding, to include more devices and operating systems.
### H265 / HEVC / AV1
While AV1 hardware encoders are not common at the moment, they should be supported as they are adopted by browsers and hardware manufactures. `&codec=av1`
H265/HEVC however isn't commonly supported by browsers, although Thorium / Safari browsers may support it, it's not an officially supported option. You can give it a try however by using `&codec=h265`.
### OBS WHIP and WHEP
With OBS v30 supporting WHIP output, it's now possible to stream video directly from OBS to VDO.Ninja via WebRTC with hardware accelerated encoding.
There are limitations with OBS's WHIP implementation in version 30 however, which may get addressed in the future, but without a server supporting OBS's WHIP output currently, this option is primarily limited for single point to point video distribution on controlled networks.
You can however use OBS's WHIP output with an SFU server however, such as Cloudflare's WHIP/WHEP server, and VDO.Ninja can ingest the WHEP output from that. This setup would work a bit like how Meshcast works with VDO.Ninja currently, except with the source being specified as WHEP-based, rather than from Meshcast.
---
description: >-
A common question on how to achieve the highest quality capture into OBS for a
remote interview.
---
# How to get highest video quality (for an interview)
The highest quality possible is a bit tricky, as that will depend on certain factors that may be hard to determine without testing and tweaking in advanced.
Depending on what you're trying to do exactly, how many people are being interviewed, and your technical level of savviness, different options may appeal to you.
### Group Room method
The VDO.Ninja group room has a director role, with everyone else being a guest.
The [director](../viewers-settings/director.md) can record locally in browser, to their own disk, or they can record remotely, to the guest's computer. The highest quality recording possible will be to record to the guest's own computer directly, bypassing the Internet. This however currently requires the guest send the recording to you afterwards, which introduces a risk of failure, nor is it always feasible.
While recording the stream as the director themselves is an option, via VDO.Ninja's director control center, better performance and more reliable results can be obtained by using OBS Studio to record the stream.
When using OBS to record, you may wish to use the provided solo-links for each guest, putting each into its own OBS Studio instance, and recording each guest independently. OBS Studio can be opened multiple times, and hardware accelerated encoding is often available up to 3 streams or more. You can also consider checking out [https://obsproject.com/forum/resources/source-record.1285](https://obsproject.com/forum/resources/source-record.1285/), which is a plugin for OBS that lets you record multiple sources at a time with one OBS instance.
If using OBS to record, configure OBS to record at a high bitrate, let's say 20,000-kbps, at perhaps 1920x1080 resolution. For each OBS browser source, which contains the solo-links, will we ensure they are 1920x1080 resolution also, and we will append [`&videobitrate=12000`](../advanced-settings/video-bitrate-parameters/bitrate.md)[`&audiobitrate=160`](../advanced-settings/view-parameters/audiobitrate.md) to each view link.
You can speak to the guest via the director's control center, which will provide echo cancellation for the director's mic, and this provides the easiest setup and operation. If you want even more control over settings and optimizations though, but don't want a director role, you may way to try the next method.
### Manual push/view links method
In this mode, there is no group room, and all guest stream IDs need to be manually specified. You can typically get excellent 1080p recording quality though with the following parameters:
**Guest link:** [`https://vdo.ninja/?push=GUEST_ID&quality=0&proaudio&view=HOST_ID&vb=200&ab=16`](https://vdo.ninja/?push=GUEST\_ID\&quality=0\&proaudio\&view=HOST\_ID\&vb=200\&ab=16)
**Host link:** [`https://vdo.ninja/?push=HOST_ID&view=GUEST_ID&vb=50&ab=16`](https://vdo.ninja/?push=HOST\_ID\&view=GUEST\_ID\&vb=50\&ab=16)
**OBS link\*:** [`https://vdo.ninja/?view=GUEST_ID&vb=12000&ab=128&scale=100`](https://vdo.ninja/?view=GUEST\_ID\&vb=12000\&ab=128\&scale=100)
_\* Note the OBS Browser source should be set to a width of 1920 and a height of 1080._
The idea here is both you and the guest can talk to each other in the browser, at relatively very low quality, while in OBS you are capturing a very high quality version of just the guest. I'd imagine you can record the host locally in OBS, without needing VDO.Ninja in most cases.
I am also assuming the guest is wearing headphones; if not, you may need to remove [`&proaudio`](../advanced-settings/audio-parameters/and-proaudio.md) from their invite link. Removing it will lower the audio quality, but with it added you will not have echo cancellation enabled.
You can improve the quality a small bit further with some added complexity, by having the host use OBS as the video/audio monitor when speaking to the guest, rather than pulling any audio/video in via a browser window. You can also consider using the [Electron Capture app](../steves-helper-apps/electron-capture.md), instead of an OBS browser source, which will let you share one guest video stream with several apps via window-capture.
For the highest quality, you'll want to record the guest at their native resolution, so if each guest is 1080p resolution, you can capture 4 guests in OBS if OBS is recording at 4K resolution, or you can record each guest as their own independent video. Common options here could be to have multiple OBS instances being open, or by using the source-record plugin for OBS: [https://obsproject.com/forum/resources/source-record.1285](https://obsproject.com/forum/resources/source-record.1285/).
### Added sharpening
If doing screen shares, or overlays, adding a bit of sharpening as an OBS video effects filter can also help the recording look better. Sharpening will make lines and fine details, like hair, pop out a bit more. This is especially helpful for text, which is usually a bit soft in video otherwise.
### AV1 video codec
The relatively new AV1 video codec offers better colors, better compression, and often better frame rates than other codecs. If your guest supports it, with a computer that won't overheat because of it, it might be worth trying.
Add [`&codec=av1`](../advanced-settings/view-parameters/codec.md#av1) to the solo- or view-link of the guest you are recording, to get the system to prefer using it instead.
### Packet loss and connection quality
The biggest impact and limitation is normally the connection itself; please sure that both sides have excellent high-quality connections. Bad connections will ruin a stream.
Sometimes using [`&relay`](../general-settings/and-relay.md) or [`&meshcast`](../newly-added-parameters/and-meshcast.md) can help with certain bad connections, in rare cases at least. Meshcast can be used on the sender's side, while `&relay` can be used on either/both side. Normally just avoiding WiFi can resolve many such packet loss issues though.
If the guest is on a mobile device, consider using a USB (lightning) to Ethernet adapter for that phone, to connect it to the Internet router directly, rather than using WiFi. If that isn't an option, bonded cellular connections may be an option for some users as well.
[packet-loss.md](../common-errors-and-known-issues/packet-loss.md "mention")
If packet loss is a still serious issue, then there is a feature in VDO.Ninja to let you record the video directly on the guest's computer, remotely, bypassing the Internet during the recording itself. It's experimental though, so it might only be useful as a backup, but when it works, it's fantastic! The [`&record`](../advanced-settings/recording-parameters/and-record.md) option, added to the guest's link, will let them control the recording, if there is no director present to start/stop the recording.
### Smartphone / computer overheating
If your phone is getting warm, putting a metal heatsink on the backside of the phone directly can help keep it from thermal throttling. You can also try changing codecs, to see if perhaps there is a better option.
As for laptops, ensure they are plugged in and are not overheating.
### Update your smartphone or change browsers
Some smartphones will have limited functionality if using an older version of the operating system. This is especially true of iOS devices, where iOS 16 has several core improvements over iOS 16, for example.
Certain browsers, such as Firefox, should also be avoided in most cases. Chromium-based browsers will offer better control over video bitrates, with more options and features to use.
### As per audio
Avoid Bluetooth or mobile devices for audio sources.
Also refer to [`&audiobitrate`](../advanced-settings/view-parameters/audiobitrate.md) or [`&proaudio`](../advanced-settings/audio-parameters/and-proaudio.md) for options to improve audio bitrate.
# How to control bitrate/quality
## Video Bitrate
The bitrate controls are accessible via a URL parameter that can be added to the VIEW link.
Something like [https://vdo.ninja/?view=yyyyy\&bitrate=10000 ](https://vdo.ninja/?view=yyyyy\&bitrate=10000)will let the viewer request set a 10-mbps bitrate; up to around 20000-kbps is reasonable, but higher is possible in situations. The value is in kilobits per second and the default bitrate is 2500-kbps.
The viewer sets the bitrate generally, although you can set maximum allowed bitrates as the publisher of a stream. See the advanced settings in the wiki for more help here; there are many options available.
When in a group room, the guests will generally get a very low-quality preview of the stream. This can be changed with the [`&totalroombitrate`](../advanced-settings/video-bitrate-parameters/totalroombitrate.md) parameter or via the room's director settings menu. The higher the room bitrate however, the more CPU and Network load will be placed on those in the room.
When dealing with a group scene link, you can use [`&bitrate`](../advanced-settings/video-bitrate-parameters/bitrate.md) as normal, or `&totalbitrate`. There are many [other ways to control bitrates](how-do-i-control-bitrate-quality.md#more-details), in both rooms and push links, with these being the standard options.
## Resolution
Camera resolution by default is captured at 1280x720. You can increase this by changing the quality setting when selecting your camera, or by adding `&quality=0` to the URL. The [`&quality`](../advanced-settings/video-parameters/and-quality.md) parameter acts as a preset, where \&quality=0 is preset for 1920x1080 @ 60-fps, `&quality=1` is 720p60, and `&quality=2` is a gentle 360p30.
You can manually set the video resolution via the URL, using `&width=1920&height=1080`, and this might be helpful when dealing with non-standard aspect-ratios.
If using the OBS Virtual Camera as a source, be sure to activate it in OBS before trying to access it with VDO.Ninja with non-standard resolutions set.
The resolution can also be set on the viewer-side via the `&scale=100` parameter. This scales down the resolution, as a percentage, based on the original camera capture resolution.
By default, VDO.Ninja will try to optimize and scale down the incoming resolution to fit the viewer's window size, but sometimes you might want to disable this. Adding `&scale=100` to the view link can achieve that, as it forces 100% scale, or no scaling in other words.
VDO.Ninja may still scale the video down however, although only if the connection between the two peers is having network issues, if the sender's encoder is having issues, or if the set bitrate is too low to sustain the higher resolution.
## Audio
You can improve audio quality in the same way, by increasing the [`&audiobitrate`](../advanced-settings/view-parameters/audiobitrate.md), but you can get better results by just disabling noise and echo cancellation instead.
[`&proaudio`](../general-settings/stereo.md) is flag that presets many audio options, which can be added to both the sender's and viewser's link to enable stereo audio with no audio processing and a very high audio bitrate set. You may need to be using headphones, especially if in a group room, if using [`&proaudio`](../general-settings/stereo.md) or if disabling the echo cancellation features.
## More Details
[video-bitrate-for-push-view-links.md](video-bitrate-for-push-view-links.md)
[video-bitrate-in-rooms.md](video-bitrate-in-rooms.md)
[audio-filters.md](audio-filters.md)
---
description: If you don't want the resolution to vary
---
# How to lock the resolution
The browser doesn't allow much control over the resolution, which is unfortunate. The published resolution will often change based on network conditions or CPU performance, but also if the bitrate for a video stream is too low.
There are still some options though:
* Ensure you and your viewers have rock solid Internet. Packet loss can cause the resolution to drop, so make sure to avoid packet loss.
* Increase the target bitrate by using [`&videobitrate=20000`](../advanced-settings/video-bitrate-parameters/bitrate.md) on the viewer side. If in a group room, consider using [`&meshcast`](../newly-added-parameters/and-meshcast.md) or increasing the total room bitrate. This is particularly true at higher resolutions with lots of motion.
* Add [`&scale=100`](../advanced-settings/view-parameters/scale.md) to the view links. This will disable any optimization VDO.Ninja applies to limit resolution based on window playback size. You can also try [`&scale=50`](../advanced-settings/view-parameters/scale.md) to lower the resolution, helping to keep the resolution stable at a lower resolution.
* Adding [`&contenthint=detail`](../advanced-settings/video-parameters/and-contenthint.md) to the guest's link is me telling the browser to "lock the resolution to something high", but it may still ignore it. This will tell the browser to lower frame rates instead of resolution, but in some cases the resolution may still drop.
* Using [`&chunked`](../newly-added-parameters/and-chunked.md) on the guest invite links sends video over the data-channels instead, which is something that allows VDO.Ninja to lock the resolution / frame rate with, but this can be very troublesome to use and may increase latency a lot.
This is also experimental and can be buggy, so please report bugs and issues and over time it may be something I can more often recommend.
* In some cases, you can have guests publish video via OBS's WHIP output into VDO.Ninja. This lacks a lot of functionality and remote control, but it should lock the resolution and frame rate. Missed frames and latency may be issues though.
* You can also publish video via [Raspberry.Ninja](../steves-helper-apps/raspberry.ninja/), where I can control resolution also. Just like with OBS's WHIP output, frame loss may be an issue.
* You can record solo links in OBS Studio or with [Vingester.app](../steves-helper-apps/community-contributed-tools.md), which will record the inbound videos at a fixed resolution, despite the source having varying frame rates and resolutions. If recording at a high bitrate and with a touch of sharpness added, you can achieve great results.
# How to control PowerPoint remotely with VDO.Ninja
### Overview
Support for remote PowerPoint slide control. (previous/next slide):
* Documented things quite a bit here: [https://github.com/steveseguin/powerpoint\_remote](https://github.com/steveseguin/powerpoint\_remote)
* I've only tested with Windows + PowerPoint so far, but it can be tweaked to work with more than PPT without much trouble
* Uses AutoHotKey + VDO.Ninja + MIDI to achieve the result; quite a few different ways implement it, with samples provided
* Built-in basic controller added, via [`&powerpoint`](../advanced-settings/settings-parameters/and-powerpoint.md) (aliases: `&slides`, `&ppt`, `&pptcontrols`)
* IFrame sample app provided with larger buttons and sample code to add more custom buttons/actions if needed. (start/stop/etc): [https://vdo.ninja/examples/powerpoint](https://vdo.ninja/examples/powerpoint)
* HTTP / WSS remote control also added; `https://api.vdo.ninja/YOURAPIKEY/nextSlide` and `prevSlide`
* Local Streamdeck support also working, via MIDI
### YouTube Tutorial
Remote control PowerPoint with VDO.Ninja
### Images
Remote PowerPoint Web control via VDO.Ninja (IFrame API)
---
description: Newer iOS devices can support 1080p60 output in some cases
---
# How to get iPhones to output 1080p Videos
iPhones 12 and newer, running higher than iOS 16.0, and with the **rear** camera selected, can access 1080p60 video output in VDO.Ninja. This was tested last with Safari on an iPhone 12 Pro, running iOS 16.2 on [VDO.Ninja v23](../releases/v23.md). (May 5th 2023)
The actual frame rate of the video that the viewer receives may be lower than the 60 or 30-fps capture rate. It may end up ranging from 20-fps to 45-fps. As a result, limiting the capture frame rate of the device to 30-fps, such as with [`&maxframerate=30`](../source-settings/and-maxframerate.md), may help offer more stable frame rates, even if limited to 30-fps. So, 1080p30 may be preferable to 1080p60 in some cases.
Keep in mind, high motion and highly detailed scenes may also require higher bitrates; the default VDO.Ninja encoding bitrate is just barely suitable for stationary talking heads at 1080p60, but increasing the video bitrate to 4000-kbps, up to as high as 20000-kbps, may help.
1080p60 seems to work with H264 video encoding (default) and even VP9 video encoding, if enabled. On a side note, H265 (HEVC) may work Safari to Safari, but it is untested at present and may only work in highly controlled situations. The state of AV1 support though is quickly changing, and may be supported by iPhones in the near future. Both these newer codec options may be quite useful for when 4K streaming becomes more common.
As for older devices, iPhone 11 and older, they may only be able to achieve 1080p30 or 720p60 capture, assuming they are running iOS 16 and up. The front and rear cameras may achieve different frame rates or resolutions, depending on the device. You may need to experiment to find what works best for you specific iOS device, though such as if using an iPhone SE or iPad.
If selecting 1080p60, but getting 720p60, that may be the result of the device defaulting to 720p60 rather than 1080p30. Using `&maxframerate=30&quality=0`, you might be able to to achieve 1080p30 instead.
For example, front facing cameras on an iPhone 6S might be able to achieve 720p60, but the rear camera may achieve 1080p30 max. Trying to force 1080p60 on the iPhone 6S may result in a lower resolution being actually selected, or an error message may appear.
Older versions of VDO.Ninja ([v22](../releases/v22.md) and older), and some specific iOS device models, may need some custom URL tweaking to get the maximum available resolution / frame rate.
### For devices running older iOS versions, see below:
You can force 1080p on many iPhones, but you then need to use [`&codec=vp8`](../advanced-settings/view-parameters/codec.md) also then on older iOS versions.
for example:
[`https://vdo.ninja/?push=streamid&width=1920&height=1080`](https://vdo.ninja/?push=streamid\&width=1920\&height=1080)
and:
[`https://vdo.ninja/?view=streamid&codec=vp8&videobitrate=6000`](https://vdo.ninja/?view=streamid\&codec=vp8\&videobitrate=6000)
Older iOS versions do not support h264 at resolutions higher than 720p30.
If you use VP8 though, you will be using the software-based encoder, which will make the iPhone pretty warm/hot. It also only works only on newer iOS versions (iOS 14, for example).
In newer versions of iOS , it's possible to do 1080p60 with H264 encoding, but only under specific circumstances.
---
description: >-
Guest invites can be configured to ensure guests join with the same stream ID
every time they join, allowing for reusable view- and solo-links.
---
# How to get permanent links
If you connect with the [`&push=xxxx`](../source-settings/push.md) URL parameter set, you essentially are telling the system what you want the 'view=' ID to be. In this case, it would be `xxxx`. This value is referred to as the "stream ID".
As long as the stream ID is not already in use, you can use it to identify the stream you or a guest is publishing with. In so doing, you can ensure you always connect with the same stream ID, making subsequent view- and solo- links reusable.
### Refreshing vs Rejoining
If a guest joins a room without the `&push` value set in advanced, their URL will update to include a randomly generated `&push` value once they start streaming. So, if a guest refreshes their page once they start streaming, they will rejoin with the same stream ID, as the stream ID will be embedded in the URL at that point.
However, if a guest re-joins the room using the original invite link, which didn't have a `&push` value included in it, they will be assigned a new `&push` value once they rejoin.
It's important to note as well that you should not copy and share your VDO.Ninja URL after you've already started streaming, as your URL will contain your unique stream ID at that point. Share the original invite link instead, or modify the URL so it includes a different and unique stream ID to avoid conflicts.
### How to set a custom stream ID
A [`&push`](../source-settings/push.md) ID can be up to around 40-characters in length, using alphanumeric characters, and it can be pretty much anything you want to make up. You don't need to register anything; it just needs to be unique, and preferably, random enough so that it is secure from others also picking the same value.
While you can use a name as a stream ID, it's not very secure to do so. Instead, you can label your streams with [`&label`](../general-settings/label.md) to make it easier to identify. [`&showlabels`](../advanced-settings/design-parameters/showlabels.md) will then show those labels via a video overlay if you want as well.
### Other ways to set a permanent view link
You can also use [`&permaid`](../advanced-settings/setup-parameters/and-permaid.md) on a guest invite link, which will save the randomly generated stream ID to the guest's local browser storage. Every time they rejoin, their stream ID kept in local storage will be reused. With this approach, you do not need to set a stream ID ahead of time, and as long as the guest doesn't clear their cache, change computers, or use a different browser, the stream ID won't change.
Another option is to not use stream IDs at all to specify a video to load into OBS, etc. Instead, you can use custom [scenes](../advanced-settings/view-parameters/scene.md). Scene 1, S2, S3, etc. When a guest joins a room, you can simply assign the guest to a specific scene, and that scene link in OBS would be unchanging. Guests would not automatically be assigned to a scene, so you'd need to manually do that, but you don't need to update any URL in OBS with this approach.
Like the above, you can also use the VDO.Ninja [Mixer App](../steves-helper-apps/mixer-app.md) ([https://vdo.ninja/mixer](https://vdo.ninja/mixer)) to have custom layouts, with "slots", and you can assign guests as they join to certain slots. You can have the system auto-assign guests to the first available slot also, or manually do so.
There are perhaps other ways of doing this as all as well, but for most users, specifying a custom stream ID for each guest is recommended. The use of a spreadsheet to keep track of invites for guests is a great way to manage this, and with the use of URL forwarding services, like [short.io](https://short.io/), you can also change a guest's VDO.Ninja invite link retroactively, via the shortening service.
# How to mirror a video while Full-Screen - For iPads and Teleprompters
To get a video to mirror while full-screened, you have a few options.
One is to just full screen the browser itself; F11 on most desktops. The video itself may not be fullscreen, but the browser will be and should be pretty close to perfect. Adding [`&hideheader`](../advanced-settings/design-parameters/and-hideheader.md) can hide any menu bars, if there are any.
Another option that is undergoing experimental testing as of Sept 23rd 2020 is to use the [`&effects`](../source-settings/effects.md) option, with `&effects=2` applying a mirrored effect to the video before publishing the video.
**Push Link**
[https://vdo.ninja/?push=SOMESTREAMID\&effects=2](https://vdo.ninja/?push=SOMESTREAMID\&effects=2)
**View Link**
[https://vdo.ninja/?view=SOMESTREAMID](https://vdo.ninja/?view=SOMESTREAMID)
So by adding `&effects=2`, the video will be mirrored in a way that can be full screened. There are some limitations with this approach still, but I'm curious to get your feedback.
---
description: >-
Maintaining a smooth 1080p60 can be tricky, but there are variety of options
to achieve the desired results
---
# How to screen share in 1080p
### Bandwidth requirements
To maintain a high quality 1080p60 stream, especially if screen sharing game content, you'll want at least 12-mbps to 20-mbps of upload bandwidth.
You'll also need a pristine Internet connection to maintain a low-latency and smooth result; you can test your connect at [https://vdo.ninja/speedtest](https://vdo.ninja/speedtest). High packet loss will limit the possibility of maintaining both low-latency and high quality video; in such a case, you'll need to prioritize one over the other.
## How to create reusable screen-share links
### Push Link (Sender)
[`https://vdo.ninja/?push=SOMESTREAMID&screenshare&quality=0`](https://vdo.ninja/?push=SOMESTREAMID\&screenshare\&quality=0)
Alias: [`https://vdo.ninja/?push=SOMESTREAMID&ss&q=0`](https://vdo.ninja/?push=SOMESTREAMID\&ss\&q=0)
Copy one of the two links above and **change **_**SOMESTREAMID**_** into a different name**. The name picked just needs to be a unique alphanumeric value is not already in active use.
You can also add [`&fps=60`](../advanced-settings/video-parameters/and-fps.md) to the link, to attempt to force 60-fps, but the default with [`&quality=0`](../advanced-settings/video-parameters/and-quality.md) is already 60-fps.
### View Link (Viewer)
[`https://vdo.ninja/?view=SOMESTREAMID&videobitrate=10000&scale=100`](https://vdo.ninja/?view=SOMESTREAMID\&videobitrate=10000\&scale=100)
Alias: [`https://vdo.ninja/?v=SOMESTREAMID&vb=10000&scale=100`](https://vdo.ninja/?v=SOMESTREAMID\&vb=10000\&scale=100)
Copy one of the two links above and change SOMESTREAMID in the same name as you did for the Push Link. You can change [`&videobitrate=10000`](../advanced-settings/video-bitrate-parameters/bitrate.md) to another value if you want to change the bitrate.
### Explanation
| Parameter | Explanation |
| --------------------------------------------------------------------------------- | --------------------------------------------------------------------------- |
| Push Link | |
| [`&push=SOMESTREAMID`](../source-settings/push.md) | sets a unique stream ID |
| [`&screenshare`](../source-settings/screenshare.md) | selects screen sharing instead of webcam |
| [`&quality=0`](../advanced-settings/video-parameters/and-quality.md) | sets the resolution to 1920x1080p |
| View Link | |
| [`&view=SOMESTREAMID`](../advanced-settings/view-parameters/view.md) | selects the stream ID |
| [`&videobitrate=10000`](../advanced-settings/video-bitrate-parameters/bitrate.md) | sets the video bitrate to 10,000-kbps, you can change the value if you want |
| [`&scale=100`](../advanced-settings/view-parameters/scale.md) | tells the system to not scale down the screen share |
If you have problems maintaining good video quality, you can add [`&codec=av1`](../advanced-settings/view-parameters/codec.md) to the viewer's side to see if it makes the screen share any better. AV1 is a newer codec with better compression efficiency. H264, VP8, and VP9 are other options to try.
### Framerate
Screen sharing at 60-fps is the default, but sometimes this does not always work.
You can try forcing 60-fps by adding [`&fps=60`](../advanced-settings/video-parameters/and-fps.md) to the source (sender-side link). If you get an error, you can try using [`&maxframerate=60`](../source-settings/and-maxframerate.md) instead.
Try disabling variable refresh rates, such as those offered by Freesync or G-Sync.
You may not achieve 60 FPS depending on your hardware, the browser or the type of screen share you use or the viewer uses.
Sharing a chrome window or tab is the best way to get 60 FPS consistently. If you share your screen or any other window you might only get 30 FPS.
Screen sharing a "Window" with Chrome (chromium) tends max out at \~42 FPS, while screen sharing via "Entire Screen" tends to make out close to 59 FPS.
### Frame rate or resolution
You can use the [`&contenthint`](../advanced-settings/video-parameters/and-contenthint.md) parameter in some browsers to suggestion whether to prioritize frame rate or resolution. Sometimes getting both high isn't possible.
[and-contenthint.md](../advanced-settings/video-parameters/and-contenthint.md "mention")
[and-screensharecontenthint.md](../advanced-settings/screen-share-parameters/and-screensharecontenthint.md "mention")
These parameters take detail or motion as a value, based on whether you value resolution or frame rate.
### Versus.cam
For an e-sports optimized version of VDO.Ninja, with many of the settings pre-configured for 1080p60 streaming, check out [Versus.cam](../steves-helper-apps/versus.cam.md).
It's free and uses VDO.Ninja, while adding a nifty management dashboard for monitoring inbound game streams. The management page makes it easy for you to remotely change resolution and bitrate without modifying the URL while live.
[versus.cam.md](../steves-helper-apps/versus.cam.md)
## Still not getting 60-fps?
Using _Entire Screen_ or _Chrome Tab_ capture, instead of _Window_ capture, can increase the frame rate when screen sharing via the Chrome browser:
For some reason, when screen sharing a _Window_ with Chrome, the frame rate is limited to around 42-fps.
If you're needing exactly 60-fps, or are still having issues, continue on for more options:
### Using OBS Studio to capture
#### With the browser and a virtual camera
For the best screen-share results, you can use OBS Studio to capture the gameplay, and bring that into VDO.Ninja via the OBS Virtual Camera. This is an annoying added step, but OBS does a better job at capturing gameplay than the browser does.
Frame rates should be close to 60-fps in this mode, but may vary still vary a bit.
#### Using WHIP from within OBS
An alternative to using the Virtual Camera and browser though is to use a feature in OBS to publish directly to VDO.Ninja.
This is an experimental feature currently and may require a special version of OBS at the moment to work, but it might be included in OBS by default with the release of OBS v30 or v31.
Check out a demo YouTube video of how to accomplish this:
[Publishing from OBS directly to VDO.Ninja](https://www.youtube.com/watch?v=ynSOE2d4Z9Y)
This mode should give OBS Studio control over frame rate and bitrate, so with a good connection it should be possible to lock in a solid 60-fps.
Using WHIP to publish to VDO.Ninja directly from OBS
### Using [\&chunked](../newly-added-parameters/and-chunked.md) mode
A fairly experimental, yet very exciting option to streaming over VDO.Ninja is the use of [\&chunked ](../newly-added-parameters/and-chunked.md)mode.
Chunked mode sends the video and audio over the data-channels, as if streaming via RTMP, rather than via the browser's default method of transmitting video. This provides VDO.Ninja more low-level control over the video, frame rate, and buffering.
This mode is more resistant to packet loss and will not vary the frame rate / resolution during the stream. It does however mean that if you are connection hiccups or is having problems, it will not be able to react and dynamically reduce quality to continuing streaming.
Chunked mode also uses more CPU than the normal mode and so may not respond well to computers that are maxing out their CPU.
To ensure reliability as a result, a buffer is needed; upwards of 1-second buffer delay may be needed to ensure reliable performance.
To screen share using chunked mode, the following is a sample sender-side link:
```
https://vdo.ninja/alpha/?chunked=2000&screenshare&push=STREAMIDHERE
```
A unique part of chunked mode is that the sender sets the bitrate via `&chunked=N`, where N is the kilobits per second of the video.
Viewing the stream is the same as normal:
```
https://vdo.ninja/alpha/?view=STREAMIDHERE&buffer=500
```
[`&buffer`](../advanced-settings/view-parameters/buffer.md) can be used to specify the default buffer delay, which accepts a value in milliseconds. The default may change depending on version of VDO.Ninja, but it's roughly between 500ms and 1s in most cases. Going below 200ms is not advised unless using it over a LAN.
Please provide request/feedback if you use `&chunked` mode, as it's experimental and still being improved upon.
### Meshcast and servers
You can explore using [`&meshcast`](../newly-added-parameters/and-meshcast.md) and [`&relay`](../general-settings/and-relay.md) as options as well. While it is a server-based method of sending video, it can sometimes allow for 1080p video where network conditions are poor.
Meshcast in particular can help stream 1080p video to multiple viewers at once, if the sender does not have a computer and network capable of doing so on their own.
Meshcast may not always be able to achieve 20-mbps speeds, sometimes only 2 to 3-mbps is possible, so it may not always be the best option for those streaming e-sports.
[screen-share-parameters](../advanced-settings/screen-share-parameters/)
---
description: >-
There's a few ways currently to limit or control access to a VDO.Ninja link or
room. More ways will be added in the future.
---
# How to selectively allow access
* One way to limit who can view your stream is with the [`&prompt`](../advanced-settings/settings-parameters/and-prompt.md) option. Essentially, it will ask the publisher of a stream if they wish to allow a certain viewer to connect.
Details here:
[and-prompt.md](../advanced-settings/settings-parameters/and-prompt.md)
* Another option is to use the [`transfer` ](../getting-started/rooms/transfer-rooms.md)room function, as a director. So, invited guests join a public lobby room, and then you can transfer them from that public room to a private secret room with the director's transfer button. Since only the director knows which room the guest is transferred to, the guest can't invite others to the secret room, nor can they rejoin once they disconnect or get kicked.
A further benefit of the transfer room method is that the director can pre-screen guests by observing their webcam and audio stream, rather than relying on just a label name.
* Another option is to use [`&maxconnections`](../source-settings/and-maxconnections.md), limiting the number of connections to something low, like 1, can be sometimes useful in ensuring there is only one viewer for a simple push stream.
* Obviously VDO.Ninja also has [`&password`](../advanced-settings/setup-parameters/and-password.md) support, and that can be useful to have back to back guests in a room, where you simply need to change the password to switch to another guest with matching password. Room names can be all the same, since it's the password AND the room name that create a room's uniqueness.
* Another option is to use [Cloudflare's Zero Trust service](https://www.cloudflare.com/en-ca/zero-trust/), which can be used with a self-hosted version of VDO.Ninja. When a user tries to join with an invite link in this setup, Cloudflare's service will prompt them to sign in first, blocking access to the site. Only users signing in with an approved location, IP address, domain, or email can continue.
* There are additional link-shortner services with password and user-access controls, which can be used to mask an invite-link for VDO.Ninja, and limit who can acess the real link that way. These services can be dynamically updated, allowing you to change the VDO.Ninja invite link after sending out the shortened alias link, and even changing the user-access allowances.
* There are also services designed for queue or user lobby management, which can be used to on-the-fly redirect a selected user to a VDO.Ninja link. [https://app.invite.cam](https://app.invite.cam) is such a service being developed by the developers of VDO.Ninja for such a purpose, although it is still in a young state of development.
More options for user control will be added to VDO.Ninja in the future. Feedback can be provided via the Discord server ([https://discord.vdo.ninja](https://discord.vdo.ninja)) in the #feature-request channel.
# How to send the audio/video output of one OBS to another OBS using VDO.Ninja
In this walk-through we demonstrate how to use VDO.Ninja to stream a low-latency video/audio stream from one OBS Studio to another remote OBS Studio.
#### Requirements
* OBS Studio
* For some Linux or older systems, you may need a virtual camera plugin as well
* A virtual audio cable
* For Windows, use VB-CABLE Virtual Audio
* This is recommended software as it enables proper audio support
* The software is Donationware
* [https://www.vb-audio.com/Cable/](https://www.google.com/url?q=https://www.vb-audio.com/Cable/\&sa=D\&source=editors\&ust=1658835550127888\&usg=AOvVaw1mgCACykvK7pkvmteZz-Mj)
* For MacOS, you have a few choices:
* [https://github.com/steveseguin/obsninja/wiki/FAQ#how-to-capture-audio-on-mac](https://www.google.com/url?q=https://github.com/steveseguin/obsninja/wiki/FAQ%23how-to-capture-audio-on-mac\&sa=D\&source=editors\&ust=1658835550128112\&usg=AOvVaw07GMfUuAZJy6FI8EYhOdd1)
#### Basic Workflow Diagram
Please find below a diagram explaining the basic premise of what we are intending to do in this guide. We will go through it all, one step at a time.

#### Step 0.
This guide assumes you have OBS installed, along with the other required software, though we shall briefly cover these initial installation steps now.
1. Install OBS Studio (or StreamLabs, etc)
[https://github.com/obsproject/obs-studio/releases/](https://github.com/obsproject/obs-studio/releases/)
2. Install the VB-Cable Virtual Audio device.
[https://vb-audio.com/Cable/](https://vb-audio.com/Cable/)
If you are on Mac, you can consider Loopback as a premium alternative option, if having problems.
#### Step 1
We now need to create a virtual webcam so we can connect OBS to VDO.Ninja. If we followed the initial software setup of Step 0 correctly, this should be all smooth sailing.
Just press START VIRTUAL CAM in OBS v26 or newer.
#### Step 2
We will now configure OBS to output audio from the Browser Source to the Virtual Audio Cable. In the OBS settings, under Advanced, we select the Monitoring Device to be our Virtual Audio device. (CABLE Input).
We also want to disable Windows audio ducking.

#### Step 3
In our last configuration step, we want to go into the Advanced Audio Properties in OBS. When there, we want to set up the Audio Monitoring setting to have any audio we want pushed to the Virtual Audio Cable to be set to MONITOR AND OUTPUT.

#### Step 4
We’re ready to now create our VDO.Ninja stream.
There are many ways to do this, but the EASIEST way is to go to VDO.Ninja, click Add your Camera to OBS, and select from the options OBS Virtualcam. This option will set you up with the default settings, such as with audio echo-cancellation on, although you can use URL parameters when visiting VDO.Ninja to customize the settings more.
A popular advanced URL option at this point might be with the stereo flag, so visit [https://vdo.ninja/?stereo](https://vdo.ninja/?stereo) instead of just [https://vdo.ninja](https://vdo.ninja). You can also set your own custom stream ID values, so [https://vdo.ninja/?push=myCustomStreamId123](https://vdo.ninja/?push=myCustomStreamId123), and then give your remote OBS user the link [https://vdo.ninja/?view=myCustomStreamId123](https://vdo.ninja/?view=myCustomStreamId123)
#### Step 5
You can select the Virtual Audio Cable from the audio choices, or instead, you can select your local microphone or multiple audio input sources.
VDO.Ninja will auto-mix if more than one option is selected. Hold `CTRL` (or `command`) to select more than one option.

#### Step 6
Press the green button when ready.
You’ll see a preview of your video stream and a link. This link is what we want to send to our remote OBS studio as an input source.
We can modify this link if we wish to have higher bitrates, for example, [https://vdo.ninja/?view=streamID\&videobitrate=20000](https://vdo.ninja/?view=streamID\&videobitrate=20000) to set a target video bitrate of 20-mbps.

#### Step 7
We send this VDO.Ninja view URL to our remote OBS Studio computer and now we use it to ingest the feed into the OBS there.
To do this, we create a scene and then a Browser Source in OBS. Give it a name and we will fill out the details in the next step.

#### Step 8
In the properties for the Browser Source, we need to fill out a few fields and then hit OK.
* The URL needs to be set to the address we created earlier, ie: [https://vdo.ninja/?view=q3QCScW](https://vdo.ninja/?view=q3QCScW)
* Width needs to match the input video resolution, so likely 1280
* The height also needs to match, so likely 720
* _**Control audio via OBS**_ should be checked, for audio capture to function

SECRET TIP: Some links on VDO.Ninja can be dragged and dropped directly into OBS, avoiding the tedious parts of this step.
#### Step 9
Once you hit OK, the video should appear and auto-play within seconds. There should be no audio feedback if you selected the Control audio via OBS option.
Now we just need to stretch the video to fill the full scene. It should snap into place when full.

All done! And that should be it! Problems?
You can also ask for help on [Discord](https://discord.vdo.ninja/); usually help can be provided within minutes, if not usually within half a day.
### WHIP Output
Newer versions of OBS may also support WHIP output, which VDO.Ninja also supports. While the Virtual Camera might be the better option for many, details on [WHIP are here](../advanced-settings/whip-parameters/and-whip.md).
# How to set up a simple chat room
### Link
With this link you can set up a simple room to chat with friends:
[https://vdo.ninja/?room=SOMEROOMNAME\&audiodevice=0\&videodevice=0\&chatbutton\&cleanoutput\&label](https://vdo.ninja/?room=SOMEROOMNAME\&audiodevice=0\&videodevice=0\&chatbutton\&cleanoutput\&label)
Alias:
[https://vdo.ninja/?r=SOMEROOMNAME\&ad=0\&vd=0\&cb\&clean\&l](https://vdo.ninja/?r=SOMEROOMNAME\&ad=0\&vd=0\&cb\&clean\&l)
Copy one of the two links above and change SOMEROOMNAME into a different name.
### Explanation
| Parameter | Explanation |
| ----------------------------------------------------------------------- | ---------------------------------------------------- |
| [`&room=SOMEROOMNAME`](../general-settings/room.md) | creates a room with a specified room name |
| [`&audiodevice=0`](../source-settings/audiodevice.md) | join with no audio input |
| [`&videodevice=0`](../source-settings/videodevice.md) | join with no camera |
| [`&chatbutton`](../general-settings/chatbutton.md) | shows the chat button |
| [`&cleanoutput`](../advanced-settings/design-parameters/cleanoutput.md) | keeps the room as clean as possible from UI elements |
| [`&label`](../general-settings/label.md) | asks for a name when joining the room |
# How to stream 4K video using VDO.Ninja
Sending a 4K video feed with VDO.Ninja is very CPU intensive. Be prepared to use all of 8 real cpu cores (not threads).
## How VDO.Ninja handles video quality
VDO.Ninja has 3 predefined [`&quality`](../advanced-settings/video-parameters/and-quality.md) levels:
* `&quality=0` tries to do 1080p (1920x1080 @ 60fps).
* `&quality=1` is the default. It tries to select 720p (1280x720 @ 30fps ) for both screen capture and webcam.
* `&quality=2` tries to do 360p (640x360 @ 30 fps).
* also there's `&quality=-1` , which will use the device's default resolution, but this could be anything, low or high, so it's a niche option.
By “trying”, I mean that if the resolution is not available, VDO.Ninja defaults to another resolution that the camera supports instead. This way, no errors are thrown and a compatible stream is sent, even if it’s not exactly what you might have desired.
VDO.Ninja is however capable of doing higher resolutions and custom resolutions however; you just need to manually specify the resolution you want. When you manually specify a resolution, if it doesn’t work, an error is thrown.
While I could make a selectable option for 4K in the user interface, another problem with 4K is that it requires a LOT of CPU power to encode. Most users will always select the highest resolution allowed, not understanding that it might actually be a bad idea. Maxing out your CPU can actually result in worse quality with lower frame rates than selecting a lower, safer, resolution.
## Pushing 4K resolution

That all said, you can give “4K” a go by adding [`&width=3840`](../source-settings/and-width.md)[`&height=2160`](../source-settings/and-height.md) to the invite link.
For example then, [https://vdo.ninja/?push=inviteGuest123\&width=3840\&height=2160](https://obs.ninja/?push=inviteGuest123\&width=3840\&height=2160)
If the guest does not support 4K, this will give an error to the guest, stating that the video device is over-constrained.
The default frame rate is 60-fps, although if their device does not support that, it will use a lower support frame rate. If you manually specify a frame rate, and the camera or display does not support it, it will also give an error.
### Smartphones
If streaming from a smartphone, not all phones can do 4K; my old LG V30 I believe could do 4K30 via [VDO.Ninja](https://vdo.ninja), but my Pixel 4a seems stuck at 1080p30. As well, an iPhone 11 might only be able to 1080p30, an iPhone 12 might be able to do 1080p60, while an iPhone 15 might be able to do 4K30. It might depend on the iOS version, where older iOS versions are pretty limited, so things will change overtime.
A common question I also get is that a certain phone can record 4K60 in the native phone app, so why not also in VDO.Ninja? Well, just because you can record to disk at 4K does not mean the manufacture has added support for 4K streaming via the browser. It requires additional development, nor is it always possible if the hardware encoder used does not support the advanced requirements of WebRTC.
Samsung devices can sometimes use the built in Samsung Internet browser instead of Chrome to get access to higher resolutions and frame rates; 1080p60 for example with new flagship devices. Sometimes changing cameras or video codecs can allow for higher resolutions as well.
The native mobile app version of VDO.Ninja may at some point support additional cameras that the browser does not, but at present there are not enough development resources available for this. It's desired however.
## What about the bitrate?
Next, while you might have selected 4K, with the exception of static video screen shares, you cannot transfer 4K video with the default video bitrates set. For action, you will need closer to 40-mbps video bitrates set on the viewer’s end. For talking head videos, you will want over 10-mbps and possibly even more. Without a high enough bitrate set, the video will not stream at 4K and more than likely not maintain 60-fps.
To set a target bitrate add [`&videobitrate=20000`](../advanced-settings/video-bitrate-parameters/bitrate.md) for 20-mbps for example. This goes on the viewer link.
## Scaling
You may need to add [`&scale=100`](../advanced-settings/view-parameters/scale.md) to the view link to have the video stream at 4K, if the playback window is smaller than 4K. VDO.Ninja by default resizes incoming videos to fit the playback area, and [`&scale=100`](../advanced-settings/view-parameters/scale.md) overrides that, requesting 100% of the available resolution; so unscaled if possible.
### Codec
A bit like bitrate and scaling, changing the video codec can sometimes help with achieving 4K video. [`&codec=av1`](../advanced-settings/view-parameters/codec.md#av1) can help if the bandwidth is limited, as it is more efficient than other codecs. [`&codec=vp8`](../advanced-settings/view-parameters/codec.md#vp8) is universal, while [`&codec=h264`](../advanced-settings/view-parameters/codec.md#h264) can often trigger the hardware encoder to be used. Using a hardware encoder can help reduce CPU load, allowing for 4K if the system would otherwise be CPU-bottlenecked.
Normally you shouldn't need to change codecs, but sometimes it does make a difference.
## Performance issues
As a result, to successfully stream 4K video, you generally need a computer system with 8 real CPU cores or more, running at 3.6ghz or higher. A modern AMD 3900X-series CPU or Intel 9900K CPU are ideal for this task, but a quad-core laptop will not be. You might be able to get away with lesser bitrates and lesser CPU requirements if just screen-sharing text, but it still is not for the faint of heart.
Lastly, MacOS users may find that 4K is simply not possible or very difficult. If you do manage to get it working, it might only operate at 5-fps or so. I don’t quite know why this is, but if you intend on sharing 4K video, you might be better off using a Windows PC. It seems to perform better.
We've successfully streamed 4K50 over 5G cellular Internet at 65-mbps using a MacBook Air M1 and VDO.Ninja.
---
description: Window sharing into Zoom with the Electron Capture app
---
# How to stream into Zoom without OBS
This guide will let you stream video from VDO.Ninja into Zoom as a window share (screen share).
Window sharing into Zoom allows for higher quality video into Zoom, but it may also result in lower frame rates. In this guide, we will assume you are using a VDO.Ninja group room with the desire to share a group scene with Zoom. Sharing a group scene is not required though.
We will be using some software to make window sharing into Zoom more effective and clean. It is technically optionally.
#### Alternative approach for sharing video into Zoom
There is another guide for publishing from VDO.Ninja into Zoom using OBS Studio, which will have the video appear as a webcam in Zoom. As a webcam source, the video will be smooth, but the resolution will be relatively low.
Check out that guide below:
[use-vdo.ninja-as-a-webcam-for-google-hangouts-zoom-and-more.md](use-vdo.ninja-as-a-webcam-for-google-hangouts-zoom-and-more.md)
## Let's get started
### Step 1.
Go to [https://vdo.ninja/](https://vdo.ninja/)
### Step 2.
Click the Add Group Chat to OBS button.
If we were looking to just share our camera, and not a group scene, we could instead just use "Add your Camera to OBS". This guide will assume you are using a group scene though.
### Step 3.
Enter a room name.
Also, check "The director will be performing as well..", so that we can add our local camera and microphone to Zoom as well, if desired.
Then click the Enter the Room’s control Center. We should then enter the “director’s control center”.
### Step 4.
In the director's control center, click the **COPY LINK** button for the **GUEST INVITE** box.
We want to send this link to our guests. The can use this link to **JOIN** the room with their camera.
If we want to join the room ourselves, we can also join as a guest, or we can do so as the director. Since our camera might be in use by Zoom currently, we can add ourselves a bit later on instead
### Step 5.
As guests join the room, they will see each other and be able to talk to each other.
The director of the room will also see each guest in the control center as they join.
### Step 6.
If we copy the **CAPTURE A SCENE LINK** in the director's room, and we open it in a new Chrome tab, we should be able to see all the guests in the room on that page.
We can technically screen share this browser tab into Zoom, especially if we joined Zoom via Chrome also. We will continue this guide assuming you want to share into Zoom via the Electron Capture app however, which offers some performance advantages.
Since we will be using the Electron Capture app instead, we can close the scene link page in our browser after we validated that it works. We will however still use the link we copied in an upcoming step.
### Step 7.
Next, we **download the** [**Electron Capture app**](../steves-helper-apps/electron-capture.md) – [https://github.com/steveseguin/electroncapture/releases](https://github.com/steveseguin/electroncapture/releases) (free)
The Electron Capture will let us share our video into Zoom without any borders and allow us to capture the audio. It also is optimized in resolution for maximum quality transfer from VDO.Ninja to Zoom.
### Step 8.
While it might be possible to capture audio another way, in this guide we will also use a Virtual Audio Cable application to bring the audio into Zoom.
Download and install VB Cable for Windows or macOS - [https://vb-audio.com/cable](https://vb-audio.com/Cable) (Donationware).
**Tip**: When installing VB Cable, on PC, you will want to extract the files, and run the installer in administrator mode.
### Step 9.
Open the Electron Capture app.
We now can put our GROUP SCENE link in Electron Capture's top input field.
The AUDIO OUTPUT DESTINATION needs to point to the Virtual Audio Cable.
Once ready, press GO to load our VDO.Ninja video.
### Step 10.
All the audio should be sent to VB Cable, so you won't hear anything if setup correctly.
While you can resize the Electron Capture app, it's best to run it at 1280x720, which is the default resolution. You can change resolutions by right-clicking the app, along enabling other options, such as pinning the app on top of all others.
The top \~ 5% of the app is draggable, so you click on its top and move it around. The app is frameless, so when window-sharing it into Zoom, the output is clean and exactly 720p resolution.
### Step 11.
To share the video with Zoom, we screen share within Zoom, selecting the the Electron Capture app as the window we want to share.
### Step 12.
To share our Audio with Zoom, we change our MICROPHONE source in Zoom to be the VB Audio Cable.
### Step 13.
Lastly, in Zoom, we ensure the ORIGINAL AUDIO SOURCE option (no echo cancellation), so we can capture the best audio quality possible.
### Step 14.
We can close the director's room if want to at this point, however keeping it open gives you control over the room, allowing you to kick and mute guests as needed.
If we want to include our own microphone and video to the stream, we can also do so via the Director's control center, clicking "enable director's microphone or video" button. We can select our microphone/video that way.
If we do close the director's control center though, we can still add our audio and video to the stream by joining the room as a guest, using the guest invite link we looked at previously.
### Need help?
If stuck, join our Discord support server at [https://discord.vdo.ninja](https://discord.vdo.ninja).
### More information
More on the **ROOM** here:
[Getting started: The Room (VDO Ninja Podcast ep02)](https://youtu.be/m1cIT1kdlEo)
More on **Advanced settings** here:
[Getting started: Power Parameters (VDO Ninja Podcast ep06)](https://youtu.be/l9BNTTNY08s)
---
description: >-
Sending video with a transparent background, or with an alpha-channel (RGBA),
is possible, but rather limited at the moment
---
# How to stream transparent video
If you wanted to stream yourself with a transparent background, or use a WebM file as a transparent effects overlay, it's possible with VDO.Ninja, however a bit limited still.
There's not many ways to bring transparent sources into the browser, nor are there many ways current to stream transparent video.
Lets list some of the methods that do work however:
## Webp-mode supports transparency
[`&webp`](../advanced-settings/view-parameters/webp.md) mode send webp images, which supports transparencies, instead of streaming video, which current does not support transparencies. It does however require quite a bit of CPU and network bandwidth, so its recommend to use low frame rates and low resolutions to avoid problems.
### Sending a video file via webp-mode
With this option, you can select a video file locally that contains a transparent background. WebM file formats support transparent backgrounds and can be opened by the browser.
[`&webp`](../advanced-settings/view-parameters/webp.md) mode supports transparency as noted, so we need to include that on the sender link. We also need to include `&alpha`, to tell the system that we want to include alpha channels (transparency), if possible.
[https://vdo.ninja/alpha/?webp\&push=rPJ5bEb\&fileshare\&alpha](https://vdo.ninja/alpha/?webp\&push=rPJ5bEb\&fileshare\&alpha)
On the viewer side, we can add [`&codec=webp`](../advanced-settings/view-parameters/codec.md#webp) to tell the system we want to pull the video stream as a webp series of images, rather than normal video. Images will transparencies will automatically include them in the display.
[https://vdo.ninja/alpha/?view=rPJ5bEb\&codec=webp](https://vdo.ninja/alpha/?view=rPJ5bEb\&codec=webp)
### Transparent webcam background via webp-mode
As with the above example, you can also send a webcam feed of a person, with their background removed.
Like above, we need to include `&alpha` and [`&webp`](../advanced-settings/view-parameters/webp.md), but we also need need to include [`&effects=5`](../source-settings/effects.md).
The goal here is to remove the background using the VDO.Ninja background removal tool, and then use a transparent image as the background, instead of a normal virtual background image. In the link below, we include a transparent pixel in the URL, so no external file is needed.
[https://vdo.ninja/alpha/?webp\&push=rPJ5bEb\&effects=5\&alpha\&webcam\&imagelist=data%3Aimage%2Fpng%3Bbase64%2CiVBORw0KGgoAAAANSUhEUgAAAAEAAAABCAQAAAC1HAwCAAAAC0lEQVR42mNkYAAAAAYAAjCB0C8AAAAASUVORK5CYII%3D](https://vdo.ninja/alpha/?webp\&push=rPJ5bEb\&effects=5\&alpha\&webcam\&imagelist=data%3Aimage%2Fpng%3Bbase64%2CiVBORw0KGgoAAAANSUhEUgAAAAEAAAABCAQAAAC1HAwCAAAAC0lEQVR42mNkYAAAAAYAAjCB0C8AAAAASUVORK5CYII%3D)
And like before, to view this stream with transparencies, we need to include [`&codec=webp`](../advanced-settings/view-parameters/codec.md#webp) on the view link.
[https://vdo.ninja/alpha/?view=rPJ5bEb\&codec=webp](https://vdo.ninja/alpha/?view=rPJ5bEb\&codec=webp)
This option is highly CPU intensive though; I'd recommend at least a fast 8-core system for this option, as you are doing both AI and heavy image processing workloads.
## Green screening
As with the above option, you can use the digital background effect ([`&effects=4`](../source-settings/effects.md), in this case) to replace your background in VDO.Ninja with a green solid color.
If using an application like OBS or vMix, during playback of the stream you can use a Chroma filter to remove the green background.
This option is pretty standard, and since it streams actual video instead of motion images, you can reduce CPU load, network bandwidth usage, maintain high frame rates, and achieve higher resolutions. There might be some green fringing on the final result, but there are ways to reduce that effect.
 (1) (1) (1) (1) (1) (1) (1) (1).png>)
Another benefit of green screening is you can use an actual physical green screen as well. And this would work without needing AI effects and it would work on anything; not just a person.
When green screening, since color is so important, try using [`&codec=av1`](../advanced-settings/view-parameters/codec.md#av1) as well on the playback view link, as the AV1 codec tends to preserve colors better than [`&codec=h264`](../advanced-settings/view-parameters/codec.md#h264) or [`&codec=vp8`](../advanced-settings/view-parameters/codec.md#vp8), which are normally the defaults. With better colors, it should be easier to chroma-key out the green.
## Chunked mode - partially working
VDO.Ninja has a mode called Chunked, which can be activated on Chromium browsers by adding [`&chunked`](../newly-added-parameters/and-chunked.md) to the push URL.
When also used with `&alpha`, ie:
[`https://vdo.ninja/alpha/?chunked&alpha`](https://vdo.ninja/alpha/?chunked\&alpha)
it will tell the browser to only select video codecs that can encode alpha channels. Normal WebRTC video streaming doesn't support alpha channels, but the chunked mode does. However, if no codec is available in your browser with alpha-channel support, then the chunked mode will fail or default back to a codec that doesn't support alpha channels.
At present, no codecs in Chrome seem to support alpha channels, but when that changes the feature will be automatically available for us.
### Not many transparent sources
At present, virtual cameras and screen shares are likely to not include alpha channels, so while you might try to screen share the [Electron Capture app](../steves-helper-apps/electron-capture.md), which has a transparent background, you'll still have the captured video having a black background.
I'm hoping this isn't the case in the future with Chrome and other Chromium browsers, but I'm not entirely sure.
### Raspberry.Ninja and OBS WHIP output - future possiblities
I've not really sure about this, but you can force video into [Raspberry.Ninja](../steves-helper-apps/raspberry.ninja/), with transparent backgrounds, and VDO.Ninja will play them back. In my previous testing, Chrome refused to play back transparent video streams from Raspberry.Ninja with transparencies, dropping them for black backgrounds instead, but this might change in the future.
If this does change, you might then be able to use OBS as well for streaming transparent video to VDO.Ninja. Or perhaps you'll be able to go from Raspberry.Ninja into OBS via WHEP at some point, but these are all not yet available and are likely years away from being materialized.
---
description: You can host a VDO.Ninja media stream on a website, via the IFRAME API
---
# How to use VDO.Ninja on a website
### Basic embedding
Embedding VDO.NInja into a website should be pretty simple; we're just using the IFRAME element and setting the source to the VDO.Ninja URL we wish to load
```
VDO.Ninja Embedded Iframe
```
You may want to add or remove certain permissions, such as geolocation. Please note that while enabling auto-play is an IFRAME option, unless the parent window has already had a user-gesture interaction, the video inside VDO.Ninja will not autoplay; at least not with audio. Auto-playing of audio is controlled by the browser to limit annoying ads from auto-playing also; overriding this isn't really feasible.
### Adding some security for public deployments
If wanting to use this page for public use, I'd probably want to secure things a bit more. Such as using the `&audience` parameter, which makes it so the viewer can't just publish to your stream ID when you stop streaming yourself.
The audience parameter is available with VDO.Ninja v25.2 and newer.
1. An example push link is this: [https://vdo.ninja/alpha/?audience=12345abcPublishingToken\&push=JkYwyxy](https://vdo.ninja/alpha/?audience=12345abcPublishingToken\&push=JkYwyxy)
2. The view link you'd be provided woudl be something then like this: [https://vdo.ninja/alpha/?audience=HrDrNy3jiA50QzlU\&view=JkYwyxy](../getting-started/vdo.ninja-basics.md)
Example of the provided audience key to use
### Advanced IFRAME API options
There's a sandbox that lets you play with the IFRAME API here: [https://vdo.ninja/iframe](https://vdo.ninja/iframe) , but it might be more complex than you need.
More about the[ ](how-to-use-vdo.ninja-on-a-website.md#advanced-iframe-api-options)[IFRAME API here.](https://docs.vdo.ninja/guides/iframe-api-documentation)
### Transparency
Setting the `allowtransparency` attribute on the IFrame to `true` will allow for the contents to be transparent. You can then make VDO.Ninja transparent by adding `&transparent` to the URL, which sets the page's background to `rgba(0,0,0,0)`.
[https://vdo.ninja/iframe ](https://vdo.ninja/iframe)can demonstrate this by opening [https://vdo.ninja/?transparent](https://vdo.ninja/?transparent) with it.
### Accessing media frames directly for use in a video element
This is a more complex request, but it's possible.
https://versus.cam makes use of the `&sendframes` parameter to send raw video frames to the parent IFRAME, for use in a video element. This requires the VDO.Ninja deployment and the parent frame to share the same site origins, however depending on how you want the domains to appear, this could require some fancy request header manipulation, etc.
Another easier option is to use the IFRAME API to make a request using `getVideoFrame`, such as: `{getVideoFrame:true, streamID:"abc123xyc"}`. This will return a video frame, a PNG image of the current video stream with stream ID `abc123xyc`, which allows for a crude video stream. If perhaps a guest's browser doesn't support the `&sendframes` option, this could be a fallback.
Anyways, these are advanced and complex options of loading a video element with a VDO.Ninja source. Normally just using the IFRAME as the playback window, and interacting with it via the IFRAME API is suggested.
If you really want another way to access VDO.Ninja streams, you may need to consider using a server to convert from VDO.Ninja into an HLS stream, however that both carries cost and incrasese the latency of the stream dramatically.
---
description: How to embed VDO.Ninja into your own website with the IFRAME API
---
# How to embed VDO.Ninja into a site with iFrames
[VDO.Ninja](https://vdo.ninja/) offers here a simple and free solution to quickly enable real-time video streaming in their websites. VDON wishes to make live video streaming development accessible to any developer, even novices, yet still remain flexible and powerful.
While VDO.Ninja does offer source-code to customize the application and UI at a low level, this isn't for beginners and it is rather hard to maintain. As well, due to the complexity of video streaming in the web, typical approaches for offering API access isn't quite feasible either.
The solution decided on isn't an SDK framework, but rather the use of embeddable _IFrames_ and a corresponding bi-directional IFrame API. An [IFrame](https://www.w3schools.com/tags/tag\_iframe.ASP) allows us to embed a webpage inside a webpage, including VDO.Ninja into your own website.
Modern web browsers allow the parent website to communicate with the child webpage, giving a high-level of control to a developer, while also abstracting the complex code and hosting requirements. Functionality, we can make an VDON video stream act much like an HTML video element tag, where you can issue commands like play, pause, or change video sources with ease.
Creating an VDON iframe can be done in HTML or programmatically with Javascript like so:
```
const iframe = document.createElement("iframe");
iframe.allow = "autoplay;camera;microphone;fullscreen;picture-in-picture;display-capture;midi;geolocation;gyroscope;";
iframe.src = "https://vdo.ninja/?push=vhX5PYg&cleanoutput&transparent";
```
You can also make an VDO.Ninja without Javascript, using just HTML, like
``
Adding that iframe to the DOM will reveal a simple page for accessing for a user to select and share their webcam. For a developer wishing to access a remote guest's stream, this makes the ingestion of that stream into production software like OBS Studios very easy. The level of customization and control opens up opportunities, such as a pay-to-join audience option for a streaming interactive broadcast experience.
An example of how this API is used by VDO.Ninja is with its Internet Speedtest, which has two VDO.Ninja IFrames on a single page. One IFrame feeds video to the other IFrame, and the speed at which it does this is a measure of the system's performance. Detailed stats of the connection are made available to the parent window, which displays the results. [https://vdo.ninja/speedtest](https://vdo.ninja/speedtest)
More community-contributed IFrame examples can be found here:
[https://github.com/steveseguin/vdoninja/tree/master/examples](https://github.com/steveseguin/vdoninja/tree/master/examples)
A sandbox of options is available at this page, too: [https://vdo.ninja/iframe](https://vdo.ninja/iframe) You can enter an VDO.Ninja URL in the input box to start using it. For developers, viewing the source of that page will reveal examples of how all the available functions work, along with a way to test and play with each of them. You can also see here for the source-code on GitHub:
[https://github.com/steveseguin/vdoninja/blob/master/iframe.html](https://github.com/steveseguin/vdoninja/blob/master/iframe.html)
I also have an example of how you can transfer virtually any data (JSON, text, small images) via the IFrame API with just a few lines of code here:
[https://gist.github.com/steveseguin/15bba03d1993c88d0bd849f7749ea625](https://gist.github.com/steveseguin/15bba03d1993c88d0bd849f7749ea625) It's a pretty awesome example of how you can securely communicate peer to peer online with virtually zero effort and with no cost.
There's dozens of other examples of how the IFrame API can be used to communicate via p2p, easily with any website, such as controlling PowerPoint remotely, but here's an example of how to use it to control OBS Studio remotely. [https://github.com/steveseguin/sample-p2p-tunnel](https://github.com/steveseguin/sample-p2p-tunnel)
Please note that since VDO.Ninja requires SSL to be strictly enabled site wide, any website you embed a VDO.Ninja IFrame into also will require SSL enabled site wide. Using a service like Cloudflare can provide SSL-enabled caching for websites to make this fairly easy to do.
Something else to note about this IFrame API is that it can not only be controlled via URL parameters given to the IFrame _src_ URL, but also using `postMessage` and `addEventListener` methods of the browser. The later is used to dynamically control VDO.Ninja, while the former is used to initiate the instance to a desired state.
Some of the more interesting ones primarily for IFrame users might include:
* [`&webcam`](../source-settings/and-webcam.md)
* [`&screenshare`](../source-settings/screenshare.md)
* [`&videodevice`](../source-settings/videodevice.md)`=`1 or 0
* [`&audiodevice`](../source-settings/audiodevice.md)`=`1 or 0
* [`&autostart`](../source-settings/and-autostart.md)
* [`&chroma`](../advanced-settings/design-parameters/chroma.md)
* [`&transparent`](../advanced-settings/design-parameters/and-transparent.md)
* As for API, allow for dynamic messaging, below are examples of the options available:
* Mute Speaker
* Mute Mic
* Disconnect
* Change Video Bitrate
* Reload the page
* Change the volume
* Request detailed connection stats
* Access the loudness level of the audio
* Send/Recieve a chat message to other connected guests
* Get notified when there is a video connection
As for the actually details for methods and options available to dynamically control child VDON IFrame, they are primarily kept up to via the iframe.html file that is mentioned previously. see: _iframe.html_. Below is a snippet from that file:
```javascript
let button = document.createElement("button");
button.innerHTML = "Mute Speaker";
button.onclick = () => {
iframe.contentWindow.postMessage({
"mute": true
}, '*');
};
iframeContainer.appendChild(button);
button = document.createElement("button");
button.innerHTML = "Un-Mute Speaker";
button.onclick = () => {
iframe.contentWindow.postMessage({
"mute": false
}, '*');
};
iframeContainer.appendChild(button);
button = document.createElement("button");
button.innerHTML = "Toggle Speaker";
button.onclick = () => {
iframe.contentWindow.postMessage({
"mute": "toggle"
}, '*');
}
iframeContainer.appendChild(button);
button = document.createElement("button");
button.innerHTML = "Mute Mic";
button.onclick = () => {
iframe.contentWindow.postMessage({
"mic": false
}, '*');
};
iframeContainer.appendChild(button);
button = document.createElement("button");
button.innerHTML = "Un-Mute Mic";
button.onclick = () => {
iframe.contentWindow.postMessage({
"mic": true
}, '*');
};
iframeContainer.appendChild(button);
button = document.createElement("button");
button.innerHTML = "Toggle Mic";
button.onclick = () => {
iframe.contentWindow.postMessage({
"mic": "toggle"
}, '*');
};
iframeContainer.appendChild(button);
button = document.createElement("button");
button.innerHTML = "Disconnect";
button.onclick = () => {
iframe.contentWindow.postMessage({
"close": true
}, '*');
};
iframeContainer.appendChild(button);
button = document.createElement("button");
button.innerHTML = "Low Bitrate";
button.onclick = () => {
iframe.contentWindow.postMessage({
"bitrate": 30
}, '*');
};
iframeContainer.appendChild(button);
button = document.createElement("button");
button.innerHTML = "High Bitrate";
button.onclick = () => {
iframe.contentWindow.postMessage({
"bitrate": 5000
}, '*');
};
iframeContainer.appendChild(button);
button = document.createElement("button");
button.innerHTML = "Default Bitrate";
button.onclick = () => {
iframe.contentWindow.postMessage({
"bitrate": -1
}, '*');
};
iframeContainer.appendChild(button);
button = document.createElement("button");
button.innerHTML = "Reload";
button.onclick = () => {
iframe.contentWindow.postMessage({
"reload": true
}, '*');
};
iframeContainer.appendChild(button);
button = document.createElement("button");
button.innerHTML = "50% Volume";
button.onclick = () => {
iframe.contentWindow.postMessage({
"volume": 0.5
}, '*');
};
iframeContainer.appendChild(button);
button = document.createElement("button");
button.innerHTML = "100% Volume";
button.onclick = () => {
iframe.contentWindow.postMessage({
"volume": 1.0
}, '*');
};
iframeContainer.appendChild(button);
button = document.createElement("button");
button.innerHTML = "Request Stats";
button.onclick = () => {
iframe.contentWindow.postMessage({
"getStats": true
}, '*');
};
iframeContainer.appendChild(button);
button = document.createElement("button");
button.innerHTML = "Request Loudness Levels";
button.onclick = () => {
iframe.contentWindow.postMessage({
"getLoudness": true
}, '*');
};
iframeContainer.appendChild(button);
button = document.createElement("button");
button.innerHTML = "Stop Sending Loudness Levels";
button.onclick = () => {
iframe.contentWindow.postMessage({
"getLoudness": false
}, '*');
};
iframeContainer.appendChild(button);
button = document.createElement("button");
button.innerHTML = "Say Hello";
button.onclick = () => {
iframe.contentWindow.postMessage({
"sendChat": "Hello!"
}, '*');
};
iframeContainer.appendChild(button);
button = document.createElement("button");
button.innerHTML = "previewWebcam()";
button.onclick = () => {
iframe.contentWindow.postMessage({
"function": "previewWebcam"
}, '*');
};
iframeContainer.appendChild(button);
button = document.createElement("button");
button.innerHTML = "CLOSE IFRAME";
button.onclick = () => {
iframeContainer.parentNode.removeChild(iframeContainer);
};
iframeContainer.appendChild(button);
// As for listening events, where the parent listens for responses or events from the VDON child frame:
// ////////// LISTEN FOR EVENTS
const eventMethod = window.addEventListener ? "addEventListener" : "attachEvent";
const eventer = window[eventMethod];
const messageEvent = eventMethod === "attachEvent" ? "onmessage" : "message";
eventer(messageEvent, function (e) {
if (e.source !== iframe.contentWindow) {
return
} // reject messages send from other iframes
if ("stats" in e.data) {
const outputWindow = document.createElement("div");
let out = ` total_inbound_connections:${
e.data.stats.total_inbound_connections
}`;
out += ` total_outbound_connections:${
e.data.stats.total_outbound_connections
}`;
for (const streamID in e.data.stats.inbound_stats) {
out += `
streamID: ${streamID} `;
out += printValues(e.data.stats.inbound_stats[streamID]);
}
outputWindow.innerHTML = out;
iframeContainer.appendChild(outputWindow);
}
if ("gotChat" in e.data) {
const outputWindow = document.createElement("div");
outputWindow.innerHTML = e.data.gotChat.msg;
outputWindow.style.border = "1px dotted black";
iframeContainer.appendChild(outputWindow);
}
if ("action" in e.data) {
const outputWindow = document.createElement("div");
outputWindow.innerHTML = `child-page-action: ${
e.data.action
} `;
outputWindow.style.border = "1px dotted black";
iframeContainer.appendChild(outputWindow);
}
if ("loudness" in e.data) {
console.log(e.data);
if (document.getElementById("loudness")) {
outputWindow = document.getElementById("loudness");
} else {
const outputWindow = document.createElement("div");
outputWindow.style.border = "1px dotted black";
iframeContainer.appendChild(outputWindow);
outputWindow.id = "loudness";
}
outputWindow.innerHTML = "child-page-action: loudness ";
for (const key in e.data.loudness) {
outputWindow.innerHTML += `${key} Loudness: ${
e.data.loudness[key]
}\n`;
}
outputWindow.style.border = "1px black";
}
});
```
This VDO.Ninja API is developed and expanded based on user feedback and requests. It is by no means complete, but it is getting better every week.
### Transparency
Setting the `allowtransparency` attribute on the IFrame to `true` will allow for the contents to be transparent. You can then make VDO.Ninja transparent by adding `&transparent` to the URL, which sets the page's background to `rgba(0,0,0,0)`.
https://vdo.ninja/iframe can demonstrate this by opening https://vdo.ninja/?transparent with it.
### Advanced IFrame functionality
There's some users who wish to have an SDK instead of an IFrame API. While an SDK may happen eventually, currently the IFram API is surprisingly capable.
If you wish to use your own video mixer logic for example, you can disable the existing auto-mixer logic that currently exists using the [`&manual`](../advanced-settings/view-parameters/manual.md) flag. You can then access the `srcObject` of each of the video elements in VDO.Ninja and pull those streams into the parent frame to manipulate or to connect to the parent DOM.
If you aren't self-hosting the code, you may run into cross origin permission issues or limitations on cross-origin permissions with certain features. You can get around these issues usually by hosting VDO.Ninja as a subdomains though, in certain cases at least, along with the correct web hosting settings set.
[https://javascript.info/cross-window-communication#windows-on-subdomains-document-domain](https://javascript.info/cross-window-communication#windows-on-subdomains-document-domain)
See the video below for an advanced demo of the IFRAME API and how videos hosted within VDO.Ninja can be accessed and manipulated by the parent window. Video works well in this fashion; pulling audio from the IFRAME is a bit trickier however.
\[update: document.domain or such is a bit depreciated now, and while it is possible to use a sub-domain still, you'll need to specify certain headers and permissions with your webserver to allow for it. https://versus.cam for example uses vdo.ninja as a subdomain to access frames across the IFRAME API]
### Basic full window IFRAME control
Below is a simple code example of a website that can use VDO.Ninja as normal, full-window, while having a wrapper around it that controls it using the IFrame API.
It also will query the IFRAME every second for detailed state of the current setup, such as who is connected and visible.
This approach can allow you to do very advanced and dynamic configurations for VDO.Ninja, which might not be possible with the normal HTTPS/WSS API or URL parameters. Code injection is also supported, so there's no limit really to what you can do. If you would like to use VDO.Ninja with a custom API or inside an application as a webview, this is also a simple example of the concept.
```
```
### WebViews
The IFrame API is is also a WebView API, using the same concept of listening for events and post-messaging into the VDO.Ninja window.
WebViews are available within iOS and Android native apps, Electron.js apps, and other applications, like Unity or Unreal.
This is a great way to configure, edit, listen to, and control VDO.Ninja, without a web or MIDI API.
### Raw video and audio transport
It's possible to transmit uncompressed video frames and audio data from VDO.Ninja to the parent window using the post-mesasging API. This allows video playback to happen outside the IFrame itself, using your own custom mixing logic. See[ https://versus.cam](https://versus.cam) for a code example; the website is on Steve's GitHub for reference. Please note, this may require a custom deployment of VDO.Ninja's website code (SameOriginPolicy), and likely will also require a recent Chromium-based browser to use.
### All to happy to support the IFRAME API
Please feel free to follow me in the VDO.Ninja Discord channel ([discord.vdo.ninja](https://discord.com/invite/T4xpQVv)) where I post news about updates and listen to requests. The upcoming version of VDO.Ninja is also often hosted at [https://vdo.ninja/beta](https://vdo.ninja/beta), where you can explore new features and help crush any unexpected bugs.
I am keen to continue to support the IFrame API, so please reach out if you have questions or requests.
\-steve
---
description: Improve quality of video if using iOS or Android native app versions
---
# How to improve quality of the native app
The [native app version](../steves-helper-apps/native-mobile-app-versions.md) of VDO.Ninja isn't as feature rich as the web-app version, so control over exactly resolutions, frame rates, and more are a bit limited. Still, there are ways to encourage the quality to be as high as it can go.
## Increase the bitrate
Setting the bitrate on the viewer side, such as by adding one of the following to the view-link.
[`&videobitrate=12000`](../advanced-settings/video-bitrate-parameters/bitrate.md), or maybe `&videobitrate=12000`[`&codec=h264`](../advanced-settings/view-parameters/codec.md) or `&videobitrate=12000&codec=av1`
Different phones will have different CPU/encoding capabilities, so different codecs can result in varying qualities sometimes.
## Enable 1080p mode
In the app itself, you can enable the prefer 1080p mode also. This doesn't force 1080p mode, but it "suggests" to the phone that is what you want captured. In time, more advanced controls may be added in this respect.
## Improve the network connection
You can also try to connect your smartphone via Ethernet, rather than via WiFi, and ensure your network connection is top-notch. You can do this with a USB to Ethernet adapter, and then connecting the phone to your router.
You'll want the viewer also to be on a wired connection if possible, so preferably also ethernet.
If on cellular, considering using a bonded cellular connection, such as those provided by Speedify or other provider.
## Smartphone overheating
If your phone is getting warm, putting a metal heatsink on the backside of the phone directly can help keep it from thermal throttling. You can also try changing codecs, to see if perhaps there is a better option
## Update your smartphone
Some smartphones will have limited functionality if using an older version of the operating system. This is especially true of iOS devices, where iOS 16 has several core improvements over iOS 16, for example.
## Final notes
Those options will give you the best chance of obtaining the highest quality from the native app.
Otherwise, if you want more control over settings and quality, you'll need to use the web app, available at [https://vdo.ninja](https://vdo.ninja).
# How to install RaspNinja on Jetson
Download image for your device from:
[https://developer.nvidia.com/embedded/downloads](https://developer.nvidia.com/embedded/downloads)
Write the image to a high-quality micro SD card, as low-quality SD cards will be slow and have a very short lifespan.
Boot the Jetson with the SD card install. You will need a display and keyboard, ideally also a mouse, to complete the initial setup.
Connect the Jetson to the internet; Ethernet is ideal, but WiFi will work if your Jetson has a WiFi adapter.
Open the Terminal app or SSH into the Jetson to continue the installation.
Download Raspberry Ninja and run the installer. This will update your Jetson installation to Ubuntu 20 and install the required components. It may take some time and may require some prodding if it fails.
```
git clone https://github.com/steveseguin/raspberry_ninja
cd raspberry_ninja
cd nvidia_jetson
chmod +x advanced_installer.sh
./advanced_installer.sh
```
---
description: Two-way low-latency audio-only transmissions
---
# How to get lowest audio latency possible
If you are a musician looking to jam out with a friend, you should be able to achieve under 40ms of latency using [VDO.Ninja](https://vdo.ninja) if both you and them have a good Internet connections. This implies being directly connected via wired Ethernet with low packet loss, rather than via Wi-Fi or cellular.
The following link is an example of settings optimized for low-latency audio-only two-way communications. I find most of the latency with a setup like this is outside the scope of VDO.Ninja; so the sound card settings, the capture device, how far away I am from the mic / speakers, etc.
```
https://vdo.ninja/?push=MystreamID123&view=TheirStreamID123&aec=0&agc=0&denoise=0&ab=16&enhance&ptime=10&maxptime=10&novideo&noap
```
Looking at the link, let's explore:
[`&aec=0`](../source-settings/aec.md) disables the echo cancellation; this implies we will need to use headphones
[`&agc=0`](../source-settings/autogain.md) will disable auto-gain, which is preferable if streaming music
[`&denoise=0`](../source-settings/and-denoise.md) will disable the noise filter, which is ideal with music applications.
[`&ab=16`](../advanced-settings/view-parameters/audiobitrate.md) gives us a constant audio bitrate of 16-kbps. Consistency will ensure more reliable latencies, and 16-kbps is so light-weight it shouldn't be boggled down on bad connections. You can increase this value depending on the audio fidelity that you want, but higher could introduce more latency.
[`&enhance`](../advanced-settings/view-parameters/enhance.md), [`&ptime=10`](../advanced-settings/view-parameters/and-ptime.md), and [`&maxptime=10`](../advanced-settings/view-parameters/and-maxptime.md) are advanced settings, that tell the system to prioritize audio packets and limit their size to 10ms. This is the lowest we can set them using a browser, but it might be possible to go lower if using something like the Raspberry\_Ninja hardware project that VDO.Ninja has available for advanced users.
[`&novideo`](../advanced-settings/video-parameters/and-novideo.md) disables video, which can make a big impact on latency, as not streaming video will free up a lot of bandwidth, but also not force the audio to stay in sync with the video. You can send the video in a second tab/session if needed, and that way, it won't try to stay in sync.
[`&noap`](../general-settings/noaudioprocessing.md) just disables any of the advanced web-audio processing, such as compression, gain, level-meters, and panning. This will free up some milliseconds of latency in some cases,
Without much effort, you should be able to achieve 40-milliseconds of latency, or less, with this setup. Achieving between 20- to 30-ms is feasible in cases, but expectations of under 20-ms will require significantly more investment.
# MIDI, API and WebHID support
## MIDI hotkeys
There are numerous more hotkeys that can be used via MIDI; these are global hotkeys, used even if the window is not visible, but they require some additional setup. You can remotely control via MIDI also, using the [`&midiout`](../midi-settings/midiout.md) and [`&midiin`](../midi-settings/midiin.md) routing functionality.
MIDI hotkeys are compatible with an Elgato Streamdeck by means of a free Streamdeck MIDI plugin.
[midi.md](../midi-settings/midi.md)
## Bitfocus Companion
There is also Bitfocus Companion control compatibility, available here: [https://github.com/bitfocus/companion-module-vdo-ninja](https://github.com/bitfocus/companion-module-vdo-ninja)
## HTTP / Websocket API
The Bitfocus Companion plugin makes use of a HTTP and Websocket API, that allows for lots of remote control functionality.
There is a website that demos some of the commands available here: [https://companion.vdo.ninja/](https://companion.vdo.ninja/) Details on the API itself is here: [https://github.com/steveseguin/Companion-Ninja](https://github.com/steveseguin/Companion-Ninja)
You can use this to create your own hotkeys for pretty any device, application, or website.
[api.md](../general-settings/api.md)
## IFRAME API
The HTTP and websocket make use of a server to route API calls. If you'd like to create your own API server or don't need remote hotkey support, you can used the provide IFRAME API and send commands instead to VDO.Ninja via an IFRAME wrapper.
The IFRAME API is the most powerful option, but it requires some basic coding on your own part to have it provide hotkey functionality for your specific requirement.
[iframe-api-documentation.md](iframe-api-documentation.md)
Below is an example of how to remotely control OBS anywhere online using the VDO.Ninja IFrame API; the code is just an example of how to use the IFrame API with OBS in this case, and it not intended to be used in production as is. The core concept lets you relay data messages from one website page to another, peer to peer, with just a few lines of code!
## WebHID
There is also WebHID support, but it's not fully implemented at this time. User requests are welcomed though and there's a demo here: [https://vdo.ninja/webhid](https://vdo.ninja/webhid)
It should be improved upon in the future, assuming the feature does not get depreciated by the browser first.
## Feature requests and feedback
It's easy enough to add new hotkeys or features; please make a request as needed. The hotkey and API commands are organically development, based on user needs and feedback. Most simple requests can be accommodated within minutes.
---
description: Encoder options that can offer smooth playback
---
# How to set up OBS WHIP output settings
OBS Studio v30 now has WHIP output, which can stream into VDO.Ninja. While there are a few limitations of using OBS Studio with VDO.Ninja directly, some H264 settings that have reported offered good results are the following:
* Rate Control: CRF
* CRF: 23
* Keyframe Interval: 1s
* Preset: Veryfast
* Profile: High
* Tune: Fastdecode (required for WebRTC playback)
* x264 Options: bframes=0 (required for WebRTC playback)
In some cases, adding [`&buffer=2500`](../advanced-settings/view-parameters/buffer.md) to the VDO.Ninja view link can further help reduce any lost of skipped frames, but at the cost of increased latency.
If looking for alternatives to publishing into VDO.Ninja, consider checking out [Raspberry.Ninja](../updates/updates-raspberry.ninja.md) also, which supports a broad range of encoders, including AV1-AOM, Intel QuickSync, Raspberry Pis, Nvidia Jetson, and many other hardware and software options. Playback is smooth, with support for multiple viewers. Runs on most systems, including Linux and _Windows for Linux Subsystem_ (WSL).
# Options to record streams
There are several ways to record, with more ways coming. I'll list some of the ways here, although they may not be exactly what you had in mind.
### Local / Remote Recording in VDO.Ninja
The VDO.Ninja room director has the option to record streams locally and remotely.
You can also add \&record to guest invite URL to introduce a recording button, for that publisher to start/stop their own local recording. Local recordings of this type are often of high quality.
You can also right-click and record any video within VDO.Ninja.
Depending on the type of video, and whether its local or remote, recording the video with this method may use up extra resources from the publisher's computer, including CPU and bandwidth.
Another issue is the format saved is WebM, which sometimes will need post-processing to make it compatible with many popular video editors. If the browser crashes, that also may cause the video recording to become lost, so it might not be the most reliable option.
That said, this is an easy option and available for free within VDO.Ninja.
### Using OBS to record; or multiple OBS
You can open multiple OBS Studios. Each OBS can record a full-window video if needed. This is useful if doing an interview with someone, and you intend to post process edit it.
OBS has advanced hardware accelerated encoding options, and so this is good option if wanting to have a few high-resolution recordings taking place, as you can offload the encoding to the GPU if available.
### OBS Source Record plugin
For OBS, there is a source-record plugin that allows you to record each Guest in OBS as its own dedicated video source. By pulling in a single high quality ISO (solo) feed per guest into OBS, and mixing videos using OBS, you can get high quality footage for post-production efforts. [https://obsproject.com/forum/resources/source-record.1285/](https://obsproject.com/forum/resources/source-record.1285/)
This is nice because you can have one OBS Studio open, and that's it. The downside is, you won't be able to use the VDO.Ninja auto-mixer if using solo-links instead.
### Electron Capture et al
[Electron Capture](../steves-helper-apps/electron-capture.md) ([https://github.com/steveseguin/electroncapture](https://github.com/steveseguin/electroncapture)) or [Vingester.app](https://vingester.app/) are similar concepts to source-recording, but instead you can capture in an application that isn't OBS. From there you window capture or NDI capture those streams locally into OBS, or/and other applications at the same time. These options do add complexity, but I sometimes will use these approaches, especially if I want to interact with the stream or pin it on top of other apps.
If interested in Vingester, as it has NDI output options, consider downloading it from here:
[https://github.com/steveseguin/vingester](https://github.com/steveseguin/vingester) , as the official repo for it is no longer maintained, and has an audio bug in it. Vingester does use quite a bit of CPU.
### Chunked mode
If using the [`&chunked`](../newly-added-parameters/and-chunked.md) mode of [VDO.Ninja](https://vdo.ninja/), a video stream is encoded once, and that is sent to all viewers and even the local/remote recordings. This is experimental and still pretty high CPU, due to the high quality of the stream being shared, but it might be lower CPU than trying to do two high quality encodings.
There is no server-side support for chunked mode at the moment, but I will continue to improve it and work on it as requests come in.
### Recording via WHIP/WHEP service
On the upcoming version of [VDO.Ninja](https://vdo.ninja/), you can use a WHIP/WHEP services to relay video via a server. In this case, the server itself can make a copy of the stream; the same stream everyone else in the room will see. There's also [SVC scalability support](../advanced-settings/whip-parameters/and-svc.md), so if your server supports that, you can push high-bitrates. ([https://vdo.ninja/alpha/whip](https://vdo.ninja/alpha/whip) for some common tooling)
To demo this concept, you can try out using Cloudflare's Stream service, as it has a free tier and I've done the heavily lifting to make it easy to use. Instructions and tool to setup Cloudflare with VDO.Ninja are here: [vdo.ninja/alpha/cloudflare](https://vdo.ninja/alpha/cloudflare). Cloudflare should technically be saving each stream to disk automatically, but I haven't actually tried downloading their videos recordings to see if they work well.
There are other premium providers other than Cloudflare, and specialized support for them and open-source projects will be added in time.
### Recording via self-hosted SFU server
If running on Linux, you can do the same concept as about with your own WHIP/WHEP/SFU service. It's a bit advanced, but you can deploy such a service and [VDO.Ninja](https://vdo.ninja/)'s (+v24) will be able to use it.
So, instead of direct p2p connections for video/audio streams between peers, streams are broadcasted via the hosted server. This is essentially like deploying your own Meshcast service, which [VDO.Ninja](https://vdo.ninja/) offers, but one that you control. In this case, you'd configure your service to record to disk, which is something Meshcast does not do or offer.
While I'm happy to support users from the [VDO.Ninja](https://vdo.ninja/) side of this all, I don't have the time to offer support to users wanting to deploy own WHIP/WHEP servers. There are many such WHIP/WHEP/SFU open source projects available, although they are perhaps targeted towards more technical users.
### Recording to Dropbox / Cloud
I have been working when I can on a way to auto-sync the local/remote recordings to Dropbox and other cloud providers. The code is there, but it still is a bit buggy and the user interface is lacking. This will record a local copy to disk, but automatically stream that local recording to the cloud as well; before or during the stream.
If there is of great interest to users, please let me know on Discord in the Feature Request channel how you'd like it to work, which provider, etc. I'm trying to figure out where best to invest my time on that feature, and with so little time, unless there's active interest, I let some tasks idle.
### Headless recording
This is a bit like having a headless version of OBS in the cloud, where it's configured to take a [VDO.Ninja](https://vdo.ninja/) browser link and publish it using FFMPEG to RTMP. Works with DigitalOcean or even an Orange pi.
[https://github.com/steveseguin/browser-to-rtmp-docker](https://github.com/steveseguin/browser-to-rtmp-docker)
You can very easily configure the FFmpeg script to save to MP4/MKV format though, so if you were wanting to record the guest in the cloud, this is an option. It still will put a load on the guest, as they are encoding a high quality stream that won't be used live really, but if you want to do isolated guest recordings, and don't have the local CPU for it, this might help.
### [Raspberry.Ninja](options-to-record-streams.md#raspberry.ninja)
[Raspberry.Ninja](https://raspberry.ninja/) is my project for Linux systems (and Windows WSL also), which lets you both publish and record Raspberry Ninja streams, without a browser at all.
While it's mainly used for publishing video to [VDO.Ninja](https://vdo.ninja/) using the hardware encoder in small embedded computers, like the Raspberry Pi, it can also record video streams to disk, as perfect copies. No transcoding is done.
If you are enterprising, you can have [Raspberry.Ninja](https://raspberry.ninja/) record the incoming guest streams to disk without transcoding, and then transcode them, before window-sharing them or publishing them to NDI. Doing this would require some Python coding, not too much, and all the code needed to achieve it is scattered around my Github. Still, this wouldn't be a task for novice developers.
### Contact me for more discussion / updates
If you want to follow up with me on some of these options, please contact me on Discord at [https://discord.vdo.ninja](https://discord.vdo.ninja/).
As well, things change quickly with VDO.Ninja; this post may already be out of date by the time you read it. Feel free to ask for updates.
---
description: How to share audio and video from OBS Studio into VDO.Ninja
---
# Publish from OBS into VDO.Ninja
In this walk-through we demonstrate how to use VDO.Ninja with the OBS Virtual camera and Virtual Audio Cable.
This combination is powerful and opens the world to numerous new live show formats. You could also push back audio and/or video from OBS into VDO.Ninja to share with a group there, or into a large Zoom call, all with super low latency.
Combining this OBS to VDO.Ninja approach with \&broadcast mode or a server-assisted approach, you can enable larger room sizes, with around 10 to 30 people in a room being feasible.
#### Requirements
* OBS Studio v26 or newer
* This ideally will run on OBS on the same system as VDO.Ninja
* For Windows, OBS version 26 or newer is recommended: [https://obsproject.com/download](https://www.google.com/url?q=https://obsproject.com/download\&sa=D\&source=editors\&ust=1626144550329000\&usg=AOvVaw1SHwecfzt\_otZPz1YNkN3r)
* Virtual Audio Cable Software
* For Windows or Mac, you can use VB-CABLE Virtual Audio
* This is recommended software as it enables proper audio support
* The software is Donationware
* [https://www.vb-audio.com/Cable/](https://www.google.com/url?q=https://www.vb-audio.com/Cable/\&sa=D\&source=editors\&ust=1626144550330000\&usg=AOvVaw3F2QQT0F6uzv1rHBdsARNF)
* There's also Voicemeter or VAC available as good options on PC.
* For macOS, you have a few other good choices too:
* [https://github.com/steveseguin/vdo.ninja/wiki/FAQ#how-to-capture-audio-on-mac](https://www.google.com/url?q=https://github.com/steveseguin/obsninja/wiki/FAQ%23how-to-capture-audio-on-mac\&sa=D\&source=editors\&ust=1626144550330000\&usg=AOvVaw1Rzm5d\_ud17CiLByYZ66lb)
### Step 0
This guide assumes you have OBS installed, along with the other required software, though we shall briefly cover these initial installation steps now.
We also will assume you are using Windows. You will need to adapt accordingly for macOS, which likely is going to be more complicated.
On the computer that will be using Zoom or Google Hangouts to broadcast, please do the following:
1. Uninstall and remove all old versions of OBS, including StreamLabs OBS if that is installed.
2. Install OBS Studio v26 or newer. [https://github.com/obsproject/obs-studio/releases/](https://github.com/obsproject/obs-studio/releases/)
3. Lastly, install the VB-Cable Virtual Audio device. [https://www.vb-audio.com/Cable/](https://www.google.com/url?q=https://www.vb-audio.com/Cable/\&sa=D\&source=editors\&ust=1626144550333000\&usg=AOvVaw1V70Tdr32UiXMUJZ0Uysnb)
### Step 1
Start the OBS Virtual camera; located under the Start Recording button.

### Step 2
We will now configure OBS to output audio from the Browser Source to the Virtual Audio Cable. In the OBS settings, under Advanced, we select the Monitoring Device to be our Virtual Audio device (CABLE Input).
We also want to disable Windows audio ducking.

### Step 3
In our last configuration step, we want to go into the Advanced Audio Properties in OBS. When there, we want to set the audio sources we want to output have its Audio Monitoring setting be set to Monitor and Output.
If you intend to feed audio from OBS back into an VDO.Ninja group call, you can use this step to also mix-minus the audio; selecting just the audio sources you want the remote guests to hear, excluding their own audio to prevent echo.


### Step 4
We’re READY to go! Using this setup we can publish from OBS into VDO.Ninja with near zero latency; going forward it's just like selecting a second Webcam and microphone.
If you are already in VDO.Ninja, you can switch between your webcam and the virtual camera and normal camera in the settings. If you're a director of a room in VDO.Ninja, you can even share you audio and video from OBS into a room and not have it show up in any scene; just have it been seen by guests.
It is important to remember that you need to select the VB-Audio Virtual Cable in the call as well, if you also want to share the audio from it that is.
If publishing to VDO.Ninja, remember that you can select multiple audio sources in VDO.Ninja by holding down `CTRL` (or command) when selecting them. You could include the VB Audio Cable and your local microphone together, for example.
.png>)
All done! You can switch between the webcam and the OBS live video as needed.
If you need to listen to your VB-Audio cable at the same time still, you can refer to this help guide for a couple options: [https://docs.vdo.ninja/guides/audio#guide-routing-windows-applications-audio-to-vdo.ninja](https://docs.vdo.ninja/guides/audio#guide-routing-windows-applications-audio-to-vdo.ninja)
### Having issues with frame rates or aspect ratios?
If you aren't getting 60-fps from the OBS Virtual Camera into `&framerate=60` to the sender's URL. The OBS Virtual Camera doesn't always report what framerates it can handle correctly to the browser, but if you manually specify it, it should work.
It's sometimes important to activate the OBS Virtual Camera in OBS before selecting it with VDO.Ninja. If you start the Virtual Camera \*after\* it has been selected, settings may not correctly work, such as the correct aspect ratio
If looking to do custom aspect-ratios with the OBS Virtual Camera into VDO.Ninja, you can specify the exact width and height via the URL in VDO.Ninja; `&width=720&height=1280,` for example.
It's important that the resolution be exactly the same as what is specified in OBS video settings; deviations will cause issues.
It is also important that you activate the OBS Virtual Camera in OBS before select it in VDO.Ninja. If you do it after, the aspect ratio may not work correctly.
## Share webcam directly from OBS
If you wish not to use a third-party browser, but publish video directly from OBS itself, you can load OBS up in a special mode that allows for it.
Please see this article for more on that: [https://docs.vdo.ninja/guides/share-webcam-from-inside-obs](https://docs.vdo.ninja/guides/share-webcam-from-inside-obs)
# How to publish to Facebook Live
There's a video guide on how to publish from VDO.Ninja to Facebook Live here: [https://www.youtube.com/watch?v=Zk345qg0U6U](https://www.youtube.com/watch?v=Zk345qg0U6U)
Some options that you can use to achieve this include:
RTMP is an option, typically done via OBS Studio. You can get a stream key for publishing from the Facebook Live production dashboard:
[https://www.facebook.com/live/producer/](https://www.facebook.com/live/producer/)
You'd use the OBS Browser source to bring VDO.Ninja into OBS Studio.
You can also publish via OBS into Facebook via the Virtual camera, as Facebook supports webcam publishing. This will require the use of a virtual audio cable though, and since OBS does not yet include its own virtual audio cable, you'll have to download one.
For example: [https://vb-audio.com/Cable/](https://vb-audio.com/Cable/)
You can also screen share VDO.Ninja into Facebook, bypassing the need for OBS altogether. Facebook doesn't support audio cable via screen share sadly, so you'll need to use a virtual audio cable still for audio routing.
You can use the Electron Capture app instead of Chrome as a screen sharing source, which provides exact resolution and always-on-top options. It also makes it easier to select the virtual audio cable output as the output destination.
With Chrome, you can select the virtual audio cable as the output source by adding [`&od=cable`](../advanced-settings/setup-parameters/and-audiooutput.md) to the scene/view link, or by visiting [https://vdo.ninja/electron](https://vdo.ninja/electron) and selecting it from the drop down menu.
# Guides
* [cheat-sheets.md](cheat-sheets.md "mention")
* [how-does-group-chat-work.md](../help/how-does-group-chat-work.md "mention")
* [video-bitrate-for-push-view-links.md](video-bitrate-for-push-view-links.md "mention")
* [video-bitrate-in-rooms.md](video-bitrate-in-rooms.md "mention")
* [hotkey-support](hotkey-support/ "mention")
* [midi-api-and-webhid-support.md](midi-api-and-webhid-support.md "mention")
* [hardware-accelerated-video-encoding.md](hardware-accelerated-video-encoding.md "mention")
* [audio-filters.md](audio-filters.md "mention")
* [options-to-record-streams.md](options-to-record-streams.md "mention")
* [guides-and-how-tos.md](guides-and-how-tos.md "mention")
## How-to's
* [how-do-i-lock-the-resolution.md](how-do-i-lock-the-resolution.md "mention")
* [use-vdo.ninja-as-a-webcam-for-google-hangouts-zoom-and-more.md](use-vdo.ninja-as-a-webcam-for-google-hangouts-zoom-and-more.md "mention")
* [capturing-without-browser-sources.md](capturing-without-browser-sources.md "mention")
* [how-do-i-control-bitrate-quality.md](how-do-i-control-bitrate-quality.md "mention")
* [how-to-selectively-allow-access.md](how-to-selectively-allow-access.md "mention")
* [how-to-send-the-audio-video-output-of-one-obs-to-another-obs-using-vdo.ninja.md](how-to-send-the-audio-video-output-of-one-obs-to-another-obs-using-vdo.ninja.md "mention")
* [how-to-mirror-a-video-while-full-screen-for-ipads-and-teleprompters.md](how-to-mirror-a-video-while-full-screen-for-ipads-and-teleprompters.md "mention")
* [how-to-get-permanent-links.md](how-to-get-permanent-links.md "mention")
* [audio.md](audio.md "mention")
* [how-to-control-vdo.ninja-with-touch-portal.md](hotkey-support/how-to-control-vdo.ninja-with-touch-portal.md "mention")
* [publish-from-obs-into-vdo.ninja.md](publish-from-obs-into-vdo.ninja.md "mention")
* [screen-share-your-iphone-ipad.md](screen-share-your-iphone-ipad.md "mention")
* [how-to-get-iphones-to-output-1080p-videos.md](how-to-get-iphones-to-output-1080p-videos.md "mention")
* [how-to-stream-into-zoom-without-obs.md](how-to-stream-into-zoom-without-obs.md "mention")
* [connecting-smartphone-to-computer-via-usb.md](connecting-smartphone-to-computer-via-usb.md "mention")
* [edit-an-invite-after-sending-it.md](edit-an-invite-after-sending-it.md "mention")
* [highest-quality-video-for-an-interview.md](highest-quality-video-for-an-interview.md "mention")
* [how-to-stream-4k-video-using-vdo.ninja.md](how-to-stream-4k-video-using-vdo.ninja.md "mention")
* [lowest-audio-latency-possible.md](lowest-audio-latency-possible.md "mention")
* [share-webcam-from-inside-obs.md](share-webcam-from-inside-obs.md "mention")
* [publish-to-facebook-live.md](publish-to-facebook-live.md "mention")
* [iframe-api-documentation.md](iframe-api-documentation.md "mention")
* [use-the-green-screen-just-locally.md](use-the-green-screen-just-locally.md "mention")
* [connect-a-gopro-to-vdo.ninja.md](connect-a-gopro-to-vdo.ninja.md "mention")
* [installing-raspninja-on-jetson.md](installing-raspninja-on-jetson.md "mention")
* [transfer-rooms.md](../getting-started/rooms/transfer-rooms.md "mention")
* [how-to-set-up-a-simple-chat-room.md](how-to-set-up-a-simple-chat-room.md "mention")
* [how-to-screen-share-in-1080p.md](how-to-screen-share-in-1080p.md "mention")
* [how-to-control-powerpoint-remotely-with-vdo.ninja.md](how-to-control-powerpoint-remotely-with-vdo.ninja.md "mention")
* [improving-quality-of-the-native-app.md](improving-quality-of-the-native-app.md "mention")
* [how-to-stream-transparent-video.md](how-to-stream-transparent-video.md "mention")
* [obs-whip-output-settings.md](obs-whip-output-settings.md "mention")
---
description: How to screen-share your iPhone or iPad to VDO.Ninja
---
# How to screen share your iPhone/iPad
If on iOS, there isn't an option available to screen share from within the browser (Safari), but there are some alternatives.
One recently added way to screen share is with the VDO.Ninja native mobile app. It now supports screen sharing, however system audio capture may be missing.
[native-mobile-app-versions.md](../steves-helper-apps/native-mobile-app-versions.md)
When using the native app to screen share, be sure to select the VDO.Ninja Screen Recorder option once prompted by Apple. Then click Start Broadcast.
If you do not see the option, try scrolling down. If you don't see it still, update your iOS system version to the newest available version. Old versions may not support screen sharing, such as v15.x.
If you still cannot find it, check that the app has the correct permissions in your iOS settings, seek support, or try one of the other options below.
You can leave all other settings as default when using the [VDO.Ninja native app](../steves-helper-apps/native-mobile-app-versions.md). Once you start your broadcast, you will be provided a link at the top of the app that you can put into your browser or OBS browser source.
### Other options
Another option to screen share is to use Apple Airplay to wirelessly cast your screen to a computer, and then window capture that output.
Better than Airplay though, if you can connect your iPhone to a mac via USB, as QuickTime supports USB-connected access to an iPhone's camera. This does not require any downloads and offers a high-quality stream. Using a virtual audio device, you can even capture IOS audio with this method.
In this guide we will show you how to screen-share to VDO.Ninja using QuickTime over USB with a MacBook and an iPhone. On Windows, you may wish to use Airplay instead, leveraging one of the free Airplay clients designed for PC.
Android users can use the native VDO.Ninja Android app to screen share directly to VDO.Ninja.
1. Connect your iPhone to your mac via a USB cable. You may need a USB to USB-C adapter if you do not have a lightning to USB-C adapter already.
2\. Open the QuickTime Player on your Mac.
3\. From the QuickTime Player menu, select File -> New Movie Recording.
4\. The QuickTime Player may show your laptop's webcam initially, but you can select from the hover-over menu the option to select your iPhone's video and audio as a video source instead.
For this to work, your iPhone needs to be connected and turned on. It will not work if locked and sleeping.
5a. OPTIONAL: If you want to capture audio from your iPhone, you will need to install a virtual audio driver.
There are several choices, although the popular ones are [Loopback ](https://rogueamoeba.com/loopback/)(\$$), [Blackhole ](https://blackhole.soullabs.com/horizon/dashboard)(Free), and [VB Cable](https://vb-audio.com/Cable/) (Free). Install one of your choice; in this walk-thru we are using Blackhole.
5b. OPTIONAL: If using Loopback, you will have the ability to customize the audio routing, but with Blackhole we will just output all the system's audio to the virtual audio cable. In the macOS audio settings, we just need to select the Blackhole audio device as the audio output destination.
5.c. OPTIONAL: Assuming QuickTime Player is capturing audio from the iPhone, we simply just need to unmute the QuickTime Player. You won't hear audio playback, as it is being streamed to the Blackhole virtual audio device instead, but you should be able to see the audio meter bouncing around if there is audio.
6\. We can now start streaming to VDO.Ninja; we just need to visit the site and click Share Screen. Using Chrome or another Chromium-based browser is required, such as the Electron Capture app. Safari will not work as it lacks the ability to select a window.
. (1) (1).png>) (1).png>)
7\. To start screen sharing, we will want to select "Window" as the capture source, and then select the QuickTime, which should be showing our iPhone.
If we want to capture audio, we can also select the Blackhole virtual audio device from the Audio Sources menu in VDO.Ninja, but we can also do this after we start streaming. We can also select our local macBook microphone if we wanted.
8\. Once we start streaming, there is a settings menu that we can use to select audio sources. If we select the Blackhole virtual audio device (or Loopback / VB Cable), we will be sharing our audio that we are capturing from the iPhone. We can hold down the `CMD` (⌘) key while selecting audio sources to select and mix more than one audio source.
.png>)
9\. Finally, we can add the VDO.Ninja view link to our remote OBS Studio or share it with friends.
The view link is normally found at the top of the VDO.Ninja page, but it can be formed based on the stream ID found in the site's URL as well. You can customize it the link and add it to OBS, making sure to enable "Control audio via OBS" and ensuring the resolution matches what you want.
10\. If you want to increase the frame rate and quality of the VDO.Ninja stream, adding [`&videobitrate=6000`](../advanced-settings/video-bitrate-parameters/bitrate.md) to the URL will increase the quality by more than double. If you're looking to stream a game, you may want to increase this value even higher, although the default bitrate is more than enough for text and basic screen sharing.
Please see the rest of the documentation for more details on customizing VDO.Ninja.
---
description: >-
Share your webcam, virtual-camera, and audio source from using VDO.Ninja
inside OBS
---
# How to share webcam from inside OBS
This guide works for OBS Studio v27.1.3, but some users have had issues with v27.2.
By default, you can't select your webcam in an OBS dock or browser source. This can be changed by adding a command-line parameter to the OBS launch shortcut.
Within Windows, we can right-click the OBS launch icon or app icon, right click the "OBS Studio" option, and then click Properties. This will provide us the launch properties window.
We want to add `--enable-media-stream` to the Target field; we want to add this after the quotations, and not inside them. See below for an example.
From there, we are good to go. We can add a dock to OBS or a browser source, and we should be able to now activate our webcam source, such as the built-in OBS virtual webcam.
If we use the following VDO.Ninja URL as a dock source, we can have VDO.Ninja auto-start every time, create a new link that you can share with others. This link is setup to auto-select the OBS virtual camera and the first VB virtual audio cable, if one is available.
`https://vdo.ninja/?webcam&vd=obs&ad=virtual&autostart&cover`
 (1).png>)
# How to use the green screen just locally
Since OBS is using a very old browser inside, the green screen effect inside [VDO.Ninja](https://vdo.ninja/) wouldn't really run well within OBS itself, and even if it did, accessing the camera from a browser-source is a hassle to setup.
What you could do though is use the Electron Capture app, and then just window capture the local preview output. You can hide the interface UI and access any camera/microphone changes via the Electron Capture's right-click context menu of options instead.
Electron download link: [https://github.com/steveseguin/electroncapture/releases](https://github.com/steveseguin/electroncapture/releases)
Getting this working is not complex; pretty easy once you do it once actually. Sample URL to enter into VDO.Ninja:
[`https://vdo.ninja/?cleanoutput&webcam&effects=4`](https://vdo.ninja/?cleanoutput\&webcam\&effects=4)
Cheers.
# How to use VDO.Ninja as a webcam for Google Hangouts, Zoom, and more
In this walk-through we demonstrate how to use VDO.Ninja and the OBS Virtual Camera to bring remote cameras, smartphones, and other media sources into third-party video software as a virtual webcam.
We will also be including audio in this guide, however that may not be needed in all situations. You can skip the audio-related portions if not needed for your application.
Some third-party applications support Browser Sources as an input, negating the need for a virtual camera, as VDO.Ninja can be used directly in such scenarios.
**Requirements for this guide**
* OBS Studio V26 or newer
* Virtual Audio Cable Software
* For Windows, use VB-CABLE Virtual Audio
* This is recommended software as it enables proper audio support
* The software is Donationware
* [https://www.vb-audio.com/Cable/](https://www.google.com/url?q=https://www.vb-audio.com/Cable/\&sa=D\&source=editors\&ust=1651965669921223\&usg=AOvVaw32Nu8pxk1d3BG6A39I2slb)
* For macOS, you have a few choices:
* [https://github.com/steveseguin/vdo.ninja/wiki/FAQ#how-to-capture-audio-on-mac](https://github.com/steveseguin/vdo.ninja/wiki/FAQ#how-to-capture-audio-on-mac)
**Basic Workflow Diagram**
Please find below a diagram explaining the basic premise of what we are intending to do in this guide. We will go through it all, one step at a time.
### **Step 0. - Installing dependencies**
This guide assumes you have OBS installed, along with the other required software, though we shall briefly cover these initial installation steps now.
We also will assume you are using Windows. You will need to adapt accordingly for MacOS, which likely is going to be more complicated.
On the computer that will be using Zoom or Google Hangouts to broadcast, please do the following:
1. Install OBS Studio h[ttps://github.com/obsproject/obs-studio/releases/](https://www.google.com/url?q=https://github.com/obsproject/obs-studio/releases/\&sa=D\&source=editors\&ust=1651965669925129\&usg=AOvVaw2y3\_HZy3Sm\_0aAQ7QRRX8K)
2. Install the VB-Cable Virtual Audio device.
[https://www.vb-audio.com/Cable/](https://www.google.com/url?q=https://www.vb-audio.com/Cable/\&sa=D\&source=editors\&ust=1651965669925809\&usg=AOvVaw3k4NHvzmWNnuxOnB2nnoYZ)
### **Step 1.**
Generate an VDO.Ninja invite. You will get an Invite link and a Browser Source link.
The Guest Invite Link is what you send to a person who you wish to join your live stream in OBS. We will also be calling this a PUSH link, as it contains \&push in the URL.
The OBS Browser Source link is what we will be putting into OBS to capture our guest’s video stream with. We will also be calling this a VIEW link, as it contains \&view in the URL.
 (1) (1).png>)
### Step 2.
For ease of setup, the "Generate Invite Link" button found at [VDO.Ninja](https://vdo.ninja) can provide you with both a PUSH (**Guest Invite**) link and an VIEW (**OBS Source**) link.
We will want to send the PUSH link to our guest, or if using a mobile phone, use the QR code to open the link. We can select our camera, microphone, and then click START.
### Step 3.
Once we have our PUSH link setup to stream our camera, we can move on to pulling that video stream into OBS using the VIEW link.
To setup our OBS Studio, create a Scene and then add a Browser Source in OBS Studio. Give it a name and we will fill out the details in the next step.

### Step 4.
In the properties for the Browser Source, we need to fill out a few fields and then hit OK.
* The URL we add to OBS needs to be set to the VIEW address we created earlier,
Just as example: `https://vdo.ninja/?view=q3QCScW`
You will of course need to use your own link, with its own unique view ID, which was given to you at the end of Step #1. The view ID should exactly make the push ID; case-sensitive.
* Width can be set to 1280
* The height be set to 720
* "**Control audio via OBS**" should be checked. This is quite important, else the audio will not work correctly or you will get a terrible echo / feedback.
 (1).png>)
_SECRET TIP_: Some links in VDO.Ninja can be dragged and dropped directly into OBS from the Chrome browser, avoiding the tedious parts of step 2 and 3. You will still need to select “Control audio via OBS” however, if you wish audio to function.
### Step 5.
The video should appear and auto-play. There should be no audio feedback if you selected the Control audio via OBS option.
Now we just need to stretch the video to fill the full scene. It should snap into place when full.
### Step 6.
Start the OBS Virtual camera ; located under the Start Recording button
### Step 7. (optional)
We will now configure OBS to output audio from the Browser Source to the Virtual Audio Cable. In the OBS settings, under Advanced, we select the Monitoring Device to be our Virtual Audio device. (CABLE Input).
We also want to disable Windows audio ducking.

### Step 8. (optional)
In our last configuration step, we want to go into the Advanced Audio Properties in OBS. When there, we want to set the audio sources we want to output have its Audio Monitoring setting be set to Monitor and Output.
If you intend to feed audio from OBS back into an VDO.Ninja group call, you can use this step to also mix-minus the audio; selecting just the audio sources you want the remote guests to hear, excluding their own audio to prevent echo.
### Step 9.
We’re READY to go! Using this setup in VDO.Ninja or Zoom or Google Hangouts is just like selecting a second Webcam and microphone.
If you are already in the Zoom / Google Hangout call, you can switch between your webcam and the virtual camera and normal camera in the settings.
It is important to remember that you need to select the VB-Audio Virtual Cable in the call as well, if you also want to share the audio from it that is.
If publishing to VDO.Ninja, remember that you can select multiple audio sources in VDO.Ninja by holding down CTRL (or command) when selecting them. You could include the VB Audio Cable and your local microphone together, for example.
### All done!
And that should be it! You can switch between the webcam and the OBS live video as needed.
If you need to increase the video quality from the defaults, all that is possible in the next section, linked below:
[how-do-i-control-bitrate-quality.md](how-do-i-control-bitrate-quality.md)
---
description: How to control video bitrates for basic push/view links
---
# Video bitrate for push/view links
## The default settings
The default video bitrate for simple push/view links is 2500-kbps.
[https://vdo.ninja/?push=streamid](https://vdo.ninja/?push=streamid)
[https://vdo.ninja/?view=streamid](https://vdo.ninja/?view=streamid)
By default, both outgoing and incoming video bitrates are set at 2500-kbps. This default setting and parameters are different if using [Rooms ](../getting-started/rooms/)and explained in detail [here](video-bitrate-in-rooms.md).
There are five parameters we will take a look at:
1. [\&outboundvideobitrate (\&ovb)](../advanced-settings/video-bitrate-parameters/and-outboundvideobitrate.md) -> push side
2. [\&maxvideobitrate (\&mvb)](../advanced-settings/video-bitrate-parameters/and-maxvideobitrate.md) -> push side
3. [\&limittotalbitrate (\<b)](../advanced-settings/video-bitrate-parameters/limittotalbitrate.md) -> push side
4. [\&videobitrate (\&vb)](../advanced-settings/video-bitrate-parameters/bitrate.md) -> view side
5. [\&totalscenebitrate (\&tsb)](../advanced-settings/video-bitrate-parameters/and-totalscenebitrate.md) -> view side
## On the source side ([\&push](../source-settings/push.md))
### The push link sets the target and maximum outgoing video bitrate
[`&outboundvideobitrate (&ovb)`](../advanced-settings/video-bitrate-parameters/and-outboundvideobitrate.md)
Sets the target and maximum outgoing video bitrate on the source side.
[https://vdo.ninja/?push=streamid\&ovb=4000](https://vdo.ninja/?push=streamid\&ovb=4000)
[https://vdo.ninja/?view=streamid](https://vdo.ninja/?view=streamid)
The push link sets the outgoing and incoming video bitrate to 4000-kbps. The view link doesn't need an additional parameter as its bitrate is set at 4000-kbps because the push link is using `&ovb.`
### The push link sets the video bitrate per stream out
[`&maxvideobitrate (&mvb)`](../advanced-settings/video-bitrate-parameters/and-maxvideobitrate.md)
`&mvb` is similar to `&ovb` but it sets the target and maximum bitrate per stream out.
[https://vdo.ninja/?push=streamid\&mvb=1000](https://vdo.ninja/?push=streamid\&mvb=1000)
[https://vdo.ninja/?view=streamid](https://vdo.ninja/?view=streamid)
Every view link has a video bitrate of 1000-kbps.
### The push link limits the video bitrate to a maximum defined value
[`&limittotalbitrate (<b)`](../advanced-settings/video-bitrate-parameters/limittotalbitrate.md)
Limits the total outbound video bitrate to a defined value.
[https://vdo.ninja/?push=streamid\<b=5000](https://vdo.ninja/?push=streamid\<b=5000)
[https://vdo.ninja/?view=streamid](https://vdo.ninja/?view=streamid)
The incoming video bitrate will still default to around 2500-kbps but permits the viewer to increase it on their end with `<b` telling the push link to not get higher than 5000-kbps total outgoing bitrate.
## On the viewer side ([\&view](../advanced-settings/view-parameters/view.md))
### The view link sets the video bitrate per stream in
[`&videobitrate (&vb)`](../advanced-settings/video-bitrate-parameters/bitrate.md)
The view link is setting the target and maximum video bitrate per incoming stream.
[https://vdo.ninja/?push=streamid](https://vdo.ninja/?push=streamid)
[https://vdo.ninja/?view=streamid\&vb=2000](https://vdo.ninja/?view=streamid\&vb=2000)
The view link is setting the bitrate per incoming stream (in this case 2000-kbps). So if you have a view link with three incoming video feeds: `&view=stream1,stream2,stream3` - every source is pushing 2000-kbps as `&vb=2000` and the view link has a combined bitrate of 6000-kbps.
### The view link sets the total video bitrate for all incoming streams combined
[`&totalscenebitrate (&tsb)`](../advanced-settings/video-bitrate-parameters/and-totalscenebitrate.md)
This is similar to [`&vb`](video-bitrate-for-push-view-links.md#the-view-link-sets-the-video-bitrate-per-stream-in) but it sets the target and maximum bitrate for all incoming streams combined.
[https://vdo.ninja/?push=streamid](https://vdo.ninja/?push=streamid)
[https://vdo.ninja/?view=streamid\&tsb=3000](https://vdo.ninja/?view=streamid\&tsb=3000)
So if you have a view link with three incoming video feeds: `&view=stream1,stream2,stream3` - every source is pushing 1000-kbps as `&tsb=3000`.
## Mixing the parameters
As doing some testing there were these results:
All the three push parameters are always limiting the maximum. So if you set one of the three parameters to a value, the outgoing video bitrate will never be higher than you set it.
`&tsb` also always limits the bitrate on the viewer side, whereas `&vb` is overwritten by `&ovb` and `&mvb`.
* `&ovb` is overwriting `&vb`
* `&mvb` is overwriting `&vb`
* `&tsb` is stronger than `&ovb`
## Related
[video-bitrate-parameters](../advanced-settings/video-bitrate-parameters/)
[video-bitrate-in-rooms.md](video-bitrate-in-rooms.md)
---
description: How to control the video bitrate inside of a room
---
# Video bitrate in rooms
This guide will show you how to control and set up the bitrate in rooms as a director and as a guest.
## Default settings
Every guest is viewing video streams in a room with a combined bitrate of 500-kbps. If there is only one video stream, the guest will view the video on 500-kbps. Two video streams: 250-kbps per video.
## Director
As a director of a room you can control the total room bitrate dynamically.
Open the room settings via this button as a director
The default is (as explained before) 500-kbps. You can increase it op to 4000-kbps.
You can control the total room bitrate also with a URL parameter: [`&totalroombitrate=6000`](../advanced-settings/video-bitrate-parameters/totalroombitrate.md)
Default is 6000-kbps now with &totalroombitrate=6000
The default setting for the room is now 6000-kbps. You can decrease it dynamically though if the guests have any problems.
## Guest
If you add [`&roombitrate=2000`](../advanced-settings/video-bitrate-parameters/roombitrate.md) to the guest's link all the other guests can view the video of the guest with a bitrate of 2000-kbps. So three other guests watching the video stream of the guest -> 6000-kbps outgoing bitrate. [`&roombitrate`](../advanced-settings/video-bitrate-parameters/roombitrate.md) limits any guest viewer in the group chat room from pulling the video stream at more than the specified bitrate value.
You can also use [`&totalroombitrate`](../advanced-settings/video-bitrate-parameters/totalroombitrate.md) on the guest's URL if you want to have different settings for each guest. So adding `&totalroombitrate=4000` to a guest's URL, the guest can view all video streams in the room with a combined bitrate of 4000-kbps.
If you use [`&controlroombitrate`](../advanced-settings/video-bitrate-parameters/and-controlroombitrate.md) on the guest's URL, the guest can change the total room bitrate dynamically via a slider. If you add `&controlroombitrate&totalroombitrate=4000` to the guest's URL the guest can change the bitrate between 0 and 4000-kbps. It doesn't affect what other guest's are viewing.
## Examples
[https://vdo.ninja/?director=TestRoomName\&push=directorStreamID\&broadcast\&totalroombitrate=5000](https://vdo.ninja/?director=TestRoomName\&push=directorStreamID\&broadcast\&totalroombitrate=5000)
When adding `&broadcast&totalroombitrate=5000` to the director's URL the guests can only see the video of the director with a bitrate of 5000-kbps. So they get pretty good video quality. If you have three guests in the room the outgoing bitrate fot the director is 15000-kbps, so it's pretty high.
If you want a guest to appear in scenes (for example in OBS) but you don't want other guests to see their video stream you can add `&roombitrate=0` to the guest's URL. [`&roombitrate`](../advanced-settings/video-bitrate-parameters/roombitrate.md) only affects the bitrate in the room, not in scenes.
Adding [`&maxbandwidth=80`](../advanced-settings/video-bitrate-parameters/and-maxbandwidth.md) to the guest's URL will allow to them to put 80 % of their available bandwidth into the video stream. This is useful for high quality gaming streams for example.
## Scenes
For scenes in OBS or other softwares ([`&scene`](../advanced-settings/view-parameters/scene.md) or [`&solo`](../advanced-settings/mixer-scene-parameters/and-solo.md)) use [`&videobitrate`](../advanced-settings/video-bitrate-parameters/bitrate.md) to specify the bitrate per video stream or [`&totalscenebitrate`](../advanced-settings/video-bitrate-parameters/and-totalscenebitrate.md) to get a combined bitrate for all videos in the scene.
3 guests in a scene -> `&videobitrate=3000`
The bitrate of each guest will be 3000-kbps.
3 guests in a scene -> `&totalscenebitrate=3000`
The bitrate of each guest will be 1000-kbps.
## Meshcast
If you are using [`&meshcast`](../newly-added-parameters/and-meshcast.md) on the director's or guest's URL remember that you control the bitrate via [`&meshcastbitrate`](../meshcast-settings/and-meshcastbitrate.md) on the sender's side.
## More Parameters
There are more parameters to control the bitrate. You can find them here:
[video-bitrate-for-push-view-links.md](video-bitrate-for-push-view-links.md)
[video-bitrate-parameters](../advanced-settings/video-bitrate-parameters/)
# add
General Option! ([`&push`](../../source-settings/push.md), [`&view`](../../advanced-settings/view-parameters/view.md), [`&scene`](../../advanced-settings/view-parameters/scene.md))
## Options
| Value | Description |
| ----- | ----------- |
| true | |
| false | |
## Modifiers
| Action | Value | Required | Description |
| ----------------- | ------------------ | -------- | ----------- |
| target (required) | '\*' \| (streamID) | yes | |
| | | | |
| | | | |
### Example
```
iframe.contentWindow.postMessage({
"target": "*",
"add": true
});
```
# advancedMode
General Option! ([`&push`](../../source-settings/push.md), [`&view`](../../advanced-settings/view-parameters/view.md), [`&scene`](../../advanced-settings/view-parameters/scene.md))
## Options
| Value | Description |
| ----- | ----------- |
| true | |
| false | |
### Example
```
iframe.contentWindow.postMessage({
"advancedMode": true
});
```
---
description: Set a video bitrate for a video; scene or view link; kbps. Lockable.
---
# audiobitrate
## Type
number
## Co-actions
| Action | Type | Required | |
| ------ | ------- | -------- | ------------------------------------------------------ |
| "lock" | boolean | No | Locks bitrate (prevents the automixer from overriding) |
### Example
```
iframe.contentWindow.postMessage({ "audiobitrate": 3000, "lock": true });
```
---
description: Stop the auto mixer if you want to control the layout and bitrate yourself
---
# automixer
General Option! ([`&push`](../../source-settings/push.md), [`&view`](../../advanced-settings/view-parameters/view.md), [`&scene`](../../advanced-settings/view-parameters/scene.md))
## Options
| Value | Description |
| ----- | ----------- |
| true | |
| false | |
## Modifiers
| Action | Value | Required | Description |
| ------ | ----- | -------- | ----------- |
| | | | |
| | | | |
| | | | |
### Example
```
iframe.contentWindow.postMessage({
"automixer": true
});
```
---
description: Set a video bitrate for a video; scene or view link; kbps. Lockable.
---
# bitrate
## Type
number
## Co-actions
| Action | Type | Required | |
| ------ | ------- | -------- | ------------------------------------------------------ |
| "lock" | boolean | No | Locks bitrate (prevents the automixer from overriding) |
### Example
```
iframe.contentWindow.postMessage({ "bitrate": 3000, "lock": true });
```
---
description: Mutes/unmutes camera
---
# camera
Sender Option! ([`&push`](../../source-settings/push.md))
| Value | Description |
| -------- | -------------- |
| true | Turns mic on |
| false | Turns mic off |
| "toggle" | Toggles on/off |
### CODE EXAMPLE
```
iframe.contentWindow.postMessage({ "camera": true });
```
# changeAudioDevice
## Type
number
### Example
```
iframe.contentWindow.postMessage({ "changeAudioDevice": 1 });
```
# changeAudioOutputDevice
## Type
number
### Example
```
iframe.contentWindow.postMessage({ "changeAudioODevice": 1 });
```
# changeVideoDevice
## Type
number
### Example
```
iframe.contentWindow.postMessage({ "changeVideoDevice": 1 });
```
---
description: Disconnect and hangup all inbound streams.
---
# close
General Option! ([`&push`](../../source-settings/push.md), [`&view`](../../advanced-settings/view-parameters/view.md), [`&scene`](../../advanced-settings/view-parameters/scene.md))
## Aliases
hangup
## Options
| Value | Description |
| ----- | ----------- |
| true | |
| false | |
## Modifiers
| Action | Value | Required | Description |
| ------ | ----- | -------- | ----------- |
| | | | |
| | | | |
| | | | |
### Example
```
iframe.contentWindow.postMessage({
"close": true,
});
```
---
description: Insert a custom style sheet
---
# getDetailedState
General Option! ([`&push`](../../source-settings/push.md), [`&view`](../../advanced-settings/view-parameters/view.md), [`&scene`](../../advanced-settings/view-parameters/scene.md))
## Options
| Value | Description |
| ----- | ----------- |
| true | |
| false | |
## Modifiers
| Action | Value | Required | Description |
| ------ | ----- | -------- | ----------- |
| | | | |
| | | | |
| | | | |
### Example
```
iframe.contentWindow.postMessage({
"style": "{ border: dashed 4px tomato }"
});
```
# getDeviceList
## Type
true
### Example
```
iframe.contentWindow.postMessage({ "getDeviceList": true });
```
# getEffectsData
General Option! ([`&push`](../../source-settings/push.md), [`&view`](../../advanced-settings/view-parameters/view.md), [`&scene`](../../advanced-settings/view-parameters/scene.md))
## Options
| Value | Description |
| ----- | ----------- |
| true | |
| false | |
## Modifiers
| Action | Value | Required | Description |
| ------ | ----- | -------- | ----------- |
| | | | |
| | | | |
| | | | |
### Example
```
iframe.contentWindow.postMessage({
"getEffectsData": true,
});
```
# getLoudness
General Option! ([`&push`](../../source-settings/push.md), [`&view`](../../advanced-settings/view-parameters/view.md), [`&scene`](../../advanced-settings/view-parameters/scene.md))
## Options
| Value | Description |
| ----- | ----------- |
| true | |
| false | |
## Modifiers
| Action | Value | Required | Description |
| ------ | ----- | -------- | ----------- |
| | | | |
| | | | |
| | | | |
### Example
```
iframe.contentWindow.postMessage({
"getLoudness": true,
});
```
# getRemoteStats
General Option! ([`&push`](../../source-settings/push.md), [`&view`](../../advanced-settings/view-parameters/view.md), [`&scene`](../../advanced-settings/view-parameters/scene.md))
## Options
| Value | Description |
| ----- | ----------- |
| (any) | |
## Modifiers
| Action | Value | Required | Description |
| ------ | ----- | -------- | ----------- |
| | | | |
| | | | |
| | | | |
### Example
```
iframe.contentWindow.postMessage({
});
```
---
description: >-
Webrtc send message to every connected peer; like send and request; a hammer
vs a knife.
---
# getStats
Sender Option! ([`&push`](../../source-settings/push.md))
## Options
| Value | Description |
| ----- | -------------- |
| (any) | Reloads iframe |
### Example
```
iframe.contentWindow.postMessage({
"getStats": null,
});
```
---
description: >-
Get a list of stream Ids, with a label if it is present. label = false if not
there
---
# getStreamIDs
General Option! ([`&push`](../../source-settings/push.md), [`&view`](../../advanced-settings/view-parameters/view.md), [`&scene`](../../advanced-settings/view-parameters/scene.md))
## Options
| Value | Description |
| ----- | ----------- |
| true | |
| false | |
## Modifiers
| Action | Value | Required | Description |
| ------ | ----- | -------- | ----------- |
| | | | |
| | | | |
| | | | |
### Example
```
iframe.contentWindow.postMessage({
"getStreamIDs": true,
});
```
---
description: >-
Get a list of stream Ids, with a label if it is present. label = false if not
there
---
# getStreamInfo
General Option! ([`&push`](../../source-settings/push.md), [`&view`](../../advanced-settings/view-parameters/view.md), [`&scene`](../../advanced-settings/view-parameters/scene.md))
## Options
| Value | Description |
| ----- | ----------- |
| true | |
| false | |
## Modifiers
| Action | Value | Required | Description |
| ------ | ----- | -------- | ----------- |
| | | | |
| | | | |
| | | | |
### Example
```
iframe.contentWindow.postMessage({
"getStreamInfo": true,
});
```
# keyframe
| Value | Description |
| ----- | ------------- |
| true | Send keyframe |
### CODE EXAMPLE
```
iframe.contentWindow.postMessage({ "keyframe": true });
```
---
description: Mutes / unmutes mic
---
# mic
Sender Option! ([`&push`](../../source-settings/push.md))
## Related URL Param
[and-mute.md](../../source-settings/and-mute.md)
## Options
| Value | Description |
| -------- | -------------- |
| true | Turns mic on |
| false | Turns mic off |
| "toggle" | Toggles on/off |
## Example
```
iframe.contentWindow.postMessage({
"mic": true
});
```
---
description: Mutes / unmutes the speaker
---
# mute
General Option! ([`&push`](../../source-settings/push.md), [`&room`](../../general-settings/room.md), [`&view`](../../advanced-settings/view-parameters/view.md), [`&scene`](../../advanced-settings/view-parameters/scene.md), [`&director`](../../viewers-settings/director.md))
## Related URL Param
[and-mutespeaker.md](../../source-settings/and-mutespeaker.md)
## Options
| Value | Description |
| -------- | ------------------- |
| true | Mute speaker |
| false | Un-mute speaker |
| "toggle" | Toggle speaker mute |
## Example
```javascript
iframe.contentWindow.postMessage({
"mute": true
});
```
# panning
| Value | Description |
| ------- | -------------------------- |
| (0-180) | set stereo panning (0-180) |
### CODE EXAMPLE
```
iframe.contentWindow.postMessage({ "panning": 100 });
```
# previewMode
General Option! ([`&push`](../../source-settings/push.md), [`&view`](../../advanced-settings/view-parameters/view.md), [`&scene`](../../advanced-settings/view-parameters/scene.md))
## Options
| Value | Description |
| ----- | ----------- |
| true | |
| false | |
## Modifiers
| Action | Value | Required | Description |
| ------ | ----- | -------- | ----------- |
| layout | | no | |
| | | | |
| | | | |
### Example
```
iframe.contentWindow.postMessage({
"previewMode": true
});
```
# API commands
* [audiobitrate.md](audiobitrate.md "mention")
* [bitrate.md](bitrate.md "mention")
* [mic.md](mic.md "mention")
* [volume.md](volume.md "mention")
* [panning.md](panning.md "mention")
* [targetbitrate.md](targetbitrate.md "mention")
* [targetaudiobitrate.md](targetaudiobitrate.md "mention")
* [mute.md](mute.md "mention")
* [senddata.md](senddata.md "mention")
* [sendchat.md](sendchat.md "mention")
* [keyframe.md](keyframe.md "mention")
* [changeaudiooutputdevice.md](changeaudiooutputdevice.md "mention")
* [changevideodevice.md](changevideodevice.md "mention")
* [changeaudiodevice.md](changeaudiodevice.md "mention")
* [scenestate.md](scenestate.md "mention")
* [sendmessage.md](sendmessage.md "mention")
* [sendrawmidi.md](sendrawmidi.md "mention")
* [sendpeers.md](sendpeers.md "mention")
* [reload.md](reload.md "mention")
* [requeststatscontinuous.md](requeststatscontinuous.md "mention")
* [getstats.md](getstats.md "mention")
* [getdevicelist.md](getdevicelist.md "mention")
* [getremotestats.md](getremotestats.md "mention")
* [getloudness.md](getloudness.md "mention")
* [geteffectsdata.md](geteffectsdata.md "mention")
* [getstreamids.md](getstreamids.md "mention")
* [getstreaminfo.md](getstreaminfo.md "mention")
* [getdetailedstate.md](getdetailedstate.md "mention")
* [close.md](close.md "mention")
* [style.md](style.md "mention")
* [automixer.md](automixer.md "mention")
* [previewmode.md](previewmode.md "mention")
* [advancedmode.md](advancedmode.md "mention")
* [requeststream.md](requeststream.md "mention")
* [scene.md](scene.md "mention")
* [scale.md](scale.md "mention")
* [remove.md](remove.md "mention")
* [settings.md](settings.md "mention")
* [camera.md](camera.md "mention")
* [add.md](add.md "mention")
---
description: >-
Webrtc send message to every connected peer; like send and request; a hammer
vs a knife.
---
# reload
Sender Option! ([`&push`](../../source-settings/push.md))
## Options
| Value | Description |
| ----- | -------------- |
| (any) | Reloads iframe |
### Example
```
iframe.contentWindow.postMessage({
"reload": null,
});
```
# remove
General Option! ([`&push`](../../source-settings/push.md), [`&view`](../../advanced-settings/view-parameters/view.md), [`&scene`](../../advanced-settings/view-parameters/scene.md))
## Options
| Value | Description |
| ----- | ----------- |
| true | |
| false | |
## Modifiers
| Action | Value | Required | Description |
| ----------------- | ------------------ | -------- | ----------- |
| target (required) | '\*' \| (streamID) | yes | |
| | | | |
| | | | |
### Example
```
iframe.contentWindow.postMessage({
"target": "*",
"remove": true
});
```
# requestStatsContinuous
General Option! ([`&push`](../../source-settings/push.md), [`&view`](../../advanced-settings/view-parameters/view.md), [`&scene`](../../advanced-settings/view-parameters/scene.md))
## Options
| Value | Description |
| ----- | ----------- |
| (any) | |
## Modifiers
| Action | Value | Required | Description |
| ------ | ----- | -------- | ----------- |
| | | | |
| | | | |
| | | | |
### Example
```
iframe.contentWindow.postMessage({
"requestStatsContinuous": true
});
```
# requestStream
General Option! ([`&push`](../../source-settings/push.md), [`&view`](../../advanced-settings/view-parameters/view.md), [`&scene`](../../advanced-settings/view-parameters/scene.md))
## Options
| Value | Description |
| ----- | ----------- |
| true | |
| false | |
### Example
```
iframe.contentWindow.postMessage({
"requestStream": true
});
```
# scale
General Option! ([`&push`](../../source-settings/push.md), [`&view`](../../advanced-settings/view-parameters/view.md), [`&scene`](../../advanced-settings/view-parameters/scene.md))
## Options
| Value | Description |
| ----- | ----------- |
| true | |
| false | |
## Modifiers
| Action | Value | Required | Description |
| ------ | ----- | -------- | ----------- |
| UUID | | no | |
| | | | |
| | | | |
### Example
```
iframe.contentWindow.postMessage({
"scene": true
});
```
# scene
General Option! ([`&push`](../../source-settings/push.md), [`&view`](../../advanced-settings/view-parameters/view.md), [`&scene`](../../advanced-settings/view-parameters/scene.md))
## Options
| Value | Description |
| ----- | ----------- |
| true | |
| false | |
## Modifiers
| Action | Value | Required | Description |
| ------ | ----- | -------- | ----------- |
| layout | | yes | |
| | | | |
| | | | |
### Example
```
iframe.contentWindow.postMessage({
"scene": true
});
```
---
description: Tells the connected peers if they are live or not via a tally light change.
---
# sceneState
## Type
boolean
### Example
```
iframe.contentWindow.postMessage({ "sceneState": true });
```
# sendChat
General Option! ([`&push`](../../source-settings/push.md), [`&view`](../../advanced-settings/view-parameters/view.md), [`&scene`](../../advanced-settings/view-parameters/scene.md))
| Value | Description |
| -------- | ------------ |
| (string) | Chat message |
### CODE EXAMPLE
```
iframe.contentWindow.postMessage({ "sendChat": "Hello" });
```
---
description: >-
Send generic data via p2p. Send whatever you want I guess; there is a max
chunk size of course.
---
# sendData
General Option! ([`&push`](../../source-settings/push.md), [`&view`](../../advanced-settings/view-parameters/view.md), [`&scene`](../../advanced-settings/view-parameters/scene.md))
| Value | Description |
| ----- | -------------------------------- |
| (any) | Small amount of data to send P2P |
### CODE EXAMPLE
```
iframe.contentWindow.postMessage({ "sendData": { foo: "bar" });
```
---
description: Webrtc send to viewers
---
# sendMessage
## Type
string
### Example
```
iframe.contentWindow.postMessage({ "sendMessage": "HELLO" });
```
---
description: >-
Webrtc send message to every connected peer; like send and request; a hammer
vs a knife.
---
# sendPeers
Sender Option! ([`&push`](../../source-settings/push.md))
## Options
| Value | Description |
| -------- | ----------- |
| (string) | |
### Example
```
```
---
description: Webrtc send to publishers
---
# sendRawMIDI
Sender Option! ([`&push`](../../source-settings/push.md))
## Options
| Value | Description |
| ------ | ----------- |
| (midi) | |
## Modifiers
| Action | Value | Required | Description |
| -------- | -------- | -------- | ----------- |
| UUID | (string) | no | |
| streamID | (string) | no | |
### Example
```
iframe.contentWindow.postMessage({
"sendRawMIDI": "11110001",
"streamID": "someid"
});
```
# settings
General Option! ([`&push`](../../source-settings/push.md), [`&view`](../../advanced-settings/view-parameters/view.md), [`&scene`](../../advanced-settings/view-parameters/scene.md))
## Options
| Value | Description |
| ----- | ----------- |
| true | |
| false | |
## Modifiers
| Action | Value | Required | Description |
| ----------------- | ------------------ | -------- | ----------- |
| target (required) | '\*' \| (streamID) | yes | |
| | | | |
| | | | |
### Example
```
iframe.contentWindow.postMessage({
"target": "*",
"add": true
});
```
---
description: Insert a custom style sheet
---
# style
General Option! ([`&push`](../../source-settings/push.md), [`&view`](../../advanced-settings/view-parameters/view.md), [`&scene`](../../advanced-settings/view-parameters/scene.md))
## Options
### Example
```
iframe.contentWindow.postMessage({
"style": "{ border: dashed 4px tomato }"
});
```
---
description: >-
This sets the fundamental audio bitrate target, but does not necessarily
"lock"
---
# targetAudioBitrate
## Type
Number (0+)
### CODE EXAMPLE
```
iframe.contentWindow.postMessage({ "targetAudioBitrate": 1000 });
```
---
description: this sets the fundamental bitrate target, but does not necessarily "lock"
---
# targetBitrate
| Value type | Description |
| ------------------ | ------------------------ |
| (positive integer) | Set target bitrate to 30 |
### CODE EXAMPLE
```
iframe.contentWindow.postMessage({ "panning": 100 });
```
---
description: Sets the speaker (output) volume of a video element
---
# volume
## Related URL Param
[and-volume.md](../../advanced-settings/upcoming-parameters/and-volume.md)
## Options
| Value | Description |
| ------- | -------------------------------- |
| (0-100) | audio playback volume as percent |
| (0-1.0) | audio playback volume as decimal |
## Modifiers
| | value | Required | Description |
| -------- | ---------- | -------- | ----------------------------- |
| "target" | (streamID) | no | Targets a guest by streamID |
| "target" | "\*" | no | Targets every guest (default) |
| | | | |
## Example
```
iframe.contentWindow.postMessage({
"volume": 0.5,
"target": "*"
});
```
---
description: Controlling VDO.Ninja with Touch Portal using API commands
---
# How to control VDO.Ninja with Touch Portal
## How to
1\. Create a new room as a director, with a custom API key, so that it looks like this: [`https://vdo.ninja/?api=APIKEY&director=TouchPortalExample`](https://vdo.ninja/?api=APIKEY\&director=TouchPortalExample)
Replacing the APIKEY with a string of your choosing.
2\. Then, in Touch Portal, add a new button with the `HTTP GET` action. In the `HTTP GET` Action `GET URL` field, input your desired action. This particular GET action will send Guest 1 to Scene 1 with a push of the button:
`https://api.vdo.ninja/APIKEY/addScene/1/1`
Thanks to djlefave on [Discord](https://discord.vdo.ninja/) for this guide.
## Switching the layout of a scene in OBS
`https://api.vdo.ninja/APIKEY/layout/[{"x":0,"y":0,"w":50,"h":100,"c":true,"slot":0},{"x":50,"y":0,"w":50,"h":100,"c":false,"slot":1}]`
You can also use Touch Portal to switch the layout of [`&scene=0`](../../advanced-settings/view-parameters/scene.md) without using the [Mixer App](../../steves-helper-apps/mixer-app.md).
[https://docs.google.com/spreadsheets/d/1cHBTfni-Os3SAITsXrrNJ3qVCMVjunuW3xugvw1dykw/edit#gid=151839312](https://docs.google.com/spreadsheets/d/1cHBTfni-Os3SAITsXrrNJ3qVCMVjunuW3xugvw1dykw/edit#gid=151839312)
You can download this google sheet and use it to create your own layouts.
## Examples and resources
For more API examples, check out these resources:
[https://github.com/steveseguin/Companion-Ninja](https://github.com/steveseguin/Companion-Ninja)
[https://companion.vdo.ninja/?api=k8eYrfvJUC](https://companion.vdo.ninja/?api=k8eYrfvJUC)
## Related
[api.md](../../general-settings/api.md)
---
description: Some keyboard hotkeys
---
# Basic hotkeys
Hotkeys
Description
CTRL + M
Mute your mic (audio output)
CTRL + B
Mute your video output
SHIFT + ALT + C
Toggle the control bar that's normally at the bottom of the screen
CTRL + ALT + F
Open the file-sharing window
CTRL + ALT + C
Cycle the camera to the next camera available
CTRL + ALT + S
Open the screen-sharing window
CTRL + ALT + D
Enable Draw-on-Screen
CTRL + ALT + P
Will toggle the picture in picture
ALT + A
Will toggle the speaker-output audio mute on/off (only usable when the browser tab is in focus)
On MacOS use `CMD` instead of `CTRL`
When using the above keyboard short-cuts, the tab/window must be actively in focus.
When using the [Electron Capture App](../../steves-helper-apps/electron-capture.md) in elevated privilege mode, the keyboard shortcuts are global.
## Related
[and-disablehotkeys.md](../../advanced-settings/settings-parameters/and-disablehotkeys.md)
# Fail safes and Backups
Low-latency Live streaming is inherently challenging, and as more remote streams that are added to a live production, the more likely a problem will occur.
[VDO.Ninja](https://vdo.ninja/) acknowledges these risks and attempts to mitigate them when possible.
## Back-up site
If the main website and service goes down, [https://backup.vdo.ninja](https://backup.vdo.ninja) is a backup deployment of VDO.Ninja. It is independent of the main service, so if the main site is down for whatever reason, the backup site should still be up.
Both the backup and main site share the same DNS provider; DNS server 1.1.1.1 should be used if there are DNS issues.
There's also the Github version of the code hosted at [https://steveseguin.github.io/vdo.ninja/](https://steveseguin.github.io/vdo.ninja/), if just the website goes down.
## Fixed versions
VDO.Ninja does update the application code every few weeks, and with new code comes potentially new bugs and/or feature changes.
To mitigate any surprises, past versions of the app remain hosted long after a new release. For example, version 18 can be found at [https://vdo.ninja/v18/](https://vdo.ninja/v18/) with **the current previous version being listed on the main site**. Most new releases become bug-free within a few days of their release, thanks to prompt user bug reports.
## Redundant relay servers
There are multiple TURN servers, which help support guests that are unable to connect directly via P2P. These are hosted in around the globe. They definitely are not cheap to host, yet are essential for a simplified and reliable user experience.
## Self-hosting
The option to self-host VDO.Ninja is available, to different degrees of isolation. Refer to the[ Github repo](https://github.com/steveseguin/vdo.ninja) for [installation instructions](https://github.com/steveseguin/vdo.ninja/blob/master/install.md).
Hosting just the website code is the easiest option, providing further customization support, but hosting also the STUN, TURN, and handshake server will provide total hosting independence.
### Third-party managed hosting
While self-hosting on your own servers works, you can also host VDO.Ninja on unaffliated third party services.
* The website code for VDO.Ninja can be forked and hosted by Github Pages for free or any website provider really.
* There are companies that offer hosted STUN and TURN services for a fee.
* VDO.Ninja's handshake server is of an agnostic design and can be replaced with a third-party websocket provider, such as piesocket.com
## Debugging tools
Speed-tests and Debug tools are provided, either via the `Left-Click + CTRL` (command) options or at [https://vdo.ninja/speedtest](https://vdo.ninja/speedtest) . These can be useful to diagnose problems, such as whether Packet Loss is a culprit to low-quality video, and remotely determining who is at fault.
## Active free support
There is active support on the [DISCORD channel](https://discord.gg/sk4caKg), Reddit, and limited support via email: steve@seguin.email If paid support is requested, there are capable users in the community who can be recommended.
## Listed known issues
On the main website, currently known issues will be listed, often with links to solutions.
As a side note, most issues are the fault of guests being connected over Wi-Fi, instead of being connected via wired Ethernet. Wi-Fi has horrible packet loss issues, and Packet Loss can kill the quality of live streams. Considering switching to Ethernet if possible, and if using OBS, perhaps consider VP9 or H264 as a codec; those codecs have less packet loss issues.
**Always prep and practice ahead of live-streams**, and make sure to have practiced game-plans and backup solutions for every possible outcome. It will reduce stress and ensure a calm and collected response to issues that inevitably happen. Low-latency live streaming can be challenging, even with the best of tools.
# Feature Requests
Please feel free to make feature requests or submit bug reports; feedback of any kind is greatly appreciated. Development is largely based on user-feedback.
The best way to track submissions is to make them feature requests and bug reports directly to the GitHub repository here: [https://github.com/steveseguin/obsninja/issues](https://github.com/steveseguin/obsninja/issues)
You can also submit bug reports or feature requests elsewhere, though they are more likely to be lost or missed:
**developer/maintainer**: [steve@seguin.email](mailto:steve@seguin.email)
**Discord**: [https://discord.vdo.ninja](https://discord.vdo.ninja)
**Reddit**: [https://www.reddit.com/r/VDONinja/](https://www.reddit.com/r/VDONinja/)
---
description: Group Chat (aka, a room)
---
# How Group Chat works
The group chat feature creates a virtual room where multiple devices can connect to share audio and video. It offers echo-cancellation and text-chat support as well. A room's ‘director’ can manage the guests from the control room, easily accessing individual sources for integration into OBS.
* Guests have their own link to join the chat room. They will be able to see all of those in the chatroom, including themselves. Settings to restrict what sources each group member can see or hear are also available.
* The 'director' will be able to view the chat room, without joining it themselves, and they will have controls provided that will let them modify aspects of how the room shows up in their OBS. For example, they will be able to mute certain people so they can't be heard or seen in OBS.
* The director will be provided isolated direct links to each of those video streams in the group room, allowing for fine-grain mixing control in OBS.
* Text-chat is available to those in the group chat.
* Passwords are available to keep rooms secure, but are optional. Passwords are not stored on any server; they are used for client-side end-to-end encryption.
* Guests present in the Group Chat room will see and hear all other present guests video/audio streams; by default anyways.
* The video quality of those in a group room will appear low to guests, but this is to ensure more bandwidth and CPU resources are made available for the OBS's access to the stream. You can increase the quality, but with potentially detrimental results.
* Group rooms are not restricted in size, although more than 10 guests can start to be challenging.
Using OBS VirtualCam (or the Mac equivalent), you can let your guests view the OBS live stream itself with sub-100ms of latency. In this case, each guest only needs to view one video stream, the main mixed OBS stream, freeing up group resources to allow for even larger group rooms. This is usually called [`&broadcast`](../advanced-settings/view-parameters/broadcast.md) mode.
# Logos and media assets
For a collection of [VDO.Ninja](https://vdo.ninja/) media assets, there is a Google Drive containing them below.
You're welcome to use them for purposes of promoting or crediting VDO.Ninja. For other uses, please use common sense as to what might be appropriate or reach out and ask.
[https://drive.google.com/drive/folders/1gYfxKEvFbKl\_UgHBT5PeGc5PJ-8yrGqW?usp=sharing](https://drive.google.com/drive/folders/1gYfxKEvFbKl\_UgHBT5PeGc5PJ-8yrGqW?usp=sharing)
You can also find stickers and mugs (0% commission rate set) using the logos here: [https://www.redbubble.com/shop/ap/88897940](https://www.redbubble.com/shop/ap/88897940)

Media assets were created and contributed to VDO.Ninja by the community. Thank you.

---
description: Privacy, Policies, and Data-collection
---
# Privacy and security details
[VDO.Ninja](https://vdo.ninja/) is a peer-to-peer network, which implies it naturally will share your IP address with the remote guests you are connecting with. There are ways to prevent this, such as using VPNs, TURN-servers, and/or enabling IP-leak protection in your browser, but this is not the default behavior. In no way does VDO.Ninja accept responsibility if your IP address is leaked. Connecting only with trusted peers, such as people you know and trust, is recommended for most use cases.
VDO.Ninja does not store IP addresses or other personal information for longer than is needed to provide the service. This might include for purposes of TURN relay server, error reporting, rate-limiting, or for Denial of Service abuse prevention (anti-flooding). There are no user-accounts, although you may use third-party services such as Discord, Reddit, Email, or YouTube to communicate with the VDO.Ninja developers, support, and community.
VDO.Ninja and Meshcast uses Cloudflare as a web server caching service and DNS service, and for some of the site's security. Cloudflare may use technical cookies and data-collection to provide reliable service and very basic analytics. These general usage analytics may be shared with the community, such as when the service sees a large spike in usage, and Cloudflare claims this data is all GDPR-compliant.
Video data may at times be transferred via a hosted TURN video relay server, but this is done only to ensure service. This media data is not stored and is only accessible to the intended remote peer. In most cases though, the video data is directly transferred between two peers, without the use of such servers. Any data that passes through the TURN server remains encrypted per the WebRTC standard, and some TURN servers provided offer further TLS encryption on top of it.
There is basic debug and statistic information transmitted between connected peers when using VDO.Ninja; this may include browser information, GPU, operating system details, and other browser-accessible details. Speed tests that knowingly upload user preferences to a VDO.Ninja server for later review also may contain such information, but it is deleted automatically after no more than a week.
VDO.Ninja on its own does not use tracking cookies, though it may use the local storage for storing user preferences, physical media device names, settings, or history for the purpose of improved user experience. These are not used for tracking, nor are they transferred anywhere. Cloudflare may use its own technical cookies, as mentioned previously.
If accessing the Twitch API, Youtube API, or other service remotely via VDO.Ninja, user auth credentials may be cached within local browser storage until it expires. A complete and future-proof list of what may be stored in local browser storage will be hard to list here, but questions can be asked to Steve directly if it is a concerned.
Deploying the VDO.Ninja website code yourself will still reveal your IP address to some servers, such as STUN/TURN/WSS servers, which are needed for WebRTC to function. The VDO.Ninja hosted and operated servers do not collect personal data, although it may be possible that error or system logs will occasionally capture an IP address. These logs are generally cleared and are not stored longer than needed to ensure reliable and bug-free service.
The option to host your own STUN, TURN and WSS servers exists, allowing for fully isolated hosting, but limited support is available for users choosing this route. Please see the VDO.Ninja GitHub repo for information on deploying server-side software, where links to code and detailed instructions are provided.
Some third-party services used by VDO.Ninja, such as [Meshcast.io](https://meshcast.io/), may be used with VDO.Ninja by means of IFRAMES or the [`&meshcast`](../newly-added-parameters/and-meshcast.md) parameter, but these third-party services are out of the scope of this privacy document. Briefly worth nothing though, being SFU server-based, Meshcast does not offer full end-to-end video encryption like VDO.Ninja alone currently offers. Meshcast does not create recordings, does not access personal streams without permission, and does not store personal data beyond what the user explicitly allows or what is technically required to offer the service.
Please also note that Meshcast hosted streams are accessible by users outside of a VDO.Ninja group room, without a password, so long as they have the Meshcast stream ID. The stream ID is accessible to anyone viewing the Meshcast stream, which they can then leak to others outside of the room. This is a typical security concern of server-based streaming services of course, so if this is a concern, do not use Meshcast in conjunction with VDO.Ninja.
VDO.Ninja does have a domain-isolated hosted version to third-party though from being used in VDO.Ninja directly, located at [https://isolated.vdo.ninja](https://isolated.vdo.ninja), which tries to block third-party domains from functioning within VDO.Ninja's website code.
When using the VDO.Ninja service, stream ID values and room names should be kept secure and treated like passwords when possible. Actual passwords are available additionally though, which are used to enable a client-side encryption mechanism that ensure two peers are unable to connect if passwords do not match. It is not recommended to the include the raw password in the URL, where possible, for maximum security.
Room names (typically encrypted) and salted stream IDs are transmitted to the handshake server, as they are required for making connections between peers. Passwords are intended to remain client-side only, and unless set in the URL, remain always entirely client-side. Passwords also are used to encrypt room names, further salt stream IDs, and to further encrypt IP-containing initial handshake connection data.
To further protect the user, any deployment of VDO.Ninja to a private domain name will be further secured, as the domain name will be used as a salting mechanism for both room names, stream IDs, and encryption. As a result, a stream or room on one domain will not be accessible from another hosted deployment on another domain without tampering; at least the odds are astronomical.
While nearly all data transfer is peer to peer based, the initial handshake between two peers is still handled by a server, as per a technical requirement. Once the peer connection is established, any further data between peers is then transferred directly between peers, if possible. This includes the media streams, chat messages, and other aspects, including display names and system information. A VDO.Ninja server may still transmit/receive data if using the remote control HTTPS/WSS API, for ping/pong keep alive requests, for reconnection or ice-restart events, and as a backup for failed peer to peer messages.
Once a user disconnects from the handshake-server, any cached information about their connection is promptly cleared from memory. Such cached information is a technical requirement to offer public service at scale.
Future and auxiliary services that use VDO.Ninja as a component, such as [SocialStream](../steves-helper-apps/social-stream-ninja/), Invite.cam, or [Versus.cam](../steves-helper-apps/versus.cam.md), may have their own data-privacy or user-storage policies.
Backup handshake servers are hosted to ensure reliability, such as with [https://backup.vdo.ninja](https://backup.vdo.ninja), and managed third-party handshake servers are supported, such as piesocket.com.
There are several hosted handshake, website, and TURN servers across the globe, with the primary servers hosted in the USA. Details for hosting a personal-sized handshake-server is here, [https://github.com/steveseguin/websocket\_server/](https://github.com/steveseguin/websocket\_server/). Self-hosting with the provided handshake server is intended for limited private/personal use, as message routing is handled in a fanout fashion, so large scale public use isn't advised without further deployment or development considerations.
VDO.Ninja cannot guarantee privacy, service, or security, despite its efforts to protect you. You use the site, code, or service at your own risk and acceptance. Questions or requests related to privacy can be made out to steve@seguin.email.
# Project Contact Info
## Project Information and Support Links
**web service URL**: [https://VDO.Ninja](https://obs.ninja)
**project development URL**: [https://github.com/steveseguin/vdo.ninja](https://github.com/steveseguin/vdo.ninja)
**developer/maintainer**: [steve@seguin.email](mailto:steve@seguin.email)
**donations**: [via GitHub Sponsors](https://github.com/steveseguin/obsninja/wiki/Sponsor-%E2%9D%A4)
### Community Support
**Discord**: [https://discord.vdo.ninja](https://discord.vdo.ninja)
**Reddit**: [https://reddit.com/r/vdoninja](https://reddit.com/r/vdoninja)
# Help!
* [fail-safes-and-backups.md](fail-safes-and-backups.md "mention")
* [privacy-and-security-details.md](privacy-and-security-details.md "mention")
* [vdo.ninja-terms-of-service.md](privacy-and-security-details/vdo.ninja-terms-of-service.md "mention")
* [vdo.ninja-privacy-policy.md](privacy-and-security-details/vdo.ninja-privacy-policy.md "mention")
* [project-contact-info.md](project-contact-info.md "mention")
* [report-a-bug.md](report-a-bug.md "mention")
* [where-can-i-get-support.md](where-can-i-get-support.md "mention")
* [feature-requests.md](feature-requests.md "mention")
* [logos-and-media-assets.md](logos-and-media-assets.md "mention")
* [what-does-vdo-stand-for.md](what-does-vdo-stand-for.md "mention")
# Where can I report a bug?
It is most helpful to report bugs via the official [Github](https://github.com/steveseguin/obsninja). We also monitor the [Reddit](https://www.reddit.com/r/VDONinja/) and [Discord](https://discord.gg/qWDshMsTar) channels, though it is easier to miss reports that occur there.
---
description: '"VeeDeeOh"'
---
# What does VDO stand for?
VDO is the loose phonetic spelling of the world _video_. "VeeDeeOh". It is not an abbreviation.
# Where can I get support?
The preferred support mechanism is via [Reddit](https://www.reddit.com/r/VDONinja/) or [Discord](https://discord.gg/feenJm8HTa), which offer community-assisted support. Development issues, feature requests, and bugs are tracked on [Github](https://github.com/steveseguin/obsninja). For mission critical support issues, or business-related inquiries, you can contact Steve directly.
---
description: We strive to protect your privacy, but you use VDO.Ninja at your own risk
---
# VDO.Ninja Privacy Policy
**Effective Date:** November 18, 2023
Welcome to VDO.Ninja, a peer-to-peer networking service designed to facilitate seamless video and audio communication. This Privacy Policy outlines our practices regarding the collection, use, and protection of your information.
**1. Data Collection and Use**
* **IP Addresses:** VDO.Ninja operates as a peer-to-peer network, which may share your IP address and basic system information with remote guests you connect with. Using VPNs, TURN servers, or enabling IP-leak protection will offer enhanced privacy, however doing so could be detrimental to the performance of the service.
* **Personal Information:** We do not store personal information longer than necessary. This may include data for TURN relay servers, error reporting, rate-limiting, speed-test results, and anti-flooding measures.
* **Cookies and Local Storage:** VDO.Ninja does not use tracking cookies. Local browser storage may be used for storing user preferences and settings; not for tracking purposes.
* **Third-Party Services:** When using third-party services like Discord or YouTube, their respective privacy policies apply.
**2. Data Deletion Policy**
* **No User Accounts:** VDO.Ninja does not create user accounts in its web or mobile app versions, thus eliminating the need for a mechanism to delete user accounts. However, related products or services may have their own privacy policies and data management procedures.
* **Web Version:** In the web version of VDO.Ninja, users can delete any local preference data, such as camera configuration settings. An option to do so is provided in the user settings menu, or it may be done using their browser's built-in clear local storage options.
* **Mobile App:** The native mobile app versions of VDO.Ninja may store stream IDs, room names, and user settings locally. This data can be manually cleared or overridden by the user at any time. Additionally, all such local data is deleted when the app is uninstalled.
* **Data Retention:** Data collected during optional pre-check performance tests is automatically deleted after a period of typically 7 days. Any personal data in general is not retained longer than necessary for the technical functioning of the service.
**3. Data Security and Responsibility**
* **Media Data:** Media data transferred via TURN servers is encrypted per the WebRTC standard. Media sent via Meshcast or other SFU services will not be end-to-end encrypted by default, and so may technically allow for server-side recording. Any viewer of a stream can record the stream without notice to others. Built-in recording options are offered, including the option to upload direct to cloud services. External recording tools, like OBS Studio, can also be used to record.
* **System Information:** Basic debug and system statistical information may be transmitted between peers, including browser user agent, basic hardware specifications, IP address, display name, and operating system details. Performing the optional pre-check system test may also store such test result information for a limited period of time on a server, only as technically required to offer the service.
* **User Auth Credentials:** Credentials may be cached in local browser storage and are subject to expiration.
**4. Third-Party Services and Cloudflare**
* **Cloudflare:** We use Cloudflare for web server caching, DNS, STUN, TURN geo-routing, security services, bandwidth testing, and probably more. Cloudflare's use of data is GDPR-compliant.
* **Meshcast.io:** This third-party service, when used with VDO.Ninja, operates independently of our privacy practices.
* **Invite.cam:** May retain details of social-sign-in credentials within a database for purposes of authenticating users and store VDO.Ninja related settings.
* **Google:** We may use Google for STUN services and host the core servers on Google Cloud.
* **SSO:** We may offer Social Sign In (SSO) options for additional functionality using services such as Dropbox, Google Drive, Discord, and YouTube chat.
**5. User Responsibility**
* **Stream ID and Room Names:** Treat these as sensitive information and choose secure values that cannot be guessed. We provide options for additional client-side encryption for added security, but the system may choose to fail-safe rather than to fail-securely in some cases.
* **Handshake Server:** The initial connection is managed by a server, but subsequent data transfers are peer-to-peer when possible. While connected to the handshake server new peer connections can potentially be established.
* **Self-Hosting:** Unless specified, self-hosting VDO.Ninja will still result in the the system still using the official handshake servers and other such services by default. You must configure your VDO.Ninja deployment to use your own such services if desired. Any self-hosted handshake server code provided is intended for private personal use; it's not secured for public use or access.
**6. Legal Disclaimer**
* **No Guarantee of Privacy or Security:** While we strive to protect your information, we cannot guarantee absolute privacy or security. Use of VDO.Ninja in any capacity is at your own risk.
* **Contact Information:** For privacy-related inquiries, contact [steve@seguin.email](mailto:steve@seguin.email).
**7. Amendments**
* This policy may be updated periodically. We encourage users to review it regularly.
# VDO.Ninja Terms of Service
**Effective Date:** November 18th, 2023
Welcome to VDO.Ninja! By using our service, you agree to be bound by the following terms and conditions. Please read them carefully.
**1. Acceptance of Terms**
* By accessing or using VDO.Ninja, you agree to these Terms of Service and our Privacy Policy.
**2. Description of Service**
* VDO.Ninja provides a peer-to-peer networking platform for video and audio communication. We offer this service free of charge.
**3. User Obligations**
* You agree to use VDO.Ninja lawfully and ethically.
* You are responsible for maintaining the confidentiality of any stream ID or room name used in the service.
**4. Prohibited Uses**
* You may not use VDO.Ninja for any illegal or unauthorized purpose.
* Harassment, abuse, or harm to another person or group is strictly prohibited.
**5. Intellectual Property**
* VDO.Ninja and its original content, features, and functionality are owned by the service provider and are protected by copyright, trademark, and other intellectual property laws.
**6. User-Generated Content**
* You are solely responsible for the content you transmit or share on VDO.Ninja.
**7. Privacy**
* Your use of VDO.Ninja is subject to our Privacy Policy.
**8. Disclaimers**
* VDO.Ninja is provided "as is" without any warranties, express or implied.
* We do not guarantee the continuous, uninterrupted or error-free operability of the services.
**9. Limitation of Liability**
* The service provider shall not be liable for any indirect, incidental, special, consequential or punitive damages, or any loss of profits or revenues, whether incurred directly or indirectly, or any loss of data, use, goodwill, or other intangible losses.
**10. Indemnification**
* You agree to indemnify and hold harmless the service provider from any claim or demand, including reasonable attorneys' fees, made by any third party due to or arising out of your breach of these Terms, or your violation of any law or the rights of a third party.
**11. Termination**
* We may terminate or suspend access to our service immediately, without prior notice or liability, for any reason whatsoever, including, without limitation, if you breach the Terms.
**12. Changes to Terms**
* We reserve the right, at our sole discretion, to modify or replace these Terms at any time.
**13. Governing Law**
* These Terms shall be governed by and interpreted in accordance with the laws of Canada, without regard to its conflict of law provisions.
**14. Contact Information**
* For any questions about these Terms, please contact [steve@seguin.email](mailto:steve@seguin.email).
# IFRAME API
# add
General Option! ([`&push`](../../source-settings/push.md), [`&view`](../../advanced-settings/view-parameters/view.md), [`&scene`](../../advanced-settings/view-parameters/scene.md))
## Options
| Value | Description |
| ----- | ----------- |
| true | |
| false | |
## Modifiers
| Action | Value | Required | Description |
| ----------------- | ------------------ | -------- | ----------- |
| target (required) | '\*' \| (streamID) | yes | |
| | | | |
| | | | |
### Example
```
iframe.contentWindow.postMessage({
"target": "*",
"add": true
});
```
# advancedMode
General Option! ([`&push`](../../source-settings/push.md), [`&view`](../../advanced-settings/view-parameters/view.md), [`&scene`](../../advanced-settings/view-parameters/scene.md))
## Options
| Value | Description |
| ----- | ----------- |
| true | |
| false | |
### Example
```
iframe.contentWindow.postMessage({
"advancedMode": true
});
```
---
description: Set a video bitrate for a video; scene or view link; kbps. Lockable.
---
# audiobitrate
## Type
number
## Co-actions
| Action | Type | Required | |
| ------ | ------- | -------- | ------------------------------------------------------ |
| "lock" | boolean | No | Locks bitrate (prevents the automixer from overriding) |
### Example
```
iframe.contentWindow.postMessage({ "audiobitrate": 3000, "lock": true });
```
---
description: Stop the auto mixer if you want to control the layout and bitrate yourself
---
# automixer
General Option! ([`&push`](../../source-settings/push.md), [`&view`](../../advanced-settings/view-parameters/view.md), [`&scene`](../../advanced-settings/view-parameters/scene.md))
## Options
| Value | Description |
| ----- | ----------- |
| true | |
| false | |
## Modifiers
| Action | Value | Required | Description |
| ------ | ----- | -------- | ----------- |
| | | | |
| | | | |
| | | | |
### Example
```
iframe.contentWindow.postMessage({
"automixer": true
});
```
---
description: Set a video bitrate for a video; scene or view link; kbps. Lockable.
---
# bitrate
## Type
number
## Co-actions
| Action | Type | Required | |
| ------ | ------- | -------- | ------------------------------------------------------ |
| "lock" | boolean | No | Locks bitrate (prevents the automixer from overriding) |
### Example
```
iframe.contentWindow.postMessage({ "bitrate": 3000, "lock": true });
```
---
description: Mutes/unmutes camera
---
# camera
Sender Option! ([`&push`](../../source-settings/push.md))
| Value | Description |
| -------- | -------------- |
| true | Turns mic on |
| false | Turns mic off |
| "toggle" | Toggles on/off |
### CODE EXAMPLE
```
iframe.contentWindow.postMessage({ "camera": true });
```
# changeAudioDevice
## Type
number
### Example
```
iframe.contentWindow.postMessage({ "changeAudioDevice": 1 });
```
# changeAudioOutputDevice
## Type
number
### Example
```
iframe.contentWindow.postMessage({ "changeAudioODevice": 1 });
```
# changeVideoDevice
## Type
number
### Example
```
iframe.contentWindow.postMessage({ "changeVideoDevice": 1 });
```
---
description: Disconnect and hangup all inbound streams.
---
# close
General Option! ([`&push`](../../source-settings/push.md), [`&view`](../../advanced-settings/view-parameters/view.md), [`&scene`](../../advanced-settings/view-parameters/scene.md))
## Aliases
hangup
## Options
| Value | Description |
| ----- | ----------- |
| true | |
| false | |
## Modifiers
| Action | Value | Required | Description |
| ------ | ----- | -------- | ----------- |
| | | | |
| | | | |
| | | | |
### Example
```
iframe.contentWindow.postMessage({
"close": true,
});
```
# Director Options
---
description: Insert a custom style sheet
---
# getDetailedState
General Option! ([`&push`](../../source-settings/push.md), [`&view`](../../advanced-settings/view-parameters/view.md), [`&scene`](../../advanced-settings/view-parameters/scene.md))
## Options
| Value | Description |
| ----- | ----------- |
| true | |
| false | |
## Modifiers
| Action | Value | Required | Description |
| ------ | ----- | -------- | ----------- |
| | | | |
| | | | |
| | | | |
### Example
```
iframe.contentWindow.postMessage({
"style": "{ border: dashed 4px tomato }"
});
```
# getDeviceList
## Type
true
### Example
```
iframe.contentWindow.postMessage({ "getDeviceList": true });
```
# getEffectsData
General Option! ([`&push`](../../source-settings/push.md), [`&view`](../../advanced-settings/view-parameters/view.md), [`&scene`](../../advanced-settings/view-parameters/scene.md))
## Options
| Value | Description |
| ----- | ----------- |
| true | |
| false | |
## Modifiers
| Action | Value | Required | Description |
| ------ | ----- | -------- | ----------- |
| | | | |
| | | | |
| | | | |
### Example
```
iframe.contentWindow.postMessage({
"getEffectsData": true,
});
```
# getLoudness
General Option! ([`&push`](../../source-settings/push.md), [`&view`](../../advanced-settings/view-parameters/view.md), [`&scene`](../../advanced-settings/view-parameters/scene.md))
## Options
| Value | Description |
| ----- | ----------- |
| true | |
| false | |
## Modifiers
| Action | Value | Required | Description |
| ------ | ----- | -------- | ----------- |
| | | | |
| | | | |
| | | | |
### Example
```
iframe.contentWindow.postMessage({
"getLoudness": true,
});
```
# getRemoteStats
General Option! ([`&push`](../../source-settings/push.md), [`&view`](../../advanced-settings/view-parameters/view.md), [`&scene`](../../advanced-settings/view-parameters/scene.md))
## Options
| Value | Description |
| ----- | ----------- |
| (any) | |
## Modifiers
| Action | Value | Required | Description |
| ------ | ----- | -------- | ----------- |
| | | | |
| | | | |
| | | | |
### Example
```
iframe.contentWindow.postMessage({
});
```
---
description: >-
Webrtc send message to every connected peer; like send and request; a hammer
vs a knife.
---
# getStats
Sender Option! ([`&push`](../../source-settings/push.md))
## Options
| Value | Description |
| ----- | -------------- |
| (any) | Reloads iframe |
### Example
```
iframe.contentWindow.postMessage({
"getStats": null,
});
```
---
description: >-
Get a list of stream Ids, with a label if it is present. label = false if not
there
---
# getStreamIDs
General Option! ([`&push`](../../source-settings/push.md), [`&view`](../../advanced-settings/view-parameters/view.md), [`&scene`](../../advanced-settings/view-parameters/scene.md))
## Options
| Value | Description |
| ----- | ----------- |
| true | |
| false | |
## Modifiers
| Action | Value | Required | Description |
| ------ | ----- | -------- | ----------- |
| | | | |
| | | | |
| | | | |
### Example
```
iframe.contentWindow.postMessage({
"getStreamIDs": true,
});
```
---
description: >-
Get a list of stream Ids, with a label if it is present. label = false if not
there
---
# getStreamInfo
General Option! ([`&push`](../../source-settings/push.md), [`&view`](../../advanced-settings/view-parameters/view.md), [`&scene`](../../advanced-settings/view-parameters/scene.md))
## Options
| Value | Description |
| ----- | ----------- |
| true | |
| false | |
## Modifiers
| Action | Value | Required | Description |
| ------ | ----- | -------- | ----------- |
| | | | |
| | | | |
| | | | |
### Example
```
iframe.contentWindow.postMessage({
"getStreamInfo": true,
});
```
# keyframe
| Value | Description |
| ----- | ------------- |
| true | Send keyframe |
### CODE EXAMPLE
```
iframe.contentWindow.postMessage({ "keyframe": true });
```
# panning
| Value | Description |
| ------- | -------------------------- |
| (0-180) | set stereo panning (0-180) |
### CODE EXAMPLE
```
iframe.contentWindow.postMessage({ "panning": 100 });
```
# previewMode
General Option! ([`&push`](../../source-settings/push.md), [`&view`](../../advanced-settings/view-parameters/view.md), [`&scene`](../../advanced-settings/view-parameters/scene.md))
## Options
| Value | Description |
| ----- | ----------- |
| true | |
| false | |
## Modifiers
| Action | Value | Required | Description |
| ------ | ----- | -------- | ----------- |
| layout | | no | |
| | | | |
| | | | |
### Example
```
iframe.contentWindow.postMessage({
"previewMode": true
});
```
# API commands
---
description: >-
Webrtc send message to every connected peer; like send and request; a hammer
vs a knife.
---
# reload
Sender Option! ([`&push`](../../source-settings/push.md))
## Options
| Value | Description |
| ----- | -------------- |
| (any) | Reloads iframe |
### Example
```
iframe.contentWindow.postMessage({
"reload": null,
});
```
# remove
General Option! ([`&push`](../../source-settings/push.md), [`&view`](../../advanced-settings/view-parameters/view.md), [`&scene`](../../advanced-settings/view-parameters/scene.md))
## Options
| Value | Description |
| ----- | ----------- |
| true | |
| false | |
## Modifiers
| Action | Value | Required | Description |
| ----------------- | ------------------ | -------- | ----------- |
| target (required) | '\*' \| (streamID) | yes | |
| | | | |
| | | | |
### Example
```
iframe.contentWindow.postMessage({
"target": "*",
"remove": true
});
```
# requestStatsContinuous
General Option! ([`&push`](../../source-settings/push.md), [`&view`](../../advanced-settings/view-parameters/view.md), [`&scene`](../../advanced-settings/view-parameters/scene.md))
## Options
| Value | Description |
| ----- | ----------- |
| (any) | |
## Modifiers
| Action | Value | Required | Description |
| ------ | ----- | -------- | ----------- |
| | | | |
| | | | |
| | | | |
### Example
```
iframe.contentWindow.postMessage({
"requestStatsContinuous": true
});
```
# requestStream
General Option! ([`&push`](../../source-settings/push.md), [`&view`](../../advanced-settings/view-parameters/view.md), [`&scene`](../../advanced-settings/view-parameters/scene.md))
## Options
| Value | Description |
| ----- | ----------- |
| true | |
| false | |
### Example
```
iframe.contentWindow.postMessage({
"requestStream": true
});
```
# scale
General Option! ([`&push`](../../source-settings/push.md), [`&view`](../../advanced-settings/view-parameters/view.md), [`&scene`](../../advanced-settings/view-parameters/scene.md))
## Options
| Value | Description |
| ----- | ----------- |
| true | |
| false | |
## Modifiers
| Action | Value | Required | Description |
| ------ | ----- | -------- | ----------- |
| UUID | | no | |
| | | | |
| | | | |
### Example
```
iframe.contentWindow.postMessage({
"scene": true
});
```
# scene
General Option! ([`&push`](../../source-settings/push.md), [`&view`](../../advanced-settings/view-parameters/view.md), [`&scene`](../../advanced-settings/view-parameters/scene.md))
## Options
| Value | Description |
| ----- | ----------- |
| true | |
| false | |
## Modifiers
| Action | Value | Required | Description |
| ------ | ----- | -------- | ----------- |
| layout | | yes | |
| | | | |
| | | | |
### Example
```
iframe.contentWindow.postMessage({
"scene": true
});
```
---
description: Tells the connected peers if they are live or not via a tally light change.
---
# sceneState
## Type
boolean
### Example
```
iframe.contentWindow.postMessage({ "sceneState": true });
```
# sendChat
General Option! ([`&push`](../../source-settings/push.md), [`&view`](../../advanced-settings/view-parameters/view.md), [`&scene`](../../advanced-settings/view-parameters/scene.md))
| Value | Description |
| -------- | ------------ |
| (string) | Chat message |
### CODE EXAMPLE
```
iframe.contentWindow.postMessage({ "sendChat": "Hello" });
```
---
description: >-
Send generic data via p2p. Send whatever you want I guess; there is a max
chunk size of course.
---
# sendData
General Option! ([`&push`](../../source-settings/push.md), [`&view`](../../advanced-settings/view-parameters/view.md), [`&scene`](../../advanced-settings/view-parameters/scene.md))
| Value | Description |
| ----- | -------------------------------- |
| (any) | Small amount of data to send P2P |
### CODE EXAMPLE
```
iframe.contentWindow.postMessage({ "sendData": { foo: "bar" });
```
---
description: Webrtc send to viewers
---
# sendMessage
## Type
string
### Example
```
iframe.contentWindow.postMessage({ "sendMessage": "HELLO" });
```
---
description: >-
Webrtc send message to every connected peer; like send and request; a hammer
vs a knife.
---
# sendPeers
Sender Option! ([`&push`](../../source-settings/push.md))
## Options
| Value | Description |
| -------- | ----------- |
| (string) | |
### Example
```
```
---
description: Webrtc send to publishers
---
# sendRawMIDI
Sender Option! ([`&push`](../../source-settings/push.md))
## Options
| Value | Description |
| ------ | ----------- |
| (midi) | |
## Modifiers
| Action | Value | Required | Description |
| -------- | -------- | -------- | ----------- |
| UUID | (string) | no | |
| streamID | (string) | no | |
### Example
```
iframe.contentWindow.postMessage({
"sendRawMIDI": "11110001",
"streamID": "someid"
});
```
# settings
General Option! ([`&push`](../../source-settings/push.md), [`&view`](../../advanced-settings/view-parameters/view.md), [`&scene`](../../advanced-settings/view-parameters/scene.md))
## Options
| Value | Description |
| ----- | ----------- |
| true | |
| false | |
## Modifiers
| Action | Value | Required | Description |
| ----------------- | ------------------ | -------- | ----------- |
| target (required) | '\*' \| (streamID) | yes | |
| | | | |
| | | | |
### Example
```
iframe.contentWindow.postMessage({
"target": "*",
"add": true
});
```
---
description: Insert a custom style sheet
---
# style
General Option! ([`&push`](../../source-settings/push.md), [`&view`](../../advanced-settings/view-parameters/view.md), [`&scene`](../../advanced-settings/view-parameters/scene.md))
## Options
### Example
```
iframe.contentWindow.postMessage({
"style": "{ border: dashed 4px tomato }"
});
```
---
description: >-
This sets the fundamental audio bitrate target, but does not necessarily
"lock"
---
# targetAudioBitrate
## Type
Number (0+)
### CODE EXAMPLE
```
iframe.contentWindow.postMessage({ "targetAudioBitrate": 1000 });
```
---
description: this sets the fundamental bitrate target, but does not necessarily "lock"
---
# targetBitrate
| Value type | Description |
| ------------------ | ------------------------ |
| (positive integer) | Set target bitrate to 30 |
### CODE EXAMPLE
```
iframe.contentWindow.postMessage({ "panning": 100 });
```
---
description: Mutes / unmutes the speaker
---
# mute
General Option! ([`&push`](../../../source-settings/push.md), [`&room`](../../../general-settings/room.md), [`&view`](../../../advanced-settings/view-parameters/view.md), [`&scene`](../../../advanced-settings/view-parameters/scene.md), [`&director`](../../../viewers-settings/director.md))
## Related URL Param
[and-mutespeaker.md](../../../source-settings/and-mutespeaker.md)
## Options
| Value | Description |
| -------- | ------------------- |
| true | Mute speaker |
| false | Un-mute speaker |
| "toggle" | Toggle speaker mute |
## Example
```javascript
iframe.contentWindow.postMessage({
"mute": true
});
```
# General Options
---
description: Mutes / unmutes mic
---
# mic
Sender Option! ([`&push`](../../../source-settings/push.md))
## Related URL Param
[and-mute.md](../../../source-settings/and-mute.md)
## Options
| Value | Description |
| -------- | -------------- |
| true | Turns mic on |
| false | Turns mic off |
| "toggle" | Toggles on/off |
## Example
```
iframe.contentWindow.postMessage({
"mic": true
});
```
# Sender-side Options
# View Options
---
description: Sets the speaker (output) volume of a video element
---
# volume
## Related URL Param
[and-volume.md](../../../advanced-settings/upcoming-parameters/and-volume.md)
## Options
| Value | Description |
| ------- | -------------------------------- |
| (0-100) | audio playback volume as percent |
| (0-1.0) | audio playback volume as decimal |
## Modifiers
| | value | Required | Description |
| -------- | ---------- | -------- | ----------------------------- |
| "target" | (streamID) | no | Targets a guest by streamID |
| "target" | "\*" | no | Targets every guest (default) |
| | | | |
## Example
```
iframe.contentWindow.postMessage({
"volume": 0.5,
"target": "*"
});
```
---
description: >-
Option to change outbound screen-share video bitrate of the &meshcast
parameter
---
# &mcscreensharebitrate
Meshcast Option / Sender-Side Option! ([`&meshcast`](../newly-added-parameters/and-meshcast.md), [`&push`](../source-settings/push.md))
## Aliases
* `&mcssbitrate`
## Options
Example: `&mcscreensharebitrate=2000`
Value
Description
(integer value)
publishing screen share Meshcast video bitrate in kbps
## Details
`&mcscreensharebitrate` controls the outbound screen-share video bitrate of the [`&meshcast`](../newly-added-parameters/and-meshcast.md) parameter while screen-sharing via Meshcast. It will override the [`&meshcastbitrate`](and-meshcastbitrate.md) if the video is a screen-share.
## Related
[and-meshcast.md](../newly-added-parameters/and-meshcast.md)
[and-meshcastbitrate.md](and-meshcastbitrate.md)
[and-mcscreensharecodec.md](and-mcscreensharecodec.md)
---
description: Option to change codec of the &meshcast parameter while screen-sharing
---
# &mcscreensharecodec
Meshcast Option / Sender-Side Option! ([`&meshcast`](../newly-added-parameters/and-meshcast.md), [`&push`](../source-settings/push.md))
## Aliases
* `&mcsscodec`
## Options
Example: `&mcscreensharecodec=h264`
Value
Description
h264
h264 codec
vp8
vp8 codec
vp9
vp9 codec
42e01f*
open h264 codec
(xxxxxx)*
h264 profile IDs
\*on beta and alpha
## Details
Adding `&mcsceensharecodec` to the publisher's side together with [`&meshcast`](../newly-added-parameters/and-meshcast.md) gives the option to change the publishing codec while screen-sharing via meshcast.
Example usage: `https://vdo.ninja/?meshcast&mcscreensharecodec=vp8`
There's 4 codec options currently, including the default option:
* The unspecified default, which is software h264.
* There's also `h264`, which is what the browser then sets. This could include hardware encoding, but that will not work with Firefox or Safari viewers then.
* `vp8` is pretty compatible, so if the default codec doesn't work, you can try that.
* `vp9` is also available, which has better compression/quality, but not fully compatible with all devices.
* av1 and svc are not yet supported, but that is planned at some point.
## Related
[and-meshcast.md](../newly-added-parameters/and-meshcast.md)
[and-mcscreensharebitrate.md](and-mcscreensharebitrate.md)
[and-meshcastcodec.md](and-meshcastcodec.md)
[codec.md](../advanced-settings/view-parameters/codec.md)
[and-h264profile.md](../newly-added-parameters/and-h264profile.md)
---
description: Option to change outbound video bitrate of the &meshcast parameter
---
# &meshcastbitrate
Meshcast Option / Sender-Side Option! ([`&meshcast`](../newly-added-parameters/and-meshcast.md), [`&push`](../source-settings/push.md))
## Aliases
* `&mcbitrate`
* `&mcb`
## Options
Example: `&meshcastbitrate=2500`
Value
Description
(integer value)
publishing meshcast video bitrate in kbps
## Details
Adding `&meshcastbitrate` to the publisher's side together with [`&meshcast`](../newly-added-parameters/and-meshcast.md) gives the option to change the video bitrate for Meshcast.
Example usage: `https://vdo.ninja/?meshcast&meshcastbitrate=2000`
Increased the default bitrate of [`&meshcast`](../newly-added-parameters/and-meshcast.md) from like 500-kbps to max of 3200-kbps; will probably change as the feature evolves and becomes more customizable.
The default Meshcast bitrate is normally set to around 2400-kbps.
Each guest will see a Meshcast video at the same bitrate and resolution as everyone else. It's the same video stream to everyone in the room, control center, view links, and scenes. This is unlike the [`&totalroombitrate`](../advanced-settings/video-bitrate-parameters/totalroombitrate.md), which varies the bitrate per video that guests see based on the number of guests in the room; [`&totalroombitrate`](../advanced-settings/video-bitrate-parameters/totalroombitrate.md) and [`&videobitrate`](../advanced-settings/video-bitrate-parameters/bitrate.md) will not impact the bitrate of a Meshcast stream, nor will [`&scale`](../advanced-settings/view-parameters/scale.md) change its resolution.
## Related
[and-meshcast.md](../newly-added-parameters/and-meshcast.md)
[and-meshcastcodec.md](and-meshcastcodec.md)
[and-meshcastaudiobitrate.md](../advanced-settings/meshcast-parameters/and-meshcastaudiobitrate.md)
---
description: Option to change codec of the &meshcast parameter
---
# &meshcastcodec
Meshcast Option / Sender-Side Option! ([`&meshcast`](../newly-added-parameters/and-meshcast.md), [`&push`](../source-settings/push.md))
## Aliases
* `&mccodec`
## Options
Example: `&meshcastcodec=h264`
Value
Description
h264
h264 codec
vp8
vp8 codec
vp9
vp9 codec
42e01f*
open h264 codec
(xxxxxx)*
h264 profile IDs
\*on beta and alpha
## Details
Adding `&meshcastcodec` to the publisher's side together with [`&meshcast`](../newly-added-parameters/and-meshcast.md) gives the option to change the publishing codec for Meshcast.
Example usage: `https://vdo.ninja/?meshcast&meshcastcodec=vp9`
There's 4 codec options currently, including the default option:
* The unspecified default, which is software h264.
* There's also `h264`, which is what the browser then sets. This could include hardware encoding, but that will not work with Firefox or Safari viewers then.
* `vp8` is pretty compatible, so if the default codec doesn't work, you can try that.
* `vp9` is also available, which has better compression/quality, but not fully compatible with all devices.
* av1 and svc are not yet supported, but that is planned at some point.
## Related
[and-meshcast.md](../newly-added-parameters/and-meshcast.md)
[and-mcscreensharecodec.md](and-mcscreensharecodec.md)
[codec.md](../advanced-settings/view-parameters/codec.md)
[and-h264profile.md](../newly-added-parameters/and-h264profile.md)
---
description: Allows for specifying which midi channel (1 to 16) to listen on
---
# &midichannel
General Option! ([`&push`](../source-settings/push.md), [`&room`](../general-settings/room.md), [`&view`](../advanced-settings/view-parameters/view.md), [`&scene`](../advanced-settings/view-parameters/scene.md))
## Options
Example: `&midichannel=3`
Value
Description
(1 to 16)
specifies which midi channel to listen on
## Details
These work in conjunction with [`&midi`](midi.md) to allow for specifying which midi channel (1 to 16) to listen on. If you don't specify anything, it listens to all channels. Previously it was hard-coded to listen to just channel-1, but now it will listen to all channels unless filtered.
## Related
[midi.md](midi.md)
[and-mididevice.md](and-mididevice.md)
---
description: Allows to specify which midi device (1 and up) selected
---
# &mididevice
General Option! ([`&push`](../source-settings/push.md), [`&room`](../general-settings/room.md), [`&view`](../advanced-settings/view-parameters/view.md), [`&scene`](../advanced-settings/view-parameters/scene.md))
## Options
Example: `&mididevice=5`
| Value | Description |
| ------------------------ | ------------------------- |
| (positive integer value) | Specifies the midi device |
## Details
Works in conjunction with [`&midi`](midi.md) to allow for specifying which midi device (1 and up) selected. If you don't specify anything, it listens to all midi devices.
## Related
[midi.md](midi.md)
[and-midichannel.md](and-midichannel.md)
---
description: >-
Allows you to set a series of buttons on a MIDI controller to be mute controls
for those guests
---
# &midioffset
General Option! ([`&push`](../source-settings/push.md), [`&room`](../general-settings/room.md), [`&view`](../advanced-settings/view-parameters/view.md), [`&scene`](../advanced-settings/view-parameters/scene.md))
## Options
Example: `&midioffset=23`
Value
Description
(positive integer value)
(postitive integer value) is the control change command you want to use to mute guest 1. N+1 will mute guest 2, etc.
## Details
You can subsequently pass `&midioffset=N`, where N is the control change command you want to use to mute guest 1. N+1 will mute guest 2, etc (up to a max. of 9 guests). This allows you to set a series of buttons on a MIDI controller to be mute controls for those guests. It ignores the MIDI CC values.
For example:
[`https://vdo.ninja/?director&midi=5&midioffset=23`](https://vdo.ninja/?director\&midi=5\&midioffset=23)
## Related
[midi.md](midi.md)
---
description: Global hotkey support via MIDI input and more
---
# &midi
General Option! ([`&push`](../source-settings/push.md), [`&room`](../general-settings/room.md), [`&view`](../advanced-settings/view-parameters/view.md), [`&scene`](../advanced-settings/view-parameters/scene.md))
## Aliases
* `&hotkeys`
## Details
You can use a MIDI controller, virtual or real, to issue commands to VDO.Ninja. This option is compatible with an Elegato Streamdeck, allowing for both control over things like mute, but also control over remote guests if a director.
A web-based dashboard for issuing MIDI commands from a virtual MIDI device can be found here: [https://vdo.ninja/midi](https://vdo.ninja/midi). It can also offer debugging information, listing MIDI event data in the browser's developer console, helping to identity what certain MIDI buttons do.
The MIDI capabilities of VDO.Ninja go beyond just controlling VDO.Ninja though. Options to seamlessly send and receive MIDI commands with remote computers at very low latency is also possible.
More information, details, guides, and tools can be found closer to the bottom of this page.
Currently a Chromium-browser, like Google Chrome, is recommended when using the MIDI features. Other browsers may not be compatible at this time.
**Notice:** The VDO.Ninja's MIDI API is still constantly evolving, so check back for updates if you face problems or to discover new available features and options.
### Options for \&midi={value}
There are two MIDI standards; one where value 33 is note A0, and the more common standard where value 33 is note A1. VDO.Ninja uses the A1 standard. Decrease your octave by one if having problems, such as if using TouchOSC.
Value
Description
&midi=N
Description of MIDI
1
Hotkeys using A3 to G4 notes
2
Hotkeys using A1 to G2 notes
3
Hotkeys using Note C1 + velocities
4
Hotkeys using control-change inputs.
Designed mainly for the director to control multiple guests, as well as themselves.
### **\&midi=1**
MIDI message
Function
Note G3
Toggle Chat
Note A3
Toggle Mute
Note B3
Toggle Video Output
Note C4
Toggle Screen Share
Note D4
Hang up
Note E4
Raise Hand Toggle
Note F4
Record Local Video Toggle
Note G4
Enable the Director’s audio [director only]
Note A4
Stop the Director’s Audio [director only]
Note B4
Toggle the Local Speaker Output
### **\&midi=2**
| MIDI message | Function |
| ------------ | -------------------------------------------- |
| Note G1 | Toggle Chat |
| Note A1 | Toggle Mute |
| Note B1 | Toggle Video Output |
| Note C2 | Toggle Screen Share |
| Note D2 | Hang up |
| Note E2 | Raise Hand Toggle |
| Note F2 | Record Local Video Toggle |
| Note G2 | Enable the Director’s audio \[director only] |
| Note A2 | Stop the Director’s Audio \[director only] |
| Note B2 | Toggle the Local Speaker Output |
### **\&midi=3**
MIDI message
Function
Note C1 + Velocity 0
Toggle Chat
Note C1 + Velocity 1
Toggle Mute
Note C1 + Velocity 2
Toggle Video Output
Note C1 + Velocity 3
Toggle Screen Share
Note C1 + Velocity 4
Hang up
Note C1 + Velocity 5
Raise Hand Toggle
Note C1 + Velocity 6
Record Local Video Toggle
Note C1 + Velocity 7
Enable the Director’s audio [director only]
Note C1 + Velocity 8
Stop the Director’s Audio [director only]
Note C1 + Velocity 9
Toggle the Local Speaker Output
### **\&midi=4**
MIDI message
Function
Command = 110
with values accepted from 0 to 8 for local toggle options.
Command = 110+N
where N is the guest’s order in the control room.
In this case, for hotkeying remote guests as a director:
MIDI message
Function
Value 0
Opens the Transfer Popup
Value 1
Add/remove from scene 1
Value 2
Mute guest in scene
Value 3
Mute guest everywhere
Value 4
Hang-up the guest
Value 5
Toggle Solo Chat with this guest
Value 6
Toggle the remote speaker
Value 7
Toggle the remote display
Value 8
Fixes Rainbow Puke of this guest in scenes
Value 12 to 18
Add/remove from scene 2 to 8
All the above hotkey mappings are purely experimental at this time and will change based on user feedback. These mappings should allow a user to use a StreamDeck with VDO.Ninja.
### Configuring MIDI device and channel
By default, any MIDI device on any MIDI channel can trigger the \&midi actions if their command and values match.
Starting with version 20 of VDO.Ninja, you can filter inputs based on channel and device using `&mididevice` and `&midichannel`.
#### &mididevice
This parameter can take any number from 1 and up. It's based on the MIDI device's list index order. You can check the developer console of the browser with \&midi added to get a list of those midi devices and the list. The first item in the list can be used using `&mididevice=1` and the second will be `&mididevice=2`, etc.
If you don't specify a MIDI device, all devices will be used. This \&mididevice filter does not apply to \&midiin or \&midiout.
#### &midichannel
MIDI supports channel 1 to 16. Prior to VDO.Ninja v20, channel 1 was the only channel that worked, but in v20, any channel will be treated as a trigger by default.
By using \&midichannel=1, you can again set VDO.Ninja to only trigger on inputs sent over channel 1. You can specify any single channel to trigger on though, from 1 to 16, if that level of control is needed.
This command is not compatible with \&midiout or \&midiin.
## Elgato Streamdeck support
You can configure a Streamdeck to issue MIDI commands, via the use of a MIDI plugin for Streamdeck. This allows you to send hotkey commands from your Streamdeck to VDO.Ninja locally, on the same computer, or even remotely, via the MIDI remote control feature.
You'll need to find a MIDI plugin within the Streamdeck store, or add one from source. Normally you can just search for MIDI and have some options appear.
For macOS, one Streamdeck plugin available is [https://github.com/tsbkelly/Streamdeck-Midibutton](https://github.com/tsbkelly/Streamdeck-Midibutton)
For PC, there's this one [https://trevligaspel.se/streamdeck/midi/index.html](https://trevligaspel.se/streamdeck/midi/index.html)
You will also need a Virtual MIDI loopback interface on your computer, if intending to send MIDI commands to VDO.Ninja. There's free options available, such as:
See below for a community-created video guide on setting up the Streamdeck with a mac and VDO.Ninja. Let me know if this documentation could use more details.
## Remote MIDI control
This is available for version 19 and higher.
This lets you route all MIDI messages from one computer to another computer, with the purpose of remote trigger the VDO.Ninja hotkeys.
```
https://vdo.ninja/beta/?midiremote=4&director=ROOMNAMEHERE
https://vdo.ninja/beta/?room=ROOMNAMEHERE&midiout=1&vd=0&ad=0&push&autostart&label=MIDI_CONTROLLER
```
* \&midiremote={reference \&midi's values; 1 to 4}
Remote controlling demo
[midiremote.md](../director-settings/midiremote.md)
## MIDI pass-through mode
This is available for version 18 and higher.
This lets you route all MIDI messages from one computer to another computer, going from local MIDI device input to the remote MIDI device output. Example usage:
Starting with VDO.Ninja v20, this will feature will also mirror the channel input, matching the channel with the output. The only control a user has really in configuring it is which device is the input and which device is the output.
```
https://vdo.ninja/?view=Nwz2C7d&midiin=1
https://vdo.ninja/?midiout=0&push=Nwz2C7d
```
* \&midiin={midi output device index; defaults to all} (or \&midipull / \&mi) -- allows for receiving of remote midi. Device indeces starts at 1, where an index of 0 implies "all".
* \&midiout={midi input device index; defaults to all} (or \&midipush / \&mo) -- allows for sending of remote midi. Device indices starts at 1, where an index of 0 implies "all".
[midiout.md](midiout.md)
[midiin.md](midiin.md)
It's important to not send and receive between two tabs locally if from the same midi device, as that will create a feedback loop; computer won't like it.
Check the console log or [https://vdo.ninja/midi](https://vdo.ninja/midi) to see which midi device is what device index.
 (1).png>)
While the original MIDI timestamp is transmitted to the remote computer also, it currently isn't included with the output MIDI event itself. I'm just not sure what to use it for currently, but let me know if you need it.
Remote midi transfer does need a VDO.Ninja peer connection to send the MIDI data over. If you don't want to create a connection that includes video and/or audio, you can disable media inputs by using `&vd=0&ad=0`, which disables any audio or video input options.
You can also disable playback of video or audio tracks by using `&novideo&noaudio.`
You can have multiple inputs and outputs per connection.
## Video Guides
https://www.youtube.com/watch?v=uidN3bLLiVk
https://www.youtube.com/watch?v=mdAzAZo65Mc
## Related
[and-mididevice.md](and-mididevice.md)
[and-mididevice.md](and-mididevice.md)
[and-midichannel.md](and-midichannel.md)
---
description: Allows for receiving of remote MIDI
---
# &midiin
General Option! ([`&push`](../source-settings/push.md), [`&room`](../general-settings/room.md), [`&view`](../advanced-settings/view-parameters/view.md), [`&scene`](../advanced-settings/view-parameters/scene.md))
## Aliases
* `&midipull`
* `&mi`
## Options
Example: `&midiin=2`
Value
Description
0
all midi output devices
(integer value. eg: 1)
midi output device index 1
## Details
Allows for receiving of remote MIDI. Device indices starts at 1, where an index of 0 implies "all".
If testing locally, beware of feedback loops, where the MIDI output is fed back into the MIDI input, causing high CPU usage and a lot of MIDI messages. If testing locally, use two MIDI devices and explicitly select the input and output MIDI devices to avoid these feedback loops.
## Related
[midi.md](midi.md)
[midiout.md](midiout.md)
---
description: Broadcast MIDI commands to a remote computer's virtual MIDI device
---
# &midiout
General Option! ([`&push`](../source-settings/push.md), [`&room`](../general-settings/room.md), [`&view`](../advanced-settings/view-parameters/view.md), [`&scene`](../advanced-settings/view-parameters/scene.md))
## Aliases
* `&midipush`
* `&mo`
## Options
Device indices starts at 1, where an index of 0 implies "all". You can refer to [`https://vdo.ninja/midi`](https://vdo.ninja/midi) for a drop-down list of available MIDI devices; the first MIDI device in the list would have a device index ID of 1.
Example: `&midiout=2`
Value
Description
0
using 0 will listen to all midi input devices
(integer value. eg: 1)
midi input device list index ID; 1 and up.
## Details
Allows for sending of MIDI signals to a remote computer. Mirrors even the channel ID.
The remote device must use [`&midiin`](midiin.md) to accept the signal and a peer connection is needed for the signal to take place.
You can disable the video and audio of VDO.Ninja, but still have a basic data-only peer-connection, but using `&videodevice=0&audiodevice=0` or [`&novideo`](../advanced-settings/video-parameters/and-novideo.md)[`&noaudio`](../advanced-settings/view-parameters/noaudio.md).
If testing locally, beware of feedback loops, where the MIDI output is fed back into the MIDI input, causing high CPU usage and a lot of MIDI messages. If testing locally, use two MIDI devices and explicitly select the input and output MIDI devices to avoid these feedback loops.
## Related
[midi.md](midi.md)
[midiin.md](midiin.md)
---
description: Optimizes the video mixer for 4:3 videos
---
# &43
Viewer-Side Option! ([`&view`](../advanced-settings/view-parameters/view.md), [`&scene`](../advanced-settings/view-parameters/scene.md), [`&room`](../general-settings/room.md))
## Details
Using `&43` on the viewer side optimizes the video mixer in a scene for videos with 4:3 aspect ratio. You can also use this combined with [`&cover`](../advanced-settings/view-parameters/cover.md).
## Related
[and-portrait.md](../advanced-settings/view-parameters/and-portrait.md)
[and-square.md](and-square.md)
---
description: Appends an added stun server
---
# &addstun
General Option! ([`&push`](../source-settings/push.md), [`&room`](../general-settings/room.md), [`&view`](../advanced-settings/view-parameters/view.md), [`&scene`](../advanced-settings/view-parameters/scene.md))
## Details
`&addstun` just appends an added stun server. So, you can have both google + custom, or two custom stun servers, with these two options.
Example:
`https://vdo.ninja/?stun=stun:stun3.l.google.com:19302&addstun=stun:stun2.l.google.com:19302&turn=false`
For more information, go to [`&stun`](../general-settings/stun.md).
## Related
[stun.md](../general-settings/stun.md)
---
description: Adds an audio-latency to the published audio stream
---
# &audiolatency
Sender-Side Option! ([`&push`](../source-settings/push.md))
## Aliases
* `&latency`
* `&al`
## Options
Example: `&audiolatency=50`
| Value | Description |
| ---------------- | ------------- |
| (no value given) | 10-ms latency |
| (integer value) | latency in ms |
## Details
This is an audio buffer for the microphone. Can be applied to the publisher of an audio stream. The browser default tends to be 10 milliseconds, but 20 or 30 might be a useful option to help reduce audio clicking caused by buffer underruns. The latency value sets the LatencyHint value of the WebAudio audioContext function.
Default is 10-ms (lowest also) and higher than like 100-ms is probably a bad idea (causes, not reduces, clicking).
That will upscale the sample rate and add a small latency buffer at the same time, so I hope that will help such issues before even hitting the webRTC pipeline.
## Related
[and-micdelay.md](../source-settings/and-micdelay.md)
[sync.md](../advanced-settings/view-parameters/sync.md)
---
description: Auto-adds the specified stream IDs to the scene
---
# &autoadd
Viewer-Side Option! ([`&scene`](../advanced-settings/view-parameters/scene.md))
## Options
Example: `&autoadd=StreamID1,StreamID2`
| Value | Description |
| ------------------------------- | --------------------------------------------------------------- |
| (streamid1,streamid2,streamid3) | the stream IDs which should be automatically added to the scene |
## Details
`&autoadd` can be added to a scene link, passing to it a comma-separated list of stream IDs. If any of those stream IDs connect, they will be auto-added to that specific scene page. The director won't see that they were added to the scene page, but the director can still toggle the add-to-scene button to remove them. This is just an alternative to using [`&view=`](../advanced-settings/view-parameters/view.md) to auto-add a guest to a scene, as [`&view`](../advanced-settings/view-parameters/view.md) filters out non-listed stream IDs as well, while `&autoadd` will not.
## Related
[scene.md](../advanced-settings/view-parameters/scene.md)
[view.md](../advanced-settings/view-parameters/view.md)
---
description: Makes the microphone mute button a lot bigger
---
# &bigbutton
Sender-Side Option! ([`&push`](../source-settings/push.md))
## Details
The microphone mute button will be above the control bar and much bigger. You could use this for guests so they can find the button easier.
## Related
[nomicbutton.md](../viewers-settings/nomicbutton.md)
---
description: It allows the director 'blinding' all the guests at a time with a new button
---
# &blindall
Director Option! ([`&director`](../viewers-settings/director.md))
## Details
`&blindall` is a director's URL parameter. It allows the director 'blinding' all the guests at a time (new button appears to toggle it). Guests that refresh will be auto blinded based on the state of the button; compatible with co-directors.
## Related
[and-blind.md](../advanced-settings/video-parameters/and-blind.md)
---
description: >-
Does not use webRTC's video streaming protocols; rather it uses a custom-made
protocol
---
# &chunked
Sender-Side Option! ([`&push`](../source-settings/push.md))
## Options
Example: `&chunked=2000`
| Value | Description |
| --------------- | ------------------------------------- |
| (integer value) | bitrate in kbps (default around 2000) |
## Details
### Chunked video transfer mode
[Version 20](../release-notes/v20.md) introduces the option to enable a chunked-video transfer mode, which is similar to how Twitch or YouTube Live broadcasts videos, but using a different and newer technology. This still uses VDO.Ninja's peer to peer connections to distribute video to viewers, except it does not use WebRTC's video streaming protocols; rather it uses a custom protocol over WebRTC data-channels.
The upsides of this mode is that packet loss on a network connection impacts the video stream less, so the quality can be higher. It also makes it easier to record the stream to disk on the viewer's end with no added quality loss and with lower CPU usage. This is because recording a chunked-stream to disk does not require any transcoding on the viewers-end; it just writes the encoded chunks directly to a WebM media container on your disk.
In theory, this mode also allows a video stream to be only encoded once, and then it can be shared with multiple viewers. There is an experimental `&retransmit` option that lets you push this concept even further, where you can broadcast chunked video from peer-to-peer-to-peer-and so on, without any additional transcoding.
Chunked mode is a bit similar to the previously released [`&webp`](../advanced-settings/view-parameters/webp.md) broadcast mode, which streamed a series of images as a custom-made video protocol over the WebRTC data-channels, but the [`&webp`](../advanced-settings/view-parameters/webp.md) mode had poor compression, low quality, and would drop frames if the connection couldn't keep up. This new chunked option though uses cutting edge features in modern browsers to allow for high bitrates and advanced video-encoder controls; it uses encoded video chunks rather than still image frames.
The downsides of the chunk-transfer mode is that if the connection stalls out long enough, the video will be forced to pause and buffer. It also has a buffer, which is currently around 1 second by default. The chunked-transfer mode might be suitable for doing remote recordings of interviews where the highest quality is desirable, but it may not be suitable for live and interactive chat if on a bad connection.
The default and normal WebRTC video and audio sending modes used by VDO.Ninja are largely handled by the browser, with few encoder and controls for apps like VDO.Ninja to control. The chunked mode offers lower-level access to the encoder on the other hand, but it's up to the app then to handle the sending, buffering, recovery, and all other aspects of streaming video. It's quite hard to do well, so `&chunked` mode isn't yet the best solution for all users; the normal mode has broader support and is better tested by the global community.
#### Random notes
* The option to save the chunked stream as a viewer is to use `&chunked=2` on the sender side. Using just `&chunked` will just enable viewing, and not saving, of the video.
* `&chunked=2` and [`&maxvideobitrate`](../advanced-settings/video-bitrate-parameters/and-maxvideobitrate.md) will likely get changed up and moved to the viewer side eventually; currently doing this just for convenience of development/testing. Multiple viewers is not recommended. There seems to be an issue with audio clicking that I'm trying to solve currently.
* Using [`&buffer`](../advanced-settings/view-parameters/buffer.md) on the viewer side can vary the buffering amount, however setting it too low may cause the stream to fail if it faces a buffer underrun event. You can change the buffer dynamically by right-clicking a video as a viewer, and changing the buffer listed value there.
#### Info and issues about using the chunked transfer mode
* It does not work with Meshcast.
* Chunked transfer is supported in recent Chromium-based browsers, including OBS v27.2 and newer.
* Audio and video sync isn't always guaranteed.
* If screen sharing your entire display, and assuming that display supports higher than 60-fps, chunked mode will support the higher frame rate. I've tested 120-fps on my gaming monitor, using chunked mode while screen sharing the entire display. Adding [`&fps=120`](../advanced-settings/video-parameters/and-fps.md) to the sender's URL will configure the chunked mode to both capture and publish at 120-fps. It will error out if not supported however.
* While support for alpha-channels (RGBA/transparencies) has been added to chunked mode, it's up to the browser to provide video encoders that support alpha-channels. VDO.Ninja as of v24 will look for any compatible alpha-enabled encoders when `&alpha` along with the `&chunked` parameter, but fall back to the normal RGB mode if none are found.
## Related
[and-nochunked.md](../advanced-settings/settings-parameters/and-nochunked.md)
[and-retransmit.md](../advanced-settings/settings-parameters/and-retransmit.md)
---
description: Combines a bunch of flags together; no video, no audio, GUI, etc.
---
# &datamode
General Option! ([`&push`](../source-settings/push.md), [`&room`](../general-settings/room.md), [`&view`](../advanced-settings/view-parameters/view.md), [`&scene`](../advanced-settings/view-parameters/scene.md))
## Aliases
* `&dataonly`
## Details
The `&datamode` parameter just combines a bunch of flags together; no video, no audio, GUI, etc. It just auto connects with data-channels only open. Useful for MIDI or sensor-data modes or the like, as it lets you connect without user-interaction or pop-up requests.
## Sample code and example
If looking to use VDO.Ninja for sending data via p2p in your application, there are some projects already doing so, but also provided is a code snippet.
#### Minimal code example
While this code snippet doesn't actually use the `&datamode` parameter, as it was created before it, it achieves the same result using [`&videodevice=0`](../source-settings/videodevice.md) and such.
[https://gist.github.com/steveseguin/15bba03d1993c88d0bd849f7749ea625](https://gist.github.com/steveseguin/15bba03d1993c88d0bd849f7749ea625)
#### Another p2p data sending example - remotely control OBS Studio
[https://github.com/steveseguin/sample-p2p-tunnel](https://github.com/steveseguin/sample-p2p-tunnel)
A remote control page, that works anywhere online, and another page to forward those remote commands into local websocket commands for OBS Studio's websocket API. You can use this to also return the video output of OBS, if you wanted to add that integration as well; the code is free to use as you see fit.
#### Social Stream Ninja
[Social Stream](../steves-helper-apps/social-stream-ninja/) is used by thousands of users as a free way to send text messages and image data using VDO.Ninja's p2p data function. The p2p nature of this setup keeps latency and internet usage low when the two connections are on the same LAN, but also provides a NAT firewall bypass for sending messages across the Internet, without the need for websocket servers.
### Update in [v23](../releases/v23.md)
The [`&datamode`](and-datamode.md) option was tweaked to work a bit better now when using it to both connect via push and view modes. Data-only mode is an advanced option; it's a bit like doing `&audiodevice=0&videodevice=0&webcam&autostart&hidemenu`, but a bit cleaner and disables a few other common functions that might be considered bloat. Useful perhaps if you want to use only the data-channels of VDO.Ninja, for remote control only operations or sending files.
## Related
[midi.md](../midi-settings/midi.md)
---
description: Sets the amount of blur or effect applied
---
# &effectvalue
Sender-Side Option! ([`&push`](../source-settings/push.md))
## Aliases
* `&ev`
## Options
Example: `&effectvalue=8`
| Value | Description |
| --------------- | ----------------------------------------- |
| (integer value) | Sets the amount of blur or effect applied |
## Details
Adding `&effectvalue` to a sender-side can take an integer. This can set the amount of blur (or effect) applied.
If not using `&effectvalue` you can change it dynamically via the settings menu.
It's best to keep the value under 10 and using this flag disables the option to use the slider.
`&effectvalue=1.2` will now work with `&zoom` ([`&effects=7`](../source-settings/effects.md#options)), so you can trigger the camera to digitally zoom in on load.
## Related
[effects.md](../source-settings/effects.md)
---
description: OpenH264 software encoding will be used
---
# &h264profile
Viewer-Side Option! ([`&view`](../advanced-settings/view-parameters/view.md), [`&scene`](../advanced-settings/view-parameters/scene.md), [`&room`](../general-settings/room.md))
## Options
Example: `&h264profile=42e01f`
| Value | Description |
| -------------------------------------------- | ---------------------------------------------------------------------------------------------------------------------------------------------- |
| (no value given) | disables hardware h264 encoding -> OpenH264 software encoding will be used, if H264 is used. This is the same as setting the value to `42e01f` |
| `42e01f` | advanced users can also pass a 6-character h264 profile ID to the parameter to get used instead. This one triggers OpenH264. |
| `42001f` \| `420029` \| `42a01e` \| `42a014` | just some examples of other h264 profiles you can try; these often will use the external hardware encoder on Windows systems. |
| `0` \| `false` \| `off` \| `default` | has the h264 profile be left as the default browser default when the sender is an android |
## Details
`&h264profile` if added to the viewer-side will tweak the h264 profile type.
Open264 software encoding can actually use less CPU than the Windows-selected hardware encoder, and in some cases will suffer from less video glitching. For this reason, it's the default profile ID that gets used when `&h264profile` is added without a value.
Without using `&h264profile`, it's up to the system to decide what profile is used, and whether hardware encoding or software encoding is used. There is no way to force hardware to be used at this time, but you can force software, which may actually use less CPU and will avoid video glitching that hardware encoders sometime have.
Hardware encoders can sometimes cause the video to puke, turn all green, pink, or grey, especially at lower resolutions. It really depends on the hardware and driver being used by the sender, so if you really want to use H264, but it's glitching, adding `&h264profile` and enabling software-encoding can help there.
Advanced users can also pass a 6-character h264 profile ID to the parameter to get used instead. This flag will not force H264 to be used, but rather configures it in case h264 gets used. You can still use [`&codec`](../advanced-settings/view-parameters/codec.md) to set the codec to h264.
Example: `https://vdo.ninja/?view=xxx&h264profile=42e01f&codec=h264&stats`
## Related
[codec.md](../advanced-settings/view-parameters/codec.md)
---
description: Checks the password
---
# &hash
General Option! ([`&push`](../source-settings/push.md), [`&room`](../general-settings/room.md), [`&view`](../advanced-settings/view-parameters/view.md), [`&scene`](../advanced-settings/view-parameters/scene.md))
## Aliases
* `&crc`
* `&check`
## Options
Example: `&hash=99e5`
| Value | Description |
| -------- | --------------- |
| (string) | Hashed password |
## Details
You can add `&hash=STRING` this to a guest's URL instead of [`&password`](../advanced-settings/setup-parameters/and-password.md) if you want to check the password. That means the password turns into another string.
If you added a password to your room, the guests' invitations in the director room get 'hashed' automatically:
If you want to hash your password manually, you can use this link:
[https://vdo.ninja/examples/changepass.html](https://vdo.ninja/examples/changepass.html)
Just enter your room password and you get the hash value.
For example:
[https://vdo.ninja/?room=roomname\&password=password](https://vdo.ninja/?room=roomname\&password=password)
\->
[https://vdo.ninja/?room=roomname\&hash=99e5](https://vdo.ninja/?room=roomname\&hash=99e5)
## Related
[and-password.md](../advanced-settings/setup-parameters/and-password.md)
[and-prompt.md](../advanced-settings/settings-parameters/and-prompt.md)
---
description: >-
Can be used to force videos not added yet to a scene to run at the specified
bitrate
---
# &hiddenscenebitrate
Viewer-Side Option! ([`&scene`](../advanced-settings/view-parameters/scene.md))
## Options
Example: `&hiddenscenebitrate=800`
| Value | Description |
| --------------- | ------------------------------- |
| (integer value) | specified video bitrate in kbps |
## Details
The `&hiddenscenebitrate` flag can be used to force videos not added yet to a scene to run at the specified bitrate (400-kbps or whatever; which is what [`&scene=1`](../advanced-settings/view-parameters/scene.md) was set to previously).
## Related
[scene.md](../advanced-settings/view-parameters/scene.md)
[and-preloadbitrate.md](and-preloadbitrate.md)
---
description: Has a guest join a room not visible to others
---
# &hideguest
Sender-Side Option! ([`&push`](../source-settings/push.md))
## Aliases
* `&hidden`
## Details
Adding `&hideguest` to a guest's URL has the guest join a room not visible to others, as if the director had pressed 'hide guest' on that guest. You can change this setting dynamically in the director's control room in the guest's setting "Additional controls".
---
description: Lets you hide the solo links from showing
---
# &hidesolo
Director Option! ([`&director`](../viewers-settings/director.md))
## Aliases
* `&hs`
## Details
If you add this to the director's URL you hide the solo guest's links in the director's panel from showing.
You won't see this if you add &hidesolo to the director's URL
## Related
[cleandirector.md](../director-settings/cleandirector.md)
---
description: Shows a pop up to invite more guests to the room
---
# &host
Sender-Side Option! ([`&push`](../source-settings/push.md))
## Details
Adding `&host` to a guest's URL shows a pop up to invite more guests to the room.
This is on by default if you create a room not as a director.
## Related
[room.md](../general-settings/room.md)
---
description: >-
Adds the option to change the video and audio settings dynamically via the
settings menu
---
# &mediasettings
Sender-Side Option! ([`&push`](../source-settings/push.md))
## Details
Adds the option for a guest to change the video and audio settings dynamically. Usually only the director can change the settings for a guest.
Outside of a room it is enabled by default.
## Related
[and-quality.md](../advanced-settings/video-parameters/and-quality.md)
---
description: >-
Triggers the service, causing the outbound audio/video stream to be
transferred to a hosted server
---
# &meshcast
Sender-Side Option! ([`&push`](../source-settings/push.md))
## Options
Example: `&meshcast=video`
Value
Description
audio
Only audio via Meshcast
video
Only video via Meshcast
(no value given)
Audio and video via Meshcast
## Details
[Meshcast ](https://meshcast.io/)is a free-to-use server-based service for broadcasting low-latency video streams. It can be used with VDO.Ninja in a couple different ways, either as an iFrame or as a peer-2-peer replacement for guest and director streams. It can be used to help lower system requirements of VDO.Ninja for some users or use cases.
Adding `&meshcast` to a guest or director link will trigger the service, causing the outbound audio/video stream to be transferred to a hosted server, which then distributes the stream to all the viewers. This adds a bit of latency to the stream and reduces the theoretical privacy, but it implies the guest/director does not need to encode and upload multiple videos, lowering CPU load and bandwidth usage.
Viewers will automatically attempt to use the server-based feed over the peer-to-peer feed. Peer to peer is still used to send data though, and it can be optionally be used for sending audio p2p (lower latency).
Unlike the [`&broadcast`](../advanced-settings/view-parameters/broadcast.md) flag, which uses IFrames, this new server-side mode does not; it's more deeply integrated. Echo cancellation should work as a result.
If publishing using `&meshcast`, I don't bother to show the viewer count, as it won't be accurate currently anyways; instead I just say you're broadcasting. I'll try to improve this in the future.
There is a toggle in the director's room which adds `&meshcast` to the guest's invite link.
Steve made a YouTube video explaining all the Meshcast stuff:
Understanding Meshcast as a tool for VDO.Ninja
As a director you can also select the Meshcast server on the bottom left of the director's control center. This method will show you the current load on a server, so you can avoid servers that are over-capacity.
You can also specify the Meshcast server based on geographic timezone values using the [`&tz=300`](and-tz.md) parameter, where the value passed is the UTC timezone value in negative minutes. Eastern Europe I suppose would be a negative value, while North America would be a positive value. The [`&tz`](and-tz.md) will also use the closest TURN server to that timezone, if needed; just keep in mind that timezones are east/west accurate; not north/south accurate.
Normally during peak-hours, around 7pm, the Internet in general can get slow, and Meshcast servers can occasionally become slow also as a result. Using a Meshcast server that's located in a different timezone, even if on the other side of the world, can sometimes avoid the bottlenecks in your local region, offering better results.
Lastly, if a Meshcast server fails to respond, please contact steve@seguin.email or Steve on discord ([discord.vdo.ninja](https://discord.com/invite/cKkj5nN8pH)) so it can be fixed.
Meshcast /w VDO.Ninja to host even Larger Rooms
### Server Codes
You can select the Meshcast server (region) via URL Parameter, if you want low-level control there:
[and-meshcastcode.md](../advanced-settings/meshcast-parameters/and-meshcastcode.md)
## Related
[meshcast-parameters](../advanced-settings/meshcast-parameters/)
https://meshcast.io/
---
description: Default mini director stylesheet
---
# &minidirector
Director Option! ([`&director`](../viewers-settings/director.md))
## Details
When adding to the director's link, it shows a default mini director style sheet. Doesn't need to be used with a dock.
`https://vdo.ninja/?director=roomname&minidirector`.png>)
### minidirector.css
Example:
[https://vdo.ninja/beta/?director=fssdgsfgdfgddfgsdf\&css=minidirector.css\&cleanoutput\&hidesolo](https://vdo.ninja/beta/?director=fssdgsfgdfgddfgsdf\&css=minidirector.css\&cleanoutput\&hidesolo)
In the link above, you'll notice the use of [`&css=minidirector.css`](../advanced-settings/design-parameters/css.md). You can modify that CSS file, hosting it yourself locally if you wanted to, allowing you to show which buttons you want. Once all setup, you can add the entire director's room as a dock directly to OBS, and even drag/drop solo links into the show with ease.
## Related
[css.md](../advanced-settings/design-parameters/css.md)
[and-hidesolo.md](and-hidesolo.md)
[cleanoutput.md](../advanced-settings/design-parameters/cleanoutput.md)
---
description: Disables the publishing resolution from being capped
---
# &noscale
Sender-Side Option! ([`&push`](../source-settings/push.md))
## Aliases
* `&noscaling`
## Details
Adding `&noscale` to a publisher-side flag just disables the publishing resolution from being capped when the target bitrate is very low (600-kbps and under). This doesn't impact screen shares and a couple different basic modes, as they bypass this optimization logic already.
## Related
[scale.md](../advanced-settings/view-parameters/scale.md)
---
description: Orders guest's by their stream ID in the director's room
---
# &orderby
Director Option! ([`&director`](../viewers-settings/director.md))
## Options
Example: `&orderby=label`
Value
Description
label
will sort based on the display name (&label) of each video, if the label is set, instead of by stream ID.
(no value given)
orders guest's by their stream ID in the director's room
## Details
`&orderby` is a director's URL parameter. While the default ordering of guests in the director's room is by time of joining, if you use `&orderby` it instead orders by guest's stream ID. I'll be adding different ordering options later, but for now it's just by stream ID (case ignored; a to z, etc).
You can still manual reorder a guest, but when you shift someone up or down the list, they will be ignored by the ordering from there on. This order is different than the mix-order; this order is largely cosmetic and only impacts the MIDI mix order IDs really.
#### Update in [v23.md](../releases/v23.md "mention")
I updated `&orderby` to work with non-director view links, such as with scenes or guests.
Previously `&orderby` only worked with the director's view to sort the positioning of control boxes, based on the _stream ID_, but now it can apply to the auto-mixer.
The _mix order_, or [`&order=N`](../source-settings/order.md), of each guest takes priority over the name when sorting. By default all guests have a mix order of 0, mind you. You can change it dynamically as a guest, via the mix-order option in each guest's control box, or pre-assign it via URL with `&order=N` on the guest invite.
#### Sort by label
I also added `&orderby=label` as an option, which will sort based on the display name ([`&label`](../general-settings/label.md)) of each video, if the label is set, instead of by stream ID.
This option doesn't apply to the director's view at the moment, but it does work when used with respect to the auto-mixer (guests/scenes).
The label sort ignores letter casing, while the default stream ID includes letter casing in the sorting logic.
## Related
[order.md](../source-settings/order.md)
---
description: Can be used to change the pre-load target bitrate for scenes
---
# &preloadbitrate
Viewer-Side Option! ([`&scene`](../advanced-settings/view-parameters/scene.md))
## Options
Example: `&preloadbitrate=500`
| Value | Description |
| --------------- | ---------------------------------------------- |
| (integer value) | specified video bitrate in kbps |
| `0` | disables preloading the scene |
| `-1` | allows for unlocked bitrates during preloading |
## Details
The `&preloadbitrate` flag can be used to change the pre-load target bitrate for scenes. You can set this higher or lower, or set to 0 to disable pre-loading all together. I'd strongly _avoid_ setting this to 0, as it can cause the video to stall out all together.
Videos not yet added to [`&scene=1`](../advanced-settings/view-parameters/scene.md) will have the audio bitrate drop to 16-kbps. Scene 1 has always been special, as the video pre-loads there, so the quality ramps up immediately and guests appear immediately. Other scenes (>1) or custom scenes will need to ramp up from 0 bitrate, which can take some time to load and ramp up, but this is needed - can't have every scene pre-loaded else things get overloaded.
You can override all this logic I'm using for pre-loading bitrates of videos in scenes now with `&preloadbitrate=500` or whatever, where the value is in kbps.
`0` disables preloading the scene.
`-1` allows for unlocked bitrates during preloading.
## Related
[scene.md](../advanced-settings/view-parameters/scene.md)
[and-hiddenscenebitrate.md](and-hiddenscenebitrate.md)
---
description: >-
Forces your computer to try to connect to the handshake service via a
different physical network end point and domain name
---
# &proxy
General Option! ([`&push`](../source-settings/push.md), [`&room`](../general-settings/room.md), [`&view`](../advanced-settings/view-parameters/view.md), [`&scene`](../advanced-settings/view-parameters/scene.md))
## Details
You can add `&proxy` to the view/push/director/scene link or wherever. This simply forces your computer to try to connect to the handshake service via a different physical network end point and domain name, which might help if the Internet ever splits in two. The purposes of this flag is that sometimes ISPs/network routers mess up, and this is just a backup option to get around those errors. This is just a backup option to get around it. While this should try to connect to the closest edge node relative to your location.
I don't recommend using this feature unless there are problems.
### More user-friendly version
[https://proxy.vdo.ninja/alpha/](https://proxy.vdo.ninja/alpha/)
(just on alpha for now)
---
description: >-
When a guest connects, this tries to load video from that guest for a few
seconds, even if not yet added to a scene
---
# &rampuptime
Sender-Side Option! ([`&push`](../source-settings/push.md))
## Options
Example: `&rampuptime=4000`
| Value | Description |
| --------------- | ------------------ |
| (integer value) | ramp up time in ms |
## Details
`&rampuptime=6000` is a sender-side parameter. Previously it was 4-seconds, but now it defaults to 6-seconds.
When a guest connects, this just tries to load video from that guest for a few seconds, even if not yet added to a scene. It helps the browser judge total bandwidth availability better, so bitrates can ramp up slightly faster later when actually added needed.
Related to this, the target bitrate for this ramp up period has been increased to 1500-kbps, rather than 1000; this could already be changed with [`&preloadbitrate`](and-preloadbitrate.md) (sender side), but based on feedback I'm nudging it up a bit.
## Related
[and-preloadbitrate.md](and-preloadbitrate.md)
---
description: Tries to load the camera/audio with as little possible complexity as possible
---
# &safemode
Sender-Side Option! ([`&push`](../source-settings/push.md))
## Details
Adding `&safemode` to a source/guest link currently just tries to load the camera/audio with as little possible complexity as possible. For cameras that just 'flash' their video preview for a second, but won't work beyond that when setting things up, this might be a solution there.
This has the guest's camera start in a rather basic fashion, which might help solve problems with certain camera not being able to use VDO.Ninja.
It's available under director's customization options as well, under "Compatibility mode".
There is a toggle in the director's room which adds `&safemode` to the guest's invite link.
---
description: >-
Will show the "Share your Screen" button before asking the user to select
screenshare options
---
# &screenshare2
Sender-Side Option! ([`&push`](../source-settings/push.md))
## Aliases
* `&ss2`
## Details
Using `&screenshare2` or using `&screenshare&intro`, will show the "Share your Screen" button before asking the user to select screenshare options. This preps the user for the permissions popup that comes next, simplies the landing page experience for iFRAME integrations. It's basically the same as [`&screenshare`](../source-settings/screenshare.md), but you get the "Share your Screen" button before selecting screenshare options.
## Related
[screenshare.md](../source-settings/screenshare.md)
[intro.md](../source-settings/intro.md)
[and-webcam2.md](and-webcam2.md)
---
description: Turns automatic echo-cancellation filter for screen-shares ON or OFF
---
# &screenshareaec
Sender-Side Option! ([`&push`](../source-settings/push.md))
## Aliases
* `&ssaec`
* `&ssec`
## Options
Example: `&screenshareaec=1`
Value
Description
0
Turns OFF the automatic echo-cancellation for screen-shares
1
Turns ON the automatic echo-cancellation for screen-shares
## Details
Adding this to a push link, automatic echo-cancellation for screen-shares turns ON or OFF.
## Related
[aec.md](../source-settings/aec.md)
---
description: Turns audio auto-normalization filter for screen-shares ON or OFF
---
# &screenshareautogain
Sender-Side Option! ([`&push`](../source-settings/push.md))
## Aliases
* `&ssagc`
* `&ssag`
## Options
Example: `&screenshareautogain=1`
Value
Description
0
Turns OFF audio auto-normalization for screen-shares
1
Turns ON audio auto-normalization for screen-shares
## Details
Adding `&screenshareautogain` to a source link, sets whether audio auto-normalization is ON or OFF for screen-shares. Your browser will try to keep optimum audio levels.
## Related
[autogain.md](../source-settings/autogain.md)
---
description: Lets you manually set the video bitrate for screen-shares
---
# &screensharebitrate
Viewer-Side Option! ([`&view`](../advanced-settings/view-parameters/view.md), [`&scene`](../advanced-settings/view-parameters/scene.md), [`&room`](../general-settings/room.md))
## Aliases
* `&ssbitrate`
## Options
Example: `&screensharebitrate=2500`
Value
Description
(integer value)
video bitrate for screen-shares in kbps
## Details
Lets you manually set the video bitrate for screen-shares in kbps. This is a viewer-side command, and works with scenes link, view links, and guest links.
This specified screen-share bitrate will not count towards the total room or scene bitrate, if those are being used. It also takes priority over most other bitrates parameters, with just a couple exceptions.
## Related
[bitrate.md](../advanced-settings/video-bitrate-parameters/bitrate.md)
---
description: Turns audio noise reduction filter for screen-shares ON or OFF
---
# &screensharedenoise
Sender-Side Option! ([`&push`](../source-settings/push.md))
## Aliases
* `&ssdn`
## Options
Example: `&screensharedenoise=1`
Value
Description
0
Turns OFF audio noise reduction for screen-shares
1
Turns ON audio noise reduction for screen-shares
## Details
Adding `&screensharedenoise` to a source link turns audio noise reduction filter for screen-shares ON or OFF.
## Related
[and-denoise.md](../source-settings/and-denoise.md)
---
description: >-
Hides the local screen-share sub-window that appears when screen sharing in a
room
---
# &screensharehide
Sender-Side Option! ([`&push`](../source-settings/push.md))
## Aliases
* `&sshide`
* `&hidescreenshare`
* `&hidess`
## Details
Just hides the local screen-share sub-window that appears when screen sharing in a room. You can use this if you want to screen share in a room, but you don't want to see your own screen share.
Using [`&screensharetype=3`](and-screensharetype.md) also hides the local screen-share window.
## Related
[screenshare.md](../source-settings/screenshare.md)
[screenshareid.md](../source-settings/screenshareid.md)
[and-screensharetype.md](and-screensharetype.md)
---
description: The screen-share of the guest will have the same label as the guest
---
# &screensharelabel
Sender-Side Option! ([`&push`](../source-settings/push.md))
## Aliases
* `&sslabel`
## Options
Example: `&screensharelabel=SomeLabel`
## Details
Without it set, screen shares do not have a label applied to them. With it added to the guest, it will use the existing [`&label`](../general-settings/label.md) value or whatever value has been passed to it. This changes the default behaviour, but it offers more flexibility and is probably the preferred default behaviour for most users.
## Related
[label.md](../general-settings/label.md)
[showlabels.md](../advanced-settings/design-parameters/showlabels.md)
---
description: >-
Sets the audio mode for screen-shares to stereo and changes default audio
settings to improve audio quality
---
# &screensharestereo
General Option! ([`&push`](../source-settings/push.md), [`&room`](../general-settings/room.md), [`&view`](../advanced-settings/view-parameters/view.md), [`&scene`](../advanced-settings/view-parameters/scene.md))
## Aliases
* `&ssproaudio`
* `&sss`
## Options
Example: `&screensharestereo=1`
Value
Description
(no value given)
It behaves like 3 or 1, depending on if you are a guest or not
0
will try to down-mix the screen-share to mono. Does not enable any pro-audio settings
1
enables it for both push and view (if used on both links)
2
enables it just for viewing requests and not publishing requests
3
enables it for just publishing requests and not viewing requests
4
enables 5.1-multichannel audio support (Experimental and may require a Chrome flag to be set)
5
This is the default if nothing is set. It behaves like 3 or 1, depending on if you are a guest or not
View [`&proaudio`](../advanced-settings/audio-parameters/and-proaudio.md) for more details.
## Details
Like [`&proaudio`](../advanced-settings/audio-parameters/and-proaudio.md) but for screen-shares.
## Related
[and-proaudio.md](../advanced-settings/audio-parameters/and-proaudio.md)
[stereo.md](../general-settings/stereo.md)
---
description: >-
Defines how webcam and screenshare of a guest in a room interacts which each
other
---
# &screensharetype
Sender-Side Option! ([`&push`](../source-settings/push.md))
## Aliases
* `&sstype`
## Options
Example: `&screensharetype=3`
Value
Description
1
Replaces the webcam screen with the screen share
2
Creates a totally new connection for the screen share
3 (default)
Reuses the existing connection, adding a second video track
## Details
This parameter can be used to specify which type of screen sharing logic is used.
* `screensharetype=1` replaces the webcam screen with the screen share
* `screensharetype=2` creates a totally new connection for the screen share
* `screensharetype=3` reuses the existing connection, adding a second video track; also doesn't show the local screen share window
The default `&screensharetype` for screen-sharing is `3` when in a room.
As a viewer or scene link, to specify only loading the `&screensharetype=3` screen share, you can now use `&view=xxxx:s`, where `:s` is appended to the end of the stream ID. This tells the system to ignore the webcam/mic feed, and just send over the screen share. You can do `&view=xxxx,xxxx:s` to target both webcam and screen share though. I may change this syntax over time, but for now it works. The solo-links in the director's room has this `:s` applied already where needed.
If using `&screensharetype=3` the parameter [`&screenshareid`](../source-settings/screenshareid.md) doesn't do anything.
The type-3 screen share is still not fully cooked for use in scenes, etc, and it won't yet
work with [`&meshcast`](and-meshcast.md), [`&novideo`](../advanced-settings/video-parameters/and-novideo.md) or [`&noaudio`](../advanced-settings/view-parameters/noaudio.md).
## Related
[screenshareid.md](../source-settings/screenshareid.md)
[and-smallshare.md](../advanced-settings/screen-share-parameters/and-smallshare.md)
[screenshare.md](../source-settings/screenshare.md)
---
description: Lets you disable the option to select audio when screen sharing
---
# &screensharevideoonly
Sender-Side Option! ([`&push`](../source-settings/push.md))
## Aliases
* `&ssvideoonly`
* `&ssvo`
## Details
Added to the publisher's side, it disables the option to select audio when screen sharing. It will not impact the microphone or other audio options.
## Related
[screenshare.md](../source-settings/screenshare.md)
---
description: Visualizes the packet loss of a guest
---
# &signalmeter
Sender-Side Option! ([`&push`](../source-settings/push.md))
## Options
Example: `&signalmeter=false`
| Value | Description |
| ---------------------- | ------------------------------------------------ |
| (no value given) | Adds a signal-meter per guest |
| `0` \| `off` \|`false` | Disables the signal-meter in the director's room |
## Details
It's added to the director's room, per guest, by default. It visualizes the packet loss of a guest:
* green == good; red == bad; and there is a gradient of colors in between
Other modes support the signal-meter, but you need to add `&signalmeter` to the URL to show it. You can also do `&signalmeter=false` to disable it in the director's room.
The signal meter turns into a flame when the remote computer is being throttled by the CPU, instead of the network. This represents the remote computer is overheating or overloaded. Only supported by guests using Chrome really.
## Related
[and-batterymeter.md](../advanced-settings/settings-parameters/and-batterymeter.md)
---
description: >-
Will force the auto-mixer to have that number of slots, even if there are more
or less videos available to fill them
---
# &slots
Viewer-Side Option! ([`&view`](../advanced-settings/view-parameters/view.md), [`&scene`](../advanced-settings/view-parameters/scene.md), [`&room`](../general-settings/room.md))
## Options
Example: `&slots=4`
Value
Description
(positive integer)
the number of slots force the auto-mixer to have that number of slots
## Details
You can pass `&slots=N` to a scene link and it will force the auto-mixer to have that number of slots, even if there are more or less videos available to fill them.
Example: `https://vdo.ninja/?room=roomname&scene&slots=4`
I made positioning sticky when using `&slots`, so videos will stick in place now (slot position wise at least), even if another video before it leaves.
If a video is made invisible, it gives up its slot position, which allows a new video to take its spot potentially. When the original video becomes visible again though, the mix-order takes priority. If the mix order is the same, then the connection order takes priority. Dislodged videos are treated like newly joining videos in terms of positioning in the slot.
Screen sharing and highlighting a guest may still break the slotted layout.
If you want more control over position, layout, and all that - consider trying out the [Mixer App](../steves-helper-apps/mixer-app.md) instead, and give some feedback:
[https://vdo.ninja/alpha/mixer](https://vdo.ninja/alpha/mixer)
---
description: Optimizes the video mixer for 1:1 aspect ratio videos
---
# &square
Viewer-Side Option! ([`&view`](../advanced-settings/view-parameters/view.md), [`&scene`](../advanced-settings/view-parameters/scene.md), [`&room`](../general-settings/room.md))
## Aliases
* `&11`
## Details
Optimize the auto-mixer to work with video streams that are in square mode 1:1 (versus landscape).
Can be used together with [`&cover`](../advanced-settings/view-parameters/cover.md) to get a better effect.
## Related
[cover.md](../advanced-settings/view-parameters/cover.md)
[and-portrait.md](../advanced-settings/view-parameters/and-portrait.md)
[and-43.md](and-43.md)
---
description: Specifies a negative timezone value in minutes for a TURN server
---
# &tz
General Option! ([`&push`](../source-settings/push.md), [`&room`](../general-settings/room.md), [`&view`](../advanced-settings/view-parameters/view.md), [`&scene`](../advanced-settings/view-parameters/scene.md))
## Options
Example: `&tz=-480`
Value
Description
(value in minutes)
specifies a negative timezone value in minutes
## Details
Using a TURN server, you can fake your location. So if a certain location is overloaded, you can try to use the TURN servers of a different location. To do so, use the `&tz` command to specify a negative timezone value in minutes, such as: [`https://vdo.ninja/?tz=-480`](https://vdo.ninja/?tz=-480), where (tz = timezone \* -60)
## Related
[turn.md](../general-settings/turn.md)
[works-on-wifi-but-not-on-4g.md](../common-errors-and-known-issues/works-on-wifi-but-not-on-4g.md)
[and-tcp.md](../general-settings/and-tcp.md)
[and-relay.md](../general-settings/and-relay.md)
---
description: >-
Like &videodevice for selecting a default video device, but you can still
choose to change the camera
---
# &vdo
Sender-Side Option! ([`&push`](../source-settings/push.md))
## Options
Example: `&vdo=BRIO_4K`
Value
Description
0
disable the video camera automatically
1
auto-select the default video camera
(string value)
auto-select a video device that has a label containing that same string / device ID. Whitespaces in names can be replaced with underscores.
## Details
`&vdo` is just like [`&videodevice`](../source-settings/videodevice.md) for selecting a default video device, but you can still choose to change the camera before joining when using `&vdo`.
## Related
[videodevice.md](../source-settings/videodevice.md)
---
description: >-
Will show the "Share your Camera" button before asking the user to select
camera options
---
# &webcam2
Sender-Side Option! ([`&push`](../source-settings/push.md))
## Aliases
* `&wc2`
## Details
Using `&webcam2` or using `&webcam&intro`, will show the "Share your Camera" button before asking the user to select camera options. This preps the user for the permissions popup that comes next, simplies the landing page experience for iFRAME integrations. It's basically the same as [`&webcam`](../source-settings/and-webcam.md), but you get the "Share your Camera" button before selecting camera options.
## Related
[and-webcam.md](../source-settings/and-webcam.md)
[intro.md](../source-settings/intro.md)
[and-screenshare2.md](and-screenshare2.md)
---
description: Adds a message the guest will see when joining the room
---
# &welcome
Sender-Side Option! ([`&push`](../source-settings/push.md))
## Aliases
* `&entrymsg`
## Options
Example: `&welcome=Hello`
(string)
the message the guest will see when joining the room
## Details
You can set a message on the guest-invite link that appears as an overlay, appearing to be from the director, once the guest joins the stream.
example: [`https://vdo.ninja/?room=roomname&welcome=hello`](https://vdo.ninja/?room=roomname\&welcome=hello)
The message can be URL encoded, to allow for spaces and special characters. You can do so with this tool: [https://www.urlencoder.org](https://www.urlencoder.org/)
You can also activate the welcome message as a director via a new toggle option. When selected, it offers the director an input text prompt and then auto-encodes the message for the director to the guest invite link.
## Related
[and-welcomeb64-alpha.md](../advanced-settings/setup-parameters/and-welcomeb64-alpha.md)
[and-welcomeimage.md](../advanced-settings/setup-parameters/and-welcomeimage.md)
[and-hangupmessage-alpha.md](../advanced-settings/setup-parameters/and-hangupmessage-alpha.md)
---
description: A relatively small update, but
---
# v21 ❤️
[https://vdo.ninja/v21/](https://vdo.ninja/v21/)
This release is a fairly small update, with an emphasis on general polish and fixes. Updates since v20.4 will be considered as part of v21, to help divide up some larger code changes.
### New features
* Right-click menu added, to allow for downloading, video mirroring, and even stream pausing.
* Chunked transfer has been improved some more. It does not adapt very well to low-quality connections still, but as a proof of concept it's become more usable and stable.
* IOTA-blockchain API support added; an experimental option, but in theory it allows VDO.Ninja as a service to be decentralized.
If you have problems with version 21, version 20.4 (from January 2022) can be accessed here:[ https://vdo.ninja/v20/](https://vdo.ninja/v20/)
I'd like to thank JK14, leb, and SilverServerT for helping out with community Discord user support during development of version 21. JK14 made significant contributions to organizing the documentation as well, so great thanks there.
I'd also like to thank everyone who made a contribution to the project, not least the sponsors and donors. Your generosity is valued and makes a real impact towards the continued health of this project.
\- Steve
---
description: Auto-hides the control bar after a few moments of the mouse being idle
---
# &autohide
Sender-Side Option! ([`&push`](../source-settings/push.md))
## Details
`&autohide` auto-hides the control bar after a few moments of the mouse being idle.
You can also toggle the control bar with `SHIFT + ALT + C`.
## Related
[and-controlbarspace.md](../advanced-settings/settings-parameters/and-controlbarspace.md)
[cleanoutput.md](../advanced-settings/design-parameters/cleanoutput.md)
---
description: Starts any screen-share paused
---
# &sspaused
Viewer-Side Option! ([`&view`](../advanced-settings/view-parameters/view.md), [`&scene`](../advanced-settings/view-parameters/scene.md), [`&room`](../general-settings/room.md))
## Aliases
* `&sspause`
* `&ssp`
## Details
`&sspaused` starts any screen-share paused (0-kbps bitrate for audio and video). A play button overlay can be clicked to start it playing as normal.
## Related
[and-screensharebitrate.md](../newly-added-parameters/and-screensharebitrate.md)
[screensharequality.md](../source-settings/screensharequality.md)
---
description: Mobile app version of VDO.Ninja and other Android related topics
---
# Android
[VDO.Ninja](https://vdo.ninja/) generally works quite well with Android; even older Android devices tend to work reasonable well. The browser-based version of VDO.Ninja is recommend for most users, although there is an native mobile app version for Android that solves some limitations of the web-version.
### Native Android app
The native mobile app for Android is fairly simple, as it can be only used for one-way publishing. It does support screen-sharing though, so it has its value. It will also work while in the background, and sometimes works on certain devices when the browser-version won't.
Please note, the native app requires a modern version of Android, while the web-based version of VDO.Ninja has been tested with Android 5.1 using Chrome.
The **Google Play Store** hosted version is here:
[https://play.google.com/store/apps/details?id=flutter.vdo.ninja](https://play.google.com/store/apps/details?id=flutter.vdo.ninja)
(It will auto-update when I push new releases.)
As well, the Android APK file for direct-downloading is hosted here:[
https://drive.google.com/file/d/1M0kv5nWLtcfl2JOnsAGiG1zUmkeIVLyZ/view?usp=sharing](https://drive.google.com/file/d/1M0kv5nWLtcfl2JOnsAGiG1zUmkeIVLyZ/view?usp=sharing)
(Manually installing will requires manual updating, as well. APK last updated May 12, 2022)
Source-code for building the Android app is here:
[https://github.com/steveseguin/vdon\_flutter/](https://github.com/steveseguin/vdon\_flutter/)
# &echocancellation
Sender-Side Option! ([`&push`](push.md))
## Aliases
* `&aec`
* `&ec`
## Options
Example: `&echocancellation=1`
| Value | Description |
| ----- | ----------------------------------------- |
| `0` | Turns OFF the automatic echo-cancellation |
| `1` | Turns ON the automatic echo-cancellation |
## Details
Automatic echo-cancellation is ON by default in VDO.Ninja.
You can turn off echo-cancellation by adding `&aec=0` to a source link (guest). If you are using [`&proaudio`](../advanced-settings/audio-parameters/and-proaudio.md), echo-cancellation gets turned off. You can enable it again with `&proaudio&aec=1`.
You can also switch it on or off via the audio settings. If you want the guests to be able to change the audio settings by themselves, use [`&mediasettings`](../newly-added-parameters/and-mediasettings.md) on the link of the guests, as per default only the director can change the audio settings of the guests.
May need to be disabled to use [`&proaudio`](../advanced-settings/audio-parameters/and-proaudio.md) on some older browsers.
## Related
[and-proaudio.md](../advanced-settings/audio-parameters/and-proaudio.md)
[noisegate.md](noisegate.md)
[and-screenshareaec.md](../newly-added-parameters/and-screenshareaec.md)
---
description: Skips the camera/audio device or screenshare selection
---
# &autostart
Sender-Side Option! ([`&push`](push.md))
## Aliases
* `&autojoin`
* `&aj`
* `&as`
## Details
Auto starts when the camera/audio device or screenshare is ready. Useful for helping a remote guest skip-past the complex setup of their camera/audio.
Can be used together with [`&webcam`](and-webcam.md) or [`&screenshare`](screenshare.md) to join the room or start the stream immediately.
## Related
[easyexit.md](easyexit.md)
[and-webcam.md](and-webcam.md)
[screenshare.md](screenshare.md)
---
description: Applies a generic audio compressor to the local microphone
---
# &compressor
Sender-Side Option! ([`&push`](push.md))
## Aliases
* `&comp`
## Details
By adding `&compressor` to a source link, it applies a generic audio compressor to the local microphone.
An audio compressor can help reduce spikes in audio loudness.
The compressor is **off by default**.
This will enable the audio processing pipeline.
There is a toggle in the director's room which adds `&comp` to the guest's invite link.
## Update in Version 22
There is now an option to control the compressor remotely (3 states for the compressor; Off/On/Limiter)
## Related
[and-limiter.md](and-limiter.md)
---
description: Turn audio noise reduction filter ON or OFF
---
# &denoise
Sender-Side Option! ([`&push`](push.md))
## Aliases
* `&dn`
## Options
Example: `&compressor=1`
| Value | Description |
| ----- | ----------- |
| `0` | Filter Off |
| `1` | Filter On |
## Details
Noise suppression reduces background audio noise from your surrounding environment.
Noise suppression is ON by default in VDO.Ninja.
You can turn off noise suppression by adding `&denoise=0` to a source link (guest). If you are using [`&proaudio`](../advanced-settings/audio-parameters/and-proaudio.md), echo-cancellation gets turned off. You can enable it again with `&proaudio&denoise=1`.
You can also switch it on or off via the audio settings. If you want the guests to be able to change the audio settings by themselves, use [`&mediasettings`](../newly-added-parameters/and-mediasettings.md) on the link of the guests, as per default only the director can change the audio settings of the guests.
## Related
[noisegate.md](noisegate.md)
[and-screensharedenoise.md](../newly-added-parameters/and-screensharedenoise.md)
---
description: Same as &audiodevice or &videodevice, but applies to both
---
# &device
Sender-Side Option! ([`&push`](push.md))
## Aliases
* `&d`
## Options
Example: `&device=Brio_4K`
Value
Description
0
disable the audio and video devices; no option to change it during setup is provided.
1
auto-select the default video and audio devices; no option to change it will be allowed.
(string value)
auto-select a video and audio device that has a label containing that same string; whitespaces in names can be replaced with underscores.
## Details
If you set `&device=0`, you disable audio and video inputs, but chat is still available.
Chat-only guests can access a group-room this way.
## Related
[videodevice.md](videodevice.md)
[audiodevice.md](audiodevice.md)
---
description: >-
Provides access to a generic audio equalizer that can be applied to the local
microphone
---
# &equalizer
Sender-Side Option! ([`&push`](push.md))
## Aliases
* `&eq`
## Details
Adding `&equalizer` to a source link, it provides access to a generic audio equalizer that can be applied to the local microphone.
It can be accessed via the Audio Settings page or the Director can remotely adjust it.
Enables the audio processing pipeline.
## Related
[and-compressor.md](and-compressor.md)
[and-limiter.md](and-limiter.md)
---
description: Allows the user to select a video or audio file as a source for streaming
---
# &fileshare
Sender-Side Option! ([`&push`](push.md))
## Aliases
* `&fs`
## Details
Adding `&fileshare` to a URL allows the user to select a video or audio file as a source for streaming.
The stream can be paused and scrubbed like a normal video/audio file. It will auto-loop when it ends.
Supports audio-only files as well as common video formats. Depends on your browser. If you mute the video, it will mute the video for all the viewers as well. It is extremely simple in functionality and is only available when the URL is used. The resolution used will be limited by the video's native resolution.
The video will be **transcoded for each** connected **guest**!
---
description: Enables a "Raise Hand" button for guests
---
# &hands
Sender-Side Option! ([`&push`](push.md))
## Aliases
* `&hand`
## Details
Adds a button for guests to raise their hands.
If pressed, and the user is in a room, the room's director will get a notification that the user pressed the button.
It will do nothing if the room does not have a director in it.
The director can dismiss the user's action.
There is a toggle in the director's room which adds `&hand` to the guest's invite link..png>)
## Related
[and-notify.md](and-notify.md)
---
description: Sets the maximum height of the video allowed in pixels
---
# &height
Sender-Side Option! ([`&push`](push.md))
## Aliases
* `&h`
## Options
Example: `&height=1080`
| Value | Description |
| ----------------------------- | ------------ |
| (some positive integer value) | height in px |
## Details
Sets the maximum height of the video allowed in pixels.
Actual height may be less based on bandwidth allowances.
Limiting the height can force the camera to use higher frame rates.
Limiting the height can reduce the CPU load.
[https://vdo.ninja/supports](https://obs.ninja/supports) will list the support resolutions of your default camera.
[https://webrtchacks.github.io/WebRTC-Camera-Resolution/](https://webrtchacks.github.io/WebRTC-Camera-Resolution/) Is a tool to help you find the resolutions supported by your camera.
You can use [`&scale=50`](../advanced-settings/view-parameters/scale.md) also, as a viewer, to scale down a selected width/height to something more exact.
If the camera cannot support the height, **it will fail**.
You can get [4K](../guides/how-to-stream-4k-video-using-vdo.ninja.md) by adding `&width=3840&height=2160` to the source link if the camera supports it.
## Related
[and-width.md](and-width.md)
[and-aspectratio.md](../advanced-settings/video-parameters/and-aspectratio.md)
[and-quality.md](../advanced-settings/video-parameters/and-quality.md)
---
description: Applies a generic audio limiter to the local microphone
---
# &limiter
Sender-Side Option! ([`&push`](push.md))
## Details
`&limiter` applies a generic audio limiter to the local microphone.
A limiter is like an aggressive compressor.
The limiter is **off by default**.
Enables the audio processing pipeline.
It cannot be used along with the [`&compressor`](and-compressor.md) option.
## Related
[and-compressor.md](and-compressor.md)
---
description: Limits total of view and push connections
---
# &maxconnections
Sender-Side Option! ([`&push`](push.md))
## Aliases
* `&mc`
## Options
Example: `&maxconnections=5`
| Value | Description |
| ------------------- | ------------------------------- |
| (any integer value) | Will set maximum to given value |
## Details
Limits total of view and push connections to the given value.
## Related
[and-maxpublishers.md](../advanced-settings/view-parameters/and-maxpublishers.md)
[and-maxviewers.md](and-maxviewers.md)
---
description: >-
Like &fps, except it will allow for lower frame rates if the specific frame
rate requested failed
---
# &maxframerate
Sender-Side Option! ([`&push`](push.md))
## Aliases
* `&mfr`
* `&mfps`
## Options
Example: `&maxframerate=60`
| Value | Description |
| ------------------------ | ------------------------------ |
| (positive integer value) | Frame rate (frames per second) |
## Details
Like [`&fps`](../advanced-settings.md#framerateframe-rate), except it will allow for lower frame rates if the specific frame rate requested failed.
You can set `&maxframerate=60` and the system automatically selects 30 if your camera doesn't support a frame rate of 60.
## Related
[and-fps.md](../advanced-settings/video-parameters/and-fps.md)
---
description: Limits the number of viewers allowed
---
# &maxviewers
Sender-Side Option! ([`&push`](push.md))
## Aliases
* `&mv`
## Options
Example: `&maxviewers=8`
| Value | Description |
| ------------------------ | ------------------- |
| (positive integer value) | max allowed viewers |
## Details
Useful for iOS devices that might explode if more than 3 video viewers connect.
Useful to prevent publicly shared guest links from being crashed due to too many viewer requests.
## Related
[and-maxpublishers.md](../advanced-settings/view-parameters/and-maxpublishers.md)
[and-maxconnections.md](and-maxconnections.md)
---
description: Delays the microphone by specified time in ms
---
# &micdelay
Sender-Side Option! ([`&push`](push.md))
## Aliases
* `&md`
## Options
Example: `&micdelay=100`
| Value | Description |
| ------------------------ | ----------------------------------- |
| (positive integer value) | Delay to add in milliseconds |
| (no value given) | Will show the mic delay as a slider |
## Details
Delays the microphone by specified time in ms.
### Update in Version 22
Added the "mic delay" option as a slider to the director's control; it's available by default, with up to 500-ms of delay ready. If you make use of it, it will "enable" the `&micdelay` web audio node remotely if not yet on, which might cause a clicking sound. Hoping that this though can help with problematic guests who might be out of sync. This is not the same as [`&buffer`](../advanced-settings/view-parameters/buffer.md) or [`&sync`](../advanced-settings/view-parameters/sync.md) delay, which are a view-side parameters.
`&micdelay`, if used on a basic push link, will show the mic delay as a slider now also. So you can adjust it as needed. I don't show the slider by default unless using the URL parameter, as I don't think its a commonly used feature.
## Related
[and-audiolatency.md](../newly-added-parameters/and-audiolatency.md)
[sync.md](../advanced-settings/view-parameters/sync.md)
---
description: Mini self-preview at the top right corner
---
# &minipreview
Sender-Side Option! ([`&push`](push.md))
## Aliases
* `&mini`
## Options
Example: `&minipreview=0`
Value
Description
(no value given)
shows the mini self-preview at the top right corner
0
disables the mini preview in broadcast mode
## Details
## Details
Shows the mini self-preview at the top right corner. This is the default behavior when [`&broadcast`](../advanced-settings/view-parameters/broadcast.md) mode is on.
You can change the default position of the mini preview with [`&minipreviewoffset`](../advanced-settings/video-parameters/and-minipreview-1.md).
## Related
[and-largepreview.md](../advanced-settings/video-parameters/and-largepreview.md)
[and-minipreview-1.md](../advanced-settings/video-parameters/and-minipreview-1.md)
[and-preview.md](and-preview.md)
[and-nopreview.md](and-nopreview.md)
[broadcast.md](../advanced-settings/view-parameters/broadcast.md)
---
description: Starts with the microphone muted by default
---
# &mute
Sender-Side Option! ([`&push`](push.md), [`&director`](../viewers-settings/director.md))
## Aliases
* `&muted`
* `&m`
## Details
Starts with the microphone muted by default. The guest can switch on the microphone.
### Update in [v23](../releases/v23.md)
`&mute` works with the director now, so the mic starts muted when you enable your microphone or when using [`&autostart`](and-autostart.md).
## Related
[and-videomute.md](and-videomute.md)
[and-mutespeaker.md](and-mutespeaker.md)
---
description: Auto mutes the speaker
---
# &mutespeaker
General Option! ([`&push`](push.md), [`&room`](../general-settings/room.md), [`&view`](../advanced-settings/view-parameters/view.md), [`&scene`](../advanced-settings/view-parameters/scene.md), [`&director`](../viewers-settings/director.md))
## Aliases
* `&ms`
* `&speakermute`
* `&sm`
* `&speakermuted`
## Options
Example: `&mutespeaker=0` or `&mutespeaker=false`
| Value | Description |
| ---------------- | --------------------------------------------------------------------- |
| (no value given) | the default behavior of this option is to mute inbound audio playback |
| `0` \| `false` | will have the speaker button unmuted |
| `1` \| `true` | will have the speaker button muted |
## Details
Sets the speaker to be muted (or unmuted) by default for a push-link, guest, director or view/scene link.
If no value is passed, the default behavior of this option is to mute inbound audio playback. The user can still unmute the audio via the speaker-icon button in their lower control bar.
If looking to mute the audio playback of a view or scene link, [`&noaudio`](../advanced-settings/view-parameters/noaudio.md) is an alternative option that will block audio tracks from connecting in the first place. It can't be toggled on and off though, like `&mutespeaker` can be though.
### Unmuting the director's speaker by default
You can also use this parameter to have a director join the room with their speaker output unmuted by default.
Set the `&mutespeaker` value to `false` or `0` to have the mute button start unmuted. By default, the director joins with their speaker output muted, so this option can be used to have the director join unmuted instead.
[https://vdo.ninja/?director=ROOMNAME\&mutespeaker=0](https://vdo.ninja/?director=ROOMNAME\&mutespeaker=0)
### Muting shared websites ([meshcast.io](https://meshcast.io/) / youtube)
The director and guests can share websites with others in a group room. The audio playback of [meshcast.io](https://meshcast.io/) shared links will respect the `&mutespeaker` parameter used by VDO.Ninja, but other sites that are shared may not respect it.
You can also add [`&mute`](and-mute.md) to a meshcast.io link itself, when sharing it, which will mute just the meshcast video by default for others. This can be useful to avoid echo cancellation issues that sometimes are created when sharing meshcast.io links in a VDO.Ninja group room.
## Related
[and-mute.md](and-mute.md)
[and-videomute.md](and-videomute.md)
[noaudio.md](../advanced-settings/view-parameters/noaudio.md)
---
description: Disables the local self-preview
---
# &nopreview
Sender-Side Option! ([`&push`](push.md))
## Aliases
* `&np`
## Details
If you don't want to see yourself when in a group chat, this will hide your video.
**iOS users:** This flag will break stuff; You must have a preview if using those devices and wanting to publish.
There is a toggle in the director's room which adds `&np` to the guest's invite link. (1).png>)
## Related
[and-preview.md](and-preview.md)
[and-minipreview.md](and-minipreview.md)
---
description: Disables the local settings button
---
# &nosettings
Sender-Side Option! ([`&push`](push.md))
## Aliases
* `&ns`
## Details
`&nosettings` disables the local settings button.
You won't be able to change video or audio feeds after initially selecting them. This prevents guests accidentally changing their webcam or microphone after entering a room.
Hides the screen-share button as well.
---
description: Hides the speaker button
---
# &nospeakerbutton
Sender-Side Option! ([`&push`](push.md))
## Aliases
* `&nsb`
## Details
Hides the button that can mute the speaker.
## Related
[nomicbutton.md](../viewers-settings/nomicbutton.md)
[and-novideobutton.md](../viewers-settings/and-novideobutton.md)
---
description: Audio alerts for raised hands, chat messages and if somebody joins the room
---
# ¬ify
Sender-Side Option / Director Option! ([`&push`](push.md), [`&director`](../viewers-settings/director.md))
## Aliases
* `&beep`
* `&tone`
## Details
Add this to a guest's/director's URL and you get audio alerts for raised-hands, chat messages and if somebody joins the room.
If you can't hear a sound, click any button in the room. Then the sounds will be activated.
## Related
[r2d2.md](r2d2.md)
[and-hands.md](and-hands.md)
---
description: Target audio bitrate and max bitrate for outgoing audio streams
---
# &outboundaudiobitrate
Sender-Side Option! ([`&push`](push.md))
## Aliases
* `&oab`
## Options
Example: `&outboundaudiobitrate=128`
| Value | Description |
| --------------- | ------------------------------ |
| (integer value) | outbound audio bitrate in kbps |
## Details
Target audio bitrate and max bitrate for outgoing audio streams.
Allows the Director to set their outbound audio bitrate to be shared with guests at something like 160-kbps, while having the guests still be able to share their audio between other guests at the default audio bitrate of around 32-kbps. If the guest sets the audio bitrate ([`&proaudio=1`](../advanced-settings/audio-parameters/and-proaudio.md) or [`&audiobitrate=200`](../advanced-settings/view-parameters/audiobitrate.md)) on the view link will override the publisher's `&outboundaudiobitrate` parameter.
## Related
[and-proaudio.md](../advanced-settings/audio-parameters/and-proaudio.md)
[audiobitrate.md](../advanced-settings/view-parameters/audiobitrate.md)
[and-outboundvideobitrate.md](../advanced-settings/video-bitrate-parameters/and-outboundvideobitrate.md)
---
description: Forces the guest to have a self-preview
---
# &showpreview
Sender-Side Option! ([`&push`](push.md))
## Aliases
* `&preview`
## Details
Forces the guest to have a self-preview.
## Related
[and-minipreview.md](and-minipreview.md)
[and-nopreview.md](and-nopreview.md)
---
description: Auto mutes guest's video
---
# &videomute
Sender-Side Option! ([`&push`](push.md))
## Aliases
* `&vm`
* `&videomuted`
## Details
Auto mutes the guest's video when connecting.
## Related
[and-mute.md](and-mute.md)
[and-videomute.md](and-videomute.md)
---
description: Disables screen-sharing as an option
---
# &webcam
Sender-Side Option! ([`&push`](push.md))
## Aliases
* `&wc`
## Details
Automatically selects the Share your Camera option and hides the screen-share button in the control bar.
Do not use while on a director page to autostart a camera; `&autostart&vd=video_device` should handle that.
If you would still like the guest to have access to the screen-sharing button once they have joined the call, you can force it to appear with the [`&ssb`](../advanced-settings/settings-parameters/and-screensharebutton.md) option. The [`&webcam`](and-webcam.md) option by default will hide the screen-share button otherwise.
Starting with [v19](../release-notes/v19.md) of VDO.Ninja, there is also the [`&webcam2`](../newly-added-parameters/and-webcam2.md) option; a minor UI variant that requires an additional button press, but more clearly preps the guest to the fact they will be sharing their webcam.
## Related
[screenshare.md](screenshare.md)
[and-webcam2.md](../newly-added-parameters/and-webcam2.md)
---
description: Only shares a website with viewers
---
# &website
Sender-Side Option! ([`&push`](push.md))
## Aliases
* `&iframe`
## Details
Only shares a website with viewers. You can use this to share a YouTube video with the guests.
---
description: Sets the maximum width of the video allowed in pixels
---
# &width
Sender-Side Option! ([`&push`](push.md))
## Aliases
* `&w`
## Options
Example: `&width=1920`
| Value | Description |
| ----------------------------- | ----------- |
| (some positive integer value) | width in px |
## Details
Sets the maximum width of the video allowed in pixels.
Actual width may be less based on bandwidth allowances.
Limiting the width can force the camera to use higher frame rates.
Limiting the width can reduce CPU load.
If the camera cannot support the width, **it will fail**.
You can get [4K](../guides/how-to-stream-4k-video-using-vdo.ninja.md) by adding `&width=3840&height=2160` to the source link if the camera supports it.
## Related
[and-height.md](and-height.md)
[and-aspectratio.md](../advanced-settings/video-parameters/and-aspectratio.md)
[and-quality.md](../advanced-settings/video-parameters/and-quality.md)
---
description: Pre-configures the selected audio device
---
# &audiodevice
Sender-Side Option! ([`&push`](push.md))
## Aliases
* `&adevice`
* `&ad`
## Options
Example: `&audiodevice=Cable_Output`
| Value | Description |
| ----------------------- | -------------------------------------------------------------------------------------------------------------------- |
| `0` | disable audio source automatically; no option to change it during setup is provided. |
| `1` \| (no value given) | auto-select the default audio; no option to change it will be allowed. |
| `Cable_Output` | will match against "CABLE Output (VB-Audio Virtual Cable). Use any other string to match against other device names. |
## Details
It can be changed after the connection has been established. Useful for helping a remote guest skip-past the complex setup of their camera/audio.
You can pass a string name to auto-select an audio device that has a label containing that same string.
You can pass a device ID as well; see [vdo.ninja/devices](https://vdo.ninja/devices) to see the device IDs (specific to VDO.Ninja's domain).
Setting this option to `&audiodevice=0` will also disable the guest's microphone, potentially allowing for guest connections that have no video or audio. You might do this if you needed midi-only transport, hidden IFRAME control, or just to chatting.
See [vdo.ninja/devices](https://vdo.ninja/devices) to see the device IDs and device names. DeviceIDs are specific to VDO.Ninja's domain, while device names are not.
This web-based tool will also auto-create links for you, just by clicking on the respective device.
There is a toggle in the director's room which adds `&ad` to the guest's invite link. (2).png>)
### Update in V22
`&audiodevice` can accept multiple audio devices now. `&audiodevice=cam,cable` for example, will select the camlink and virtual audio cable devices as an audio source when joining.
`&audiodevice={device name}` will now also now show the selected audio devices before joining, while `&audiodevice=1` or `&audiodevice=0` will still hide the option to change or see audio devices.
## Related
[and-nosettings.md](and-nosettings.md)
[videodevice.md](videodevice.md)
---
description: Sets whether audio auto-normalization is ON or OFF
---
# &autogain
Sender-Side Option! ([`&push`](push.md))
## Aliases
* `&agc`
* `&ag`
## Options
Example: `&autogain=1`
| Value | Description |
| ----- | ---------------------------- |
| `0` | audio auto-normalization off |
| `1` | audio auto-normalization On |
## Details
Audio auto-normalization is ON by default in VDO.Ninja.
You can turn off auto-normalization by adding `&autogain=0` to a source link (guest). If you are using [`&proaudio`](../advanced-settings/audio-parameters/and-proaudio.md), auto-normalization gets turned off. You can enable it again with `&proaudio&autogain=1`.
You can also switch it on or off via the audio settings. If you want the guests to be able to change the audio settings by themselves, use [`&mediasettings`](../newly-added-parameters/and-mediasettings.md) on the guests' link, as per default only the director can change the audio settings of the guests.
Your browser will try to keep optimum audio levels.
## Known issues with auto-gain
Some microphones or devices with software-based gain controls can have problems with auto-gain. The microphone volume might go to high, causing clipping, for example, or it might interfere with the gain of other applications.
If using a Chromium-based browser, like Chrome, Edge or Brave, you can either disable auto-gain or you can go into your browser's settings and disable the browser from being able to control the device's input volume. The link to this option is here: [chrome://flags/#enable-webrtc-allow-input-volume-adjustment](chrome://flags/#enable-webrtc-allow-input-volume-adjustment) (as of March 2024 at least)
Please note that this issue seems to be a Chromium-related issue, and it is not VDO.Ninja specific. If you do disable auto-gain within VDO.Ninja, the option to manually increase your gain is still normally available also.
## Related
[and-screenshareautogain.md](../newly-added-parameters/and-screenshareautogain.md)
[and-audiogain.md](../advanced-settings/audio-parameters/and-audiogain.md)
[and-volume.md](../advanced-settings/audio-parameters/and-volume.md)
---
description: Will ask the user for content to remote change their camera or microphone
---
# &consent
Sender-Side Option! ([`&push`](push.md))
## Details
Adding to the guest's invite link will either alert the guest or seek permission of the guest to remotely change their camera or mic without further approval.
For privacy reasons, without this flag a director of a room will need to have the guest approve a remote camera or microphone change. With this flag added however, the consent to do so will be obtained on the initial connection, allowing the director to change cameras or mics of the guest without blockers.
### Update on [v23](../releases/v23.md)
Added "change URL" permissions to the `&consent` flag. That is, when using `&consent` on the guest URL, the director can remotely change the guest's URL without additional permission -- it will just change.
## Related
[remote.md](../general-settings/remote.md)
---
description: Attempts to show the mouse cursor on screen shares
---
# &screensharecursor
Sender-Side Option! ([`&push`](push.md))
## Aliases
* `&cursor`
## Details
Adding `&screensharecursor` to a source link attempts to show the mouse cursor on screen shares.
This flag is introduced in [v18.4](../release-notes/v18.md), but it's largely useless currently due to lack of support from most browsers.
The default cursor state in VDO.Ninja is to not show a cursor, but Chrome/Firefox will still add a cursor overlay in regardless.
If sharing a Chrome tab, Chrome adds the cursor in only when that tab is active.
According to the web spec, we should be able to control the visibility of a cursor, but we can't. Not yet.
You can see this link to tinker with different settings easily, to validate the problem:
[https://www.webrtc-experiment.com/getDisplayMedia/](https://www.webrtc-experiment.com/getDisplayMedia/)
Generally, to have better control of the cursor, maybe instead capture the screen with OBS and bring the video into VDO.Ninja as a virtual camera.
For information on alternative ideas on how to hide or show the cursor, you can see the following article.
[cursor-shows-when-screen-sharing.md](../common-errors-and-known-issues/cursor-shows-when-screen-sharing.md)
If none of this is working you might try [YoloMouse](https://store.steampowered.com/app/1283970/YoloMouse/) on Steam:
[https://store.steampowered.com/app/1283970/YoloMouse/](https://store.steampowered.com/app/1283970/YoloMouse/)
## Related
[and-nocursor.md](../general-settings/and-nocursor.md)
---
description: Message ONLY the director
---
# &directorchat
Sender-Side Option! ([`&push`](push.md))
## Aliases
* `&dc`
## Details
When this parameter is set, guest messages will only go to the director.
---
description: Won't ask the user to confirm that they wish to exit or leave the page
---
# &easyexit
Sender-Side Option! ([`&push`](push.md))
## Aliases
* `&ee`
## Details
To prevent accidental page refreshes or exits during a stream, VDO.Ninja will ask the user to confirm they wish to leave the page when they try to. Using `&easyexit` prevents this confirmation pop-up from occurring, which might be useful if you are doing a lot of testing and find the added clicking to be annoying.
It hides this popup:
## Related
[and-autostart.md](and-autostart.md)
---
description: Applies effects to the video/audio feeds
---
# &effects
Sender-Side Option! ([`&push`](push.md))
## Aliases
* `&effect`
## Options
Example: `&effects=7` or `&effects=zoom`
Value
Description
(no value given)
Shows a "Digital Video Effects" panel when setting up devices
New experimental background blur effect; it's not supported by most browsers/systems and its in origin trial
## Details
Adding `&effects` to a guest link enables the drop-down menu for Digital Video Effects. The guest can then choose the digital video effect via the drop-down menu.
This is on by default when using a basic push link outside of a room.
You can pre-select the digital video effect by adding `&effects=X` (see [Options](effects.md#options) above) to a guest/push link.
The guest can change the digital video effect dynamically via the video settings panel if you have added `&effects` to the guest's URL.
You can also pre-select the effect value by adding [`&effectvalue`](../newly-added-parameters/and-effectvalue.md) to the URL. ie: the amount of blur.
### Greenscreen performance
`&effects=4` enables a virtual Greenscreen on the publisher side.
Green screen doesn't require SIMD support to work, although it won't work as well without it on. There's a little warning info icon (!) if SIMD is not enabled.
Please do enable Webassembly-SIMD support under `chrome://flags/` if you'd like to see a large reduction in CPU load when using this feature.
### Important Note for `&effects=1`
`&effects=1` requires the use of the Chromium experimental face detection API, as I'm using the built-in browser face-tracking model for this. You can enable the API flag here: `chrome://flags/#enable-experimental-web-platform-features`
My hope is that this feature will eventually be enabled by default within Chromium, as loading a large ML model to do face detection otherwise is a bit heavy; you may need to enable this within the OBS CLI if wishing to use it there?
### `&effects=8`
Added `&effects=8`, which might be useful if using a Camlink or simple HDMI capture device and [`&record`](../advanced-settings/recording-parameters/and-record.md) mode. The current `&record` mode doesn't seem to always scale down the video before recording (browser issue it seems), so local file recordings might be 4K in size, despite the target resolution being set much lower. `&effects=8` will use a canvas to first resize the video though, and then recordings will be based on that, making smaller recording sizes possible. (You could also use `&effects=7`, which then provides digital zooming controls and is otherwise the same thing).
This `&effects=8` mode might also be helpful in solving issues with cameras disconnecting or having their frame rate change while recording, causing issues with the recording. The canvas acts as a reliable middle man between the camera and output video stream, so if the camera's input stream fails, the recording stream will not be impacted, other than perhaps skipping some frames. The canvas is sensitive to CPU load or browser throttling though, so frame rates may fluctuate more often when using it, so I can't suggest using it unless the guest/user is known to have a problematic camera.
### `&effects=7` (Zoom)
[`&effectvalue=1.2`](../newly-added-parameters/and-effectvalue.md) will now work with `&zoom` (`&effects=7`), so you can trigger the camera to digitally zoom in on load.
## Related
[and-effectvalue.md](../newly-added-parameters/and-effectvalue.md)
[and-chunked.md](../newly-added-parameters/and-chunked.md)
---
description: The preview video will be fullscreen
---
# &fullscreen
Sender-Side Option! ([`&push`](push.md))
## Details
If publishing a video outside **of** a room, and not viewing any other video except your own preview, that preview will be windowed. This command will make that preview larger, sized to fit the window.
### Purpose
If you combine this command with [`&cleanoutput`](../advanced-settings/design-parameters/cleanoutput.md), you can then cleanly window-capture your preview window and use that instead as a local webcam source elsewhere, such as in OBS. This may potentially use less CPU than using a virtual camera, while still having access to the webcam in multiple applications.
If you load the webcam in OBS first, you'll need to use the Virtual Camera and some special settings to have the webcam be available in other applications, like the browser. Window-capturing is an alternative that uses less CPU and does not require special drivers to be installed.
It is recommend to consider using the Electron Capture app as the window-capture source app, as it is frameless, can be pinned on top, uses less CPU than the Chrome browser, and can be screen-captured or window-captured by most applications. It's also designed for VDO.Ninja, so lots of command line options available.
## Related
[cleanoutput.md](../advanced-settings/design-parameters/cleanoutput.md)
[and-fullscreenbutton.md](../advanced-settings/settings-parameters/and-fullscreenbutton.md)
---
description: >-
When combined with the either &webcam or &screenshare, this option won't
auto-load the camera/mic selection page
---
# &intro
Sender-Side Option! ([`&push`](push.md),[`&webcam`](and-webcam.md),[`&screenshare`](screenshare.md))
## Aliases
* `&ib`
## Details
When combined with the either [`&webcam`](and-webcam.md) or [`&screenshare`](screenshare.md), this option won't auto-load the camera/mic selection page. Instead, it shows the main-menu button for either the webcam option or screen-share option.
For some users, this prepares them better for the upcoming request for camera/microphone permissions; particularly useful if using VDO.Ninja as an IFRAME integration.
`&intro&webcam` is the same like [`&wc2`](../newly-added-parameters/and-webcam2.md).
`&intro&screenshare` is the same like [`&ss2`](../newly-added-parameters/and-screenshare2.md).
## Related
[and-webcam.md](and-webcam.md)
[and-webcam2.md](../newly-added-parameters/and-webcam2.md)
[screenshare.md](screenshare.md)
[and-screenshare2.md](../newly-added-parameters/and-screenshare2.md)
---
description: Adds a low-cut filter
---
# &lowcut
Sender-Side Option! ([`&push`](push.md))
## Aliases
* `&lc`
* `&higpass`
## Options
Example: `&lowcut=150`
| Value | Description |
| --------------- | --------------------------------------------------- |
| (integer value) | Sets the cut-off frequency in hz (default is 100hz) |
## Details
Adds a low-cut filter.
Enables the audio processing pipeline.
## Related
[and-compressor.md](and-compressor.md)
[and-limiter.md](and-limiter.md)
[and-equalizer.md](and-equalizer.md)
---
description: Share audio-only; no video publishing allowed
---
# &miconly
Sender-Side Option! ([`&push`](push.md))
## Details
Mostly just an alias of `&videodevice=0&webcam`, but it also further hides the option to later select a video device via the settings menu. It also hides the 'mute camera' and screen-share buttons.
This is a useful option for when you want a guest to join a room and only publish audio, with no opportunity to share video.
## Related
[videodevice.md](videodevice.md)
[and-webcam.md](and-webcam.md)
---
description: Hides the ability for a guest to upload a file
---
# &nofileshare
Sender-Side Option! ([`&push`](push.md),[`&room`](../general-settings/room.md))
## Aliases
* `&nodownloads`
* `&nofiles`
## Details
In some cases, the guest will have a button by default to upload files to the group room.
Using `&nofileshare`**,** the button needed to select and share a file will be hidden.
This may also prevent a guest from being able to download files that are shared with them.
## Related
[and-fileshare.md](and-fileshare.md)
---
description: >-
Lowers your mic volume to 10% of its current value based on volume-level
activity
---
# &noisegate
Sender-Side Option! ([`&push`](push.md))
## Aliases
* `&gating`
* `&gate`
* `&ng`
## Options
Example: `&noisegate=1`
| Value | Description |
| ----------------------- | -------------------------------------------------------------------------- |
| `0` | hides it from the menu |
| `1` \| (no value given) | enables the new noise gate (see Details) |
| `2` | will mute the speakers when you are talking |
| `3` | will mute the speakers when someone else is talking (mainly for debugging) |
| `4` | will mute the microphone when someone else is speaking |
## Details
The default setting is OFF. You can switch on the noise gate in the audio settings:
This is a new noise gate, that lowers your mic volume to 10% of its current value based on volume-level activity. If you haven't made a significant sound in few seconds, the noise gate kicks in, and will re-enable when a significant noise is detected. It will take about 300-ms for the volume to recover once the noise triggers it back on, which can be a small bit harsh/distracting at times.
The point of this feature is to allow guests who might be in a rather noisy room or who are unable to use echo cancellation to still engage with a chat, without them introducing feedback back into the room.
This is a very hard and aggressive noise filter, and a guest won't be audible to others in the room if others in the room are currently talking.
User feedback on this feature welcomed.
### Noise Gate Settings
[`&noisegatesettings`](../advanced-settings/audio-parameters/and-noisegatesettings.md) is used in conjunction with `&noisegate`. This feature lets you tweak the noise-gate's variables, making it more or less aggressive as needed.
It takes a comma separated list:
* First value is target gain (0 to 100), although 0 to 40 is probably the recommended range here.
* Second value is the threshold value where the gate is triggered if below it. \~ 100 is loudly speaking, \~ 20 is light background noise levels, and under 5 is quiet background levels.
* Third value is how 'sticky' the gate-open position is, in milliseconds. Having this set to a few seconds should prevent someone from being cut off while speaking or if taking a short pause.
Example:
[`https://vdo.ninja/alpha/?noisegate&noisegatesettings=10,25,3000`](https://vdo.ninja/alpha/?noisegate\&noisegatesettings=10,25,3000)
## Related
[and-noisegatesettings.md](../advanced-settings/audio-parameters/and-noisegatesettings.md)
[and-denoise.md](and-denoise.md)
---
description: >-
Disables IFrames from loading, such as remotely shared websites by another
guest or director
---
# &nowebsite
Sender-Side Option! ([`&push`](push.md))
## Aliases
* `&noiframes`
* `&noiframe`
* `&nif`
## Details
Disables IFRAMEs from loading, such as remotely shared websites by another guest or director.
## Related
[and-website.md](and-website.md)
---
description: The order priority of a source video when added to the video mixer
---
# &order
Sender-Side Option! ([`&push`](push.md), [`&room`](../general-settings/room.md))
## Options
Example: `&order=3`
| Value | Description |
| ------------------------ | ----------------------------------- |
| (positive integer value) | Higher order, drawn first on screen |
## Details
Videos in the auto-mixer are normally sorted by default by their connection ID, but assigning a mix-order value to a video will order it based on that mix value instead. If not set manually via the `&order` parameter, the mix order value will be zero.
The director can change this value dynamically for each guest; they can change the order of a guest via the `Mix Order` option in the director's room. If wanting to pre-assign the mix-order value though, the `&order` option can be useful, such as when wanting to ensure the main host of a stream is always first in the video mix layout.
The mixer order takes priority over [`&orderby`](../newly-added-parameters/and-orderby.md), but the mix order has no effect if using a custom layout, such as when using a custom [`&layout`](../advanced-settings/mixer-scene-parameters/and-layout.md) or via the mixer app.
If two videos have the same order value, the mixer will decide on its own which is drawn first of the two.
Order is Left to Right; Top to Bottom.
The mix order value for a guest/video source is synced with all other guests/scenes/viewers, so changing it will impact how others see the mix order as well.
## Related
[and-orderby.md](../newly-added-parameters/and-orderby.md)
---
description: Enables pan/tilt/zoom control of the device, if compatible
---
# &ptz
Sender-Side Option! ([`&push`](push.md))
## Details
Enables pan/tilt/zoom control of the device, if compatible.
This will trigger a new permission popup though.
Can be added to a guest's URL in a room. Then the director can manually change pan, tilt and zoom for the guest's camera.
Can also be added to a simple push link, then you can change pan, tilt and zoom in the video settings.
---
description: The stream ID that you are publishing with will be the defined value
---
# &push
Sender-Side Option! ([`&room`](../general-settings/room.md))
## Aliases
* `&id`
## Options
Example: `&push=StreamID`
Value
Description
(no value given)
creates a randomly generated stream ID
(string)
1 to 49-characters long: aLphaNumEric-characters; case sensitive.
## Details
`&push` is the parameter that tells VDO.Ninja to be a publisher.
[https://vdo.ninja/?push=streamid](https://vdo.ninja/?push=streamid)
[https://vdo.ninja/?view=streamid](https://vdo.ninja/?view=streamid)
If the parameter is not provided, a randomly generated stream ID will be used instead.
[https://vdo.ninja/?push](https://vdo.ninja/?push)
This is a useful parameter if you wish to reuse an invite link or if you refresh the page often.
The value needs to be 1 to 24-characters long: `aLphaNumEric-characters`; case sensitive.
If left empty, the stream ID will default to a random one.
If the stream ID is already in active use, an error will be shown and the stream will not publish.
If using a [`&room`](../general-settings/room.md) URL and not using [`&scene`](../advanced-settings/view-parameters/scene.md) or [`&solo`](../advanced-settings/mixer-scene-parameters/and-solo.md), VDO.Ninja will automatically generate a `&push` ID.
## Related
[and-permaid.md](../advanced-settings/setup-parameters/and-permaid.md)
[view.md](../advanced-settings/view-parameters/view.md)
---
description: Easter egg ¬ify sound
---
# &r2d2
Sender-Side Option! ([`&push`](push.md))
## Details
Add this to a guest's/director's URL and you get R2-D2 audio alerts for raised-hands, chat messages.
Same as [`¬ify`](and-notify.md). If there is no sound when a guest is joining or leaving the room, use `¬ify&r2d2` to get a basic sound.
If you can't hear a sound, click any button in the room. Then the sounds will be activated.
## Related
[and-notify.md](and-notify.md)
[and-hands.md](and-hands.md)
---
description: Disables camera-sharing as an option
---
# &screenshare
Sender-Side Option! ([`&push`](push.md))
## Aliases
* `&ss`
## Details
`&screenshare` will allow the guest to screen share by being directly asked to share a screen or window instead of being taken to the camera/screenshare selection screen.
Starting with [v19](../release-notes/v19.md) of VDO.Ninja, there is also the [`&screenshare2`](../newly-added-parameters/and-screenshare2.md) option; a minor UI variant that requires an additional button press, but more clearly preps the guest to the fact they will be sharing their screen.
#### Using `&screenshare` with the [Electron Capture App](../steves-helper-apps/electron-capture.md)
When using the Electron Capture App you have to "Elevate Privileges" to be able to share a window or screen. You can enable Elevated Privileges for the Electron App via the command line with `--node true` or in the app by right-clicking and selecting "Elevate Privileges" from the context-menu.
One unique feature about the [Electron Capture App](../steves-helper-apps/electron-capture.md) is that it can auto-select a screen or window when screen-sharing with VDO.Ninja, without user-input.
For example:
`&screenshare=1` for the main display
`&screenshare=2` for the second display
`&screenshare=discord` for the Discord application
`&screenshare=googlechrome` for the Chrome Browser
## Related
[and-webcam.md](and-webcam.md)
[and-screenshare2.md](../newly-added-parameters/and-screenshare2.md)
[and-smallshare.md](../advanced-settings/screen-share-parameters/and-smallshare.md)
---
description: Set a target FPS for your screenshare (secondary stream)
---
# &screensharefps
Sender-Side Option! ([`&push`](push.md))
## Aliases
* `&ssfps`
## Options
Example: `&screensharefps=60`
| Value | Description |
| --------------- | ---------------------------------- |
| (integer value) | will target this framerate. Eg: 60 |
## Details
Set a target FPS for your screen share.
## Related
[screenshareid.md](screenshareid.md)
[screensharequality.md](screensharequality.md)
---
description: >-
Pre-sets the screenshare stream id for a screen share if its a secondary
stream
---
# &screenshareid
Sender-Side Option! ([`&push`](push.md))
## Aliases
* `&ssid`
## Options
Example: `&screenshareid=SomeID`
Value
Description
(no value given)
If no value is passed, the system will automatically add the suffix of "_ss" to the existing stream ID that the user might be using.
(string)
Pre-sets the screenshare ID. Useful to automate or prepare stuff in advance.
## Details
When screen sharing as a guest in a group room, in `&sstype=2` screen sharing mode, the screen share will now create a second stream for the screen share, keeping your webcam also.
`&screenshareid` will preset the ID the screen share will have, making the stream ID for the screen share easier to predict and prep for.
Example (`&room=roomname&sstype=2&push=streamid&screenshareid`)
Without this, the screen share ID in `&sstype=2` mode is random, which is a decision made to increase security. This complication will be addressed in the future.
There is a toggle in the director's room which adds `&ssid` to the guest's invite link.
`&screenshareid` doesn't work with [`&screensharetype=3`](../newly-added-parameters/and-screensharetype.md). When using `&screensharetype=3` the screen share gets the appendix `:s` added to the stream ID of the guest.
As of VDO.Ninja [v23](../releases/v23.md),`&screensharetype=3` is default, but you can revert back to `&screensharetype=2` or use the new `&screensharetype=3` method post-fix `:s` method of identify screen shares.
## Related
[screenshare.md](screenshare.md)
[screensharefps.md](screensharefps.md)
[screensharequality.md](screensharequality.md)
---
description: Set a custom screenshare quality
---
# &screensharequality
Sender-Side Option! ([`&push`](push.md))
## Aliases
* `&ssq`
## Options
Example: `&screensharequality=1`
| Value | Description |
| ----- | ------------- |
| `0` | 1080p |
| `1` | 720p |
| `2` | 360p |
| -1 | unconstrained |
## Details
Update on V22:
`&screensharequality` applies now to both primary and secondary types of screen-shares. Before [`&quality`](../advanced-settings/video-parameters/and-quality.md) was needed for primary screen share quality setting.
When a guest shares their screen during a group chat, it creates a secondary VDO.Ninja session to share that screen, alongside their active webcam. Two streams as a result.
Using this parameter will give you control over the quality of the screen share, specifically, overriding what you might have set with [`&quality`](../advanced-settings/video-parameters/and-quality.md). It will not impact the webcam quality.
Set a target quality for your screen share, when you screen share as a secondary stream (in a room).
### Achieving higher sharpness
If looking to screen share a document at the highest quality possible, consider the follow URL parameters:
* `&screensharequality=-1` may be a good option for screen sharing documents, where more sharpness is needed.
* `&screensharecontenthint=detail` to hint to use higher resolution over frame rates; this would be applied to the viewer's URL.
* `&codec=av1` can also be applied to the viewer's URL to change to a better video codec.
* `&screensharebitrate=6000` on the viewer side can increase the video bitrate, but you can go upwards of 20000-kbps if needed for heavier motion-based video.
* `&sharperscreen` on the viewer end can avoid scaling down the image if the playback window is smaller than the video's native resolution. This will avoid double aliasing issues.
* As well, if using OBS Studio for playback, you can add a sharpness filter to the video to improve the clarity. This can undo some of the softness caused by video compression, improving edge sharpness.
* If in a group room, as a guest, the director can increase the total bitrate of the room, which will improve the screen share quality for all the guests in the room. By default, guests and directors view a screen share at a relatively low bitrate.
## Related
[and-quality.md](../advanced-settings/video-parameters/and-quality.md)
[screenshareid.md](screenshareid.md)
[screensharefps.md](screensharefps.md)
---
description: >-
Disconnects communication with the handshake server as soon as possible and
provides verbose feedback
---
# &secure
General Option! ([`&push`](push.md), [`&room`](../general-settings/room.md), [`&view`](../advanced-settings/view-parameters/view.md), [`&scene`](../advanced-settings/view-parameters/scene.md))
## Details
The enhanced security parameter will auto-disconnect you from the handshake-server after the first peer connection is established (Publishers only are disconnected; not viewers). In effect, this makes it impossible for the server to request future handshakes from you, and hence no more future peer connections.
The feature also makes the connection activity verbose, letting you know when someone starts watching your stream and when that viewer disconnects.
The security mode also limits the max number of viewers to just one viewer, and if they do disconnect, they cannot reconnect. No one can actually; you will have to re-setup via a page refresh to let someone try connecting again.
This can help prevent someone from destroying a live stream due to accidentally screen sharing the stream ID to the public.
### Technical Benefits
* The handshake server has no way of talking to the publisher after the stream starts. Fully decentralized once initialized.
* The publisher cannot be spammed by "Watch Stream" requests if the invite link gets shared accidentally.
* The publisher can clearly see when someone has joined and when someone has disconnected.
* Increased security and privacy, with just some minor added inconveniences.
### Alternatives
* If you wish to host your own handshake server, there is one available that is adequate for private for personal use here: [https://github.com/steveseguin/websocket\_server/](https://github.com/steveseguin/websocket\_server/)
* If interesting in hiding your IP address from a remote guest, you can use `&privacy` instead, which will use a TURN server to connect with remote guests, acting as a middleman for the peer connection.
* While it should be tested, you can also perhaps try [`&icefilter=host`](../general-settings/and-icefilter.md) which will attempt to filter out connections with remote guests that are behind a firewall. Feedback and test results welcomed.
---
description: Access device sensor data at given rate
---
# &sensor
Sender-Side Option! ([`&push`](push.md))
## Aliases
* `&sensors`
* `&gyro`
* `&gyros`
* `&accelerometer`
## Options
Example: `&sensor=50`
| Value | Description |
| --------------- | ----------------------------------------------------- |
| (integer value) | Set polling rate to given value, in hz. Default 30hz. |
## Details
Gyroscopic, accelerometer, magnetometer data can be pushed out.
Enable with `&sensor=30` (30hz).
Results show up in the remote stats log or the remote IFRAME API.
Useful for VR live streaming support, where you want to capture a smartphone's movement, as well as video.
Support will vary from device to device; please report problems or reach out for requests.
#### Update 22/06/02
`&sensor` now also includes speed and altitude data.
Added a demo/sample on how to overlay speed + acceleration on top of video playback (compatible with a mobile phone sender)
[https://vdo.ninja/examples/sensoroverlay?view=STREAMID](https://vdo.ninja/examples/sensoroverlay?view=STREAMID)
## Related
[and-sensorfilter.md](../advanced-settings/settings-parameters/and-sensorfilter.md)
---
description: Shows list of hidden guests
---
# &showlist
General Option! ([`&push`](push.md), [`&room`](../general-settings/room.md), [`&scene`](../advanced-settings/view-parameters/scene.md))
## Options
Example: `&showlist=1`
| Value | Description |
| ----------------------- | --------------------------------------- |
| `0` | Force disable the list of hidden guests |
| `1` \| (no value given) | Force enable the list of hidden guests |
## Details
Should list user's labels in a list, along with whether they are video-muted or not.
Includes microphone mute states and voice activity meters in the list.
Is visible by default when using [`&broadcast`](../advanced-settings/view-parameters/broadcast.md) mode.
---
description: Enables transcription and closed captioning
---
# &transcribe
Sender-Side Option! ([`&push`](push.md))
## Aliases
* `&trans`
* `&transcript`
## Options
Example: `&transcribe=de-DE`
| Value | Description |
| ------------------------- | -------------------------------------------------------------------------------------------------------- |
| `en-US` | American English |
| `de-DE` | German |
| `pt-PT` | Portuguese |
| (any xx-XX language code) | You can check for additional language codes [here](https://www.science.co.il/language/Locale-codes.php). |
## Details
The transcription service uses default browser/system mic as a source and cannot be muted.
Generally needs to be used in conjunction with [`&closedcaptions`](../advanced-settings/settings-parameters/and-closedcaptions.md).
* The transcription audio source will be the default microphone of the browser, which often is the same as the system's default input source.
* It is not necessary the microphone that has been selected in VDO.Ninja. Please double check this if the transcription isn't working.
* The mute button of VDO.Ninja will not work with this feature; at the moment anyways.
* Only one transcription service can run at a time.
* Chrome or other browsers will prevent the user from running multiple transcription services at a time. Since the transcription services of most browsers requires the Internet.
You will normally need Internet access for this to work and be willing to tolerate the occasional hiccup that the browser's transcription service may cause. Service may stop for seconds at a time as a result.
Certain Android devices may not require internet for the transcription to work.
Does not work in Safari!
## Related
[and-closedcaptions.md](../advanced-settings/settings-parameters/and-closedcaptions.md)
[caption.ninja.md](../steves-helper-apps/caption.ninja.md)
---
description: Pre-configures the selected video device
---
# &videodevice
Sender-Side Option! ([`&push`](push.md))
## Aliases
* `&vdevice`
* `&vd`
## Options
Example: `&videodevice=BRIO_4K`
Value
Description
0
disable the video camera automatically. No option to change it during setup is provided.
1 | (no value given)
auto-select the default video camera. No option to change it will be allowed.
(string value)
auto-select a video device that has a label containing that same string / deviceID. Whitespaces in names can be replaced with underscores.
## Details
It can be changed after the connection has been established.
Useful for helping a remote guest skip-past the complex setup of their camera/audio.
You can use this option to also disable a guest's camera, potentially allowing for guest connections that have no video or audio. This is a great option if you want to use midi-only transport, add some hidden IFRAME control, or just wanted to text chat.
For a device like an iPhone, you can pass a string value such as `&videodevice=back` to specify the back camera by default. For Android, you might try `rear` instead of `back`, but it will depend on the name the manufacture gave the camera.
When combined with [`&webcam`](and-webcam.md) and [`&autostart`](and-autostart.md), you can have the camera start publishing instantly, often without any user interaction at all. Keep in mind that some browsers will still need to ask for permissions or require a user-gesture for things to function correctly though.
See [vdo.ninja/devices](https://vdo.ninja/devices) to see the device IDs and device names. DeviceIDs are specific to VDO.Ninja's domain, while device names are not. The page will also auto-create links for you, just by clicking on the respective device.
When using `&videodevice=videoDevice`, the name matching order sorts based on "NameStartsWith", then "ExactDeviceID", and then finally "NameIncludes". This should avoid the Streamlabs OBS Virtual Cam being selected when you actually want the OBS Virtual Camera being selected, as the two devices both contain `obs virtual camera` in their name.
#### Director's room toggles
Auto-selects the default camera of a guest by adding `&vd` to the guest's invite link.
Disables the guest's camera by adding `&vd=0` to the guest's invite link.
## Related
[and-vdo.md](../newly-added-parameters/and-vdo.md)
[audiodevice.md](audiodevice.md)
[and-nosettings.md](and-nosettings.md)
[and-webcam.md](and-webcam.md)
[and-autostart.md](and-autostart.md)
[and-device.md](and-device.md)
---
description: >-
Lets you use the browser's built in speech-to-text service to provide overlay
captions for your live stream
---
# Caption.Ninja
## Caption
[https://caption.ninja/](https://caption.ninja/)
Although VDO.Ninja supports captions, sometimes you need something simple yet flexible. Caption.Ninja lets you use the browser's built in speech-to-text service to provide overlay captions for your live stream.
Captions are streamed via a web-socket service to your OBS or other studio software, where they can be shown over your video.
Transcriptions can be saved by means of copy and paste when done, multiple languages are supported, and even **manual** user-entered captions support is provided at [https://caption.ninja/manual](https://caption.ninja/manual)
## Translation
[https://caption.ninja/translate](https://caption.ninja/translate)
Added a "translation" component to caption.ninja, so you can convert speakers to a single language for overlay on stream. I tried this before, but only now do I think I have it working okay. There's two ways to use it:
1\. You can go here to explore and tinker.[ https://caption.ninja/translate](https://caption.ninja/translate) which offers a bit of a menu to play with, but is sender's side-based translation (works in a single page, but you can't translate to more than one language)
2\. And then there's the normal way of using caption.ninja, which offers viewer-side translation and scrolling support, so you can use this mode to have different languages as outputs instead of just one (assuming the viewer supports the translation code).
[https://caption.ninja/?room=ufv3QaH\&lang=en-US](https://caption.ninja/?room=ufv3QaH\&lang=en-US) (to capture as english) and [https://caption.ninja/overlay?room=ufv3QaH\&translate=fr](https://caption.ninja/overlay?room=ufv3QaH\&translate=fr) (viewer-side, which converts to french).
I welcome feedback.
## Updates
[updates-caption.ninja.md](../updates/updates-caption.ninja.md)
---
description: Multi-group audio chat
---
# Comms
[https://comms.cam/](https://comms.cam/)
* Created a page called _Comms_, which is designed for audio-only production.
* You can select which "group" you want to be a part of via the top bar, where those in your group can hear you and vice versa.
* If you aren't in a group, you hear everyone.
* Compatible with [`&groups`](../general-settings/and-group.md) with VDO.Ninja as normal; it's just a custom layout stylized/tweaked for audio-only production comms.
* There's a few URL parameters you can set, including [`&push`](../source-settings/push.md), [`&label`](../general-settings/label.md), [`&room`](../general-settings/room.md), [`&password`](../advanced-settings/setup-parameters/and-password.md), and [`&groups`](../general-settings/and-group.md).
* If you use `&groups=group1,groupb,etc`, new group buttons will appear.
* By default, groups 1 to 6 are there.
* If you use `&groups=1,2,3` , you'll auto-join groups 1, 2 and 3.
ie: [`https://vdo.ninja/alpha/comms?group=backstage,directors,onairgroup,steve123&push=STREAMID&room=TESTROOM`](https://vdo.ninja/alpha/comms?group=backstage,directors,onairgroup,steve123\&push=STREAMID\&room=TESTROOM)
or just go to [https://comms.cam/](https://comms.cam/) to quick start without presetting anything
## Voice-chat-room app
An experimental very simple voice-chat-room app based on the new Comms app: [https://vdo.ninja/alpha/meet](https://vdo.ninja/alpha/meet)
## Updates
[updates-comms.md](../updates/updates-comms.md)
---
description: >-
Awesome tools made by the community that help with common VDO.Ninja-related
tasks
---
# Community contributed tools
There's some tools out there made by the greater community that can help with common [VDO.Ninja](https://vdo.ninja/) related-tasks. If you want your project listed here, please get in contact with us at the discord ([discord.vdo.ninja](https://discord.vdo.ninja)).
| Tool | Description | Author |
| --------------------------------------------------------------------------------------------------------------------------------- | ------------------------------------------------------------------------------------------------------------------------------------------------- | -------------------------------------------------------------------------------------------- |
| [Linkgen](https://linkgen.vdo.ninja/) | Wizard style links generator | [@jcalado](https://github.com/jcalado/) |
| [Invite Generator](https://invite.vdo.ninja/) | Toggle style links generator | [@jcalado](https://github.com/jcalado/) |
| [Trampoline](https://rse.github.io/vdo-ninja-trampoline/) | Another awesome link generator for VDO.Ninja | [Dr. Ralf S. Engelschall](https://github.com/rse) |
| [Vingester](https://github.com/steveseguin/vingester) | Ingest web pages as NDI-multicasted streams | [Dr. Ralf S. Engelschall](https://github.com/rse) |
| [Cheat Sheets](https://github.com/steveseguin/obsninja/blob/quickstart/README.md) | Quick start guides and cheat sheets | [Chris Marquardt](https://chrismarquardt.com/) |
| [Show Manager](https://github.com/knmurphy/show-manager-obsn) | Excel based link configuration tool | [@knmurphy](https://github.com/knmurphy) |
| [Pro Audio Matrix](https://docs.google.com/spreadsheets/d/1onfIh1hNR1Gh\_mthkhmezzWNUMYKMGKPrwx7T428\_hc/edit#gid=0) | Detailled sheet of how to use [`&proaudio`](../advanced-settings/audio-parameters/and-proaudio.md) and [`&stereo`](../general-settings/stereo.md) | ? |
| [Cheat Sheet 2](https://docs.google.com/spreadsheets/d/15xPoTeLnOufB2VCRm-Aj-uP9KCMWMiLTxxypcwEyVsc/edit?usp=sharing) | A simple Google Sheets list of most common parameters | qdaps on Discord |
| [Cheat Sheet 3](https://docs.google.com/spreadsheets/d/1rNPus\_c6fLwNIKOr1WCZZVMRWtlNJttUNtvvelInuRU) | A Google Sheets list of all available parameters | JK14 on Discord |
| [URL Configurator](https://drive.google.com/file/d/1A7qiFACoCxk9J-uTv9yyZa5yQWzFol8l/view?usp=sharing) | Excel based URL Link Configurator | JK14 on Discord |
| [Layout String Generator](https://docs.google.com/spreadsheets/d/1cHBTfni-Os3SAITsXrrNJ3qVCMVjunuW3xugvw1dykw/edit#gid=151839312) | For [`&layouts`](../advanced-settings/director-parameters/and-layouts.md) parameter | JK14 on Discord |
| [API / IFRAME sandbox page](https://vdo.ninja/alpha/iframe) | API / IFRAME Sandbox page for developer using VDO.Ninja | Sam MacKinnon on Discord |
| [Companion Module](https://github.com/bitfocus/companion-module-vdo-ninja) | Remote control VDON via this plugin for Companion | [Bryce](https://github.com/bitfocus/companion-module-vdo-ninja/commits?author=bryce-seifert) |
| [VirtualCam Filter](https://github.com/exeldro/obs-virtual-cam-filter) | Select any source in OBS to be the virtual cam output | [Exeldro](https://obsproject.com/forum/members/exeldro.128836/) |
| [Source Record](https://obsproject.com/forum/resources/source-record.1285/) | Record a source in OBS that is different than the output | [Exeldro](https://obsproject.com/forum/members/exeldro.128836/) |
| [OBS Audio Monitor](https://obsproject.com/forum/resources/audio-monitor.1186/) | Plugin for OBS; adds Audio Monitor dock and filter | [Exeldro](https://obsproject.com/forum/members/exeldro.128836/) |
| [Win Cap Audio](https://obsproject.com/forum/resources/win-capture-audio.1338/) | Capture audio from specific window in OBS | [bozbez](https://obsproject.com/forum/members/bozbez.344203/) |
| [Browser to RTMP](https://github.com/steveseguin/browser-to-rtmp-docker) | A docker container that lets you output a VDO.Ninja to RTMP | [aws-samples](https://github.com/aws-samples/amazon-chime-meeting-broadcast-demo) |
| [Atrium Vertical](https://obsproject.com/forum/resources/aitum-vertical.1715/) | Allow OBS to publish both Portrait (vertical) and Landscape (16:9) video at the same time. | [Aitum](https://obsproject.com/forum/members/aitum.441032/) |
The video engineering and live streaming community is pretty amazing, so thank you all for being so awesome. ♥
---
description: Provides users a clean way of window capturing websites
---
# Electron Capture
[https://github.com/steveseguin/electroncapture](https://github.com/steveseguin/electroncapture)
Created for [VDO.Ninja](https://vdo.ninja) users, it can provide users a clean way of window capturing websites. In the case of [VDO.Ninja](https://vdo.ninja), it may offer a more flexible and reliable method of capturing live video than the browser source plugin built into OBS.
## Why ?
On some systems the OBS Browser Source plugin isn't available or doesn't work all that well, so this tool is a viable alternative. It lets you cleanly screen-grab just a video stream without the need of the Browser Source plugin. It also makes it easy to select the output audio playback device, such as a Virtual Audio device: ie) [https://vb-audio.com/Cable/](https://vb-audio.com/Cable/) (Windows & macOS; donationware).
The app can also be set to remain on top of other windows, attempts to hide the mouse cursor when possible, provides accurate window sizes for 1:1 pixel mapping, and supports global system hotkeys (`CTRL+M` on Windows, for example).
Windows users may find it beneficial too, as it offers support for VDO.Ninja's [`&buffer`](https://docs.vdo.ninja/viewers-settings/buffer) audio sync command and it has robust support for video packet loss. In other words, it can playback live video better than OBS can, with fewer video playback errors and with better audio/video sync. If you have a spare monitor, it may at times be worth the hassle to use instead of OBS alone.
The Electron Capture app uses recent versions of Chromium, which is more resistant to desync, video smearing, and other issues that might exist in the native OBS browser source capture method. [More benefits listed here](https://github.com/steveseguin/electroncapture/blob/master/BENEFITS.md)
Lastly, since playback is agnostic, you can window-capture the same video multiple times, using one copy in a mixed-down live stream, while using a window-capture to record a clean full-resolution isolated video stream.
## Updates
[updates-electron-capture-app.md](../updates/updates-electron-capture-app.md)
---
description: Link generators to create invite links for VDO.Ninja
---
# Invite Link Generators
| Tool | URL |
| ---------------------------- | --------------------------------------------------------------------------------------------------------------------- |
| Wizard-style | [https://linkgen.vdo.ninja/](https://linkgen.vdo.ninja/) |
| Toggle-style | [https://invite.vdo.ninja/](https://invite.vdo.ninja/) |
| Excel-based | [https://drive.google.com/file/d/1A7qiFAC](https://drive.google.com/file/d/1A7qiFACoCxk9J-uTv9yyZa5yQWzFol8l/view)... |
| Trampoline | [https://rse.github.io/vdo-ninja-trampoline/](https://rse.github.io/vdo-ninja-trampoline/) |
| URL Obfuscator for VDO.Ninja | [https://invite.cam/](https://invite.cam/) |
| Dock for OBS | [https://vdo.ninja/dock](https://vdo.ninja/dock) |
---
description: PNG and 3D LUT maker for color calibration
---
# LUT maker for color calibration
Using accurate color samples obtained from the local paint shop (free) or a color checker card from Datacolor/Aliexpress, you can create online a color filter (LUT) for the purpose of color correcting video recordings, photos, and OBS live streams.
This tool can create custom LUTS (PNG or 3D CUBE) on demand; you just need color references cards to get started. OBS Studio supports PNG-based LUTS, giving everyone the taste of pro-level color grading for free.
It's also open-source and no downloads are needed; you can run the script using Google Colab online. A video guide is available to walk you thru out to customize it, plus the code can be easily adjusted to meet your own needs or preferences.
[https://github.com/steveseguin/color-grading](https://github.com/steveseguin/color-grading)
---
description: >-
A low latency video CDN (content delivery network), which can be used to host
larger group rooms in VDO.Ninja
---
# Meshcast.io
[https://meshcast.io/](https://meshcast.io/)
This is a free to use service that can work in conjunction with VDO.Ninja. It's a low latency video CDN (content delivery network), which can be used to host larger group rooms in VDO.Ninja. It's not designed for mass broadcast, not at present anyways, but it can handle upwards of 100-viewers without taxing your CPU or network.
[https://youtu.be/-7QsLChfdsE](https://youtu.be/-7QsLChfdsE)
[and-meshcast.md](../newly-added-parameters/and-meshcast.md)
[meshcast-parameters](../advanced-settings/meshcast-parameters/)
## Updates
[updates-meshcast.io.md](../updates/updates-meshcast.io.md)
---
description: >-
Customize layouts, positions, and assets in VDO.Ninja, with remote control to
change the layouts dynamically. This is very efficient and low on resources
compared to other methods.
---
# Mixer App
[https://vdo.ninja/alpha/mixer](https://vdo.ninja/alpha/mixer)
The Mixer App is an alternative to the director's control center of VDO.Ninja. It gives you the full power to customize scenes, layouts and positions of the video feeds dynamically.
There are currently 3 versions of the Mixer App. The newest version with all the current updates is Alpha.
| Version | Link |
| ---------- | -------------------------------------------------------------- |
| Alpha | [https://vdo.ninja/alpha/mixer](https://vdo.ninja/alpha/mixer) |
| Beta | [https://vdo.ninja/beta/mixer](https://vdo.ninja/beta/mixer) |
| Production | [https://vdo.ninja/mixer](https://vdo.ninja/mixer) |
Layout of the Video Mixer
If you find some bugs, have feature requests, ideas or feedback, please contact us on the [Discord channel](https://discord.gg/qWDshMsTar).
There is a YouTube video from Steve (December 2021) about the Mixer App. It's slightly out of date though.
[https://youtu.be/9xdZq4SCBoA](https://youtu.be/9xdZq4SCBoA)
## Updates
[updates-mixer-app.md](../updates/updates-mixer-app.md)
---
description: Where do I find the native mobile app versions?
---
# Native mobile app versions
Android
iOS
At present, the native mobile app versions of VDO.Ninja are fairly basic, but they can be useful for a couple of reasons.
* The native Android app supports screen-sharing, while the browser-based version of VDO.Ninja does not.
* More camera types are listed on the Android native app version; some wide-angle lenses appear that do not appear in the browser-based version.
* Sometimes the native mobile app will work when the browser-based versions do not.
There are some limitations to the native mobile app versions though.
* Rooms and group chat are not supported yet.
* Passwords are not supported yet.
* UVC camera and mic support is not yet available, but we're working on it. UVC devices are supported via the Raspberry Pi and Nvidia Jetson devices however (see bottom).
* The native app requires a modern version of Android, while the web-based version of VDO.Ninja has been tested with Android 5.1 using Chrome.
## Download the Android app
You have a few different ways to download and install the Android app for VDO.Ninja. Installing the Google Play Store version is recommended, as it can auto-update with patches and new features automatically.
#### The **Google Play Store** hosted version is here:
_(It will auto-update when I push new releases.)_
You can also download and install the Android APK file manually:
Download the APK directly from Google Drive, without using the Google Play store
_(Manually installing will requires manual updating, as well. APK last updated May 12, 2022)_
Lastly, you can also download the source-code for the Android app, allowing you to build and install the app yourself.
GitHub repository for the app
## Download the iOS app
The native iOS app for VDO.Ninja is again available on the Apple App Store.
Download from the Apple App Store - It's Free
The native App Store app is very basic, but It does support the ability to stream your camera's output to a remote computer, with the option to enable the Torch light.
While screen share support is available in-app, it currently only works when the app is open, making it a bit useless if you need to switch apps. If you're looking to screen-share from an iPhone or iPad with VDO.Ninja, other ways to do it exist. See this guide here:
How to screen capture your iPhone or iPad with VDO.Ninja
Room support and passwords are not supported yet in the native mobile apps.
## Updates
[updates-native-mobile-apps.md](../updates/updates-native-mobile-apps.md)
## Related
[improving-quality-of-the-native-app.md](../guides/improving-quality-of-the-native-app.md)
---
description: List of apps and helper tools Steve has created to be used with VDO.Ninja
---
# Steve's helper apps & tools
* [electron-capture.md](electron-capture.md "mention") ([https://github.com/steveseguin/electroncapture](https://github.com/steveseguin/electroncapture))
* [social-stream-ninja](social-stream-ninja/ "mention")([https://socialstream.ninja](https://socialstream.ninja))
* [meshcast.io.md](meshcast.io.md "mention") ([https://meshcast.io](https://meshcast.io))
* [caption.ninja.md](caption.ninja.md "mention") ([https://caption.ninja/](https://caption.ninja/))
* [raspberry.ninja](raspberry.ninja/ "mention") ([https://raspberry.ninja](https://raspberry.ninja))
* [mixer-app.md](mixer-app.md "mention") ([https://vdo.ninja/alpha/mixer](https://vdo.ninja/alpha/mixer))
* [whip-and-whep-tooling.md](whip-and-whep-tooling.md "mention") ([https://vdo.ninja/whip](https://vdo.ninja/whip))
* [versus.cam.md](versus.cam.md "mention") ([https://versus.cam/](https://versus.cam/))
* [speed-test.md](speed-test.md "mention") ([https://vdo.ninja/check](https://vdo.ninja/alpha/check))
* [comms.md](comms.md "mention") ([https://comms.cam/](https://comms.cam/))
* [native-mobile-app-versions.md](native-mobile-app-versions.md "mention") ([Android](https://play.google.com/store/apps/details?id=flutter.vdo.ninja) | [iOS](https://apps.apple.com/us/app/vdo-ninja/id1607609685))
* [teleprompter-tool.md](teleprompter-tool.md "mention") ([https://vdo.ninja/teleprompter](https://vdo.ninja/teleprompter))
* [vdo-applications.md](vdo-applications.md "mention")
* [tech-demonstrations.md](tech-demonstrations.md "mention")
* [invite-link-generators.md](invite-link-generators.md "mention")
* [community-contributed-tools.md](community-contributed-tools.md "mention")
---
description: Video streaming quality test
---
# Speed Test
[https://vdo.ninja/alpha/check](https://vdo.ninja/alpha/check)
I put together a first version of a tool designed to help with automated tech-checking of guests. Tool is located here currently: [https://vdo.ninja/alpha/check](https://vdo.ninja/alpha/check), although I may move it at some point.
The tool is based after the speedtest I have up still, but once the test is complete, it offers a link to the results that can be shared. The results are stored on a server, anonymously, for up to a week, after which they expire and auto-delete.
A demo results page can be found here: [https://vdo.ninja/alpha/results?id=steve12345](https://vdo.ninja/alpha/results?id=steve12345)
The results include the details found within the speedtest, but also the bandwidth is ramped up from 2500, to 4000, and then to 6000 -- 30-seconds each, for a total of 90-seconds. The test then takes about 90 seconds to complete, and the end it auto-uploads the results.
While the guest can send you the link of the results, you can also send the guest a link with the ID pre-set, so you can check the results at a later date without needing the guest's feedback. To do so, just add `?id=xxxx` to the test link.
ie: `https://vdo.ninja/alpha/check?id=exampleGuest123`
You can create an excel sheet of different links, for different guests, and then email them out to guests, asking that they complete the test before a stream. If there are problems with the guests's connection/computer, you'll be able to resolve them sooner this way.
I'd still recommend you do a proper tech check before the stream regardless, but this 'pre-tech-check' can help in cases of larger groups.
At some point I'll add a dashboard or notification system to make managing invite links easier, but that will probably be for another day.
Testing regions for vdo.ninja/alpha/check
[https://vdo.ninja/alpha/regions](https://vdo.ninja/alpha/regions)
There is also another Speed Test option here:
[https://vdo.ninja/speedtest](https://vdo.ninja/speedtest)
## Updates
[updates-speed-test.md](../updates/updates-speed-test.md)
---
description: Useful tools that could help you make your stream better
---
# Tech Demonstrations
# Teleprompter Tool
[https://vdo.ninja/teleprompter](https://vdo.ninja/teleprompter)
Created a tool that lets you rotate, flip, and mirror any cors-compatible website. It's designed mainly for teleprompters.
* There are drop downs to switch between source modes, rotation, transformation
* It will store the last used settings automatically, and restore automatically on reload. simple
* Passing discord or chat pop out links will be auto-converted into a cors-friendly embed version of the chat pop out
* (optionally) it can take `&link` with a URL value, or `&twitch` to pass a user name
* Hide menu button; to show the menu again, just reload the page
This works great for reading chat out from a teleprompter or even just for VDO.Ninja feeds. VDO.Ninja works great for sending remote teleprompter feeds to something like a Firestick 4K Max, and this teleprompting website should make it easy to flip/invert/mirror the video as needed.
---
description: Useful tools that could help you make your stream better
---
# VDO Applications
---
description: Focus on ease of use and high-bitrate / e-sports streams
---
# Versus.cam
Versus.cam is the upcoming and standalone replacement for the [vdo.ninja/monitor](https://vdo.ninja/monitor) page. Versus.cam has some interesting features that are specific to the upcoming version of VDO.Ninja, so at the moment it only works in conjunction with [vdo.ninja/alpha](https://vdo.ninja/alpha/).
### Details
* It contains a larger and dedicated graph per scene/view link than what the [vdo.ninja/beta/'s ](https://vdo.ninja/beta/)director room has under scene-stats. Both color code to indicate packet loss, where red is bad, and green is good.
* It is setup to use a group room by default, with a very simple interface to login and get started without visiting vdo.ninja itself.
* Despite having a group room by default, it works with standalone push/view links as well, via the "Add a stream manually" button, which lets you include normal view links that exist outside rooms.
* All the scene links and invite links are preconfigured for E-Sports , where video is set to pull around 20-mbps for smooth 1080p60 game play. The idea is, if you choose to use this page for creating links, it's all already setup to be used for ingestion.
* The room is configured so that guests cannot see or talk to each other. All guests can do is text-chat with the versus host.
* Versus.cam is compatible with a director and the director room, so you can use a director room AND the Versus.cam room at the same time, without conflict.
* A new feature that Versus.cam has, that will also soon be coming to the normal VDO.Ninja directors' room, is the ability to **dynamically change the resolution and bitrate of remote scenes**. This works by means of the [`&remote`](../general-settings/remote.md) control feature, which is preconfigured in the links already, so no director is needed when using versus. This will then also work with non-room links, so long as [`&remote`](../general-settings/remote.md) is included in their URL.
* I don't intend to add many advanced features to this site.
* It's designed to be very simple, elegant, and hyper focused on a single use case and user type.
* E-Sports and one-way ingestion of very high quality video. I'll likely be making more scenario-specific interfaces in the future like this, to make VDO.Ninja easier and less cluttered for common use cases.
* Versus.cam is built using the VDO.Ninja IFRAME API, which I hope demonstrates the flexibility of it.
* Versus.cam is only supported by Chrome/Chromium-based browsers; it isn't yet compatible with Firefox/Safari (they lack the features needed for it to operate).
[Please report bugs](https://discord.gg/qWDshMsTar). It's a first release, using the alpha version of VDO.Ninja, so bugs are kind of expected.
[https://youtu.be/I12ASNWHPPI](https://youtu.be/I12ASNWHPPI)
## Updates
[updates-versus.cam.md](../updates/updates-versus.cam.md)
---
description: >-
WHIP allows you to publish to supported sites, like Twitch, directly from
VDO.Ninja
---
# WHIP and WHEP tooling
Using the newly added WHIP ingest end point at Twitch, you can now publish directly from VDO.Ninja to Twitch. Low-latency, no downloads needed, and free.
WHIP is a bit like the classic RTMP publishing, but it's far more advanced, includes AV1 video codec support, and can even work within your browser. Best of all, VDO.Ninja supports it. VDO.Ninja can both act as a host for WHIP publishers, such as OBS Studio, or it can publish video via WHIP to WHIP broadcasting hosts, such as Twitch, Janus, Mediamtx, Pion, Cloudflare, and many more.
WHEP, on the other hand, is generally used to playback video using the same technology, rather to publish it. VDO.Ninja also supports WHEP playback and hosting, with advanced statistic panels, recording, and buffering options.
### Our WHIP page for making WHIP / WHEP easy
To make using WHIP and WHEP more accessible, VDO.Ninja has a hosted page with common tools for making use of it, such as publishing a video or screen share to Twitch.
[https://vdo.ninja/whip](https://vdo.ninja/whip)
This is the future! To try it out, visit [https://vdo.ninja/whip](https://vdo.ninja/whip), enter your Twitch stream token in the correct field, GO, and then select your camera in VDO.Ninja as normal.
### Alpha version of WHIP support and features
The alpha version of VDO.Ninja has the cutting edge available to it, often with even more advanced features and fixes that have not yet made it available to the production stable release.
Check out the alpha version here: [https://vdo.ninja/alpha/whip](https://vdo.ninja/alpha/whip)
### WHIP ingest from OBS Studio or other
While VDO.Ninja can act as a host for incoming WHIP requests (published to `https://whip.vdo.ninja/YOURTOKENHERE`), many such publishing clients do not support NAT traversal or STUN server support yet.
OBS Studio v30 does not, for example, so it may not work if publishing to someone who is behind a firewall. Still, even in those cases, the WHIP ingest feature will still work when:
* on the same Local Area Network as the publisher,
* if hosting VDO.Ninja on a cloud server with public IP address available,
* if your UDP ports are being forwarded (UDP ports 4096-65535)
* or if your local IP address is set to the DMZ mode target within your router's network settings.
For WHIP publishing clients that do support NAT traversal, such as Gstreamer's whip element, VDO.Ninja will already work with them.
I welcome support and engagement from other developers to work through these issues, so please reach out if you'd like to speak.
In terms of ideal settings for OBS v30's WHIP output into VDO.Ninja, below you can find a link to some recommended encoder options, to ensure smoothest playback
[obs-whip-output-settings.md](../guides/obs-whip-output-settings.md)
For more help, join the Discord
Contact me on Discord
### Using WHIP + WHEP to host your own Meshcast service
For more advanced users, you can use VDO.Ninja's WHIP/WHEP support, with your own WHIP/WHEP compatible broadcasting host, to provide your own Meshcast functionality within VDO.Ninja.
The [Meshcast service](meshcast.io.md) long offered by VDO.Ninja works like a WHIP/WHEP host, offloading video distribution via the hosted servers, thus avoiding the need for multiple p2p streams. As a result, it was pretty easy to add support for generic WHIP/WHEP hosting alternatives.
Currently a guide on using Cloudflare as the host is available, located here, [https://vdo.ninja/cloudflare](https://vdo.ninja/cloudflare), with guides for other self-hosted providers becoming available all the time.
For the highly technical and curious, please note that if your WHIP server's response header includes a WHEP URL in it, where the WHIP stream can be viewed from, VDO.Ninja will automatically provide that URL to connected viewers to use as the main video source.
ie: WHEP: [`https://whep.urdomain.com/yourstreamtoken`](https://whep.urdomain.com/yourstreamtoken)
### Demo video, showing us publishing from VDO.Ninja to Twitch
[https://youtu.be/\_RHBsAJmfGs?si=653vhKBJesct\_cmS](https://youtu.be/\_RHBsAJmfGs?si=653vhKBJesct\_cmS)
### The VDO.Ninja Mixer app supports WHIP out also
The VDO.Ninja [Mixer App](mixer-app.md) ([https://vdo.ninja/alpha/mixer](https://vdo.ninja/alpha/mixer)) supports WHIP output, with an option to publish directly to Twitch as well. If OBS is too much for you, and you need just a simple studio and mixing controls, this could be a great option for you.
### `&publish` URL option
While still a work in progress, some of the features of the [https://vdo.ninja/whip](https://vdo.ninja/whip) page, primarily the WHIP publishing features, are also slowly being added as an integral part of VDO.Ninja itself.
While this may change in the future, adding `&publish` to the URL of a VDO.Ninja (v24) will let you select a screen to capture and publish to a WHIP endpoint. This may also be added as built-in menu option at some point as well, allowing you to select any screen, page, or element to publish via WHIP.
### Raspberry Ninja also now supports WHIP output
[Raspberry.Ninja](raspberry.ninja/) isn't just for Raspberry Pis, but works on a Linux system really, along with Windows WSL.
If you want low-level controls over AV1 codec encoding and other facets of WHIP publishing that can't be obtained via the browser, check it out. It of course also supports VDO.Ninja, has a built-in SFU for VDO.Ninja, and lots more!
## Related
[whip-parameters](../advanced-settings/whip-parameters/)
[obs-whip-output-settings.md](../guides/obs-whip-output-settings.md)
[and-whip.md](../advanced-settings/whip-parameters/and-whip.md)
## Updates
[updates-whip-whep.md](../updates/updates-whip-whep.md)
---
description: This Electron Capture documentation was last updated Aug 16, 2023
---
# Documentation
**PLEASE NOTE:** This copy of documentation for the Electron Capture app is not kept up to date.
For the most recent version of Electron Capture documentation, please visit: [https://github.com/steveseguin/electroncapture](https://github.com/steveseguin/electroncapture).
This copy of the documentation is provided here simply as a consolidated resource for our LMM AI support bot to learn from. It will be updated only occasionally, as needed.
Chronologically updates are here:
[updates-electron-capture-app.md](../../updates/updates-electron-capture-app.md)
### This is the **Electron Capture app**,
Created originally for [VDO.Ninja](https://vdo.ninja) users, it can provide users a clean way of window capturing websites or as a production-oriented Chrome-alternative with numerous performance tweaks. It can also be used to pin [live chat overlays](https://socialstream.ninja) on screen, screen share without user interaction, increase the resolution of Zoom streams, and much much more.
[**Jump to Downloads Section**](https://github.com/steveseguin/electroncapture#links-to-downloads-below)
### Why was this made ?
On some systems the OBS Browser Source plugin isn't available or doesn't work all that well, so this tool was made as a viable agnostic alternative. It was originally built to let you cleanly screen-grab just a video stream without the need of the OBS Browser Source plugin. The app was also made to make selecting the output audio playback device easy, outputting audio to something such as a Virtual Audio device: ie) https://vb-audio.com/Cable/ (Windows & macOS; donationware) or VAC (Windows @ https://vac.muzychenko.net/), or Loopback (macOS).
While the OBS Browser source is ever maturing, and issues with video smearing, crashing, and dropped audio are far less common these days, there are still user reports of desync issues and other mishaps with OBS browser sources. As a result, Electron Capture remains the preference for many professional VDO.Ninja users, and over time it has evolved to offer additional solutions for many different use cases in the video production world.
The app can be set to remain on top of other windows, can hide the mouse cursor when possible, provides accurate window sizes options for 1:1 pixel mapping, and supports global system hotkeys (CTRL+M on Windows, for example). It also offers relatively low-CPU usage, command-line launch tools, built-in recording options, and it won't crash if OBS crashes. It may be worth exploring before your next production.
The Electron Capture app uses recent versions of Chromium, and is setup to more resistant to desync, video smearing, and other issues that might exist in the native OBS browser source capture method. If a cutting edge web feature becomes available within browsers, it will also become available to Electron Capture first, making certain experimental features within VDO.Ninja accessible. The app is also optimized to not throttle when the system is stressed, ensuring that production-critical web-oriented code and media does not slow down or stop when its most needed.
For non-VDO.Ninja users, the window-sharing focus of Electron Capture is also useful for Zoom or other users. For example, when screen sharing it into Zoom, the published video will be high-resolution, since Zoom publishes virtual webcam and other camera streams at lower quality compared to screen shares. You can screen share websites without the browser frame, search history, or nav bar from appearing. When doing a Power Point presentation, you can screen share the window via Electron Capture, while also pinning the it in place on top, avoiding having to toggle between multiple windows as you present.
[More benefits listed here](https://github.com/steveseguin/electroncapture/blob/master/BENEFITS.md)
Lastly, since playback is agnostic, you can window-capture the same video multiple times, using one copy in a mixed-down live stream, while using a window-capture to record a clean full-resolution isolated video stream. Both YouTube, Twitch, Facebook, and more are supported in this regard, where a full-window clean output option is available for those sites as well. There's even optimizations for sites like Twitch, letting you easily full-window any video on the page, without overlays or other effects from appearing.
### Video guide on how to use Electron Capture
### Settings and Parameters
| Parameter | Alias | Description | Example values | Notes |
| ----------- | ------ | ---------------------------------------------------------------------------- | --------------------------------- | -------------------------------------------------------------------------------- |
| --width | -w | Window width | 1280 | Value in px |
| --height | -h | Window height | 720 | Value in px |
| --x | | X position on screen | 1 | Left side is 1 |
| --y | | Y position on screen | 1 | Top side is 1 |
| --pin | -p | Pin window on top | (Takes no values) | Display this window always on top. |
| --url | -u | Set a custom link on start | https://vdo.ninja/?view=aCustomID | You can push and pull with single links or rooms. |
| --title | -t | Set a custom window title | Guest 1 | Handy for use with OBS window capture |
| --node | -n | Use advanced features | true | Enable with `true`. Allows for screen capture, global hotkeys, prompts and more. |
| --hwa | -a | Hardware acceleration | false | Disable with `false` |
| --minimized | -min | start the app minimized | | |
| --css | -css | Pass a CSS file to insert into newly created windows | test.css | |
| --chroma | -color | Pass a 3 or 4 character HEX value to change the background color of websites | 0F0C | |
* note: Use the --help command to get the most recent available commands and options. While I try to keep the documenation update to date, I'm not always the best at it.
The default frameless resolution of the capture window is 1280x720. The app automatically accounts for high-DPI displays, so it is always 1:1 pixel-accurate with the specified resolution on even Apple Retina displays.
The optional Command Line arguments can be seen as examples below, along with their default values.
```
elecap.exe --width 1280 --height 720 --url 'https://vdo.ninja/electron' --title 'my Window name' --x 1 --y 1 --node 1
```
or for example
```
./elecap -w 1280 -h 720 -u 'https://vdo.ninja/electron' -t 'my Window name' --x 10 --y 10 -n 1
```
If running from Windows command prompt, any ampersand "&" characters will need to be escaped with a "^" character, as seen below:
```
C:\Users\Steve\Desktop>elecap -t feed2 --url https://vdo.ninja/?view=ePz9hnx^&scene^&codec=h264^&room=SOMETHINGTEST123
```
You can also use it like this, if you are in the same folder as the app itself:
```
elecap.exe --node true --title feed2 --url "https://vdo.ninja/?view=ePz9hnx&scene&codec=h264&room=SOMETHINGTEST123"
```
If running from a Windows batch file with the goal of launching multiple instances at a time, try the following:
```
start elecap.exe -t feed1 -u https://vdo.ninja/?view=2P342n5^&scene^&codec=h264^&room=SOMETHINGTEST123
timeout /T 1
start elecap.exe -t feed2 -u https://vdo.ninja/?view=ePz9hnx^&scene^&codec=h264^&room=SOMETHINGTEST123
timeout /T 1
start elecap.exe -t feed3 -u https://vdo.ninja/?view=12342n5^&scene^&codec=h264^&room=SOMETHINGTEST123
timeout /T 1
start elecap.exe -t feed4 -u https://vdo.ninja/?view=eP543hnx^&scene^&codec=h264^&room=SOMETHINGTEST123
timeout /T 1
start elecap.exe -t feed5 -u https://vdo.ninja/?view=432n5^&scene^&codec=h264^&room=SOMETHINGTEST123
timeout /T 1
start elecap.exe -t feed6 -u https://vdo.ninja/?view=eP654x^&scene^&codec=h264^&room=SOMETHINGTEST123
timeout /T 1
start elecap.exe -t feed7 -u https://vdo.ninja/?view=76542n5^&scene^&codec=h264^&room=SOMETHINGTEST123
timeout /T 1
start elecap.exe -t feed8 -u https://vdo.ninja/?view=gfd9hnx^&scene^&codec=h264^&room=SOMETHINGTEST123
```
* Please note, do not use double-quotes, rather single-quotes, if needing to enclose text via the command line.
* Please also note,the use ot timeout /T 1, as adding a delay between loading apps allows them to load correctly
* x and y position is available in v1.5.2 and up; x or y values must be greater than 0.
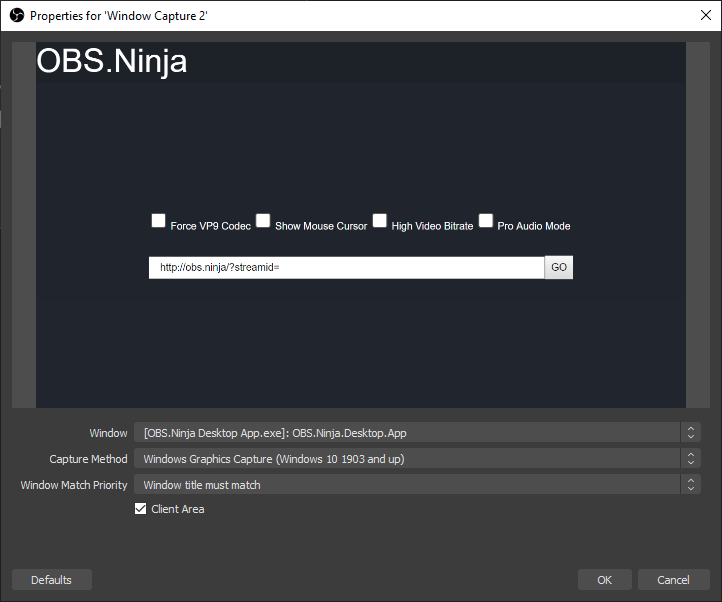
If you right-click the application, you'll get a context menu with additional options. Changing resolutions dynamically is an option, for example.
#### Screen-share, global hotkeys, and user-prompts
**Screen-sharing**
Starting with version 1.6.0, to enable screen-share support and some other features, the app needs Node Integration enabled; aka, Elevated Privileges. This will allow remote websites to run node-based code, which is a security concern if visiting untrusted websites.
You can enable Elevated Privileges for the app via the command line with `--node 1` or in the app by right-clicking and selecting "Elevate Privileges" from the context-menu. If right-clicking to enable this mode, the app may reload the page afterwards.
A unique feature about the Electron Capture app is that it can auto-select a screen or window when screen-sharing with VDO.Ninja, without user-input. Adding to the VDO.Ninja URL, [`&ss=1`](../../source-settings/screenshare.md) will select display 1, `&ss=2` for the second display, etc. Or specify a window with `&ss=window_name_here`.
To select Screen 1 automatically on load, for example you can do:
`elecap.exe --node 1 --url "https://vdo.ninja/beta/?ss=1&autostart"`
or to select Discord automatically
```
elecap.exe --node 1 --url "https://vdo.ninja/beta/?ss=Discord&autostart"
```
It's also possible to select audio-only when screen sharing via Electron Capture with VDO.Ninja; you do not need to select a video if you wish to share audio-only.
**Global hotkeys**
Global Hotkeys, such as CTRL+M, are supported. CTRL+M will mute the mic, in the most recently opened window. You can assign a custom global hot-key in VDO.Ninja, and it will be respected by Electron Capture. (VDO.Ninja Settings -> User -> Global Hotkey)
Youtube has a built-in automatic ad-skipper added, and for both Youtube, Twitch, and more, when watching a video, you can full-window the video, allowing for clean video capture. This option is available via the context menu of Electron Capture; just right-click somewhere on the page that is empty and select Clean Video Output.
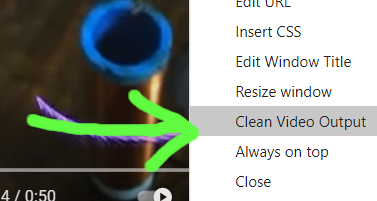
#### Audio Output
A popular way of outputting audio from the Electron Capture app into OBS is done using a virtual audio cable. Some such cables include:
Mac Audio Options: https://rogueamoeba.com/loopback/ (MacOS & non-free, but excellent), and [https://existential.audio/blackhole/](https://existential.audio/blackhole/) (MacOS & free) (and more here [https://github.com/steveseguin/vdoninja/wiki/FAQ#macaudio](https://github.com/steveseguin/vdoninja/wiki/FAQ#macaudio))
Windows Audio Option: [https://www.vb-audio.com/Cable/](https://www.vb-audio.com/Cable/) (donation ware)
If you intend to have more than a 6 virtual audio cables, you can try VAC instead of VB Cables, as VAC seems to support dozens of virtual audio cables, while VB Cable supports just a few: https://vac.muzychenko.net/
You can also use some advanced URL parameters to output the audio to specific channels. The following link links the parameters and the outcome, based on device/software used: [https://docs.google.com/spreadsheets/d/1R-y7xZ2BCn-GzTlwqq63H8lorXecO02DU9Hu4twuhuA/edit?usp=sharing](https://docs.google.com/spreadsheets/d/1R-y7xZ2BCn-GzTlwqq63H8lorXecO02DU9Hu4twuhuA/edit?usp=sharing)
You can still capture audio via OBS Browser source, appending [`&novideo`](../../advanced-settings/video-parameters/and-novideo.md) to the URL to disable video. Appending [`&noaudio`](../../advanced-settings/view-parameters/noaudio.md) to the Electron Capture URL would conversely disable audio there, allowing you to capture audio with OBS browser source and video with Electron Capture. The audio/video sync might be slightly off in this setup, but not noticible in most cases.
More recently, with newer versions of OBS, you can capture an application's audio using OBS natively, but with older versions you can use the following OBS plugin to also do it: [https://github.com/bozbez/win-capture-audio](https://github.com/bozbez/win-capture-audio)
New option in OBS for capture a window's audio
**Changing the audio output device**
If you right click the app when on a site, you can change the audio output device for that site. This is useful for setting a YouTube or VDO.Ninja video to output to a virtual audio cable or headphones, rather than playout via the default audio device.
On MacOS, this is especially helpful since there is a lack of audio routing controls.
Please note: To use this feature, you will need to elevate the app's privilleges, which can expose the user to security issues on untrusted websites.
#### Pinning and click-pass thru
You can pin the app on top of other apps via the right-click menu, and when enabled, you can then also enable "click thru" mode also via the context-menu, so no mouse input is captured. The app acts a bit like it is invisible, turning it into a bit of HUD for other applications and games.
If using Social Stream or vdo.ninja, you can append \&transparent to those URLs to make the background transparent. You can also use custom CSS to make web pages shown semi-transparent, so you can still see underneath.
Once "click thru" mode is enabled, you can re-enable click-capture by just selecting the app via the task bar, as bringing the app into focus will disable the click-thru mode.
#### Syphon Output
While there is no native Syphon or NDI output option yet available, one user has mentioned a solution for some users: [http://www.sigmasix.ch/syphoner/](http://www.sigmasix.ch/syphoner/)
#### Automation Workflows with VDO.Ninja
You can see a quick start / cheat sheet guide for example uses of the app with VDO.Ninja here: [https://github.com/steveseguin/vdo.ninja/blob/quickstart/automation/cheatsheet\_obsn\_automation.md](https://github.com/steveseguin/vdo.ninja/blob/quickstart/automation/cheatsheet\_obsn\_automation.md)
### Notes on Using and Closing the App
**For Windows users:**
* Right click to bring up the context menu, which allows you to close the app. You can also press ALT-F4 in many cases.
* You can disable hardware-assisted rendering by passing '-a 0' to the command line when lauching; this can help hide the windows mouse cursor with some setups when using BitBlt capture mode.
* You can use the Win+Tab key combo on Windows 10 machines to create a secondary desktop and load the Electron Capture into that. In this way, you can hide your electron capture windows, yet still have them be available to OBS for window-capture. This is a great option for window-capturing without on computers with limited desktop screen space.
**For Mac users:**
* You can hover your mouse cursor over the top-left corner of the app to show the close button.
* Also note, the top portion of the app is draggable, so you can move it around to place it accordingly. It is also resizable.
* Multiple versions of the app can run on macOS; just make a copy of the file with a different name to open up a new window.
* Desktop audio capture with screen share is not supported by Electron (https://www.electronjs.org/docs/latest/api/desktop-capturer#caveats)
* You need to enable Screen Capture support in the macOS security preferences for the app to enable desktop capture support on macOS 10.15 Catalina or higher. Yuo also need to enable elevated privillges in the Electron Capture app itself.
* If capturing the window with OBS, you can use either DISPLAY CAPTURE with a WINDOW CROP -or- WINDOW CAPTURE
\--- _WINDOW CAPTURE_ will have a video delay of up to \~800ms, but Windows can be stacked without issue
\--- _DISPLAY CAPTURE_ will have no delay, but the windows cannot be stacked, which could be a problem if you only have one screen
## Links to downloads below.
You can find the newest release builds of the app here: [https://github.com/steveseguin/electroncapture/releases](https://github.com/steveseguin/electroncapture/releases) or see below.
Please note that the Electron Capture app does not auto-update to newer versions of Chromium. This can become a security issue if it is left to become out of date. It's also recommended to not use the Electron Capture app with websites and remote VDO.Ninja peers that you do not trust.
#### Windows Version
There are two versions for Windows. An installer for x64 systems. There's also a portable version, which is larger in size, but supports x64 and x86 (32-bit) systems. The portable version requires no install and is easier to use from the command-line or from a batch file.
New release here: [https://github.com/steveseguin/electroncapture/releases/](https://github.com/steveseguin/electroncapture/releases/)
If you have problems, try a different version or contact me on Discord.
#### Mac Version
* Newest version can be found here: [https://github.com/steveseguin/electroncapture/releases/](https://github.com/steveseguin/electroncapture/releases/)
* If having problems, there's an older version here (v1.1.3) [https://github.com/steveseguin/electroncapture/releases/download/1.1.3/obsn-1.1.3.dmg](https://github.com/steveseguin/electroncapture/releases/download/1.1.3/obsn-1.1.3.dmg)
If on version of Electron doesn't work for you all that well, try a different version. There may be some issues with rounded edges depending on you MacOS version and the Electron version used.
#### Linux Version
There are two pre-build versions of Electron Capture available currently. One built for PopOS and another for Raspbian. Those builds are here: https://github.com/steveseguin/electroncapture/releases/tag/2.5.0
For most Linux users though, we're recommending Linux users build it themselves. Details below
Getting the correct nodejs/npm versions can be hard on linux, but using snap can help there.
```
sudo apt-get update
sudo apt-get install snapd -y
sudo snap install node --classic --channel=16
```
Next, close the shell and open a new one, to ensure the installation is completed.
To get the actual app source code and to build a distributable version, see below
```
git clone https://github.com/steveseguin/electroncapture
cd electroncapture
npm install
npm run build:linux
```
The file you need to run will be in the dist folder.
### Building for the Raspberry Pi
If you want to compile on Raspberry Pi, it's possible, but keep in mind the GPU may not work without also patching Electron.js to support the GPU. Currently you'll need to run it without hardware-acceleration disabled, which is rather disappointing. Contributions that can help fix this are welcomed.
Anyways, this is all much like with the Linux install, but we also need to install `fpm` before trying to build the app.
```
sudo apt-get update
sudo apt-get install snapd -y
sudo apt-get remove nodejs -y
sudo snap install node --classic --channel=14
## close the current terminal shell and open a new one here ##
sudo apt install ruby ruby-dev -y
sudo gem install fpm
```
We also need to build the app using `build:rpi` instead of `build:linux`, as we need to target ARM versus x64.
```
git clone https://github.com/steveseguin/electroncapture
cd electroncapture
npm install
npm run build:rpi
```
You should get a `.deb` file in the dist file with this option. If you install the deb file, it should appear in the Raspbian start menu, under `Other -> ElectronCapture`
This will probably file if you do not disable the GPU / hardware-acceration within the Electron Capture app first, but who knows -- maybe you can get it working?
### Building from source on Windows
You'll also need nodejs and npm installed.
If on Windows, you can find the NPM/Nodejs install files here: [https://nodejs.org/en/download/current/](https://nodejs.org/en/download/current/)
and then to get the source code for Electron Capture,
```
git clone https://github.com/steveseguin/electroncapture.git
cd electroncapture
```
To just run the app from source without building, you can:
```
npm install
npm start
```
If you get an error about node versions, you can install the required version with something like this:
```
npm install -g node@14.6.0
npm install
npm run build:win32
```
#### Building the app from source on macOS :
* For Mac, please also see this issue for building: https://github.com/electron-userland/electron-builder/issues/3828
The basic idea is is to first install node, npm, and git. Then to clone and build the folder:
```
git clone https://github.com/steveseguin/electroncapture.git
cd electroncapture
npm install -g node@14.6.0
npm install
npm run build:darwin
```
If you need to sign the build, for distribution, you can then try:
```
npm install
export appleId={yourApp@dev.email}
export appleIdPassword={app-specific-password-here}
sudo -E npm run build:darwin
```
#### Trouble-shooting -- if can't hide cursor when window capturing using OBS:
Change the capture method in OBS to "BitBlt"and uncheck the Capture Cursor. Also make sure OBS runs in compatibility mode for win 7, so you don't get a black screen

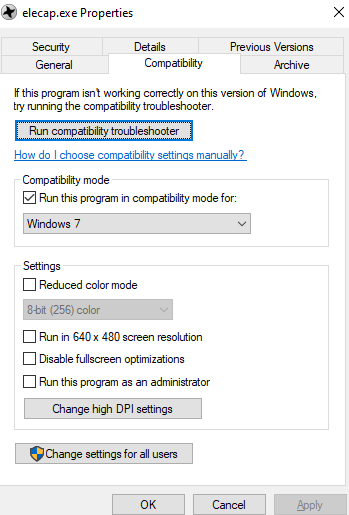
Adding [`&nocursor`](../../general-settings/and-nocursor.md) to VDO.Ninja will hide the cursor in that browser window, but that often isn't enough. If the above fails, make sure you are window capturing with OBS using the same display adapter for both OBS and the Electron window.
Lastly, if that still doesn't help, you can try Windows + Tab (on windows), and host the Electron Capture app on the secondary windows desktop. Windows + Tab back to the main one and select the window then. You may need to toggle between the two desktops after selecting the window to capture, to get it to show in OBS, but it is one way of hiding the mouse.
You can also drag the Electron Capture far off screen, so the cursor can't approach it really.
**Issues with dependencies when compiling**
Sometimes a dependency won't update to the value stated in the package.json.
This option might be able to update the package.json to the newest version of dependencies automatically,
```
npx npm-check-updates -u
npm install
```
Seems to work with newer npm versions
#### Thank you
"Electron capture is one process that unstable atoms can use to become more stable. " - [https://education.jlab.org/glossary/electroncapture.html](https://education.jlab.org/glossary/electroncapture.html)
---
description: This is an archived snapshot of the documentation as of Aug. 16, 2023.
---
# Documentation
## 👉👉👉Go to [https://raspberry.ninja](documentation.md#go-to-https-raspberry.ninja) 👈👈👈
## Please note that this documentation is not kept up to date.
Please visit [https://raspberry.ninja](../../updates/updates-raspberry.ninja.md) for the most up-to-date documentation for Raspberry.Ninja. This documentation is included here as a consolidate resource for our LMM AI support bot to learn from. The resource here will be updated only occasional, as needed, and many links or references may be out of date.
Chronologically updates are here:
[updates-raspberry.ninja.md](../../updates/updates-raspberry.ninja.md)
##  Raspberry Ninja
Turn your Raspberry Pi, Nvidia Jetson, Orange Pi, or nearly any Python-compatible system into a ninja-cam with hardware-acceleration enabled! This lets you publish live streaming video and audio directly to your web browser or OBS instance using VDO.Ninja. Achieve very low streaming latency over the Internet or a LAN; all for free.
It also has the ability to record remote VDO.Ninja streams to disk, without needing to transcode, and can broadcast a low-latency video stream to multiple viewers at time. More recently, fdsink and OpenCV support have been added, for ingesting remote video streams with sub-300-ms of latency into your computer vision projects.
### Preface
The core concepts and code used in this project can be reused for other projects; most Linux systems, and a large variety of embedded systems; potentially even smartphones. There's a focus of supporting Raspberry Pis and Nvidia Jetson systems, which includes offering pre-built images and install scripts. Other Linux system users should still be able to use the code, but setup support will be limited.
YouTube video demoing:
I also have another longer [YouTube video here](https://youtu.be/eqC2SRXoPK4), which focuses on setting up the Raspberry\_ninja for IRL-streaming.\*\*\*\*
[](https://youtu.be/J0qqXxHNU\_c)
Recent updates to Raspberry Ninja have added improved error correction and video redundancy, along with automated dynamic bitrate controls for congestion management. This has greatly improved stream reliability, reducing frame loss, and limiting buffer sizes. That said, having more than 5-megabites of upload bandwidth and having a solid connection is recommend if intending to use the default settings.
### Install options
See below for different install options
#### Setup for a Raspberry Pi
See the `raspberry_pi` sub-folder for instructions on installing and setting up a Raspberry Pi. [Jump there now](https://github.com/steveseguin/raspberry\_ninja/tree/main/raspberry\_pi)
A Raspberry Pi works fairly well with a CSI-connected camera, but USB-based cameras currently struggle a bit with older Raspberry Pi models. As a result, consider buying an Nvidia Jetson Nano 2GB instead of a Raspberry Pi if looking to jump into this all. Also, the RPI Zero W 1 and RPi 3 both don't have the greatest WiFi built-in, while the Raspberry Pi Zero 2 seems to work rather well. Without good connectivity, you may find yourself facing frame-drops and stutter. HDMI to CSI adapters do work, but they may be limited to 25-fps and can be finicky still with some camera sources; audio over HDMI is also a bit tricky to setup currently.
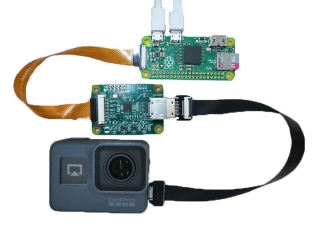
#### Setup for an Nvidia Jetson
Please see the `nvidia_jetson` folder for details on installation. [Jump there now](https://github.com/steveseguin/raspberry\_ninja/blob/main/nvidia\_jetson/README.md)
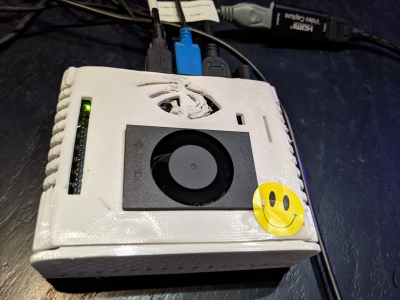
Nvidia Jetsons work well with USB-connected cameras and have a selection of compatible CSI-cameras well. You may need to buy WiFi adapter if it is not included.
#### Setup for Linux Desktops
You can deploy Raspberry.Ninja to a desktop pretty quickly in most cases, without compiling anything. I have an installer for recent versions of Ubuntu if interested. [Jump there now](https://github.com/steveseguin/raspberry\_ninja/blob/main/ubuntu)
For other distros, see below for requirements
**Requirements for linux systems in general:**
You'll want to install Gstreamer 1.16 or newer; emphasis on the newer. You'll need to ensure `libnice`, `srtp`, `sctp`, and `webrtcbin` are part of that install, along with any media codecs you intend to use.
Python3 is also required, along with `websockets`. If you have PIP installed, `pip3 install websockets` can get you going there.
#### Setup for Windows (WSL)
You can actually run Raspberry Ninja on a Windows PC via the WSL virtual machine interface. It's really quick and simple, except getting camera/hardware support going is tricky.
Still, it might be useful if you want to pull a stream from a remote Raspberry.Ninja system, recording the stream to disk or using it for local machine learning.
See the WSL install script here: [Jump there now](https://github.com/steveseguin/raspberry\_ninja/blob/main/wsl)
It is possible to install Gstreamer for Windows natively, but due to the difficulty in that all, I'm not supporting it officially at present. The main challenge is `cairo` fails to compile, so that needs to be fixed first.
### Generic quick-install method
```
sudo apt-get update && sudo apt upgrade -y
sudo apt-get install python3-pip -y
sudo apt-get install -y libgstreamer1.0-dev libgstreamer-plugins-base1.0-dev libgstreamer-plugins-bad1.0-dev gstreamer1.0-plugins-base gstreamer1.0-plugins-good gstreamer1.0-plugins-bad gstreamer1.0-plugins-ugly gstreamer1.0-libav gstreamer1.0-tools gstreamer1.0-x python3-pyqt5 python3-opengl gstreamer1.0-alsa gstreamer1.0-gl gstreamer1.0-qt5 gstreamer1.0-gtk3 gstreamer1.0-pulseaudio gstreamer1.0-nice gstreamer1.0-plugins-base-apps
pip3 install websockets
sudo apt-get install -y libcario-dev ## possibly optional
pip3 install PyGObject ## possibly optional
sudo apt-get install git -y
cd ~
git clone https://github.com/steveseguin/raspberry_ninja
cd raspberry_ninja
python3 publish.py --test
```
### Updating
Major updates sometimes will require that the latest Rasbperry Pi or Jetson image be installed on your device, but most updates are minor and only require the `publish.py` file to be updated. If you've just installed the latest device image, you will still want to update before going further, as the image is not updated with every new code release.
You can normally update by logging into your device, either via SSH, or via mouse/keyboard with the terminal app open.
```
cd ~
cd raspberry_ninja
git pull
```
That's it.
If you run into issues due making changes to the code, you can either `git stash` your changes first, or you can just delete the raspberry\_ninja folder and clone it again.
ie:
```
cd ~
rm raspberry_ninja -r
git clone https://github.com/steveseguin/raspberry_ninja
cd raspberry_ninja
```
Updates are usually optional, as they typically just focus on added features or improving video quality/stability. I do recommend checking for new updates every now and then.
### Usage
You should be able to run the publshing script simply with `python3 publish.py`, however lots of options are available for customizing as desired.
```
$ python3 publish.py
```
To get the list of supported commands with your version of the code, run `python3 publish.py --help`.
Sample help output: ( what's shown below may not be up-to-date)
```
usage: publish.py [-h] [--streamid STREAMID] [--server SERVER]
[--bitrate BITRATE] [--width WIDTH] [--height HEIGHT]
[--framerate FRAMERATE] [--test] [--hdmi] [--v4l2 V4L2]
[--rpicam] [--nvidiacsi] [--alsa ALSA] [--pulse PULSE]
[--raw] [--h264] [--nvidia] [--rpi] [--novideo] [--noaudio]
[--pipeline PIPELINE]
optional arguments:
-h, --help show this help message and exit
--streamid STREAMID Stream ID of the peer to connect to
--server SERVER Handshake server to use, eg:
"wss://wss.vdo.ninja:443"
--bitrate BITRATE Sets the video bitrate. This is not adaptive, so
packet loss and insufficient bandwidth will cause
frame loss
--width WIDTH Sets the video width. Make sure that your input
supports it.
--height HEIGHT Sets the video height. Make sure that your input
supports it.
--framerate FRAMERATE
Sets the video framerate. Make sure that your input
supports it.
--test Use test sources.
--rtmp Use RTMP instead of webRTC; pass "rtmp://xxxx.com/live/xxx-xxxx-xxx"
--hdmi Try to setup a HDMI dongle
--v4l2 V4L2 Sets the V4L2 input device.
--rpicam Sets the RaspberryPi input device.
--nvidiacsi Sets the input to the nvidia csi port.
--alsa ALSA Use alsa audio input.
--pulse PULSE Use pulse audio (or pipewire) input.
--raw Opens the V4L2 device with raw capabilities.
--bt601 Changes the input color profile when in raw mode to BT601
--h264 For PC, instead of VP8, use x264.
--vp8 VP8 encoder instead of h264; likely software-based
--nvidia Creates a pipeline optimised for nvidia hardware.
--rpi Creates a pipeline optimised for raspberry pi hadware.
--novideo Disables video input.
--noaudio Disables audio input.
--omx An alternative hardware encoder for the RPi; glitches, but faster?
--pipeline PIPELINE A full custom pipeline
--record STREAMID Specify a remote stream ID to record; this will disable publishing mode
--midi MIDI transport; can forward/recieve MIDI to remote browser/device
--save Will save a local copy of the outbound stream to disk (MKV format)
--rotate DEGREES Will rotate the video by 90, 180 , or 270 degrees
--multiviewer Allows for multiple viewers at a time; this can increase bandwidth usage of course
--nored Disable error correction. If you don't disable it, the bandwidth may be up to 2x higher than the target video bitrate. I do not recommend removing, unless you're on a pristine connection.
--noqos This will disable the qos feature. The QOS feature will lower the bitrate of the video encoder if heavy packet loss is detected. It won't lower it more than 5x (20% of target), but I find this works well to combat times where the network bandwidth is insufficient.
--pipein Lets you pipe data in from a unix pipe, something like: `ffmpeg -i input.mp4 -o - | python3 publish.py --pipein auto`
--libcamera Use libcamera as a source; this may be needed if using third party cameras like those from Arducam
--latency Set the incoming jitter buffer, in milliseconds. 200-ms is the default.
--password Start with VDO.Ninja v24, Raspberry.Ninja is partially compatible with passwords
--framebuffer Specify the stream ID that you wish to ingest and output locally as as frame buffer (OpenCV friendly)
```
**Changing video input sources**
Using `gst-device-monitor-1.0` will list available devices and their 'caps', or settings. This can help determine what GStreamer pipeline changes need to be made in the script or getting info about what video format options are available for your device.
To help further debug, `gst-launch-1.0` can be used to test a pipeline out before adding it to the script. For for added reference, here is an example Pipeline for the Rasbperry Pi to enable UVC-based MJPEG video capture support is:
```
gst-launch-1.0 v4l2src device=/dev/video0 io-mode=2 ! image/jpeg,framerate=30/1,width=1920,height=1080 ! jpegparse ! nvjpegdec ! video/x-raw ! nvvidconv ! "video/x-raw(memory:NVMM)" ! omxh264enc ! "video/x-h264, stream-format=(string)byte-stream" ! h264parse ! rtph264pay config-interval=-1 ! application/x-rtp,media=video,encoding-name=H264,payload=96 ! fakesink
```
Notice how we used device = OUR\_AUDIO\_DEVICE\_NAME to specify the audio device we want to use, and we configure the device to read and decode JPEG, as that is what our device in this case supports.
The Raspberry\_Ninja publish.py script automatically tries to create a pipeline for you, based on the command line arguments passed, but you can override that at a code level with your own pipeline if easier as well.
**Adding an audio source**
The script will use the default system ALSA audio output device, although you can override that using the command line arguments or via manually setting a gstreamer pipeline at the code level.
To get details of available audio devices, assuming pulseaudio is installed, running the following from the command line will give us access to audio device IDs
```
pactl list | grep -A2 'Source #' | grep 'Name: ' | cut -d" " -f2
```
resulting in..
```
alsa_input.usb-MACROSILICON_2109-02.analog-stereo
alsa_output.platform-sound.analog-stereo.monitor
alsa_input.platform-sound.analog-stereo
```
In this example, an HDMI audio source is the first in the list, so that is our device name. Your device name will likely vary.
Pulse audio and ALSA audio command-line arguments can be passed to setup audio, without needing to tweak Gstreamer pipelines manually. The defaults I think will use the system ALSA default device.
### How to Run:
Ensure the pi/jetson is connected to the Internet, via Ethernet is recommended for best performance. You'll also very likely need to ensure a camera and/or microphone input are connected; this can also be a USB UVC device, supported CSI-based camera, or other selectable media inputs. It technically might be possible to even select a pipe to stream from, although this is a fairly advanced option.
Run using: `python3 publish.py --streamid SomeStreamID --bitrate 2000`
In Chrome, open this link to view: `https://vdo.ninja/?password=false&view=SomeStreamID`
You can have multiple viewers at a time, but you must enable that with a command-line argument.
Also note, if you run with `sudo`, you might get a permissions error when using audio.
#### [Auto-starting the script on boot](https://github.com/steveseguin/raspberry\_ninja#auto-starting-the-script-on-boot)
A guide on how to setup a RPI to auto-stream on boot can be found in the Rasbperry Pi folder, along with details on how to configure the WiFi SSID and password without needing to SSH in first.
#### [RTMP output](https://github.com/steveseguin/raspberry\_ninja#rtmp-output)
RTMP support overrides WebRTC support at the moment, and the features that are support are pretty limited.
`python3 publish.py --rtmp rtmp://a.rtmp.youtube.com/live2/z4a2-q14h-01gp-xhaw-3zvw --bitrate 6000`
Things like bitrate, width, height, raw, framerate are also supported, but not a whole lot else.
RTMP support is currently experimental; example use with a Jetson here: [https://www.youtube.com/watch?v=8JOn2sK4GfQ](https://www.youtube.com/watch?v=8JOn2sK4GfQ)
You can't publish to vdo.ninja with RTMP, but rather a service like YouTube.
#### [SRT support](https://github.com/steveseguin/raspberry\_ninja#srt-support)
I have added SRT support to the Raspberry Pi image. You need to use it via Ffmpeg or Gstreamer via command line currently, as I haven't added it to the Raspberry Ninja code directly yet. Still, it's easy enough to publish via command line with SRT, and you get the benefits of an up-to-date Raspberry Pi image with drivers and software all pre-installed.
#### [WHIP / Meshcast support](https://github.com/steveseguin/raspberry\_ninja#whip--meshcast-support)
I added WHIP/WHEP support to the Raspberry Pi x64 pre-built image, although currently its via the rust-based webrtchttp gstreamer plugins and is outside the scope of Raspberry.Ninja itself for now.
[whipsink](https://gstreamer.freedesktop.org/documentation/webrtchttp/whipsink.html?gi-language=python) [whepsrc](https://gstreamer.freedesktop.org/documentation/webrtchttp/whepsrc.html?gi-language=python)
You can technically build these plugins yourself also, using Rust (cargoc) and Gstreamer 1.22 I think, but I intend to offer my own version of WHEP/WHIP support as an integral part of Raspberry.Ninja at some point in the future instead.
#### [NDI support](https://github.com/steveseguin/raspberry\_ninja#ndi-support)
I've been experimenting with NDI support, but it's not officially working correct yet.
#### [OpenCV / FFMPEG / FDSink / Framebuffer support](https://github.com/steveseguin/raspberry\_ninja#opencv--ffmpeg--fdsink--framebuffer-support)
There's support for OpenCV/Framebuffer (--framebuffer STREAMIDHERE) and FDSink now. There's a Youtube video online demoing how to use Raspberry.Ninja to bring raw BGR video frames into Numpy.
### Hardware options
Of the Raspberry Pi devices, the Raspberry Pi 4 or the Raspberry Pi Zero 2 are so far the best options on this front, depending on your needs. Any of the Nvidia Jetson devices should work fine, but only the Jetson Nano 2GB, 4GB, and NX have been tested and validated. If you wish to use other Jetson devices, you'll need to setup and install Gstreamer 1.19 yourself on those systems, as no pre-built image will be provided at this time. (Unless someone wishes to donate the hardware that is) Any other Linux system or SBC embedded system is on the user to setup and install at this point, but they should closely follow the same steps that the Nvidia Jetson uses.
It's rather hard to install everything needed on a Raspberry Pi Zero 2 directly, due to the limited memory, so I do recommend that if installing from scratch that you use a Raspberry Pi 4 with 4GB or greater.
#### Camera options
There's plenty of options for the Rasbperry Pi and Nvidia Jetson when it comes to cameras and HDMI adapters. The easiest option for a Raspberry Pi is to use one of the official Raspberry Pi camera. These are normally just plug an play on both platforms and well supported.
USB cameras are options, but currently with Raspberry Pi devices these are only supported up to around 720p30. USB 3.0 devices are even less supported, as you need to ensure the Raspberry Pi you are using supports USB 3.0; for example, a Camlink will not work on a Raspberry Pi 3.
If low-light is important to you, the Sony IMX327 and IMX462 series of sensors might appeal to you. They are generally designed for security camera applications, but with the use of an IR Filter, you can make them adequate for use a standard video cameras. These options may require additional gstreamer and driver work to have work however, so they are for more advanced-users at this time.
I have gotten the low-light Arducam IMX462 to work with the newest image for RPI working (the Bullseye image). It might require a small change to the `dtoverlay` line in the `/boot/config.txt` file though to configure your specific camera, but I think I have most working now without any need drivers. (a few exceptions) , oh, and if you are changing `dtoverlay`, you might need to also comment out the camera auto detect link that is also in the config.txt file. (else it might not work)
Links for such low-light cameras:
[https://www.uctronics.com/arducam-for-raspberry-pi-ultra-low-light-camera-1080p-hd-wide-angle-pivariety-camera-module-based-on-1-2-7inch-2mp-starvis-sensor-imx462-compatible-with-raspberry-pi-isp-and-gstreamer-plugin.html](https://www.uctronics.com/arducam-for-raspberry-pi-ultra-low-light-camera-1080p-hd-wide-angle-pivariety-camera-module-based-on-1-2-7inch-2mp-starvis-sensor-imx462-compatible-with-raspberry-pi-isp-and-gstreamer-plugin.html) (I own this camera and it works on a Raspberry Pi 4 with my newest created RPi image. It works if you do not use the pivariety daughterboard and just connecting directly; you'll need to change the config.txt file a bit and use --libcamera to use though)
[https://www.amazon.ca/VEYE-MIPI-327E-forRaspberry-Jetson-XavierNX-YT0-95-4I/dp/B08QJ1BBM1](https://www.amazon.ca/VEYE-MIPI-327E-forRaspberry-Jetson-XavierNX-YT0-95-4I/dp/B08QJ1BBM1)
[https://www.e-consystems.com/usb-cameras/sony-starvis-imx462-ultra-low-light-camera.asp ](https://www.e-consystems.com/usb-cameras/sony-starvis-imx462-ultra-low-light-camera.asp)(USB-based; more compatible with other devices)
You can buy IR Filters, or you can buy lenses that come with IR filters, if needed, for pretty cheap. Many are designed for security applications, so be aware. [https://fulekan.aliexpress.com/store/1862644](https://fulekan.aliexpress.com/store/1862644)
#### 360-degree cameras
Support for the Theta 4k 360 USB camera has been added. Has been tested with the Jetson. It is likely too slow to use with a Raspberry Pi though.
Install script and brief usage example found here: [https://github.com/steveseguin/raspberry\_ninja/blob/main/nvidia\_jetson/theta\_z1\_install.sh](https://github.com/steveseguin/raspberry\_ninja/blob/main/nvidia\_jetson/theta\_z1\_install.sh)
To view equirectangular 360-degree video with VDO.Ninja, you can refer the the https://vdo.ninja/360 simple 360-degree player offered. Usage is like:
[https://vdo.ninja/360?view=the360StreamIDHere](https://vdo.ninja/360?view=the360StreamIDHere), with the \&password being an optional parameter. Just change out `the360StreamIDHere` with your own stream ID, and publish a equirectangular video stream at high resolution to it.
Some notes about the 360-player and support:
* The player only supports Chrome/Chromium browsers currently
* It only can one stream at a time; whatever value you specify in the `&view` parameter
* Each viewer of the stream can interact, with each having their control to look around in 360-space.
* As the sender, you can use an OBS Virtual Camera as a source, when sending, or use a camera with a Equirectangular output
* In terms of supported cameras, I have a Theta V 360 camera for example, which can output via USB to OBS Studio.
* It requires a plugin to work, but it handles converting to Equirectangular format. From there, you can add the virtual camera output containing the equirectangular output to VDO.Ninja
* More on the Theta V camera and its use with OBS Studio here; [https://www.youtube.com/watch?v=qUzciWQ5HiM](https://www.youtube.com/watch?v=qUzciWQ5HiM)
#### HDMI Input options
As per HDMI adapters, a 1080p30 USB 2.0 HDMI to MJPEG adapter can usually be had for $10 to $20, although there are many fake offerings out there. I've tested a $12 MACROSILICON HDMI to USB adapter, and it works pretty well with the Jetson (and OK with the RPI), although finding a legitimate one might be tricky. On a Raspberry Pi 4, 1080p30 is posssible with the HDMI to USB adapter, but audio currently then goes out of sync; at 720p though, audio stays in sync with the video more frequently. Audio sync issues might be resolved in the future with more system tuning.
There's another option though, and that is to use an HDMI to CSI adapter for Raspberry Pis, such as the C780A ($29 USD) https://www.aliexpress.com/item/1005002861310912.html, although the frame rate of an HDMI to CSI option is limited to 1080p25 (due to 2 CSI lanes only). It's also slightly more expensive than the HDMI to USB alternative. The RPi Compute Module boards seem to have four-lanes of CSI available though, so 30-fps might be achivable there if you buy the compatible board (C780B ?)
Audio is also more challenging when dealing with the HDMI to CSI adapters, as you need to connect audio from the board via I2S to the RPi. This isn't easy to do with some of the HDMI to CSI boards, but there are a couple options where this is a trival step.
Please note before buying that there are different HDMI to CSI2 boards, and they might look similar, but they are definitely not equal.
* X630 boards seem to have a solder-free audio support (via an addon board; X630-A2) and 1080p25 support; there's a nice YouTube guide on setting it up https://www.youtube.com/watch?v=lJL2Ihs1aYg and a kit available to make it all a breeze; https://geekworm.com/products/x630?variant=39772641165400.
* C779 boards do not support audio (hardware problem), making it quite challenging to use. But it is often the cheapest option. I don't recommend this option.
* C780 boards supposedly has fixed the audio issue of the C779 boards, but they remain untested by me yet. It appears they have good audio support and a 4-lane option (C780B) for the RPi Compute module boards, but most users will proabably need the two-lane C780A.
* Boards by Auvidea, like the B100, B101, or B102, have audio support via I2S it seems. These are more expensive options though, and there is mention of RPi Compute Module support with some of these Auvidea boards as well. I haven't tested these boards yet.
* I haven't tested the Geekworm HC100 board yet, but it seems similar to the B100/B101. Might require some light soldering to get audio support? Not sure.
HDMI to CSI boards are not plug-and-play currently, as they do require a couple tweaks to the boot file at the very least, and maybe an update to the EDID file. (script provided for that). Depending on the video input signal, you might need to further tweak settings, such as colorimetery settings. This not really an issue with the HDMI to USB adapters, as they convert to a very standard MJPEG format, making them more plug and play friendly.
Please share with the community what works well for you and what did not.
#### MIDI options
When using the `--midi` parameter, video and audio are disabled. Instead, the script can send and recieve MIDI commands over VDO.Ninja. Supports plug-and-play, although you may need to install `python-rtmidi` using pip3 first.
Incoming MIDI messages will be forwarded to the first MIDI device connected to the Pi. Adding `&midiout` to the viewer's view-link will have that remote browser send any MIDI messages (such as from a USB DJ Controller) to the raspberry\_ninja publish.py script, which will then be forwarded to the first local MIDI device
Outgoing MIDI messages will be sent to connected viewers, and if those connected viewers have `&midiin` added to their view-links, those MIDI commands will be forwarded to the connected MIDI devices.
If using a virtual MIDI device on the remote viewer's computer, such as `loopMIDI`, you can target that as both a source and target for MIDI commands. This is especially useful for connecting VDO.Ninja to DJ software applilcations, like Mixxx or Serato DJ Pro, which supports mapping of MIDI inputs/outputs.
Please note, the raspberry\_ninja publish.py script can both send and recieve MIDI commands over a single peer connection, which is a bit different than how video/audio work currently. It's also different than how browser to browser currently is setup, where a sender won't ever request MIDI data, yet the raspberry\_ninja code does allow the sender to both send and receive MIDI data.
Midi demo video:
#### Note:
* Installation from source is pretty slow and problematic on a RPI; using system images makes using this so much easier.
* Please use the provided backup server for development purposes; that wss server is `wss://apibackup.vdo.ninja:443` and for viewing: `https://backup.vdo.ninja`
* Passwords must be DISABLED explicitly as this code does not yet have the required crypto logic added yet. Things will not playback if you leave off `&password=false`
* The current code does not dynamically adjust resolution to combat frame loss; rather it will just drop frames. As a result, having a high quality connection between sender and viewer is required. Consider lowering the bitrate or resolution if problems persist.
* Speedify.com works on Linux and embedded devices, providing network bonding and fail-over connections. The install instructions are pretty easy and can be found here: https://support.speedify.com/article/562-install-speedify-linux (not sponsored)
* If you want to do computer-vision / machine-learning with cv2 or tensorflow on the resulting webRTC video stream, I have an open-source project here that you can take snippets from that you can add to raspberry\_ninja to do what you want: [github.com/ooblex](https://github.com/ooblex/ooblex/blob/master/code/decoder.py#L84)
* If you wish to play a video back, using a Raspberry Pi, try this "kiosk" mode image that can be found here: https://awesomeopensource.com/project/futurice/chilipie-kiosk. Raspberry Pis seem to handle video playback in Chromium-based browsers OK. I'l try to have browser-free playback at some point in the future.
* If needing to make a backup of your microSD, see: [http://sigkillit.com/2022/10/13/shrink-a-raspberry-pi-or-retropie-img-on-windows-with-pishrink/](http://sigkillit.com/2022/10/13/shrink-a-raspberry-pi-or-retropie-img-on-windows-with-pishrink/)
#### TODO:
* Fix VP8/VP9 recordings and add muxing to the H264 recordings (moderate)
* Have an option to "playback" an incoming stream full-screened on a pi or Jetson, to use as an input to an ATEM mixer.
* Add a jitter buffer to the recording mode (moderate)
* Add support for passwords and group rooms (steve)
* Make easier to use for novice users; perhaps adding a local web-interface or config file accessible via an SD card reader via Windows. These options could then allow for setting of wifi passwords, device, settings, stream IDs, etc, without needing to SSH in or using nano/vim. (moderate)
* Add a QR-code reader mode to the app, as to setup Stream ID, bitrate, and WiFi passwords using a little website tool. (moderate)
* Have gstreamer/python automatically detect the input devices, settings, system, and configure things automatically. Allowing for burn, plug, and boot, without needing to log in via SSH at all.
#### Discord Support
Support is available on Discord at [https://discord.vdo.ninja](https://discord.vdo.ninja) in channel _#raspberry-ninja_
---
description: Publish live streaming video to VDO.Ninja at very high resolutions
---
# Raspberry.Ninja
[https://raspberry.ninja/](https://raspberry.ninja/)
Turn your Raspberry Pi or Nvidia Jetson into a Ninja-cam with hardware-acceleration enabled! Publish live streaming video to VDO.Ninja on the cheap at very high resolutions! The script for the Nvidia Jetson ($69 and up) is setup to plug in a $10 1080p30 HDMI to USB adapter and go, while the Raspberry Pi is setup as a quick-deploy image that can work with the official Raspicam.
Get support on the Discord if you have any problems: [🏮│raspberry․ninja](https://discord.gg/BVvGwGaD9F)
 (1).png>)
## Raspberry Pi system images (and code)
If you have a Raspberry Pi, Nvidia Jetson, or a Linux system, you can use those devices to connect UVC-compatible cameras and microphones to VDO.Ninja. It's a great way to make a cheap mobile stream encoder.
This is much cheaper than using a mobile phone and this solution won't overheat when streaming 1080p video after hours. The code is written in Python, so it is accessible for novice developers to use, and it supports hardware-accelerated video encoding.
Stream live video from your embedded SBC or Linux system!
## Updates
[updates-raspberry.ninja.md](../../updates/updates-raspberry.ninja.md)
---
description: This is a snapshot of the Social Stream documentation, taken Aug. 16, 2023
---
# Documentation reference
For the newest and most up-to-date copy of the Social Stream documentation, please visit: [https://github.com/steveseguin/social\_stream](https://github.com/steveseguin/social\_stream). This article won't be kept as up-to-date, but should cover the basics; it is provided here as a consolidated resource for our LMM AI support bot to learn from.
Chronologically Updates are here:
[updates-social-stream-and-chat-overlay](../../updates/updates-social-stream-and-chat-overlay/)
## Social Stream
Consolidate your live social messaging streams
[Jump to Download and Install instructions](https://github.com/steveseguin/social\_stream/blob/main/README.md#to-install)
* Supports live automated two-way chat messaging with Facebook, Youtube, Twitch, Zoom, and dozens more
* Includes a "featured chat" overlay, with messages selectable via the dockable dashboard; auto or manual selection.
* Supports bot-commands and automated chat responses, with custom logic supported via scriptable plugin file.
* Text-to-speech support, along with many other niche features supported.
* Multi-channel source-icon support, so you can differentiate between different streams and creators
* No user login, API key, or permission needed to capture the chat messages from most sites and services.
* Queuing of messages for later highlighting
* Free community support at [https://discord.socialstream.ninja](https://discord.socialstream.ninja)
Social Stream makes use of VDO.Ninja's data-transport API to stream data securely between browser windows with extremely low latency and all for free!
 
#### Supported sites:
* twitch.tv - pop out chat to trigger
* youtube live - pop out the chat to trigger (studio or guest view); or add \&socialstream to the YT link
* youtube static comments - click SS in the top right corner of Youtube, then select the message you wish to publish inside the YT comment section via the new buttons there.
* facebook live - guest view, publisher view, or the producer's pop-up chat on the web is supported.
* workplace.com - (same setup as Facebook)
* zoom.us (web version)
* owncast demo page (`watch.owncast.online`, or for a pop-out chat version, open `https://watch.owncast.online/embed/chat/readwrite/` )
* crowdcast.io
* livestream.com
* mixcloud.com (pop out chat)
* ms teams (experimental support)
* vimeo.com (pop out chat page; https://vimeo.com/live-chat/xxxxxxxxx/interaction/)
* instagram live (instagram.com/\*/live/), css note: `[data.type = "instagramlive"]`
* Instagram post non-live comments (REQUIRES the TOGGLE in menu to enable it), css note: `[data.type = "instagram"]`
* instafeed.me (no pop out; alternative instagram live support)
* tiktok live (tiktok.com/\*/live)
* webex live chat (not the pop out)
* linkedin events and live comments. (works with linkedin.com/videos/live/\* or linkedin.com/videos/events/\* or linkedin.com/events/\*)
* vdo.ninja (pop-out chat)
* Whatsapp.com (REQUIRES the TOGGLE in menu to enable it; use @ https://web.whatsapp.com ; fyi, no avatar support)
* discord.com (web version; requires toggle enabled via the settings as well)
* telegram (web.telegram.org in stream mode; requires toggle enabled)
* slack (https://app.slack.com/ ; required toggle enabled to use)
* Google Meet ; required toggle enabled to use
* 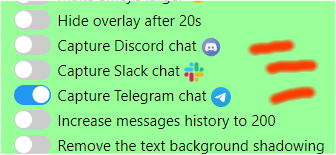 telegram, slack, whatsapp, discord require an extra step to enable. See this video for more help: https://www.youtube.com/watch?v=L3l0\_8V1t0Q
* restream.io chat supported (https://chat.restream.io/chat)
* amazon.com/live
* wix.com (https://manage.wix.com/dashboard/_/live-video/_)
* clouthub (no pop out; just the video page)
* rumble.com (pop out chat)
* trovo.live (open the chat pop-up page; ie: https://trovo.live/chat/CHANNEL\_NAME\_HERE)
* theta.tv (pop-out chat; https://www.theta.tv/chat/xxxxxxxxxxxxxxx)
* Dlive.tv (pop-out chat)
* Picarto.tv (pop-out chat; ie: https://picarto.tv/chatpopout/CHANNELNAMEHERE/public)
* Mobcrush (this page: https://studio.mobcrush.com/chatpopup.html)
* vimm.tv (https://www.vimm.tv/chat/xxxxxxxxx/)
* odysee.com (via the pop out chat I think)
* minnit.chat support (https://minnit.chat/xxxxxxxxxxx?mobile\&popout)
* livepush.io (chat overlay link provided; no input field support?)
* piczel.tv (pop out chat @ https://piczel.tv/chat/xxxxxxxxx)
* bilibili.tv added (just regular view page /w chat; no pop out)
* Amazon Chime (https://app.chime.aws/meetings/xxxxxxxxx)
* Locals.com (no pop out needed)
* Nimo.TV (pop out chat, ie: https://www.nimo.tv/popout/chat/xxxx)
* kick.com (pop out chat)
* quickchannel.com (https://play.quickchannel.com/\*)
* rokfin.com (https://www.rokfin.com/popout/chat/xxxxxx?stream=yyyyyy)
* sli.do (https://app.sli.do/event/XXXXXXXXXXXXXX/live/questions)
* cbox.ws (no pop out needed)
* castr.io (https://chat.castr.io/room/XXXXXXXX)
* tellonym.me
* peertube (triggers on: https://\*/plugins/livechat/_router/webchat/room/_)
* IRC (via https://webchat.quakenet.org/)
* Tradingview.com (just the normal viewer page; no pop out)
* rooter.gg (no pop out; just pause the video I guess)
* loco.gg (no pop out; just pause the video I guess)
* joystick.tv (+18, pop-out chat, ie: https://joystick.tv/u/USERNAMEHERE/chat)
* buzzit.ca (community member submitted integration)
* afreecatv.com (pop out the chat; you can't close the main window it seems tho?)
* nonolive.com (no pop out; partial support added so far only)
* xeenon.xyz
* stageTEN.tv
* vkplay.live (pop out chat)
* arena.tv (no pop out chat support, so just pause the video I guess)
* bandlab.com (no pop out, so just pause the video I guess while chat open)
* threads.net (a little funky star icon, right of the share icon, will select thread to push to dock)
* floatplane.com (pop out chat; gotta keep the main window still open though? annoying..)
* OpenAI chatGPT chat - (via https://chat.openai.com/chat). You must opt-in via the toggle for this though
* live.space (Just open the basic watch page, OR, open the pop up chat @ https://live.space/popout-chat/XXXXXXXXX)
* vstream.com (pop out chat)
* estrim - live video chat supported
* livestorm.io (open the 'external sidebar', which might be a plugin, and it should capture that)
... and likely many many more. Even more on request
**Chat graveyard 🪦🪦🪦**
Past supported sites that have ceased to exist.
* 🪦 omlet.gg (RIP June 2023)
* 🪦 glimesh (RIP July 2023)
(it's the effort that counts, guys; may your code live on in our ai llm bots forever)
#### Adding sites yourself
I have a video walk-thru on how I added a simple social site to Social Stream:
You can also refer to some of my code commits, where you can see which changes I made to add support for any specific site.
ie: `https://github.com/steveseguin/social_stream/commit/942fce2697d5f9d51af6da61fc878824dee514b4`
For a simple site, a developer should need just 30 minutes to an hour to get a site supported. A more complicated and tricky site may take a few hours or longer, depending on the developer's skill.
#### Video walk-thru
An older guide covering the basics of setting up Social Stream:
For a more recent guide focusing on setup for Discord, slack, Whatsapp, and Telegram, see:
#### To install
This extension should work with Chromium-based browser on systems that support webRTC. This includes Chrome, Edge, and Brave. [Firefox users see here](https://github.com/steveseguin/social\_stream#firefox-support).
Currently you must download, extract, and load the browser extension manually. It is not available yet in the browser's web store.
The link to download newest version is here: [https://github.com/steveseguin/social\_stream/archive/refs/heads/main.zip](https://github.com/steveseguin/social\_stream/archive/refs/heads/main.zip)
Once extracted into a folder, you can go here to load it: chrome://extensions/
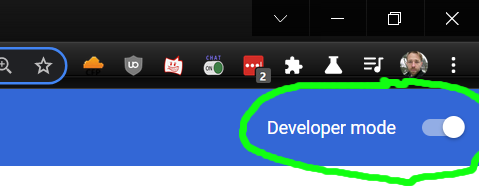
Ensure you have Developer Mode enabled; then you can just load the extension via the load unpacked button and selecting the folder you extracted the fiels to.
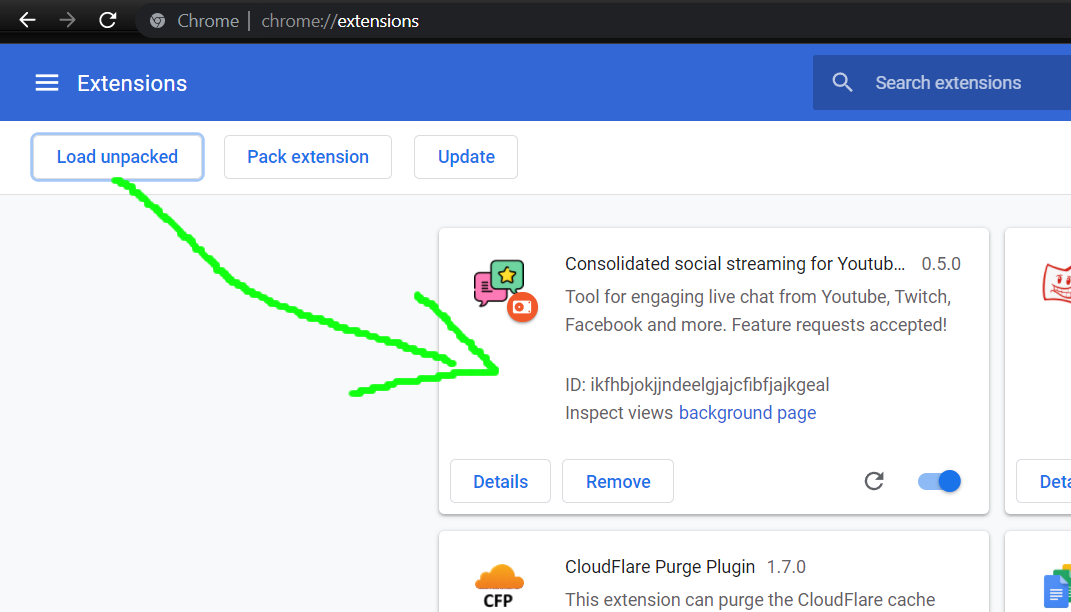
You're ready to start using it!
Please note also that you will need to manually update the extension to access newer versions; it currently does not auto-update aspects of the extension; just the dock and single overlay page auto-update as they are hosted online.
**Seeing an error message?**
If you see the browser say there is an "Error", specifically a manifest v2 warning or something, you can safely ignore it. It is not actually an error and will not impact the function of the extension.
Something of concern though is Google will be updating Chrome browsers on January 2023 to block many popular Chrome extensions, including many Adblockers and also Social Stream. I'm working to resolve this concern, but Social Stream may end up having diminished functionality if Google has their way. If necessary, Social Stream may evolve into a downloadable app instead to avoid these limiations, but I'm hoping to avoid that if possible.
**Updating**
To update, just download the extension, replace the old files with the new files, and then reload the extension or completely restart the browser. If just reloading the extension, you may then need to also reload any open chat sites that you wish to use Social Stream with.
You can download the newest version here:
Link to the newest version of Social Stream
Please note: DO NOT Uninstall the extension if you want to update it. This will delete all your settings. Replace the files, and reload the extension or browser instead. If you MUST uninstall, you can export your settings to disk and reload them after you have reinstalled.
New app integrations do not auto-update; just the overlay and dock page will auto-update. It's suggeseted you update every now and then manually, or whenever you encounter a bug. I'll try to resolve this issue down the road, perhaps with a standalone desktop app eventually.
**Firefox support**
You have two ways to install the add-on for Firefox.
Please note, neither Firefox option supports two-way message responding, but the dock and featured chat overlay should work. If you want to use the bot commands with auto-responding, please consider using a Chromium-based browser instead.
**First way:**
Download+extract or clone the SocialStream code somewhere.
Go to `about:debugging#/runtime/this-firefox` in Firefox and select Load Temporary Add-on.
Select any file inside the SocialStream folder.
You're done. This is a temporary install and none of the settings made will be persist, including your session ID.
You will still need to manually redo these steps to update when needed, but you can use the newest version of the code.
**Second way:**
(This method hasn't been updated in a while and no longer works probably; you'll need to make your own XPI file to try it)
Go to the release section of this repo and find a release that includes a Firefox XPI file.
https://github.com/steveseguin/social\_stream/releases
Download the XPI file and drag it into an Open Firefox window.
Accept any install pop ups. Storage functions should work with this approach.
You are good to go, but you will need to manually update when needed by recompleting these steps.
Please note: XPI files are currently provided on request or with major updates; XPI file creation hasn't yet been automated. (TODO)
#### To use
Open Twitch or Youtube "Pop out" chat; or just go to your Facebook Live chat while connected to Ethernet or WiFi. You must not minimize or close these windows, but they can be left in the background or moved to the side.
Then, press the Social Stream chrome extension button and ENABLE streaming of chat data. (Red implies disabled. Green is enabled)
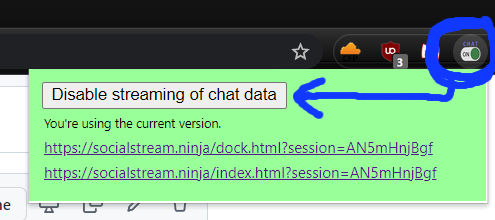
**Please note: If the Extension's icon is RED, then it means it is still off and wil not work. You have to click "Enable extension", and the icon must change to the color green.**
Next, using the provided two links, you can manage the social stream of chat messages and view selected chat messages as overlays.

You can hold ALT on the keyboard to resize elements in OBS, allowing you to crop the chat stream if you want to hide aspects like the time or source icon.
Clicking on a message will have it appear in the overlay link. You can press the clear button to hide it or use the `&showtime=20000` URL option added to the overlay page to auto-hide it after 20-seconds (20,000 ms).

There is a `&darkmode` option, but the default is white, for the dock.
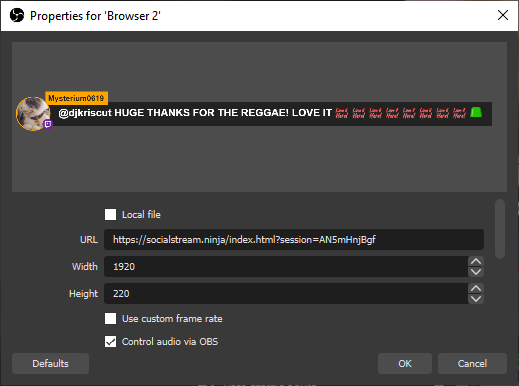
A good resolution for the overlay is either 1280x600 or 1920x600; you can specify this in the OBS browser source. You can edit the style of the overlay using the OBS CSS style input text box. The chat overlay will appear 50-px from the bottom currently, but the height of the chat window can be quite tall; to avoid the name of the overlay being cropped, just make sure you give it enough room.
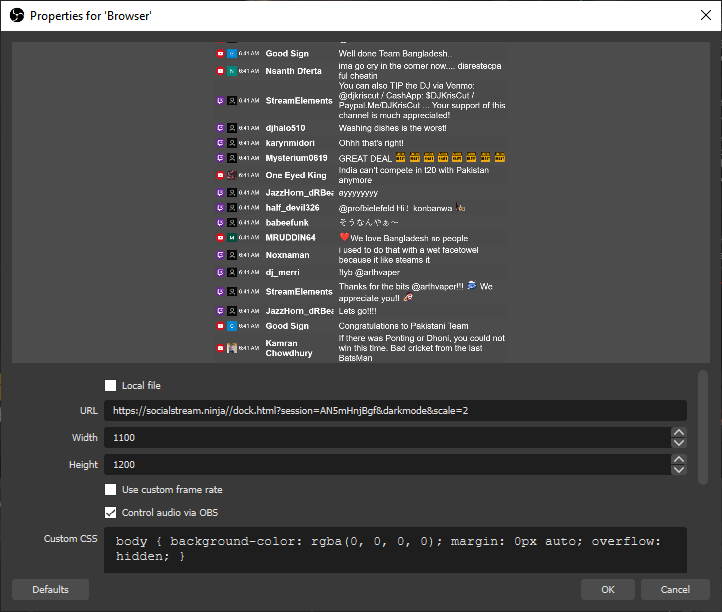
If using the automated chat response options, like auto-hi, you must ensure the YouTube/Twitch/Facebook chat input options are enabled and that you are able to send a chat message. Manually entering a chat message into the pop-out window or into the Facebook live chat area first can help ensure things are working are intended, else automated message may not be sent.
**Note: If things do not work,**
* Toggle the extension on and off, and reload the pop-out chat window. Ideally the pop-out chat should be visible on screen, as even just a few pixels shown will allow the pop-out chat to work at full-power. Chrome otherwise may throttle performance.
* Open a new dock / overlay link if things still do not work, as the session ID may have changed.
* Ensure that VDO.Ninja works with your browser, as if not, webRTC may be disabled and so this social stream extension will not work also.
* If using Facebook live chat, please sure you are viewing the page as a "viewer", not as a publisher, and that you are connected to WiFi or Ethernet, and not mobile LTE/4G/5G.
* The auto-responder requires you to be signed in to the social endpoint and that you have access to chat; ensure you accept any disclaimer and try issuing a test message first.
* Try using the extension in Incognito mode or try disabling all other browser extensions, then reloading the browser, and trying again. Many extension types will conflict with Socialstream, causing certain functions to fail.
#### Customize
There are quite a few toggles available to customize functions and styles, but these toggles often just apply URL parameters. You can as a result, just manually apply the parameters yourself, opening up more fine-grain control. A list of some of the options are available below.
To customize the dock, you can use the following options:
* `&lightmode` (Enables the dark-mode for the chat stream)
* `&scale=2` (doubles size/resolution of all elements)
* `¬ime` (hides the date in the chat stream)
* `&hidesource` (hides the youtube/twitch/fb icons from the stream)
* `&compact` (Removes the spacing between name and message)
* `&autoshow` (will auto-feature chat messages as they come into the dock at a rate of about 2 per 3 seconds)
* `&attachmentsonly` (will only show image attachments in the dock; the messages will be wiped)
To customize the featured chat overlay, the following URL parameters are available
* `&showtime=20000` (auto-hides selected messages after 20s)
* `&showsource` (shows the youtube/twitch/fb icons next to the name)
* `&fade` (will have featured messages fade in, rather than pop up)
* `&swipe` (will have featured messages swipe in from the left side)
* `¢er` (center featured messages)
To customize the color, font-size and styling, you can edit the CSS, in either the OBS browser source style-sheet section, or by editing the and using the index.html file. See below:
**More advanced styling customizations**
To further customize the appearance of the overlay or dock, you can make CSS style changes via OBS browser source, without any coding.
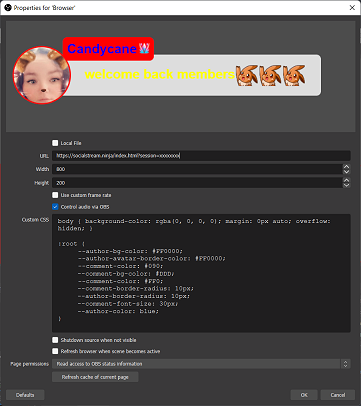
```
body { background-color: rgba(0, 0, 0, 0); margin: 0px auto; overflow: hidden; }
:root {
--comment-color: #090;
--comment-bg-color: #DDD;
--comment-color: #FF0;
--comment-border-radius: 10px;
--comment-font-size: 30px;
--author-border-radius: 10px;
--author-bg-color: #FF0000;
--author-avatar-border-color: #FF0000;
--author-font-size: 32px;
--author-color: blue;
--font-family: "opendyslexic", opendyslexic, serif;
}
@font-face {
font-family: 'opendyslexic';
src: url('https://vdo.ninja/examples/OpenDyslexic-Regular.otf');
font-style: normal;
font-weight: normal;
}
.hl-name{
padding: 2px 10px
}
```
Sample CSS of which you can use to customize some of the basic styles. There's not much that you can't do via CSS in this way, but you can edit things further at a code-level if needed. Mac/Linux users may face issues with OBS not liking self-hosted versions of the index/dock file, but it's not an issue for the PC version.
**Removing text-outlines**
Try:
```
body {
text-shadow: 0 0 black;
}
```
#### Changing CSS without OBS
You can also pass custom CSS to the dock and index page via URL parameters using either `&css` or `&b64css`.
`&css=https://youdomain.com/style.css` or `&b64css=YOUR_CSS_CODE_HERE`
You can use this tool to encode the URL you want to link to: https://www.urlencoder.org/
For the base64 css option, you can create the base64 encoding using `btoa(encodeURIComponent(csshere))` via the browser's developer console. For example:
`window.btoa(encodeURIComponent("#mainmenu{background-color: pink; ❤" ));`
The above will return the base64 encoded string required. Special non-latin characters are supported with this approach; not just latin characters.
Example of what it might look like: [https://socialstream.ninja/?64css=JTIzbWFpbm1lbnUlN0JiYWNrZ3JvdW5kLWNvbG9yJTNBJTIwcGluayUzQiUyMCVFMiU5RCVBNA](https://socialstream.ninja/?64css=JTIzbWFpbm1lbnUlN0JiYWNrZ3JvdW5kLWNvbG9yJTNBJTIwcGluayUzQiUyMCVFMiU5RCVBNA)
#### Pre-styled templates / themes
You can try out some stylized chat overlays in the themes folder:
An example of one is available here: [https://socialstream.ninja/themes/pretty.html?session=SESSIONIDHERE](https://socialstream.ninja/themes/pretty.html?session=SESSIONIDHERE)
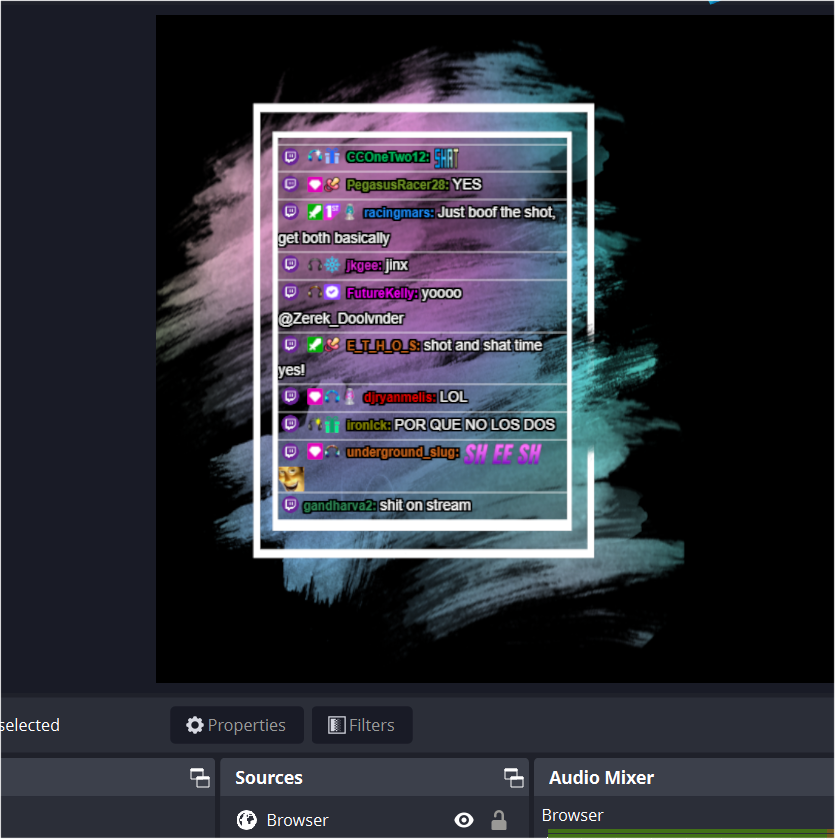
For anyone who wants to create a custom theme/style/template for their chat stream, you can share them via adding them to this repository as a Pull Request.
**Custom Javascript**
You can inject a bit of javascript into the dock or index pages using `&js={URL ENCODED JAVASCRIPT}`
For example, [https://socialstream.ninja/index.html?session=test123\&js=https%3A%2F%2Fvdo.ninja%2Fexamples%2Ftestjs.js](https://socialstream.ninja/index.html?session=test123\&js=https%3A%2F%2Fvdo.ninja%2Fexamples%2Ftestjs.js)
**Auto responding / custom actions**
You can create your own custom auto-responding triggers or other actions by including a `custom.js` file. You don't need to host the index or dock file for this.
Included in the code is the `custom_sample.js` file, which you can rename to custom.js to get started. Included in it is the `&auto1` trigger, which auto responds "1" to any message that is also "1". You need to add `&auto1` to the dock's URL to activate it.
It's fairly easy to modify the `auto1` trigger to do whatever you want. You can also customize or removee the URL-parameter trigger needed to activate it.
#### Queuing messages
If you hold CTRL (or cmd on mac), you can select messages in the dock that get added to a queue. A button should appear in the top dock menu bar that will let you cycle through the queue, one at a time. When pressing the Next in Queue button, messages from the queue will appear as featured chat messages in the overlay page.
#### Pinning messages
Like queuing a message, you can also instead hold down the ALT key while clicking a message to pin it; it will stay at the top of the page, until unpinned in the same fashion.
#### Togglable Menu Commands
These are some generic auto-reply commands that can be toggled on/off via the extension's menu. They do not need a custom.js file to work
* !joke (tells a random geeky dad joke)
* hi (Welcomes anyone who says "hi" into chat)
#### Hotkey (MIDI / Streamlabs) support
There's a toggle to enable MIDI hotkey support. This allows a user to issue commands to the extension when active, such as issue predefined chat messages to all social destinations.
The hotkeys can be issued via MIDI, which can be applied to a Streamdeck also via a virtual MIDI device. The MIDI actions available currently include:
Using Control Change MIDI Commands, on channel 1:
* command 102, with value 1: Say "1" into all chats
* command 102, with value 2: Say "LUL" into all chats
* command 102, with value 3: Tell a random joke into all chats
* command 102, with value 4: Clear all featured chat overlays
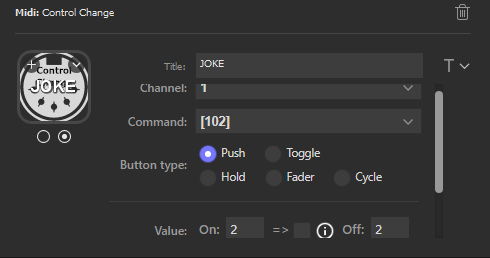
The StreamDeck MIDI plugin can be found in the Streamdeck store pretty easily.
Please note that you will also need a MIDI Loopback device installed if using the StreamDeck MIDI plugin. For Windows, you can find a virtual MIDI loopback device here: https://www.tobias-erichsen.de/software/loopmidi.html There are some for macOS as well.
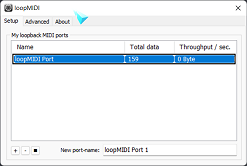
Lastly, please note that you will need to enable the MIDI option in the menu options for it to work, as it is not loaded by default.
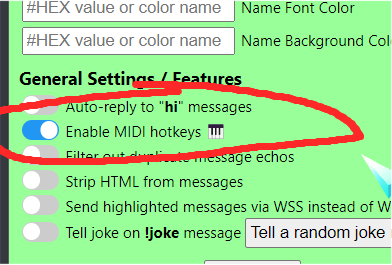
#### Server API support
You can send messages to Social Stream via the hosted server ingest API, and you can also send messages from Social Stream to remote third-parties.
So if you can a donation webhook, you can push those notifications to Social Stream. You can also use a third-party service to overlay messages captured by Social Stream. More below.
**Social Stream's server API (ingest and clear messages via remote request)**
If using the MIDI API isn't something you can use, you can also check out the hosted API service to send messages to SocialStream, which will be redirected to your social live chat sites. This API works with a Stream Deck or custom applications.
This API end point supports WSS, HTTPS GET, and HTTP POST (JSON). Support for this API must be toggled on in the menu settings (or by adding `&server` to the dock.html page).
**A couple common examples**
An overly simple example of how to use the GET API would be: https://api.vdo.ninja/XXXXXXXXXX/sendChat/null/Hello, which sends HELLO. Replace XXXXX with your Social Stream session ID. Other options, like `https://api.vdo.ninja/XXXXXXXXXX/clearOverlay` should work, too.
You can use this API to clear the featured-chat, poke the next-in-queue item, and more. It works with WSS or HTTP requests.
**Target specific docks**
You can also target specific docks with your API requests by assigning a target name to each dock.html page using `&label`.
For example, to set a dock with the target name of "NAMEHERE", we'd do: `https://socialstream.ninja/dock.html?session=XXXXXXXXXXXXX&server&sync&label=NAMEHERE`. From there, we can target it with the API format like this: `https://api.vdo.ninja/XXXXXXXXXXXXX/nextInQueue/NAMEHERE/null`. This all may be needed because if you have multiple docks connected to the API interface, you may not want to trigger the same command multiple times in all cases.
**More details**
For details of the commands, see the following link for sample functionality and refer to its source code for examples.
`https://socialstream.ninja/sampleapi.html?session=xxxxxxxxxx` (replacing xxxxxxxx with your Social Stream session ID to have it work)
More functionality can be added on request.
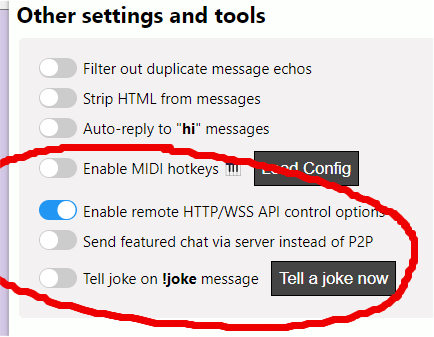
**Remote server API support (publish messages to third parties)**
Remote API support is available via dock page, configured by URL parameters. In the future, some support can be added to the extension itself directly, so no dock page needs to be open. You can currently auto-publish messages via the dock with the `&autoshow` parameter, but otherwise messages will be issues to the remote API only when a message is selected manually.
For some images provided in the outgoing data-structure, the assumed host location for certain files/images, if none provided, should be `https://socialstream.ninja/`.
More destinations available on request.
**Singular Live**
`&singular=XXXXXXX` will send selected messages to singular live for featured message overlay. The target address will be: `https://app.singular.live/apiv1/datanodes/XXXXXXX/data`
**H2R**
`&h2r=XXXXXXX` will send selected messages to local H2R server using its POST data structure. The target address will be: `"http://127.0.0.1:4001/data/XXXXXXX`
You can manually set a custom H2R URL though with `&h2rurl` though, which will override the default one.
**Generic POST / PUT**
A generic JSON-POST can be made using `&postserver`, with the address provided `&postserver=https://domain.com/input-source`
A generic JSON-PUT can be made using `&putserver`, with the address provided. There isn't much difference between POST and PUT, but some sites are picky. `&putserver=https://domain.com/input-source`
In these cases, the JSON being delivered is in the Social Stream data-structure.
**Stripe webhook donation support**
If you create a Stripe payment link (eg: https://donate.stripe.com/YYYYYYYYYYYY), you can have successful payments show up in Social Stream. This is a great way to collect donations from viewers of your stream without needing to use middleware for payment processing.
To get started, after creating a Stripe payment link, create a Stripe webhook that listens for the event `checkout.session.completed`. Have the webhook point to: `https://api.overlay.ninja/XXXXXX/stripe`, where XXXXXX is your Social Stream session ID. You don't need to worry about the verification signatures or API tokens in Stripe since we won't be verifying the payments. Of course, keep your session ID private as a result, else someone will be able to spoof fake donations to your end point.
If you wish to ask the payer for a name, include a custom field called "Display Name" or "Username" when creating your Stripe payment link. You can also include a field called "Message", which will allow the payer an opportunity to leave a custom message. The donation amount and current type should be dervived from the payment automatically, but some rare exotic currencies may not always show up with the right decimal place -- just keep that in mind.
Lastly, to allow these events to show up in the Social Stream dock, add \&server to the dock URL; this will have the dock start listening for incoming messages from the webhook/api server. You can always test that the workflow is working using Stripe's "Test mode"; just spam 424242.. etc for the credit card number, expiration, cvc, etc, when using the test mode, rather than a valid credit card.


#### Text to speech
Text messages can be converted to speech, assuming your system supports TTS. On my Windows machine running Chrome/OBS, it works. I have it set to English-US by default, but you can change the language to something else by editing the URL. ()
ie: `index.html?session=XXXXXX&speech=en-US` or `socialstream.ninja/?session=xxx&&speech=en-US`
You can get a list of support languages on your system by running `speechSynthesis.getVoices()` from the Chrome browser console on your system. You can install additional ones fairly easily, if on Windows. See: https://support.microsoft.com/en-us/windows/download-language-pack-for-speech-24d06ef3-ca09-ddcc-70a0-63606fd16394
The audio will play out the default system audio output device. This might be a problem if using OBS for capture, as you'll need to use a virtual audio cable to capture the audio output of the system output and route it back into OBS for capture. Another user mentioned they were able to capture the TTS audio in OBS by selecting `explorer.exe` in the system application recorder. Using the Premium Google-based TTS option (mentioned below) might also be a solution to this issue. See the related issue here: https://github.com/w3c/mediacapture-output/issues/102
If loading the app in the Chrome/Edge/Firefox browser, you will need to "click" the web page first before audio will play. This isn't the case with OBS, but most browsers require the user interact with the website on some level before it will play audio. Please keep this in mind when testing things.
There is a toggle in the dock to turn off and on the text-to-speech; turning it off whill automatically stop any audio playout. Still, be careful when using text-to-speech with the dock, as viewers can exploit it to have your system read out unwanted things on air.
**Installing different language-speech packs**
By default, the list of support languages on your computer could be slim. To add more speech options for different langauges, you'll need to install them.
see: https://support.microsoft.com/en-us/windows/download-language-pack-for-speech-24d06ef3-ca09-ddcc-70a0-63606fd16394 for details
There's a simplified test app for text-to-speech here also, that might also help try different languages on the fly: https://mdn.github.io/dom-examples/web-speech-api/speak-easy-synthesis/
You can manaul set the pitch, volume, rate, and even voice-name with the below URL parameters. The voice just matches on a partial word, so "siri", "google", "bob", or whatever is being used will work. This still assumes the language selected also matches. `&speech=en` (first english to match), `&speech=en-US` (default), or `&speech=fr-CA` can specify the language, for example.
```
&pitch=1
&volume=1
&voice=google
&rate=1
```
**Premium TTS voice options**
**GOOGLE CLOUD TTS**
I've added support for Google Cloud Text to Speech API, but you must use your own API key to use this feature, as it is expensive to use.
Go to https://cloud.google.com/text-to-speech -> Enable the service, and then get an API key.
This premium text-to-speech is supported on the index.html (the featured chat overlay) and dock.html page. If you stop the TTS with the button in the dock's menu, it will stop playback immediately in the dock. It will also delete any queued messages to be spoken.
You need at least \&speech and \&ttskey to enable the premium TTS, but there are customizations:
```
&volume=1
&voice=en-GB-Standard-A
&gender=FEMALE
&speech=en-us
&ttskey=XXXXXXX
```
See the Google Cloud doc for more help
**Eleven Labs TTS**
If you want a different set of voices, or wish to train your own, ElevenLabs.io has a TTS service that you can try. There's a "free" version you can get started testing with, which just needs you to create an account there and get an API key from your profile settings there. You may need to provide attribution as required, for the free tier?
Anyways, documentation on getting start with finding a voice you want to use and testing your API key: API Social Stream is using: https://api.elevenlabs.io/docs#/text-to-speech/Text\_to\_speech\_v1\_text\_to\_speech\_\_voice\_id\_\_stream\_post Available voices: https://api.elevenlabs.io/docs#/voices/Get\_voices\_v1\_voices\_get
To use this with Social Stream, you'll need to be using the featured-chat index.html or dock.html page, and you'll need to provide your api key there.
Example URL with options `https://socialstream.ninja/index.html?session=SESSIONIDHERE&tts&elevenlabskey=YOURELEVENLABSAPIKEYHERE&latency=4&voice=VR6AewLTigWG4xSOukaG`
* `&tts` is also required to enable TTS in general
* `&voice={VOICEIDHERE}`, is the voice ID you want to use.
* `&latency={N}`, where N can be 0,1,2,3, or 4. 0 is high latency, but better quality. Default is 4 (fastest)
* `&elevenlabskey={APIKEYHERE}`, don't share this API key, but this is needed to use the service and to specify that you want to use elevenlabs for TTS
If you stop the TTS with the button in the dock's menu, it will stop playback immediately in the dock. It will also delete any queued messages to be spoken.
Please NOTE: Make sure to CLICK on the browser page after it loads, else audio may not work in the browser. Browsers require user-gesture detection before audio can auto-play. OBS Studio's browser source and the Electron Capture app are exceptions to this rule.
#### Branded channel support
There is a toggle that lets you show the source of the chat messages.
* `&branded` will show the channel-icon; YouTube and Twitch channels supported. Use with the dock or index file.
* `&showsource` can be added to the index.file, to show the main site the source is from; ie: YouTube, Facebook.
#### Known issues or solutions
* Browsers will sometimes stop browser tabs after an hour of inactivity. Disable this option in your browser under `chrome://settings/performance` or where ever this setting is found.
* Other options that may be active in your browser can be disabled also, to avoid tabs being throttled or paused, such as `chrome://flags/#calculate-native-win-occlusion`
* Another option, if using Windows, is to do Windows + Tab, and have two virtual Desktops on your PC. Put the chat windows into one virtual desktop, and use OBS in the other. Win+Tab can let you switch between windows.
If the auto responder doesn't work -- you see a blue bar, but nothing happens, there's a couple things to do.
* make sure if using YouTube/Twitch that the pop out window is open
* go to `chrome://apps` and remove the YouTube(s) apps that might appear. You can remove them all really if none are required.
* Make sure you have permission to post into the chat first -- sometimes you need to be a subscriber for example to send chat messages.
* If the blue bar warning about Debugging mode is a problem, start Chrome with this command line flag: `--silent-debugger-extension-api`
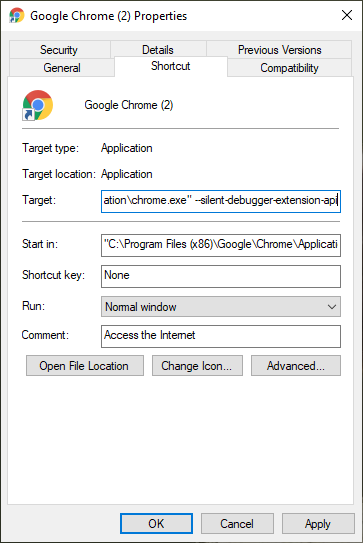
* If you can't save to disk, like export the settings to disk, ensure your browser allows the `File System Access API`
In Brave, this can be enabled via `brave://flags/#file-system-access-api` ; open that link and enable the setting (then restart)
* If the chat capture stops when you minimize or hide a browser window, disable background throttling within your browser. Instructions as follows:
```
Go to chrome://flags/ (That's a real URL in Chrome, Edge, Brave, and others)
In the search, type "throttle"
You're going to get 3 options, the two labeled "Throttle Javascript timers in background" and "Calculate window occlusion on Windows", probably set as "default" right now, turn them to "disabled"
In the bottom right corner, hit relaunch to relaunch chrome with new settings. Throttling should pause browser tabs or windows when occluded or minimized.
```
* Try refreshing the chat page; sometimes refreshing the page will retrigger the code and bypass any errors. This is particularly try if you install or refresh the extension after the chat page has already been loaded.
* Try to keep the chat window and dock page active and if possible, even partially visible on screen. If the windows are hidden or minimized, they may stop working. This is also true if the scroll bar for the chat window is not at the bottom; sometimes messages won't load unless you are seeing the newest messages.
* If using OBS Studio on macOS or Linux, for some reason this extension will not work if hosted locally on your drive, so custom CSS needs to happen via the browser source style section. It works great on PC locally, and when hosted on socialstream.ninja, but locally on mac, it does not seem supported. This is an issue you'll need to take up with the OBS developers.
* For discord, slack, and telegram, for security reasons, you need to enable the TOGGLE switch in the settings to enable.
* To set the Session ID to your own value, go to Extensions settings to set it. On Chrome: Settings -> Extensions -> Social Stream Ninja -> Details -> Extension options.
#### Requesting a site
You can make a request here on Github as an issue ticket, or join the Discord server at https://discord.socialstream.ninja and request there.
Not all requested sites can or will be supported. Steve generally will add support for publicly accessible social chat sites that have a significantly-large community; it's ultimately up to the decretion of Steve though on what he wants to add or has time to add. Code contributions from others that add new site integration or features are normally welcomed, but sites/features that may violate Canadian laws, fail to meet quality standards, or for any other reason, may possibly not be merged or accepted. In these cases you may need to self-host or fork the repo, maintaining your own copy with said changes instead.
There is no guarentee that a site that gets added will continue to be supported over time. Steve also doesn't accept payment for adding an integration or for support.
#### Adding sites yourself
I have a video walk-thru on how I added a simple social site to Social Stream:
You can also refer to some of my code commits, where you can see which changes I made to add support for any specific site.
ie: `https://github.com/steveseguin/social_stream/commit/942fce2697d5f9d51af6da61fc878824dee514b4`
For a simple site, a developer should need just 30 minutes to an hour to get a site supported. A more complicated and tricky site may take a few hours or longer, depending on the developer's skill.
#### Support
You can find me on discord over at https://discord.socialstream.ninja or [https://discord.gg/7U4ERn9y](https://discord.gg/vFU8AuwNf3), offering free support in channel #chat.overlay-support
Feedback and feature requests are welcomed. Please also make a Github issue if you're not a fan of Discord, but still need to report a bug or feature request.
#### Icons
I do not claim rights of all the icons distributed. While I made some of the icons, trademarks and logos of third party companies/services are the rights of those respectivitive entities. Use them according to the terms that those entities may offer them under.
#### Credit
This project contains inspiration by my other project, chat.overlay.ninja, which was a derivation of another Youtube-specific chat widget, which was inspired by the stylings of other featured-chat code sample, of which that was also inspired by existing chat overlay designs. May the many new innovations of this project inspire the future foundation of other awesome projects as well.
#### Contributors to this project
[](https://github.com/steveseguin/social\_stream/graphs/contributors)
---
description: >-
Consolidate your live social messaging streams, including YouTube, Twitch, and
more, into a single chat stream that can be docked into OBS
---
# Social Stream Ninja
[https://github.com/steveseguin/social\_stream#readme](https://github.com/steveseguin/social\_stream#readme)
Consolidate your live social messaging streams, including YouTube, Twitch, and more, into a single chat stream that can be docked into OBS and be used to to select featured chat messages as an overlay.
Very much like Chat Overlay Ninja, except is purely for live chat and has a focus on consolidation of chat messages, instead of just featured chat. Has many features and supported sites at this point.
Get support on the Discord if you have any problems: [💬│social-stream-ninja](https://discord.gg/6Wbu848w94)
## Standalone App
I'm putting out a "still-in-development preview" version of the **Social Stream Standalone App**
[**https://github.com/steveseguin/social\_stream/releases**](https://github.com/steveseguin/social\_stream/releases)
I've been poking at this project for the past year, and due to frequent requests for it I'm making it available as a preview-build.
I'd say 90% of the features available in the extension work in this standalone version, with the interface about 50% done.
Available as an installer for Windows x64 and MacOS.
## Updates
[updates-social-stream-and-chat-overlay](../../updates/updates-social-stream-and-chat-overlay/)
[updates-social-stream-standalone-app.md](../../updates/updates-social-stream-and-chat-overlay/updates-social-stream-standalone-app.md)
---
description: What is new
---
# &novideobutton
Sender-Side Option! ([`&push`](../source-settings/push.md))
## Aliases
* `&nvb`
## Details
Disables the video button. Guests can't mute their video input.
## Related
[nomicbutton.md](nomicbutton.md)
[and-nospeakerbutton.md](../source-settings/and-nospeakerbutton.md)
---
description: Lets the director perform alongside guests, showing up in scene-view links
---
# &showdirector
Director Option / Viewer-Side Option! ([`&director`](director.md), [`&scene`](../advanced-settings/view-parameters/scene.md))
## Aliases
* `&sd`
## Options
Example: `&showdirector=3`
Value
Description
1 | (no value given)
should allow everything from the director into the scene, except webpage shares and widget shares
2
allows the director's video from the director in scenes, but not audio
3
should allow the director's screen share to appear scene links, but not their main camera stream
4
allows everything, including iframe/webpage shares
## Details
This URL value can be added to the director's URL (`&director=roomname&showdirector`) or to the scene link (`&scene&showdirector`) when you wish the director to appear in those links. You can also enable this flag a couple other ways.
* As a director, you will now appear as a performer kind of like other performers.
* The ability to add/remove the director's camera/audio from scenes becomes available, including a new highlight guest option, the ability to record, re-order, and more.
* By default, a director normally won't appear in any scene link or group link, and has limited functions available.
* When a director enables their camera, while in `&showdirector` mode, they gain access to following set of options for the director's camera feed specifically:
## Related
[director.md](director.md)
[scene.md](../advanced-settings/view-parameters/scene.md)
---
description: Enters a room as the director, instead of a guest and have full control
---
# &director
Director Option!
## Aliases
* `&dir`
## Options
Example: `&director=RoomName`
Value
Description
(no value given)
opens the director page
(room name)
room name to enter as the director
## Details
Directors have powers over some aspects of those in a group room and its scenes.
**First** director **to join** a room **claims the room**. There can be ONLY ONE! (1)
In the newer versions there is an option to have multiple directors aka [`&codirector`](../director-settings/codirector.md).
## Related
[codirector.md](../director-settings/codirector.md)
[cleandirector.md](../director-settings/cleandirector.md)
[and-showdirector.md](and-showdirector.md)
---
description: Disables the mic button; guests can't mute audio
---
# &nomicbutton
Sender-Side Option! ([`&push`](../source-settings/push.md))
## Aliases
* `&nmb`
## Details
Disables the mic button. Guests can't mute their audio input.
## Related
[and-novideobutton.md](and-novideobutton.md)
[and-nospeakerbutton.md](../source-settings/and-nospeakerbutton.md)
 (1) (4).png)
.png)
 (2) (6).png)
 (1) (3) (1).png)
 (1) (1) (1).png)
 (1) (3).png)
 (1) (1) (1) (1).png)
 (2).png)
.png)
.png)
 (1) (1) (1) (1) (1) (1) (1) (1) (1) (1) (1) (1) (1).png)
 (8) (1).png)
 (4) (2).png)
 (1) (4).png)
 (2) (3).png)
 (2) (2) (1).png)
 (1).png)
 (1) (2).png)
 (3) (2).png)
 (8).png)
 (3) (1).png)
.png)
 (3) (3).png)
 (3).png)
 (1).png)
 (1) (1) (3) (1).png)
.png)
 (1) (1) (1) (1) (1).png)
 (6) (1).png)
 (1) (6).png)
 (9).png)
 (2) (1) (1) (2).png) * When using a scene, if you manually specify a video via the [`&view`](view.md) parameter, it automatically is added to the scene.
* Audio of videos in scenes can be controlled by the director: volume and mute are options.
* In [v17.2](../../release-notes/v17-release-notes.md) of VDO.Ninja, if using [`&view`](view.md) in a scene link, the director won't be able to remotely control the scene. This applies to solo links.
* In [v18](../../release-notes/v18.md), you can create custom scenes, as per the video below.
## Related
[room.md](../../general-settings/room.md)
[and-solo.md](../mixer-scene-parameters/and-solo.md)
---
description: >-
Tells VDO.Ninja to not block VDO.Ninja from attempting to run when using
Streamlabs for MacOS
---
# &streamlabs
Viewer-Side Option! ([`&view`](view.md), [`&scene`](scene.md), [`&room`](../../general-settings/room.md))
## Details
Tells VDO.Ninja to not block VDO.Ninja from attempting to run when using Streamlabs for MacOS.
For normal OBS users, update to OBS 26.1.2 on MacOS to obtain native support for VDO.Ninja in OBS.
Streamlabs doesn't yet have full support for VDO.Ninja; consider the [Electron Capture](../../steves-helper-apps/electron-capture.md) app if it fails to work well.
---
description: Sets an offset (in ms) for the automatic audio sync fix node
---
# &sync
Viewer-Side Option! ([`&view`](view.md), [`&scene`](scene.md), [`&room`](../../general-settings/room.md))
## Options
Example: `&sync=50`
| Value | Description |
| --------------- | ----------- |
| (integer value) | value in ms |
## Details
`&sync=X` will set an offset in milliseconds for the audio stream.
[`&buffer=0`](../../advanced-settings.md#buffer) or `&sync=0` will do the same thing: it will try to auto-sync video and audio.
Tiny negative offsets _may_ work, like `&sync=-25` is possible, but large negative offsets will not work.
No clue if it is supported in OBS or not; works in Chromium/Chrome v76 or newer tho. Useful if the video device has a large delay that needs compensating for that isn't fixed automatically.
`&sync=500` without the [`&buffer`](buffer.md) command also will only add an audio delay; there will be no additional video buffer or delay.
Using may stop [Echo Cancellation](../../source-settings/aec.md) from working.
## Related
[buffer.md](buffer.md)
[and-buffer2.md](../video-parameters/and-buffer2.md)
---
description: Sets the audio bitrate to be variable, instead of constant
---
# &vbr
Viewer-Side Option! ([`&view`](view.md), [`&scene`](scene.md), [`&room`](../../general-settings/room.md))
## Details
Sets the audio bitrate to be variable, instead of constant, but only when an audio bitrate is manually specified.
By default, Chrome uses a variable bitrate with a cap at around 32-kbps with mono-audio.
When manually specifying a bitrate, Chrome keeps the audio bitrate pretty constant, even if VBR is turned on.
## Related
[audiobitrate.md](audiobitrate.md)
---
description: Defines the stream(s) you are receiving, by their stream IDs
---
# &view
Viewer-Side Option! ([`&scene`](scene.md), [`&room`](../../general-settings/room.md))
## Aliases
* `&streamid`
* `&pull`
* `&v`
## Options
Example: `&view=StreamID1,StreamID2`
* When using a scene, if you manually specify a video via the [`&view`](view.md) parameter, it automatically is added to the scene.
* Audio of videos in scenes can be controlled by the director: volume and mute are options.
* In [v17.2](../../release-notes/v17-release-notes.md) of VDO.Ninja, if using [`&view`](view.md) in a scene link, the director won't be able to remotely control the scene. This applies to solo links.
* In [v18](../../release-notes/v18.md), you can create custom scenes, as per the video below.
## Related
[room.md](../../general-settings/room.md)
[and-solo.md](../mixer-scene-parameters/and-solo.md)
---
description: >-
Tells VDO.Ninja to not block VDO.Ninja from attempting to run when using
Streamlabs for MacOS
---
# &streamlabs
Viewer-Side Option! ([`&view`](view.md), [`&scene`](scene.md), [`&room`](../../general-settings/room.md))
## Details
Tells VDO.Ninja to not block VDO.Ninja from attempting to run when using Streamlabs for MacOS.
For normal OBS users, update to OBS 26.1.2 on MacOS to obtain native support for VDO.Ninja in OBS.
Streamlabs doesn't yet have full support for VDO.Ninja; consider the [Electron Capture](../../steves-helper-apps/electron-capture.md) app if it fails to work well.
---
description: Sets an offset (in ms) for the automatic audio sync fix node
---
# &sync
Viewer-Side Option! ([`&view`](view.md), [`&scene`](scene.md), [`&room`](../../general-settings/room.md))
## Options
Example: `&sync=50`
| Value | Description |
| --------------- | ----------- |
| (integer value) | value in ms |
## Details
`&sync=X` will set an offset in milliseconds for the audio stream.
[`&buffer=0`](../../advanced-settings.md#buffer) or `&sync=0` will do the same thing: it will try to auto-sync video and audio.
Tiny negative offsets _may_ work, like `&sync=-25` is possible, but large negative offsets will not work.
No clue if it is supported in OBS or not; works in Chromium/Chrome v76 or newer tho. Useful if the video device has a large delay that needs compensating for that isn't fixed automatically.
`&sync=500` without the [`&buffer`](buffer.md) command also will only add an audio delay; there will be no additional video buffer or delay.
Using may stop [Echo Cancellation](../../source-settings/aec.md) from working.
## Related
[buffer.md](buffer.md)
[and-buffer2.md](../video-parameters/and-buffer2.md)
---
description: Sets the audio bitrate to be variable, instead of constant
---
# &vbr
Viewer-Side Option! ([`&view`](view.md), [`&scene`](scene.md), [`&room`](../../general-settings/room.md))
## Details
Sets the audio bitrate to be variable, instead of constant, but only when an audio bitrate is manually specified.
By default, Chrome uses a variable bitrate with a cap at around 32-kbps with mono-audio.
When manually specifying a bitrate, Chrome keeps the audio bitrate pretty constant, even if VBR is turned on.
## Related
[audiobitrate.md](audiobitrate.md)
---
description: Defines the stream(s) you are receiving, by their stream IDs
---
# &view
Viewer-Side Option! ([`&scene`](scene.md), [`&room`](../../general-settings/room.md))
## Aliases
* `&streamid`
* `&pull`
* `&v`
## Options
Example: `&view=StreamID1,StreamID2`
 (1) (1) (1) (1) (1) (1) (1).png)
.png)
.png)
 (9).png)
 (1) (1) (1) (1) (1) (1) (1) (1) (1).png)
.png)
.png)
.png)
.png)
 (2) (1).png)
 (1) (1) (1) (1) (1) (1) (1) (1) (1) (1) (1) (1) (1) (1) (1) (1) (1) (1) (1) (1).png)
 (1) (1) (1).png)
 (1) (1) (1) (1) (1) (1) (1) (1) (1) (1) (1) (1) (1) (1) (1).png)
 (1) (1) (1) (1) (1) (1) (1) (1) (1) (1) (1) (1) (1) (1) (1) (1) (1) (1).png)
.png)
.png)
 (1) (1) (1) (1) (1) (1) (1) (1) (1) (1) (1).png)
 (1) (1).png) To fix the problem though, a bit of troubleshooting may be needed. More often than not, if using a USB 3.x camera, the cause is a USB-related issue.
* Try a different USB 3.0 cable; ideally a short cable that conforms to the USB 3.1 specification or newer.
* Do not plug any USB camera into a USB hub, dock, or use it alongside other high-bandwidth USB devices.
* Try a different USB port; try them all if needed; a blue USB 3.0 port is normally required.
* Reduce the frame rate and/or resolution of the camera. Lowering the bandwidth over the USB connection may help. 1280x720 @ 30fps is recommend trying, if possible.
* Update the drivers on the computer, especially those for the USB controller and camera. Update the operating system as well, if needed, re-installing old drivers if possible.
* If using an AMD motherboard, update the BIOS of your motherboard, and perhaps set your PCIe lane speed to Gen3, instead of Gen4.
* If using a laptop in particular, ensure the USB port is not set to go to sleep; this would be a Windows setting. Also, enabling _Performance Mode and being plugged into the wall,_ may help as well. See the below images:
### Internet /connection issues
If the issue is not fixed by toggling your camera, make sure your internet connection is stable and you're device is not overloaded. Bad connections, network firewalls, or VPNs can cause the video to lose connection and then reconnect, causing the picture to appear to freeze for several seconds or longer.
VDO.Ninja requires a solid Internet connection with no interfering services to work its best. On some networks, especially during prime-time evening hours of the day, connections can drop out for seconds at the time constantly.
Mobile devices may also have the video freeze for a few moments at a time if switching between cellular networks and WiFi networks, but in these cases things will auto-reconnect within a few seconds normally.
Services like [https://speedify.com](https://speedify.cm) can offer a VPN with bonding, designed for streaming, and it can help avoid network issues on mobile networks, where IP addresses or wireless connections constantly are changing.
### iPhone specific issues
Regarding mobile, iOS users can only send video to 3 viewers at a time if using the H264 hardware encoder. Newer versions of VDO.Ninja will try to keep track of how many H264 streams are being used, and revert to VP8-software-based encoding when the hardware encoders are maxed out, however VP8 encoding can cause iPhones to get very warm. If forcing H264 with an iPhone or iPad, and you max them out, you might cause videos to freeze or go black though.
View links and scenes can sometimes can use an iPhone H264's encoder, even if the video isn't visible in OBS. If having issues, try to avoid forcing the H264 encoder or using it sparingly for only the active sources. If using [`&broadcast`](../advanced-settings/view-parameters/broadcast.md) mode, only the director and scenes could possibly contribute to using an H264 encoder; other guests won't have access to the guest's video stream, so they won't count towards this H264 encoder total.
### H264 specific issues
Some Windows computers that can offer H264 hardware encoding with AMD or Nvidia GPUs run into the same limitations that an iPhone device may have. That is, if more than 2 or 3 video streams are being published that use H264 encoding, the hardware encoder on those devices may fail.
If someone if using OBS to publish H264 video via RTMP using Nvidia's NVenc, while also publishing H264 video to VDO.Ninja, conflicts may arise, and video streams may fail. This shouldn't happen really, but in theory, it's something to be aware of.
---
description: When the video turns into a rainbow puke with distorted colors
---
# Video stream looks corrupted
Update: This issue of rainbow puke impacted OBS v25 and older, but is no longer an issue for most users.
If having issues with the video being very low quality, this is often due to high packet loss caused by weak WiFi or other network issue. More info: [https://www.youtube.com/watch?v=je2ljlvLzlY](https://www.youtube.com/watch?v=je2ljlvLzlY)
**DO NOT USE WIFI**. Have everyone connect to stable wired Internet whenever possible.
"Pixelation" (as seen here: [https://imgur.com/oKEPOvu](https://imgur.com/oKEPOvu)) is a difficult issue to troubleshoot as there are several potential upstream configurations which can ultimately lead to high packet loss which is the primary cause. Here are some potential fixes and configurations that may assist in lowering packet loss:
* Change the video codec or video encoder used: h264, VP8, and VP9 are options. VP9 seems to handle packet loss the best within OBS, but it also creates the most CPU load. VP8 handles packet loss the worst in OBS.
* Use Speedify.com (in AUTO or TCP mode).
* Use the Electron Capture app instead of OBS to capture video. The Electron Capture app uses a newer version of Chromium, which works far better than OBS when dealing with packet loss related issues.
* Lowering the framerate or resolution, especially for those using H264, can provide smoother video, and perhaps with less distortion.
* You can increase the jitter buffer size by using the [`&buffer`](../advanced-settings/view-parameters/buffer.md) URL parameter; such as "[https://obs.ninja?view=abs\&buffer=300](https://obs.ninja/?view=abs\&buffer=300)". This only works if using Chrome/Chromium v76 or newer though; OBS v25 currently uses Chromium v75 and so is not yet compatible.
* You connect two peers via TCP, instead of UDP, which will ensure there is no packet loss. This option is for more advanced users and requires a compatible TURN server (or VPN). Please use your own TURN servers for this option if so, as the bandwidth costs can be quite high for me.
* You can scale down the video while viewing with [`&scale=50`](../advanced-settings/view-parameters/scale.md) to potentially reduce stutter and reduce the frequency of frame corruption.
* Normally the video should "fix itself" after a moment of so, but if not that is likely a bug in the browser used for decoding. If in OBS you can toggle the visibility of the element to try to trigger a resolution. I've also provided a "SEND KEYFRAME" button in the hidden stats menu that lets the publish do this from their end.
* Mentioning this again, but connect over wired ETHERNET if possible and avoid wireless connections, including WiFi networks. DSL connections are also often quite poor. Do so for both OBS and the video-connected device for optimal results. Even 4G LTE is better than Wi-Fi in many cases.
* Do not watch a 4K Netflix or Youtube video while streaming; it will increase network congestion and can cause packet loss and buffer-bloat.
* If you have LOW QUALITY video, or low resolution or low bitrates, that perhaps can be adjusted. Please see below re: [bitrates and resolutions](https://github.com/steveseguin/obsninja/wiki/FAQ#bnr)
* Ensure your computer and remote computer are not maxing out their CPU power. If they are, have them lower the resolution and bitrate.
---
description: >-
If the OBS Virtual Camera is not appearing in Chrome or your browser after
installing OBS on MacOS, you may need to enable screen recording permissions
---
# Virtual camera not working on Mac
If using OBS Virtual Camera or other virtual camera on MacOS (Apple) system, please note that there are a list of applications that are not supported.
### Apps that will **not** work
* Bluejeans Events
* Safari
* Tencent Meeting
* FaceTime
* Photo Booth
Please see the follow official guide for more details on these and other problematic apps.
Official documentation
### General tips to using the Virtual Camera
If using Windows or if you have just installed OBS, please restart your browser fully or restart the computer first, to ensure its properly loaded and available to all applications.
The Google Chrome usually works with most virtual cameras. If you are having problems with it, you can also try another browser.
Please also be sure to START the virtual camera before selecting or opening it in VDO.Ninja. If you open it in VDO.Ninja before starting it, the resolution and/or frame rate may be wrong.
## Enabling permissions for Virtual Camera on MacOS
If the OBS Virtual Camera is not appearing in Chrome or your browser after installing OBS on MacOS, you may need to enable screen recording permissions.
1. Open your System Preferences; you can find this via the Apple logo in the top left corner of your desktop.
To fix the problem though, a bit of troubleshooting may be needed. More often than not, if using a USB 3.x camera, the cause is a USB-related issue.
* Try a different USB 3.0 cable; ideally a short cable that conforms to the USB 3.1 specification or newer.
* Do not plug any USB camera into a USB hub, dock, or use it alongside other high-bandwidth USB devices.
* Try a different USB port; try them all if needed; a blue USB 3.0 port is normally required.
* Reduce the frame rate and/or resolution of the camera. Lowering the bandwidth over the USB connection may help. 1280x720 @ 30fps is recommend trying, if possible.
* Update the drivers on the computer, especially those for the USB controller and camera. Update the operating system as well, if needed, re-installing old drivers if possible.
* If using an AMD motherboard, update the BIOS of your motherboard, and perhaps set your PCIe lane speed to Gen3, instead of Gen4.
* If using a laptop in particular, ensure the USB port is not set to go to sleep; this would be a Windows setting. Also, enabling _Performance Mode and being plugged into the wall,_ may help as well. See the below images:
### Internet /connection issues
If the issue is not fixed by toggling your camera, make sure your internet connection is stable and you're device is not overloaded. Bad connections, network firewalls, or VPNs can cause the video to lose connection and then reconnect, causing the picture to appear to freeze for several seconds or longer.
VDO.Ninja requires a solid Internet connection with no interfering services to work its best. On some networks, especially during prime-time evening hours of the day, connections can drop out for seconds at the time constantly.
Mobile devices may also have the video freeze for a few moments at a time if switching between cellular networks and WiFi networks, but in these cases things will auto-reconnect within a few seconds normally.
Services like [https://speedify.com](https://speedify.cm) can offer a VPN with bonding, designed for streaming, and it can help avoid network issues on mobile networks, where IP addresses or wireless connections constantly are changing.
### iPhone specific issues
Regarding mobile, iOS users can only send video to 3 viewers at a time if using the H264 hardware encoder. Newer versions of VDO.Ninja will try to keep track of how many H264 streams are being used, and revert to VP8-software-based encoding when the hardware encoders are maxed out, however VP8 encoding can cause iPhones to get very warm. If forcing H264 with an iPhone or iPad, and you max them out, you might cause videos to freeze or go black though.
View links and scenes can sometimes can use an iPhone H264's encoder, even if the video isn't visible in OBS. If having issues, try to avoid forcing the H264 encoder or using it sparingly for only the active sources. If using [`&broadcast`](../advanced-settings/view-parameters/broadcast.md) mode, only the director and scenes could possibly contribute to using an H264 encoder; other guests won't have access to the guest's video stream, so they won't count towards this H264 encoder total.
### H264 specific issues
Some Windows computers that can offer H264 hardware encoding with AMD or Nvidia GPUs run into the same limitations that an iPhone device may have. That is, if more than 2 or 3 video streams are being published that use H264 encoding, the hardware encoder on those devices may fail.
If someone if using OBS to publish H264 video via RTMP using Nvidia's NVenc, while also publishing H264 video to VDO.Ninja, conflicts may arise, and video streams may fail. This shouldn't happen really, but in theory, it's something to be aware of.
---
description: When the video turns into a rainbow puke with distorted colors
---
# Video stream looks corrupted
Update: This issue of rainbow puke impacted OBS v25 and older, but is no longer an issue for most users.
If having issues with the video being very low quality, this is often due to high packet loss caused by weak WiFi or other network issue. More info: [https://www.youtube.com/watch?v=je2ljlvLzlY](https://www.youtube.com/watch?v=je2ljlvLzlY)
**DO NOT USE WIFI**. Have everyone connect to stable wired Internet whenever possible.
"Pixelation" (as seen here: [https://imgur.com/oKEPOvu](https://imgur.com/oKEPOvu)) is a difficult issue to troubleshoot as there are several potential upstream configurations which can ultimately lead to high packet loss which is the primary cause. Here are some potential fixes and configurations that may assist in lowering packet loss:
* Change the video codec or video encoder used: h264, VP8, and VP9 are options. VP9 seems to handle packet loss the best within OBS, but it also creates the most CPU load. VP8 handles packet loss the worst in OBS.
* Use Speedify.com (in AUTO or TCP mode).
* Use the Electron Capture app instead of OBS to capture video. The Electron Capture app uses a newer version of Chromium, which works far better than OBS when dealing with packet loss related issues.
* Lowering the framerate or resolution, especially for those using H264, can provide smoother video, and perhaps with less distortion.
* You can increase the jitter buffer size by using the [`&buffer`](../advanced-settings/view-parameters/buffer.md) URL parameter; such as "[https://obs.ninja?view=abs\&buffer=300](https://obs.ninja/?view=abs\&buffer=300)". This only works if using Chrome/Chromium v76 or newer though; OBS v25 currently uses Chromium v75 and so is not yet compatible.
* You connect two peers via TCP, instead of UDP, which will ensure there is no packet loss. This option is for more advanced users and requires a compatible TURN server (or VPN). Please use your own TURN servers for this option if so, as the bandwidth costs can be quite high for me.
* You can scale down the video while viewing with [`&scale=50`](../advanced-settings/view-parameters/scale.md) to potentially reduce stutter and reduce the frequency of frame corruption.
* Normally the video should "fix itself" after a moment of so, but if not that is likely a bug in the browser used for decoding. If in OBS you can toggle the visibility of the element to try to trigger a resolution. I've also provided a "SEND KEYFRAME" button in the hidden stats menu that lets the publish do this from their end.
* Mentioning this again, but connect over wired ETHERNET if possible and avoid wireless connections, including WiFi networks. DSL connections are also often quite poor. Do so for both OBS and the video-connected device for optimal results. Even 4G LTE is better than Wi-Fi in many cases.
* Do not watch a 4K Netflix or Youtube video while streaming; it will increase network congestion and can cause packet loss and buffer-bloat.
* If you have LOW QUALITY video, or low resolution or low bitrates, that perhaps can be adjusted. Please see below re: [bitrates and resolutions](https://github.com/steveseguin/obsninja/wiki/FAQ#bnr)
* Ensure your computer and remote computer are not maxing out their CPU power. If they are, have them lower the resolution and bitrate.
---
description: >-
If the OBS Virtual Camera is not appearing in Chrome or your browser after
installing OBS on MacOS, you may need to enable screen recording permissions
---
# Virtual camera not working on Mac
If using OBS Virtual Camera or other virtual camera on MacOS (Apple) system, please note that there are a list of applications that are not supported.
### Apps that will **not** work
* Bluejeans Events
* Safari
* Tencent Meeting
* FaceTime
* Photo Booth
Please see the follow official guide for more details on these and other problematic apps.
Official documentation
### General tips to using the Virtual Camera
If using Windows or if you have just installed OBS, please restart your browser fully or restart the computer first, to ensure its properly loaded and available to all applications.
The Google Chrome usually works with most virtual cameras. If you are having problems with it, you can also try another browser.
Please also be sure to START the virtual camera before selecting or opening it in VDO.Ninja. If you open it in VDO.Ninja before starting it, the resolution and/or frame rate may be wrong.
## Enabling permissions for Virtual Camera on MacOS
If the OBS Virtual Camera is not appearing in Chrome or your browser after installing OBS on MacOS, you may need to enable screen recording permissions.
1. Open your System Preferences; you can find this via the Apple logo in the top left corner of your desktop.
 (3) (1).png)
 (2) (2).png)
 (14).png)
 (1).png)
.png)
.png)
 (4).png)
.png)
 (1) (2).png)
 (7).png)  (1) (1) (1) (2).png>)
### Sender side options
On the publishing side, the _default_ target resolution is already 1280x720 @ 60-fps, but we can set this higher by adding [`&quality=0`](../advanced-settings/video-parameters/and-quality.md) to the push link. This will have the publisher’s side try to make available a 1920x1080 video stream, if their camera or video device supports it. If not, it will fall back to 1280x720p. [`https://vdo.ninja/?push=streamid&quality=0`](https://vdo.ninja/?push=streamid\&quality=0)
For 1080p60 gaming, you’ll want to set the video bitrate to 12000-kbps or higher, as lower bitrates might cause the frame rate to be quite low otherwise. Otherwise, for talking head-type videos, the default video bitrate is often going to be adequate.
Higher resolution streams, especially 1080p60, requires a LOT of CPU power. Having 4-CPU cores is generally recommend for 1080p60 video streams, and 6 to 8 cores are recommended if you are intending to game at the same time.
Up to 4K or beyond is possible as well, but you'll need to manually specify the capture resolution with [`&width`](../source-settings/and-width.md) and [`&height`](../source-settings/and-height.md) instead, and it will require significantly more CPU and network bandwidth than even 1080p. You can also gently ask for a specific frame rate with [`&maxframerate=60`](../source-settings/and-maxframerate.md), which is sometimes needed with certain iPhones to force 60-fps at 1080p.
### Connection Quality
As VDO.Ninja dynamically also adjusts video resolution and bitrate to match the available Internet connection bandwidth availability, sometimes 1280x720 video resolutions won’t be maintainable. You can run the [https://vdo.ninja/speedtest](https://vdo.ninja/speedtest) to see if you are able to hit at least 2000-kbps, which is about what is needed for smooth 720p video.
Using Ethernet instead of Wi-Fi will also help to ensure the quality and frame loss at these higher resolutions is obtainable. At higher resolutions, frame rates are more likely to be unstable and the resolution might be throttled to something lower. Packet loss will impact the quality of a video stream quite a bit, and in rare cases, you may need to use [`&relay`](../general-settings/and-relay.md) or [`&meshcast`](../newly-added-parameters/and-meshcast.md) mode to assist in overcoming network throttling or routing issues.
### Group Room Settings
When in a group room, specifically as a guest or director sharing video with another guest, the video will be limited to 500-kbps by default.
The director can increase the total room bitrate using a slider under the room settings menu; the button for is found in the director's lower menu bar.
You can also use [`&totalroombitrate=4000`](../advanced-settings/video-bitrate-parameters/totalroombitrate.md) to set a higher room bitrate via the URL, as well as experiment with other bitrate options or trying out [`&meshcast`](../newly-added-parameters/and-meshcast.md). Setting the room bitrate too high though can cause everyone in the room to have problems, specifically with overloaded CPUs or network bandwidth saturation. 500-kbps is the default for a reason.
# Mobile phone camera into webcam
This set of instructions will work for Windows, Mac1 and Linux2.
## Simple Steps
1. Go to [https://vdo.ninja/?push](https://vdo.ninja/?push) with your mobile phone and start sharing your camera.
2. Add your VDO.Ninja ‘view’ link as a Browser Source in OBS in a Scene.
1. Select the "Control audio via OBS" option to bring audio in.
2. Resize the source as you see fit.
3. Configure OBS' Virtual Camera to use the Scene or Source as the Output Selection
4. Select “Start Virtual Camera” in OBS.
5. Open your 3rd party program and choose “OBS Virtual Camera” as the Video input.
Detailed steps of how to perform this setup and include audio from the device are explained [here](../guides/use-vdo.ninja-as-a-webcam-for-google-hangouts-zoom-and-more.md).
## Use Cases
OBS VirtualCam is fully compatible with VDO.Ninja and is useful for connecting MULTIPLE different OBS mixers together remotely, so you can take turn producing a show. You can also use it to turn your smartphone into a webcam. You can also share your “live show” with a small group of friends, perhaps those who are also in the show with you, so everyone has a real-time view of the show that is going on.
## Notes
Sometimes you may need to stop/restart the OBS VirtualCam if it starts crashing your computer. If you see nothing but “GREY”, then you need to start it before using it. See “How to use”. If you see just black, its probably because you haven’t put anything into OBS yet.
# Multi-Person Chat
## Two-Person Chat
While you can achieve a multi-person chat with a [group room](rooms/), you can also do it without it.
For example, `https://vdo.ninja/?view=id2&push=id1`
You’ll notice that here we have the link both a PUSH and VIEW parameter. This allows us to view a remote video and publish our own video to others within a single browser tab. This has the advantage over using two browser tabs as echo-cancellation will work with this approach. It is also compatible with mobile devices where two browser tabs isn’t likely feasible.
The downside of this approach is that you’ll need to create a custom link for every person. In this case,
`https://vdo.ninja/?view=id2&push=id1` and `https://vdo.ninja/?view=id1&push=id2`
If you go with a simple group room instead, you won’t need to personalize links in this way, but rather just have a single link for multiple guests.
For example, `https://vdo.ninja/?room=yourroomname`
or for something even cleaner, `https://vdo.ninja/yourroomname`
## Three-Person Chat
To create a 3-person setup, you can list multiple streams IDs as VIEW values alongside the PUSH value into three different personalized links.
`https://vdo.ninja/?view=id1,id2&push=id3`
`https://vdo.ninja/?view=id1,id3&push=id2`
`https://vdo.ninja/?view=id2,id3&push=id1`
# Getting started
Bring remote video and audio streams into your video production software for free. Low-latency and high-quality, VDO.Ninja is flexible tool ideal for the COVID era of remote participation. As a beginner to VDO.Ninja you should take a look at these pages:
* [vdo.ninja-basics.md](vdo.ninja-basics.md "mention")
* [stream-ids.md](stream-ids.md "mention")
* [the-power-of-the-url-parameter.md](the-power-of-the-url-parameter.md "mention")
* [multi-person-chat.md](multi-person-chat.md "mention")
* [rooms](rooms/ "mention")
* [high-quality-camera.md](high-quality-camera.md "mention")
* [mobile-phone-camera-into-webcam.md](mobile-phone-camera-into-webcam.md "mention")
* [cheat-sheet-of-basic-parameters](../advanced-settings/cheat-sheet-of-basic-parameters/ "mention")
---
description: Details and links if interested in making a gift to the developer of VDO.Ninja
---
# Sponsor ❤
[VDO.Ninja](https://vdo.ninja/) is a passion project and is free to use.
If you'd like to donate as a way of saying thank you, please visit Steve Seguin's [GitHub Sponsors](https://github.com/sponsors/steveseguin) page. Donations are appreciated.
While GitHub Sponsors is the main way to donate, there is also [PayPal](https://paypal.me/steveseguin) and [buymeacoffee](https://www.buymeacoffee.com/steveseguin). Some crypto options are also listed on the GitHub Sponsors page, including Bitcoin and Ethereum. If you wish to contribute financially in other ways, please contact Steve directly: [steve@seguin.email](mailto:steve@seguin.email)
If you do make a gift, be sure to let **@steve** know on Discord so he can thank you personally.
User feedback, bug reports, and suggestions are great ways to contribute to the project; they are highly-valued. Spreading the word of VDO.Ninja to those who may find it useful is also greatly appreciated. Community involvement, such as helping to support other users, writing user-guides, and even showcasing what you've made with VDO.Ninja is also appreciated.
If you'd like to grab a VDO.Ninja branded sticker or mug, there is a merch store with a 0% commission fee set. It won't financially support the project, but it's always motivating to see them randomly in a stream. [https://zero.vdo.ninja](https://zero.vdo.ninja).
# What are stream IDs?
Stream IDs are not magical in any way and can be manually or automatically created and reused.
Use [`https://vdo.ninja/?push=STREAMID`](https://vdo.ninja/?\&push=STREAMID) to publish a video and [`https://vdo.ninja/?view=STREAMID`](https://vdo.ninja/?\&view=STREAMID) to remotely view it. If you don't manually specify a stream ID, VDO.Ninja will sometimes generate one for you. You can reuse the generated stream ID if you wish.
Stream IDs only exist when they are actively used; once you stop using a stream ID, it no longer exists until it is used again.
### Additional technical details of stream IDs
* When in a group room, a stream ID can only be accessed from within that same room, unless transferred to a new room by the room's director.
* To make up a valid stream ID of your own, choose something with less than 51-characters of length and ensure it's AlpHaNuMerIc-only.
* A stream ID must not already be in active use, else you will be provided with an error stating this. This isn't the case when using a password however, as the password AND the stream ID must be the same in this case for the stream ID to be considered _already in use_. So, you technically can reuse the same stream IDs, changing only the password, if security is a concern. Even still, you should try to keep stream ID's confidential and change them when appropriate.
* You can use the [`&label`](../general-settings/label.md) property to give a name to a stream, rather than using a stream ID to do the same. Using this strategy of using securely-named stream IDs, while using labels to assign a name to a stream, will improve security and unlock new options, like lower-third display name overlays.
* A director does have a stream ID, and they can be manually assigned to a director in the same way they are assigned to any publisher.
* When a guest shares their screen, while also sharing their webcam, the screen share stream will get its own stream ID. Adding [`&ssid`](../source-settings/screenshareid.md) to the guest link can have the stream ID for that screen share be predictable, appending `_ss` as a value. Otherwise, the screen share stream may have a random stream ID.
# The power of the URL parameter
You can customize the playback of videos by adding query string parameters to the [VDO.Ninja](https://vdo.ninja/) URL links, along with many other aspects. VDO.Ninja is highly flexible in this regard, letting you achieve your desired outcome without needing to code and without additional software.
For example, a simple viewer URL link such as
```
https://vdo.ninja/?view=streamid
```
could be amended to
```
https://vdo.ninja/?view=streamid&videobitrate=500
```
which will cause the viewer to receive the publisher's video stream at a video bitrate of 500-kbps.
Multiple parameters can be appended together by using the ampersand (`&`) as a separating character.
For example, to view the video stream published at stream ID `streamid` at a video bitrate of 500-kbps and set the [`&proaudio`](../advanced-settings/audio-parameters/and-proaudio.md) parameter to `1`:
```
http://vdo.ninja/?view=streamid&videobitrate=500&proaudio=1
```
Some parameters, like [`&view`](../advanced-settings/view-parameters/view.md) will accept a comma-separated list of valid values, so you can do some rather powerful combos, such as publishing your own video (using [`&push`](../source-settings/push.md)) while also viewing multiple others videos. VDO.Ninja will auto-mix the videos together into a single layout for you:
```
http://vdo.ninja/?push=aaa&view=bbb,ccc,ddd
```
[advanced-settings.md](../advanced-settings.md)
[cheat-sheet-of-basic-parameters](../advanced-settings/cheat-sheet-of-basic-parameters/)
# VDO.Ninja basics
VDO.Ninja needs two things to work:
* Someone pushing a video feed out from their device
* Someone viewing that video feed
1. Visit [https://vdo.ninja/](https://vdo.ninja/) with your web browser (Chrome, Edge, Safari).
2. Select `Add your camera to OBS`.
3. Select your camera and audio device from the list of devices.
You will see the video feed of the device on screen.
4. Select `Start` and at the top of the screen a ‘view’ link will appear.
5. Copy this view link and send it to someone you want to have access to this feed, or place it inside an OBS browser source.
 (1) (1) (1) (2).png>)
### Sender side options
On the publishing side, the _default_ target resolution is already 1280x720 @ 60-fps, but we can set this higher by adding [`&quality=0`](../advanced-settings/video-parameters/and-quality.md) to the push link. This will have the publisher’s side try to make available a 1920x1080 video stream, if their camera or video device supports it. If not, it will fall back to 1280x720p. [`https://vdo.ninja/?push=streamid&quality=0`](https://vdo.ninja/?push=streamid\&quality=0)
For 1080p60 gaming, you’ll want to set the video bitrate to 12000-kbps or higher, as lower bitrates might cause the frame rate to be quite low otherwise. Otherwise, for talking head-type videos, the default video bitrate is often going to be adequate.
Higher resolution streams, especially 1080p60, requires a LOT of CPU power. Having 4-CPU cores is generally recommend for 1080p60 video streams, and 6 to 8 cores are recommended if you are intending to game at the same time.
Up to 4K or beyond is possible as well, but you'll need to manually specify the capture resolution with [`&width`](../source-settings/and-width.md) and [`&height`](../source-settings/and-height.md) instead, and it will require significantly more CPU and network bandwidth than even 1080p. You can also gently ask for a specific frame rate with [`&maxframerate=60`](../source-settings/and-maxframerate.md), which is sometimes needed with certain iPhones to force 60-fps at 1080p.
### Connection Quality
As VDO.Ninja dynamically also adjusts video resolution and bitrate to match the available Internet connection bandwidth availability, sometimes 1280x720 video resolutions won’t be maintainable. You can run the [https://vdo.ninja/speedtest](https://vdo.ninja/speedtest) to see if you are able to hit at least 2000-kbps, which is about what is needed for smooth 720p video.
Using Ethernet instead of Wi-Fi will also help to ensure the quality and frame loss at these higher resolutions is obtainable. At higher resolutions, frame rates are more likely to be unstable and the resolution might be throttled to something lower. Packet loss will impact the quality of a video stream quite a bit, and in rare cases, you may need to use [`&relay`](../general-settings/and-relay.md) or [`&meshcast`](../newly-added-parameters/and-meshcast.md) mode to assist in overcoming network throttling or routing issues.
### Group Room Settings
When in a group room, specifically as a guest or director sharing video with another guest, the video will be limited to 500-kbps by default.
The director can increase the total room bitrate using a slider under the room settings menu; the button for is found in the director's lower menu bar.
You can also use [`&totalroombitrate=4000`](../advanced-settings/video-bitrate-parameters/totalroombitrate.md) to set a higher room bitrate via the URL, as well as experiment with other bitrate options or trying out [`&meshcast`](../newly-added-parameters/and-meshcast.md). Setting the room bitrate too high though can cause everyone in the room to have problems, specifically with overloaded CPUs or network bandwidth saturation. 500-kbps is the default for a reason.
# Mobile phone camera into webcam
This set of instructions will work for Windows, Mac1 and Linux2.
## Simple Steps
1. Go to [https://vdo.ninja/?push](https://vdo.ninja/?push) with your mobile phone and start sharing your camera.
2. Add your VDO.Ninja ‘view’ link as a Browser Source in OBS in a Scene.
1. Select the "Control audio via OBS" option to bring audio in.
2. Resize the source as you see fit.
3. Configure OBS' Virtual Camera to use the Scene or Source as the Output Selection
4. Select “Start Virtual Camera” in OBS.
5. Open your 3rd party program and choose “OBS Virtual Camera” as the Video input.
Detailed steps of how to perform this setup and include audio from the device are explained [here](../guides/use-vdo.ninja-as-a-webcam-for-google-hangouts-zoom-and-more.md).
## Use Cases
OBS VirtualCam is fully compatible with VDO.Ninja and is useful for connecting MULTIPLE different OBS mixers together remotely, so you can take turn producing a show. You can also use it to turn your smartphone into a webcam. You can also share your “live show” with a small group of friends, perhaps those who are also in the show with you, so everyone has a real-time view of the show that is going on.
## Notes
Sometimes you may need to stop/restart the OBS VirtualCam if it starts crashing your computer. If you see nothing but “GREY”, then you need to start it before using it. See “How to use”. If you see just black, its probably because you haven’t put anything into OBS yet.
# Multi-Person Chat
## Two-Person Chat
While you can achieve a multi-person chat with a [group room](rooms/), you can also do it without it.
For example, `https://vdo.ninja/?view=id2&push=id1`
You’ll notice that here we have the link both a PUSH and VIEW parameter. This allows us to view a remote video and publish our own video to others within a single browser tab. This has the advantage over using two browser tabs as echo-cancellation will work with this approach. It is also compatible with mobile devices where two browser tabs isn’t likely feasible.
The downside of this approach is that you’ll need to create a custom link for every person. In this case,
`https://vdo.ninja/?view=id2&push=id1` and `https://vdo.ninja/?view=id1&push=id2`
If you go with a simple group room instead, you won’t need to personalize links in this way, but rather just have a single link for multiple guests.
For example, `https://vdo.ninja/?room=yourroomname`
or for something even cleaner, `https://vdo.ninja/yourroomname`
## Three-Person Chat
To create a 3-person setup, you can list multiple streams IDs as VIEW values alongside the PUSH value into three different personalized links.
`https://vdo.ninja/?view=id1,id2&push=id3`
`https://vdo.ninja/?view=id1,id3&push=id2`
`https://vdo.ninja/?view=id2,id3&push=id1`
# Getting started
Bring remote video and audio streams into your video production software for free. Low-latency and high-quality, VDO.Ninja is flexible tool ideal for the COVID era of remote participation. As a beginner to VDO.Ninja you should take a look at these pages:
* [vdo.ninja-basics.md](vdo.ninja-basics.md "mention")
* [stream-ids.md](stream-ids.md "mention")
* [the-power-of-the-url-parameter.md](the-power-of-the-url-parameter.md "mention")
* [multi-person-chat.md](multi-person-chat.md "mention")
* [rooms](rooms/ "mention")
* [high-quality-camera.md](high-quality-camera.md "mention")
* [mobile-phone-camera-into-webcam.md](mobile-phone-camera-into-webcam.md "mention")
* [cheat-sheet-of-basic-parameters](../advanced-settings/cheat-sheet-of-basic-parameters/ "mention")
---
description: Details and links if interested in making a gift to the developer of VDO.Ninja
---
# Sponsor ❤
[VDO.Ninja](https://vdo.ninja/) is a passion project and is free to use.
If you'd like to donate as a way of saying thank you, please visit Steve Seguin's [GitHub Sponsors](https://github.com/sponsors/steveseguin) page. Donations are appreciated.
While GitHub Sponsors is the main way to donate, there is also [PayPal](https://paypal.me/steveseguin) and [buymeacoffee](https://www.buymeacoffee.com/steveseguin). Some crypto options are also listed on the GitHub Sponsors page, including Bitcoin and Ethereum. If you wish to contribute financially in other ways, please contact Steve directly: [steve@seguin.email](mailto:steve@seguin.email)
If you do make a gift, be sure to let **@steve** know on Discord so he can thank you personally.
User feedback, bug reports, and suggestions are great ways to contribute to the project; they are highly-valued. Spreading the word of VDO.Ninja to those who may find it useful is also greatly appreciated. Community involvement, such as helping to support other users, writing user-guides, and even showcasing what you've made with VDO.Ninja is also appreciated.
If you'd like to grab a VDO.Ninja branded sticker or mug, there is a merch store with a 0% commission fee set. It won't financially support the project, but it's always motivating to see them randomly in a stream. [https://zero.vdo.ninja](https://zero.vdo.ninja).
# What are stream IDs?
Stream IDs are not magical in any way and can be manually or automatically created and reused.
Use [`https://vdo.ninja/?push=STREAMID`](https://vdo.ninja/?\&push=STREAMID) to publish a video and [`https://vdo.ninja/?view=STREAMID`](https://vdo.ninja/?\&view=STREAMID) to remotely view it. If you don't manually specify a stream ID, VDO.Ninja will sometimes generate one for you. You can reuse the generated stream ID if you wish.
Stream IDs only exist when they are actively used; once you stop using a stream ID, it no longer exists until it is used again.
### Additional technical details of stream IDs
* When in a group room, a stream ID can only be accessed from within that same room, unless transferred to a new room by the room's director.
* To make up a valid stream ID of your own, choose something with less than 51-characters of length and ensure it's AlpHaNuMerIc-only.
* A stream ID must not already be in active use, else you will be provided with an error stating this. This isn't the case when using a password however, as the password AND the stream ID must be the same in this case for the stream ID to be considered _already in use_. So, you technically can reuse the same stream IDs, changing only the password, if security is a concern. Even still, you should try to keep stream ID's confidential and change them when appropriate.
* You can use the [`&label`](../general-settings/label.md) property to give a name to a stream, rather than using a stream ID to do the same. Using this strategy of using securely-named stream IDs, while using labels to assign a name to a stream, will improve security and unlock new options, like lower-third display name overlays.
* A director does have a stream ID, and they can be manually assigned to a director in the same way they are assigned to any publisher.
* When a guest shares their screen, while also sharing their webcam, the screen share stream will get its own stream ID. Adding [`&ssid`](../source-settings/screenshareid.md) to the guest link can have the stream ID for that screen share be predictable, appending `_ss` as a value. Otherwise, the screen share stream may have a random stream ID.
# The power of the URL parameter
You can customize the playback of videos by adding query string parameters to the [VDO.Ninja](https://vdo.ninja/) URL links, along with many other aspects. VDO.Ninja is highly flexible in this regard, letting you achieve your desired outcome without needing to code and without additional software.
For example, a simple viewer URL link such as
```
https://vdo.ninja/?view=streamid
```
could be amended to
```
https://vdo.ninja/?view=streamid&videobitrate=500
```
which will cause the viewer to receive the publisher's video stream at a video bitrate of 500-kbps.
Multiple parameters can be appended together by using the ampersand (`&`) as a separating character.
For example, to view the video stream published at stream ID `streamid` at a video bitrate of 500-kbps and set the [`&proaudio`](../advanced-settings/audio-parameters/and-proaudio.md) parameter to `1`:
```
http://vdo.ninja/?view=streamid&videobitrate=500&proaudio=1
```
Some parameters, like [`&view`](../advanced-settings/view-parameters/view.md) will accept a comma-separated list of valid values, so you can do some rather powerful combos, such as publishing your own video (using [`&push`](../source-settings/push.md)) while also viewing multiple others videos. VDO.Ninja will auto-mix the videos together into a single layout for you:
```
http://vdo.ninja/?push=aaa&view=bbb,ccc,ddd
```
[advanced-settings.md](../advanced-settings.md)
[cheat-sheet-of-basic-parameters](../advanced-settings/cheat-sheet-of-basic-parameters/)
# VDO.Ninja basics
VDO.Ninja needs two things to work:
* Someone pushing a video feed out from their device
* Someone viewing that video feed
1. Visit [https://vdo.ninja/](https://vdo.ninja/) with your web browser (Chrome, Edge, Safari).
2. Select `Add your camera to OBS`.
3. Select your camera and audio device from the list of devices.
You will see the video feed of the device on screen.
4. Select `Start` and at the top of the screen a ‘view’ link will appear.
5. Copy this view link and send it to someone you want to have access to this feed, or place it inside an OBS browser source.
 (2) (1) (1) (1).png)

 (5).png)
 (1) (1) (4).png)
 (3).png)
 (4).png)
 (1).png)
 (1).png)
.png)
.png)
.png)
 (2).png)
 (1) (1) (1) (1) (1) (1) (1) (1) (1) (1) (1) (1) (1) (1).png)  (1) (1) (1) (1) (1) (1) (1) (1).png>)
Another benefit of green screening is you can use an actual physical green screen as well. And this would work without needing AI effects and it would work on anything; not just a person.
When green screening, since color is so important, try using [`&codec=av1`](../advanced-settings/view-parameters/codec.md#av1) as well on the playback view link, as the AV1 codec tends to preserve colors better than [`&codec=h264`](../advanced-settings/view-parameters/codec.md#h264) or [`&codec=vp8`](../advanced-settings/view-parameters/codec.md#vp8), which are normally the defaults. With better colors, it should be easier to chroma-key out the green.
## Chunked mode - partially working
VDO.Ninja has a mode called Chunked, which can be activated on Chromium browsers by adding [`&chunked`](../newly-added-parameters/and-chunked.md) to the push URL.
When also used with `&alpha`, ie:
[`https://vdo.ninja/alpha/?chunked&alpha`](https://vdo.ninja/alpha/?chunked\&alpha)
it will tell the browser to only select video codecs that can encode alpha channels. Normal WebRTC video streaming doesn't support alpha channels, but the chunked mode does. However, if no codec is available in your browser with alpha-channel support, then the chunked mode will fail or default back to a codec that doesn't support alpha channels.
At present, no codecs in Chrome seem to support alpha channels, but when that changes the feature will be automatically available for us.
### Not many transparent sources
At present, virtual cameras and screen shares are likely to not include alpha channels, so while you might try to screen share the [Electron Capture app](../steves-helper-apps/electron-capture.md), which has a transparent background, you'll still have the captured video having a black background.
I'm hoping this isn't the case in the future with Chrome and other Chromium browsers, but I'm not entirely sure.
### Raspberry.Ninja and OBS WHIP output - future possiblities
I've not really sure about this, but you can force video into [Raspberry.Ninja](../steves-helper-apps/raspberry.ninja/), with transparent backgrounds, and VDO.Ninja will play them back. In my previous testing, Chrome refused to play back transparent video streams from Raspberry.Ninja with transparencies, dropping them for black backgrounds instead, but this might change in the future.
If this does change, you might then be able to use OBS as well for streaming transparent video to VDO.Ninja. Or perhaps you'll be able to go from Raspberry.Ninja into OBS via WHEP at some point, but these are all not yet available and are likely years away from being materialized.
---
description: You can host a VDO.Ninja media stream on a website, via the IFRAME API
---
# How to use VDO.Ninja on a website
### Basic embedding
Embedding VDO.NInja into a website should be pretty simple; we're just using the IFRAME element and setting the source to the VDO.Ninja URL we wish to load
```
 (1) (1) (1) (1) (1) (1) (1) (1).png>)
Another benefit of green screening is you can use an actual physical green screen as well. And this would work without needing AI effects and it would work on anything; not just a person.
When green screening, since color is so important, try using [`&codec=av1`](../advanced-settings/view-parameters/codec.md#av1) as well on the playback view link, as the AV1 codec tends to preserve colors better than [`&codec=h264`](../advanced-settings/view-parameters/codec.md#h264) or [`&codec=vp8`](../advanced-settings/view-parameters/codec.md#vp8), which are normally the defaults. With better colors, it should be easier to chroma-key out the green.
## Chunked mode - partially working
VDO.Ninja has a mode called Chunked, which can be activated on Chromium browsers by adding [`&chunked`](../newly-added-parameters/and-chunked.md) to the push URL.
When also used with `&alpha`, ie:
[`https://vdo.ninja/alpha/?chunked&alpha`](https://vdo.ninja/alpha/?chunked\&alpha)
it will tell the browser to only select video codecs that can encode alpha channels. Normal WebRTC video streaming doesn't support alpha channels, but the chunked mode does. However, if no codec is available in your browser with alpha-channel support, then the chunked mode will fail or default back to a codec that doesn't support alpha channels.
At present, no codecs in Chrome seem to support alpha channels, but when that changes the feature will be automatically available for us.
### Not many transparent sources
At present, virtual cameras and screen shares are likely to not include alpha channels, so while you might try to screen share the [Electron Capture app](../steves-helper-apps/electron-capture.md), which has a transparent background, you'll still have the captured video having a black background.
I'm hoping this isn't the case in the future with Chrome and other Chromium browsers, but I'm not entirely sure.
### Raspberry.Ninja and OBS WHIP output - future possiblities
I've not really sure about this, but you can force video into [Raspberry.Ninja](../steves-helper-apps/raspberry.ninja/), with transparent backgrounds, and VDO.Ninja will play them back. In my previous testing, Chrome refused to play back transparent video streams from Raspberry.Ninja with transparencies, dropping them for black backgrounds instead, but this might change in the future.
If this does change, you might then be able to use OBS as well for streaming transparent video to VDO.Ninja. Or perhaps you'll be able to go from Raspberry.Ninja into OBS via WHEP at some point, but these are all not yet available and are likely years away from being materialized.
---
description: You can host a VDO.Ninja media stream on a website, via the IFRAME API
---
# How to use VDO.Ninja on a website
### Basic embedding
Embedding VDO.NInja into a website should be pretty simple; we're just using the IFRAME element and setting the source to the VDO.Ninja URL we wish to load
```
.png)
.png)
.png) When using the native app to screen share, be sure to select the VDO.Ninja Screen Recorder option once prompted by Apple. Then click Start Broadcast.
If you do not see the option, try scrolling down. If you don't see it still, update your iOS system version to the newest available version. Old versions may not support screen sharing, such as v15.x.
If you still cannot find it, check that the app has the correct permissions in your iOS settings, seek support, or try one of the other options below.
You can leave all other settings as default when using the [VDO.Ninja native app](../steves-helper-apps/native-mobile-app-versions.md). Once you start your broadcast, you will be provided a link at the top of the app that you can put into your browser or OBS browser source.
### Other options
Another option to screen share is to use Apple Airplay to wirelessly cast your screen to a computer, and then window capture that output.
Better than Airplay though, if you can connect your iPhone to a mac via USB, as QuickTime supports USB-connected access to an iPhone's camera. This does not require any downloads and offers a high-quality stream. Using a virtual audio device, you can even capture IOS audio with this method.
In this guide we will show you how to screen-share to VDO.Ninja using QuickTime over USB with a MacBook and an iPhone. On Windows, you may wish to use Airplay instead, leveraging one of the free Airplay clients designed for PC.
Android users can use the native VDO.Ninja Android app to screen share directly to VDO.Ninja.
1. Connect your iPhone to your mac via a USB cable. You may need a USB to USB-C adapter if you do not have a lightning to USB-C adapter already.
2\. Open the QuickTime Player on your Mac.
3\. From the QuickTime Player menu, select File -> New Movie Recording.
4\. The QuickTime Player may show your laptop's webcam initially, but you can select from the hover-over menu the option to select your iPhone's video and audio as a video source instead.
For this to work, your iPhone needs to be connected and turned on. It will not work if locked and sleeping.
5a. OPTIONAL: If you want to capture audio from your iPhone, you will need to install a virtual audio driver.
There are several choices, although the popular ones are [Loopback ](https://rogueamoeba.com/loopback/)(\$$), [Blackhole ](https://blackhole.soullabs.com/horizon/dashboard)(Free), and [VB Cable](https://vb-audio.com/Cable/) (Free). Install one of your choice; in this walk-thru we are using Blackhole.
5b. OPTIONAL: If using Loopback, you will have the ability to customize the audio routing, but with Blackhole we will just output all the system's audio to the virtual audio cable. In the macOS audio settings, we just need to select the Blackhole audio device as the audio output destination.
5.c. OPTIONAL: Assuming QuickTime Player is capturing audio from the iPhone, we simply just need to unmute the QuickTime Player. You won't hear audio playback, as it is being streamed to the Blackhole virtual audio device instead, but you should be able to see the audio meter bouncing around if there is audio.
6\. We can now start streaming to VDO.Ninja; we just need to visit the site and click Share Screen. Using Chrome or another Chromium-based browser is required, such as the Electron Capture app. Safari will not work as it lacks the ability to select a window.
. (1) (1).png>) (1).png>)
7\. To start screen sharing, we will want to select "Window" as the capture source, and then select the QuickTime, which should be showing our iPhone.
If we want to capture audio, we can also select the Blackhole virtual audio device from the Audio Sources menu in VDO.Ninja, but we can also do this after we start streaming. We can also select our local macBook microphone if we wanted.
8\. Once we start streaming, there is a settings menu that we can use to select audio sources. If we select the Blackhole virtual audio device (or Loopback / VB Cable), we will be sharing our audio that we are capturing from the iPhone. We can hold down the `CMD` (⌘) key while selecting audio sources to select and mix more than one audio source.
.png>)
9\. Finally, we can add the VDO.Ninja view link to our remote OBS Studio or share it with friends.
The view link is normally found at the top of the VDO.Ninja page, but it can be formed based on the stream ID found in the site's URL as well. You can customize it the link and add it to OBS, making sure to enable "Control audio via OBS" and ensuring the resolution matches what you want.
10\. If you want to increase the frame rate and quality of the VDO.Ninja stream, adding [`&videobitrate=6000`](../advanced-settings/video-bitrate-parameters/bitrate.md) to the URL will increase the quality by more than double. If you're looking to stream a game, you may want to increase this value even higher, although the default bitrate is more than enough for text and basic screen sharing.
Please see the rest of the documentation for more details on customizing VDO.Ninja.
---
description: >-
Share your webcam, virtual-camera, and audio source from using VDO.Ninja
inside OBS
---
# How to share webcam from inside OBS
This guide works for OBS Studio v27.1.3, but some users have had issues with v27.2.
By default, you can't select your webcam in an OBS dock or browser source. This can be changed by adding a command-line parameter to the OBS launch shortcut.
Within Windows, we can right-click the OBS launch icon or app icon, right click the "OBS Studio" option, and then click Properties. This will provide us the launch properties window.
We want to add `--enable-media-stream` to the Target field; we want to add this after the quotations, and not inside them. See below for an example.
From there, we are good to go. We can add a dock to OBS or a browser source, and we should be able to now activate our webcam source, such as the built-in OBS virtual webcam.
If we use the following VDO.Ninja URL as a dock source, we can have VDO.Ninja auto-start every time, create a new link that you can share with others. This link is setup to auto-select the OBS virtual camera and the first VB virtual audio cable, if one is available.
`https://vdo.ninja/?webcam&vd=obs&ad=virtual&autostart&cover`
 (1).png>)
# How to use the green screen just locally
Since OBS is using a very old browser inside, the green screen effect inside [VDO.Ninja](https://vdo.ninja/) wouldn't really run well within OBS itself, and even if it did, accessing the camera from a browser-source is a hassle to setup.
What you could do though is use the Electron Capture app, and then just window capture the local preview output. You can hide the interface UI and access any camera/microphone changes via the Electron Capture's right-click context menu of options instead.
Electron download link: [https://github.com/steveseguin/electroncapture/releases](https://github.com/steveseguin/electroncapture/releases)
Getting this working is not complex; pretty easy once you do it once actually. Sample URL to enter into VDO.Ninja:
[`https://vdo.ninja/?cleanoutput&webcam&effects=4`](https://vdo.ninja/?cleanoutput\&webcam\&effects=4)
Cheers.
# How to use VDO.Ninja as a webcam for Google Hangouts, Zoom, and more
In this walk-through we demonstrate how to use VDO.Ninja and the OBS Virtual Camera to bring remote cameras, smartphones, and other media sources into third-party video software as a virtual webcam.
We will also be including audio in this guide, however that may not be needed in all situations. You can skip the audio-related portions if not needed for your application.
Some third-party applications support Browser Sources as an input, negating the need for a virtual camera, as VDO.Ninja can be used directly in such scenarios.
**Requirements for this guide**
* OBS Studio V26 or newer
* Virtual Audio Cable Software
* For Windows, use VB-CABLE Virtual Audio
* This is recommended software as it enables proper audio support
* The software is Donationware
* [https://www.vb-audio.com/Cable/](https://www.google.com/url?q=https://www.vb-audio.com/Cable/\&sa=D\&source=editors\&ust=1651965669921223\&usg=AOvVaw32Nu8pxk1d3BG6A39I2slb)
* For macOS, you have a few choices:
* [https://github.com/steveseguin/vdo.ninja/wiki/FAQ#how-to-capture-audio-on-mac](https://github.com/steveseguin/vdo.ninja/wiki/FAQ#how-to-capture-audio-on-mac)
**Basic Workflow Diagram**
Please find below a diagram explaining the basic premise of what we are intending to do in this guide. We will go through it all, one step at a time.
### **Step 0. - Installing dependencies**
This guide assumes you have OBS installed, along with the other required software, though we shall briefly cover these initial installation steps now.
We also will assume you are using Windows. You will need to adapt accordingly for MacOS, which likely is going to be more complicated.
On the computer that will be using Zoom or Google Hangouts to broadcast, please do the following:
1. Install OBS Studio h[ttps://github.com/obsproject/obs-studio/releases/](https://www.google.com/url?q=https://github.com/obsproject/obs-studio/releases/\&sa=D\&source=editors\&ust=1651965669925129\&usg=AOvVaw2y3\_HZy3Sm\_0aAQ7QRRX8K)
2. Install the VB-Cable Virtual Audio device.
[https://www.vb-audio.com/Cable/](https://www.google.com/url?q=https://www.vb-audio.com/Cable/\&sa=D\&source=editors\&ust=1651965669925809\&usg=AOvVaw3k4NHvzmWNnuxOnB2nnoYZ)
### **Step 1.**
Generate an VDO.Ninja invite. You will get an Invite link and a Browser Source link.
The Guest Invite Link is what you send to a person who you wish to join your live stream in OBS. We will also be calling this a PUSH link, as it contains \&push in the URL.
The OBS Browser Source link is what we will be putting into OBS to capture our guest’s video stream with. We will also be calling this a VIEW link, as it contains \&view in the URL.
When using the native app to screen share, be sure to select the VDO.Ninja Screen Recorder option once prompted by Apple. Then click Start Broadcast.
If you do not see the option, try scrolling down. If you don't see it still, update your iOS system version to the newest available version. Old versions may not support screen sharing, such as v15.x.
If you still cannot find it, check that the app has the correct permissions in your iOS settings, seek support, or try one of the other options below.
You can leave all other settings as default when using the [VDO.Ninja native app](../steves-helper-apps/native-mobile-app-versions.md). Once you start your broadcast, you will be provided a link at the top of the app that you can put into your browser or OBS browser source.
### Other options
Another option to screen share is to use Apple Airplay to wirelessly cast your screen to a computer, and then window capture that output.
Better than Airplay though, if you can connect your iPhone to a mac via USB, as QuickTime supports USB-connected access to an iPhone's camera. This does not require any downloads and offers a high-quality stream. Using a virtual audio device, you can even capture IOS audio with this method.
In this guide we will show you how to screen-share to VDO.Ninja using QuickTime over USB with a MacBook and an iPhone. On Windows, you may wish to use Airplay instead, leveraging one of the free Airplay clients designed for PC.
Android users can use the native VDO.Ninja Android app to screen share directly to VDO.Ninja.
1. Connect your iPhone to your mac via a USB cable. You may need a USB to USB-C adapter if you do not have a lightning to USB-C adapter already.
2\. Open the QuickTime Player on your Mac.
3\. From the QuickTime Player menu, select File -> New Movie Recording.
4\. The QuickTime Player may show your laptop's webcam initially, but you can select from the hover-over menu the option to select your iPhone's video and audio as a video source instead.
For this to work, your iPhone needs to be connected and turned on. It will not work if locked and sleeping.
5a. OPTIONAL: If you want to capture audio from your iPhone, you will need to install a virtual audio driver.
There are several choices, although the popular ones are [Loopback ](https://rogueamoeba.com/loopback/)(\$$), [Blackhole ](https://blackhole.soullabs.com/horizon/dashboard)(Free), and [VB Cable](https://vb-audio.com/Cable/) (Free). Install one of your choice; in this walk-thru we are using Blackhole.
5b. OPTIONAL: If using Loopback, you will have the ability to customize the audio routing, but with Blackhole we will just output all the system's audio to the virtual audio cable. In the macOS audio settings, we just need to select the Blackhole audio device as the audio output destination.
5.c. OPTIONAL: Assuming QuickTime Player is capturing audio from the iPhone, we simply just need to unmute the QuickTime Player. You won't hear audio playback, as it is being streamed to the Blackhole virtual audio device instead, but you should be able to see the audio meter bouncing around if there is audio.
6\. We can now start streaming to VDO.Ninja; we just need to visit the site and click Share Screen. Using Chrome or another Chromium-based browser is required, such as the Electron Capture app. Safari will not work as it lacks the ability to select a window.
. (1) (1).png>) (1).png>)
7\. To start screen sharing, we will want to select "Window" as the capture source, and then select the QuickTime, which should be showing our iPhone.
If we want to capture audio, we can also select the Blackhole virtual audio device from the Audio Sources menu in VDO.Ninja, but we can also do this after we start streaming. We can also select our local macBook microphone if we wanted.
8\. Once we start streaming, there is a settings menu that we can use to select audio sources. If we select the Blackhole virtual audio device (or Loopback / VB Cable), we will be sharing our audio that we are capturing from the iPhone. We can hold down the `CMD` (⌘) key while selecting audio sources to select and mix more than one audio source.
.png>)
9\. Finally, we can add the VDO.Ninja view link to our remote OBS Studio or share it with friends.
The view link is normally found at the top of the VDO.Ninja page, but it can be formed based on the stream ID found in the site's URL as well. You can customize it the link and add it to OBS, making sure to enable "Control audio via OBS" and ensuring the resolution matches what you want.
10\. If you want to increase the frame rate and quality of the VDO.Ninja stream, adding [`&videobitrate=6000`](../advanced-settings/video-bitrate-parameters/bitrate.md) to the URL will increase the quality by more than double. If you're looking to stream a game, you may want to increase this value even higher, although the default bitrate is more than enough for text and basic screen sharing.
Please see the rest of the documentation for more details on customizing VDO.Ninja.
---
description: >-
Share your webcam, virtual-camera, and audio source from using VDO.Ninja
inside OBS
---
# How to share webcam from inside OBS
This guide works for OBS Studio v27.1.3, but some users have had issues with v27.2.
By default, you can't select your webcam in an OBS dock or browser source. This can be changed by adding a command-line parameter to the OBS launch shortcut.
Within Windows, we can right-click the OBS launch icon or app icon, right click the "OBS Studio" option, and then click Properties. This will provide us the launch properties window.
We want to add `--enable-media-stream` to the Target field; we want to add this after the quotations, and not inside them. See below for an example.
From there, we are good to go. We can add a dock to OBS or a browser source, and we should be able to now activate our webcam source, such as the built-in OBS virtual webcam.
If we use the following VDO.Ninja URL as a dock source, we can have VDO.Ninja auto-start every time, create a new link that you can share with others. This link is setup to auto-select the OBS virtual camera and the first VB virtual audio cable, if one is available.
`https://vdo.ninja/?webcam&vd=obs&ad=virtual&autostart&cover`
 (1).png>)
# How to use the green screen just locally
Since OBS is using a very old browser inside, the green screen effect inside [VDO.Ninja](https://vdo.ninja/) wouldn't really run well within OBS itself, and even if it did, accessing the camera from a browser-source is a hassle to setup.
What you could do though is use the Electron Capture app, and then just window capture the local preview output. You can hide the interface UI and access any camera/microphone changes via the Electron Capture's right-click context menu of options instead.
Electron download link: [https://github.com/steveseguin/electroncapture/releases](https://github.com/steveseguin/electroncapture/releases)
Getting this working is not complex; pretty easy once you do it once actually. Sample URL to enter into VDO.Ninja:
[`https://vdo.ninja/?cleanoutput&webcam&effects=4`](https://vdo.ninja/?cleanoutput\&webcam\&effects=4)
Cheers.
# How to use VDO.Ninja as a webcam for Google Hangouts, Zoom, and more
In this walk-through we demonstrate how to use VDO.Ninja and the OBS Virtual Camera to bring remote cameras, smartphones, and other media sources into third-party video software as a virtual webcam.
We will also be including audio in this guide, however that may not be needed in all situations. You can skip the audio-related portions if not needed for your application.
Some third-party applications support Browser Sources as an input, negating the need for a virtual camera, as VDO.Ninja can be used directly in such scenarios.
**Requirements for this guide**
* OBS Studio V26 or newer
* Virtual Audio Cable Software
* For Windows, use VB-CABLE Virtual Audio
* This is recommended software as it enables proper audio support
* The software is Donationware
* [https://www.vb-audio.com/Cable/](https://www.google.com/url?q=https://www.vb-audio.com/Cable/\&sa=D\&source=editors\&ust=1651965669921223\&usg=AOvVaw32Nu8pxk1d3BG6A39I2slb)
* For macOS, you have a few choices:
* [https://github.com/steveseguin/vdo.ninja/wiki/FAQ#how-to-capture-audio-on-mac](https://github.com/steveseguin/vdo.ninja/wiki/FAQ#how-to-capture-audio-on-mac)
**Basic Workflow Diagram**
Please find below a diagram explaining the basic premise of what we are intending to do in this guide. We will go through it all, one step at a time.
### **Step 0. - Installing dependencies**
This guide assumes you have OBS installed, along with the other required software, though we shall briefly cover these initial installation steps now.
We also will assume you are using Windows. You will need to adapt accordingly for MacOS, which likely is going to be more complicated.
On the computer that will be using Zoom or Google Hangouts to broadcast, please do the following:
1. Install OBS Studio h[ttps://github.com/obsproject/obs-studio/releases/](https://www.google.com/url?q=https://github.com/obsproject/obs-studio/releases/\&sa=D\&source=editors\&ust=1651965669925129\&usg=AOvVaw2y3\_HZy3Sm\_0aAQ7QRRX8K)
2. Install the VB-Cable Virtual Audio device.
[https://www.vb-audio.com/Cable/](https://www.google.com/url?q=https://www.vb-audio.com/Cable/\&sa=D\&source=editors\&ust=1651965669925809\&usg=AOvVaw3k4NHvzmWNnuxOnB2nnoYZ)
### **Step 1.**
Generate an VDO.Ninja invite. You will get an Invite link and a Browser Source link.
The Guest Invite Link is what you send to a person who you wish to join your live stream in OBS. We will also be calling this a PUSH link, as it contains \&push in the URL.
The OBS Browser Source link is what we will be putting into OBS to capture our guest’s video stream with. We will also be calling this a VIEW link, as it contains \&view in the URL.
 (2).png)
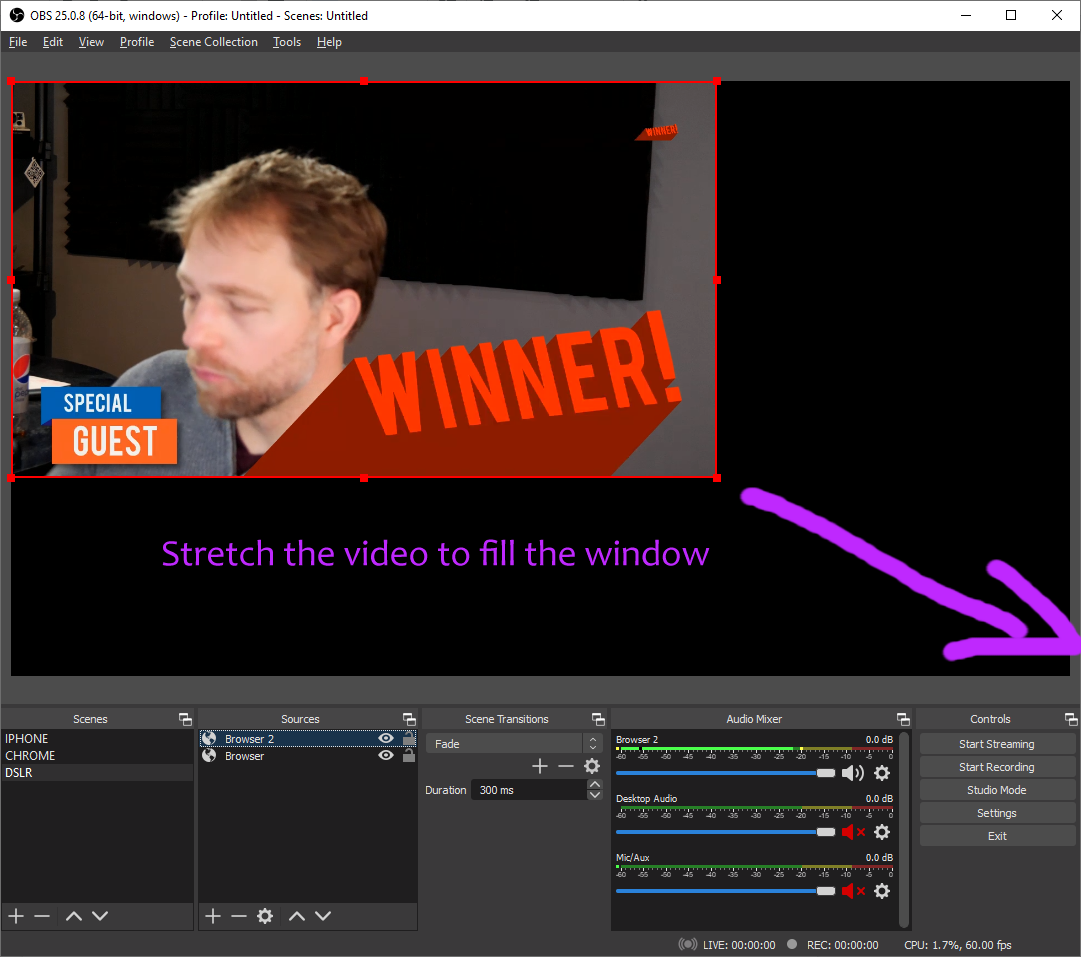

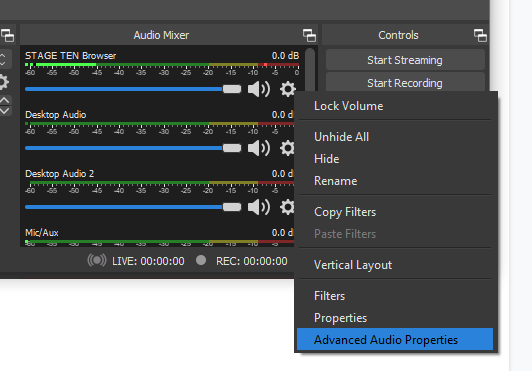

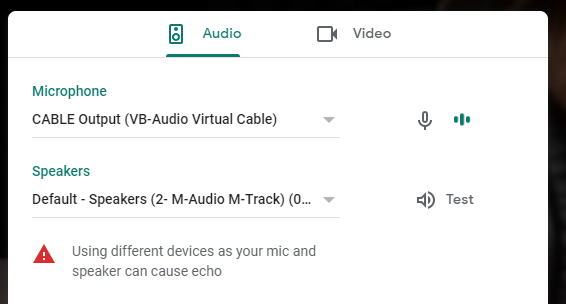
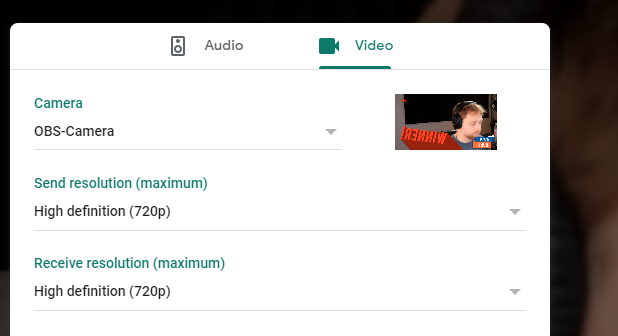
 (3) (1).png)
 (8).png)
.png)
 (1) (1).png)
 (2).png)

.png)

 (3) (1).png)
.png)
 (1).png) hosted version is here:
[https://play.google.com/store/apps/details?id=flutter.vdo.ninja](https://play.google.com/store/apps/details?id=flutter.vdo.ninja)
(It will auto-update when I push new releases.)
As well, the Android APK file for direct-downloading is hosted here:[
https://drive.google.com/file/d/1M0kv5nWLtcfl2JOnsAGiG1zUmkeIVLyZ/view?usp=sharing](https://drive.google.com/file/d/1M0kv5nWLtcfl2JOnsAGiG1zUmkeIVLyZ/view?usp=sharing)
(Manually installing will requires manual updating, as well. APK last updated May 12, 2022)
Source-code for building the Android app is here:
[https://github.com/steveseguin/vdon\_flutter/](https://github.com/steveseguin/vdon\_flutter/)
# &echocancellation
Sender-Side Option! ([`&push`](push.md))
## Aliases
* `&aec`
* `&ec`
## Options
Example: `&echocancellation=1`
| Value | Description |
| ----- | ----------------------------------------- |
| `0` | Turns OFF the automatic echo-cancellation |
| `1` | Turns ON the automatic echo-cancellation |
## Details
Automatic echo-cancellation is ON by default in VDO.Ninja.
You can turn off echo-cancellation by adding `&aec=0` to a source link (guest). If you are using [`&proaudio`](../advanced-settings/audio-parameters/and-proaudio.md), echo-cancellation gets turned off. You can enable it again with `&proaudio&aec=1`.
You can also switch it on or off via the audio settings. If you want the guests to be able to change the audio settings by themselves, use [`&mediasettings`](../newly-added-parameters/and-mediasettings.md) on the link of the guests, as per default only the director can change the audio settings of the guests.
May need to be disabled to use [`&proaudio`](../advanced-settings/audio-parameters/and-proaudio.md) on some older browsers.
## Related
[and-proaudio.md](../advanced-settings/audio-parameters/and-proaudio.md)
[noisegate.md](noisegate.md)
[and-screenshareaec.md](../newly-added-parameters/and-screenshareaec.md)
---
description: Skips the camera/audio device or screenshare selection
---
# &autostart
Sender-Side Option! ([`&push`](push.md))
## Aliases
* `&autojoin`
* `&aj`
* `&as`
## Details
Auto starts when the camera/audio device or screenshare is ready. Useful for helping a remote guest skip-past the complex setup of their camera/audio.
Can be used together with [`&webcam`](and-webcam.md) or [`&screenshare`](screenshare.md) to join the room or start the stream immediately.
## Related
[easyexit.md](easyexit.md)
[and-webcam.md](and-webcam.md)
[screenshare.md](screenshare.md)
---
description: Applies a generic audio compressor to the local microphone
---
# &compressor
Sender-Side Option! ([`&push`](push.md))
## Aliases
* `&comp`
## Details
By adding `&compressor` to a source link, it applies a generic audio compressor to the local microphone.
An audio compressor can help reduce spikes in audio loudness.
The compressor is **off by default**.
This will enable the audio processing pipeline.
There is a toggle in the director's room which adds `&comp` to the guest's invite link.
## Update in Version 22
There is now an option to control the compressor remotely (3 states for the compressor; Off/On/Limiter)
## Related
[and-limiter.md](and-limiter.md)
---
description: Turn audio noise reduction filter ON or OFF
---
# &denoise
Sender-Side Option! ([`&push`](push.md))
## Aliases
* `&dn`
## Options
Example: `&compressor=1`
| Value | Description |
| ----- | ----------- |
| `0` | Filter Off |
| `1` | Filter On |
## Details
Noise suppression reduces background audio noise from your surrounding environment.
Noise suppression is ON by default in VDO.Ninja.
You can turn off noise suppression by adding `&denoise=0` to a source link (guest). If you are using [`&proaudio`](../advanced-settings/audio-parameters/and-proaudio.md), echo-cancellation gets turned off. You can enable it again with `&proaudio&denoise=1`.
You can also switch it on or off via the audio settings. If you want the guests to be able to change the audio settings by themselves, use [`&mediasettings`](../newly-added-parameters/and-mediasettings.md) on the link of the guests, as per default only the director can change the audio settings of the guests.
## Related
[noisegate.md](noisegate.md)
[and-screensharedenoise.md](../newly-added-parameters/and-screensharedenoise.md)
---
description: Same as &audiodevice or &videodevice, but applies to both
---
# &device
Sender-Side Option! ([`&push`](push.md))
## Aliases
* `&d`
## Options
Example: `&device=Brio_4K`
hosted version is here:
[https://play.google.com/store/apps/details?id=flutter.vdo.ninja](https://play.google.com/store/apps/details?id=flutter.vdo.ninja)
(It will auto-update when I push new releases.)
As well, the Android APK file for direct-downloading is hosted here:[
https://drive.google.com/file/d/1M0kv5nWLtcfl2JOnsAGiG1zUmkeIVLyZ/view?usp=sharing](https://drive.google.com/file/d/1M0kv5nWLtcfl2JOnsAGiG1zUmkeIVLyZ/view?usp=sharing)
(Manually installing will requires manual updating, as well. APK last updated May 12, 2022)
Source-code for building the Android app is here:
[https://github.com/steveseguin/vdon\_flutter/](https://github.com/steveseguin/vdon\_flutter/)
# &echocancellation
Sender-Side Option! ([`&push`](push.md))
## Aliases
* `&aec`
* `&ec`
## Options
Example: `&echocancellation=1`
| Value | Description |
| ----- | ----------------------------------------- |
| `0` | Turns OFF the automatic echo-cancellation |
| `1` | Turns ON the automatic echo-cancellation |
## Details
Automatic echo-cancellation is ON by default in VDO.Ninja.
You can turn off echo-cancellation by adding `&aec=0` to a source link (guest). If you are using [`&proaudio`](../advanced-settings/audio-parameters/and-proaudio.md), echo-cancellation gets turned off. You can enable it again with `&proaudio&aec=1`.
You can also switch it on or off via the audio settings. If you want the guests to be able to change the audio settings by themselves, use [`&mediasettings`](../newly-added-parameters/and-mediasettings.md) on the link of the guests, as per default only the director can change the audio settings of the guests.
May need to be disabled to use [`&proaudio`](../advanced-settings/audio-parameters/and-proaudio.md) on some older browsers.
## Related
[and-proaudio.md](../advanced-settings/audio-parameters/and-proaudio.md)
[noisegate.md](noisegate.md)
[and-screenshareaec.md](../newly-added-parameters/and-screenshareaec.md)
---
description: Skips the camera/audio device or screenshare selection
---
# &autostart
Sender-Side Option! ([`&push`](push.md))
## Aliases
* `&autojoin`
* `&aj`
* `&as`
## Details
Auto starts when the camera/audio device or screenshare is ready. Useful for helping a remote guest skip-past the complex setup of their camera/audio.
Can be used together with [`&webcam`](and-webcam.md) or [`&screenshare`](screenshare.md) to join the room or start the stream immediately.
## Related
[easyexit.md](easyexit.md)
[and-webcam.md](and-webcam.md)
[screenshare.md](screenshare.md)
---
description: Applies a generic audio compressor to the local microphone
---
# &compressor
Sender-Side Option! ([`&push`](push.md))
## Aliases
* `&comp`
## Details
By adding `&compressor` to a source link, it applies a generic audio compressor to the local microphone.
An audio compressor can help reduce spikes in audio loudness.
The compressor is **off by default**.
This will enable the audio processing pipeline.
There is a toggle in the director's room which adds `&comp` to the guest's invite link.
## Update in Version 22
There is now an option to control the compressor remotely (3 states for the compressor; Off/On/Limiter)
## Related
[and-limiter.md](and-limiter.md)
---
description: Turn audio noise reduction filter ON or OFF
---
# &denoise
Sender-Side Option! ([`&push`](push.md))
## Aliases
* `&dn`
## Options
Example: `&compressor=1`
| Value | Description |
| ----- | ----------- |
| `0` | Filter Off |
| `1` | Filter On |
## Details
Noise suppression reduces background audio noise from your surrounding environment.
Noise suppression is ON by default in VDO.Ninja.
You can turn off noise suppression by adding `&denoise=0` to a source link (guest). If you are using [`&proaudio`](../advanced-settings/audio-parameters/and-proaudio.md), echo-cancellation gets turned off. You can enable it again with `&proaudio&denoise=1`.
You can also switch it on or off via the audio settings. If you want the guests to be able to change the audio settings by themselves, use [`&mediasettings`](../newly-added-parameters/and-mediasettings.md) on the link of the guests, as per default only the director can change the audio settings of the guests.
## Related
[noisegate.md](noisegate.md)
[and-screensharedenoise.md](../newly-added-parameters/and-screensharedenoise.md)
---
description: Same as &audiodevice or &videodevice, but applies to both
---
# &device
Sender-Side Option! ([`&push`](push.md))
## Aliases
* `&d`
## Options
Example: `&device=Brio_4K`
 (1) (1) (2).png)
.png)
 (3) (1) (1).png)
 (2) (1) (1).png)
 (1) (4).png)
 (5).png)

 (1) (1) (1) (1) (1) (1) (1) (1) (1) (1) (1) (1) (1) (1) (1) (1) (1).png)
 (1) (1) (1) (1) (1) (1) (1) (1) (1) (1) (1).png)
.png)